WavLink Wi-Fi Repeater Instructions
Configure the Wi-Fi Repeater Mode
Configure the Repeater ModeThis is the easiest way to configure the AP/Router to be used as a Wi-Fi Repeater First check whether your wireless router supports “WPS ” For further details, please read the operating instructions for your wireless router

- The mode selector must be set to the “AP/REPEATER’ position for REPEATER MODE
- Plug the AP/Router into a wall socket
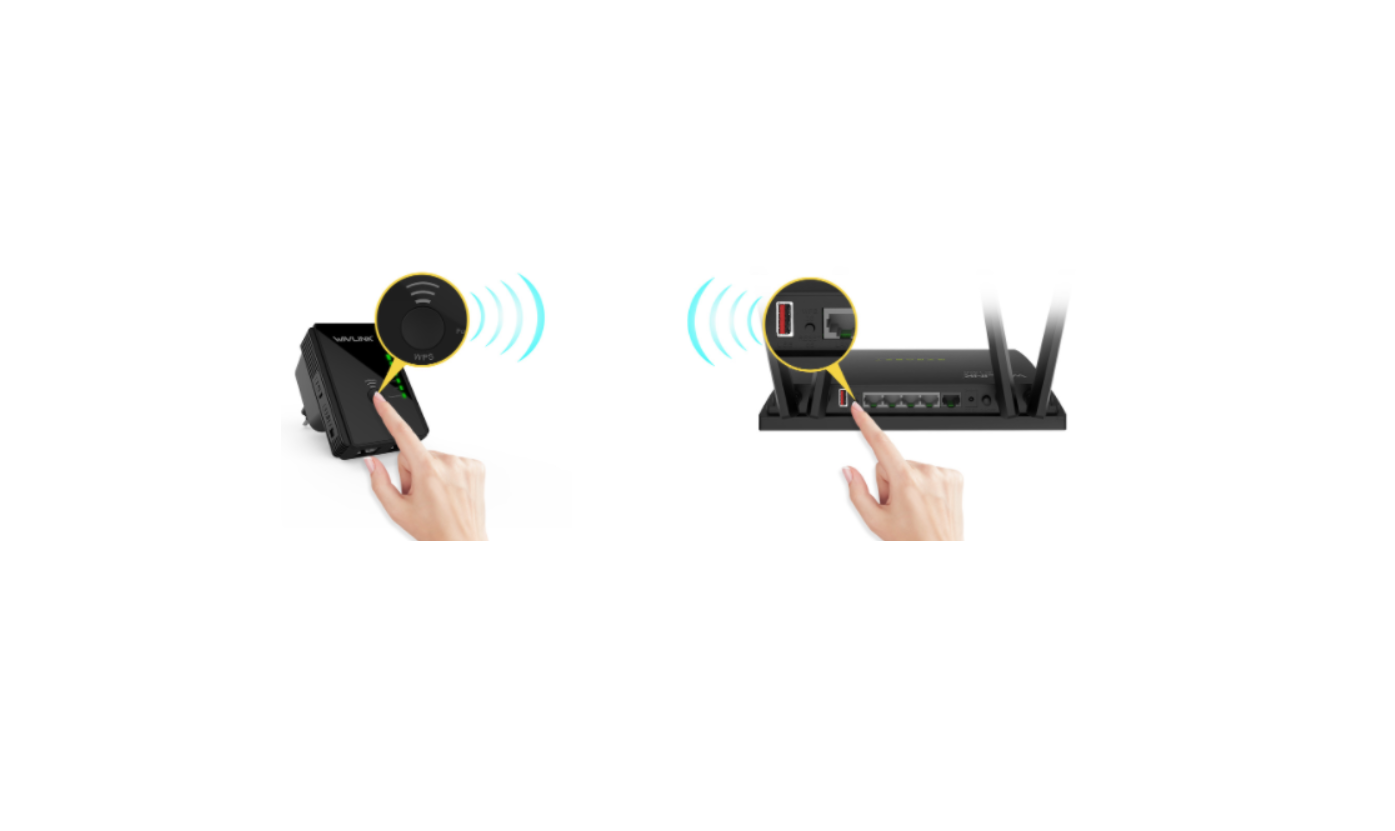
- Press the WPS button on the AP1Router for at least 6 seconds (the Wi-Fi J WPS LED now flashes for approx 2 minutes)
- Within these 2 minutes, please press the WPS button on your Wireless Router directly for 2-3 seconds (for further details / instructions, please read the operating instructions of your current Wi-Fi router)
The AP/Router will automatically connect to your wireless router and copies all wireless keys / settings. The AP/Router can be accessed via the SSID and the wireless key of your wireless router You can also configure the Wi-Fi Repeater Mode by connecting it with your computer/laptop with enclosed RJ-45 cable or wirelessly
Configure the Wi-Fi Repeater Mode wirelessly
- The mode selector must be set to “AP/Repeater” position for Repeater Mode. Plug the AP/Router into a wall socket.
- Click on the network icon (Ethernet or Wireless icon) on the bottom right of your tool bar of your desktop. Identify and Connect to the signal titled “Wireless-AC” – this will take a few seconds.
- Open Web Browser and type: http://192.168.10.1 or http://ap.setup in the URL box of your browser. This number is the default IP address for this AP/Router device.
- Once on the set-up URL page, a log-in screen will appear. Enter the User Name and Password and then click submit. A.Default User Name = adminB. Default Password = admin
- After logging in, you will see the webpage like the below:a.Click on the REPEATER button in the set-up wizard.
- From the list, select a wireless network with which you want to connect the AP/Router by choosing the corresponding network in the “select” field.
- After having selected a wireless network, you must then specify the network key of your wireless router – same as current Wireless Router security key.
- After completing the entry, click apply button. The device will reboot and upon completion of reboot, the AP/Router is now accessible under the same SSID andWireless key of your wireless router.
Read More About This Manual & Download PDF:
[xyz-ips snippet=”download-snippet”]


