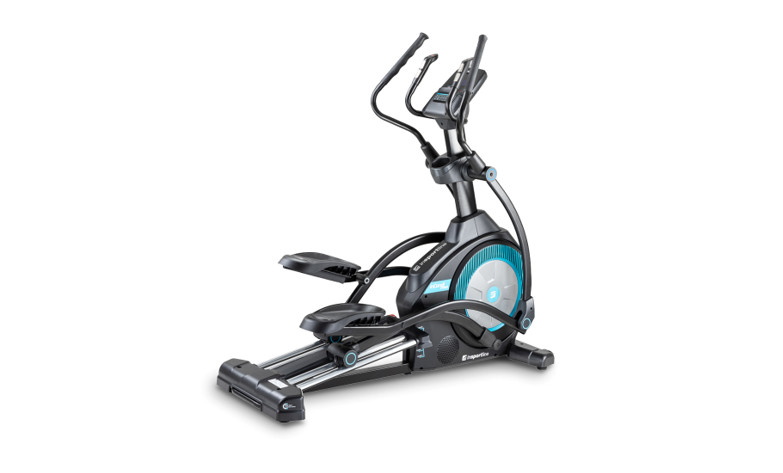
USER MANUAL ENIN 21341 Elliptical inSPORTline inCondi ET660i II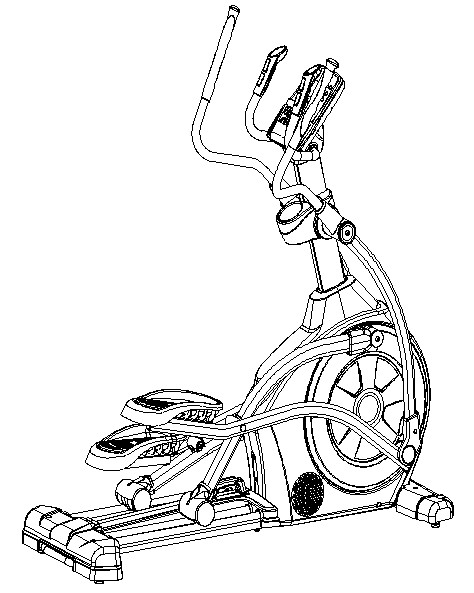
SAFETY INSTRUCTIONS
- Read the manual carefully and keep it for future reference.
- To ensure the best safety of the exerciser, regularly check it on damages and worn parts.
- If you pass on this exerciser to another person or if you allow another person to use it, make sure that that person is familiar with the content and instructions in these instructions.
- Only one person should use the exerciser at a time.
- Before the first use and regularly make sure that all screws, bolts and other joints are properly tightened and firmly seated.
- Before you start your work-out, remove all sharp-edged objects around the exerciser.
- Only use the exercise for your work-out if it works flawlessly.
- Any broken, worn or defective part must immediately be replaced and/or the exerciser must no longer be used until it has been properly maintained and repaired.
- Parents and other supervisory persons should be aware of their responsibility, due to situations which may arise for which the exerciser has not been designed and which may occur due to children’s natural play instinct and interest in experimenting.
- If you do allow children to use this exerciser, be sure to take into consideration and assess their mental and physical condition and development, and above all their temperament. Children should use the exerciser only under adult supervision and be instructed on the correct and proper use of the exerciser. The exerciser is not a toy.
- For your own safety, always ensure that there is at least 0.6 meter of free space in all directions around your product while you are exercising.
- To avoid possible accidents, do not allow children to approach the exerciser without supervision, since they may use it in a way for which it is not intended due to their natural play instinct and interest in experimenting.
- Please note that an improper and excessive work-out may be harmful to your health.
- Please note that levers and other adjustment mechanisms are not projecting into the area of movement during the work-out.
- When setting up the exerciser, please make sure that the exerciser is standing in a stable way and that any possible unevenness of the floor is evened out.
- Always wear appropriate clothing and shoes which are suitable for your work-out on the exerciser. The clothes must be designed in a way so that they will not get caught in any part of the exerciser during the work-out due to their form (for example, length). Be sure to wear appropriate shoes which are suitable for the work-out, firmly support the feet and which are provided with a non-slip sole.
- Be sure to consult a physician before you start any exercise program. He may give you proper hints and advice with respect to the individual intensity of stress for you as well as to your work-out and sensible eating habits.
- Weight limit: 150 kg
- WARNING! The hart rate monitor may not be accurate. Overloading during training may cause serious injury or death. If you feel any discomfort, immediately stop the exercise!
- Category: SC for professional and commercial use (according to EN 957)
IMPORTANT NOTES
- Assemble the exerciser as per assembly instructions and be sure to only use the structural parts provided with the exerciser and designed for it. Prior to the assembly, make sure the contents of the delivery is complete by referring to the parts list of the assembly and operating instructions.
- Be sure to set up the exerciser in a dry and even place and always protect it from humidity. If you wish to protect the place particularly against pressure points, contamination, etc., it is recommended to put a suitable, non-slip mat under the exerciser.
- The general rule is that exercisers and training devices are no toys. Therefore, they must only be used by properly informed or instructed persons.
- Stop your work-out immediately in case of dizziness, nausea, chest pain or any other physical symptoms. In case of doubt, consult your physician immediately.
- Children, disabled and handicapped persons should use the exercise only under supervision and in presence of another person who may give support and useful instructions.
- Be sure that your body parts and those of other persons are never close to any moving parts of the exerciser during its use.
- When adjusting the adjustable parts, make sure they are adjusted properly and note the marked, maximum adjusting position, for example of the saddle support, respectively.
- Do not work out immediately after meals!
ASSEMBLY
Make sure you have enough free space before assembly.Before assembly, make sure you have all the parts, and none are missing.
STEP 1Remove the attached plate (C) by unscrewing the two screws (B) on the front of the main frame (1). The plate and screws are not required for the next steps.
Lift the post (44) in the direction of the arrow in the figure as close as possible to the main frame (1). One person holds the post and the other connects the cables (A1 and A2). Then insert the cable into the main frame (1). Secure the post with the screws (33) and washers (34). STEP 2The mainframe (1) is supported by the packing material (A). There are 3 bolts (33) and 3 washers (34) on the right and left stabilizer (3, 2) with foot. The screws (21) are screwed in front of the mainframe (1). Unscrew these screws and keep them, the screws are still used. Attach the right and left stabilizer with foot (3, 2) to the mainframe (1) with 3 screws (33) and 3 washers (34) on each side. Remove the packing material (A) under the mainframe (1). Attach the front rail cover (40) to the mainframe (1) with 2 screws (21).
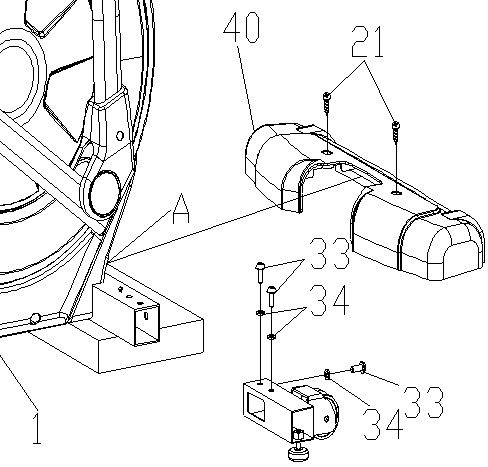 STEP 3Remove the 2 screws (21) from the main frame and attach the rear stabilizer cover with the 2 screws (21).
 STEP 4Attach the chain guards (42 and 43) to the main frame (1) as shown.
 STEP 5Connect the console cables (51) as shown. Connect the cables (A1 – A2), (B1 – B2), (C1 – C2), (D1 D2), (E1 – E2) and plug the excess cables into the post (44). Then attach the console (51) to the post (44) with 4 screws (52).
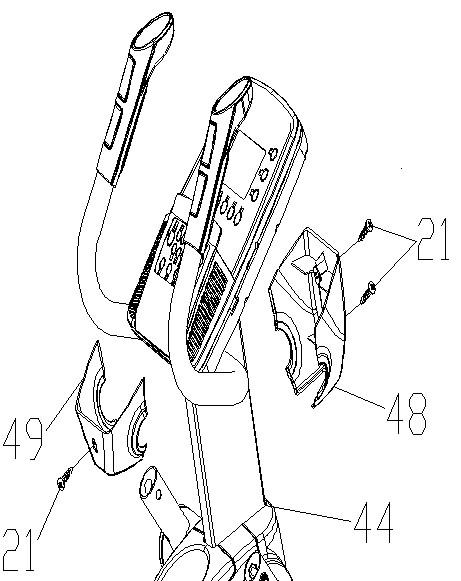
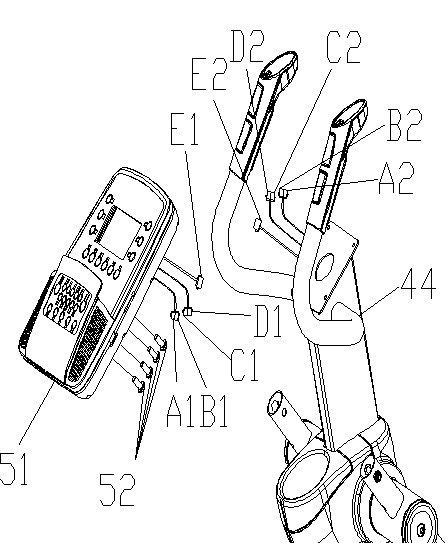 STEP 6Remove the 3 screws (21) from the post (44). Then attach the covers (48 and 49) to the post with 3 screws (21).
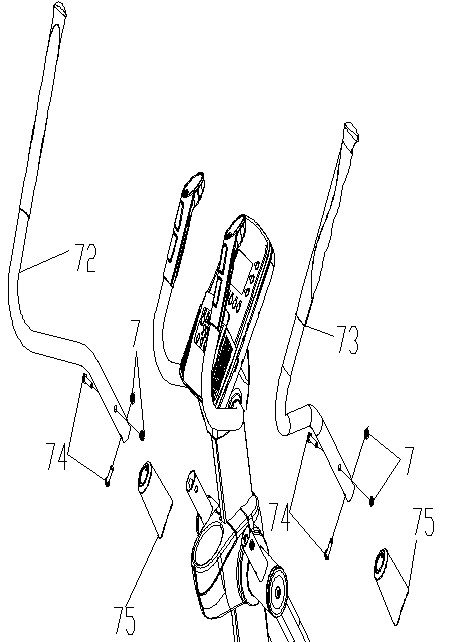
 STEP 7Remove the 4 screws (74) and 4 nuts (7) from the left and right handlebars (72 and 73). Install the covers (75) on the left and right handlebars (72 and 73). Then attach the left and right handlebars with the screws (74) and nuts (7). Then slide the covers (75) down.
INCLINE ADJUSTMENT
You can adjust pedal’s incline with handle. You can choose from levels 1 5. CONSOLEConsole contains 21 programs:
|
1 Manual program |
|
 |
|
|
10 presets programs |
|
| P1: Rolling | P2: Valley |
|
|
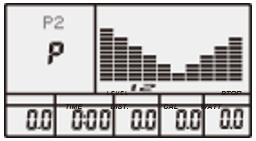 |
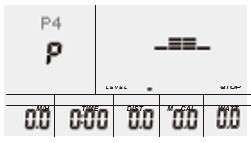
| P3: Fat burn | P4: Ramp |
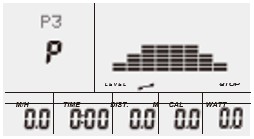 |
 |
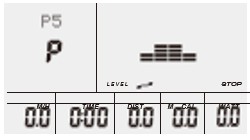
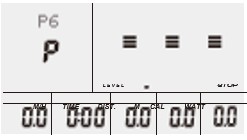
| P5: Mountain | P6: Interval |
 |
 |
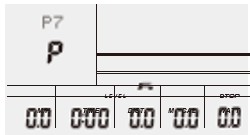
| P7: Cardio | P8: Endurance |
 |
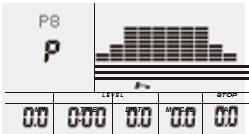 |
| P9: Slope | P10: Rally |
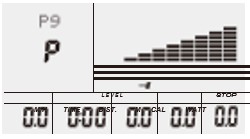 |
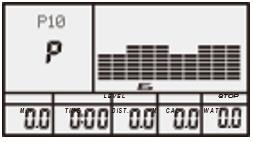 |
|
WATT program |
|
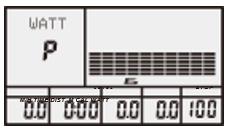 |
|
|
HRC program |
|
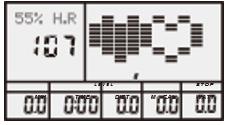
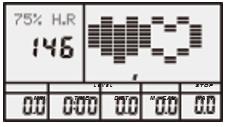
| 55% H.R | 75% H.R |
 |
 |
| 90% H.R | TARGET H.R |
 |
 |
|
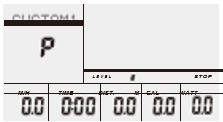
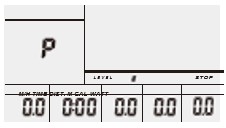
User programs 1 – 4 |
|
| User program 1 | User program 2 |
 |
 |
| User program 3 | User program 4 |
 |
 |
| BODY FAT | |
 Gender, height, weight, and age data are saved even when you disconnect the device.The dot display shows the current status. Gender, height, weight, and age data are saved even when you disconnect the device.The dot display shows the current status. |
| The heart rate is displayed. |
BUTTONS
| ENTER | If no program is running (the display shows STOP), press ENTER to enter the program selection1. When selecting a program, press ENTER to confirm the program2. When setting values in the setting, press ENTER to confirm the settingWhen a program is running (the display shows START), you can use theENTER key to toggle between the displayed SPEED, RPM, or alternate display. |
| START/STOP | Press to pause or start the program In any mode, hold down the button for 2 seconds to restart the console |
| UP | Use the button to select the program above or increase the value (if the button is a rotary knob, turn clockwise) |
| DOWN | Use the button to select the program below or decrease the value (if the button is a rotary knob, turn counterclockwise) |
| PULSE RECOVERY | First test that the device detects your current heart rate, then press to start the recovery testPress the button repeatedly to end the test |
| RESET (if available) | In the settings you can return the values to the factory settingsHold down the button for 2 seconds to restart the console |
USE
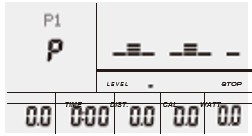
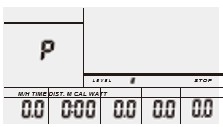
A. TURN ONPlug the device into the power outlet, the console will start up, a beep will sound and enter the home screen (Pic. 24)
 |
|
Pic. 24 |
B. PROGRAM SELECTIONManual program or preset programs P1-P10
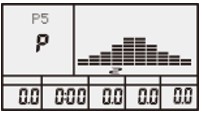
- Select a program using the navigation buttons UP / DOWN (Pic. 25)
- Press ENTER to confirm your selection and enter the time setting
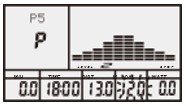
- TIME starts flashing and use UP / DOWN navigation buttons to set the value, then press ENTER to confirm (Pic. 26)


Pic. 25
Pic. 26
- Then set DISTANCE using the UP / DOWN navigation buttons to set the value, then press ENTER to confirm (Pic. 27)
- Then set CALORIES using the UP / DOWN navigation buttons to set the value, then confirm with ENTER (Pic. 28)


Pic. 27
Pic. 28
- Press START / STOP to start the program.NOTE: In the WATT program, the load is set by torque and RPM. The WATT value will remain the same if you pedal fast, the load will decrease and if you pedal slowly, the load will increase
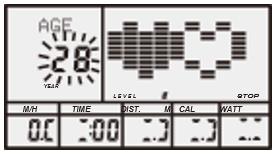
C. HRC PROGRAMValues 55 %, 75 % a 90 %The maximum value depends on age
- Select the heart rate control program
- Confirm with ENTER and set the time
- Use the navigation buttons to set the time and confirm with ENTER, then set the distance
- Use the navigation buttons to set the distance and confirm with ENTER, then set the calories burned
- Use the navigation buttons to set the desired calories burned and confirm with ENTER, then set the age
- Use the navigation buttons to set the age and confirm with ENTER
- Then the program sets the appropriate value according to the set age
- Press START / STOP to start the program


Pic. 31
Pic. 32 13
D. TARGET HEART RATEThe user can set his own heart rate value
- Choose TARGET HEART RATE
- Confirm with ENTER and set the time
- Use the navigation buttons to set the time and confirm with ENTER, then set the distance
- Use the navigation buttons to set the distance and confirm with ENTER, then set the calories burned
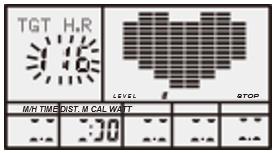
- Use the navigation buttons to set the desired calories burned and confirm with ENTER, then set the target heart rate
- Use the navigation buttons to set the target heart rate and confirm with ENTER Press START / STOP to start the program NOTE: Heart rate depends on speed and exercise. If the heart rate is higher than the set value, the load is reduced. If the heart rate is lower than the specified value, the load will increase.
USER PROGRAMS (CUSTOM 1 CUSTOM 4)
- Use the navigation keys to select a user.
- Confirm with ENTER and set the time.
- se the navigation buttons to set the time and confirm with ENTER, then set the distance
- Use the navigation buttons to set the distance and confirm with ENTER, then set the calories burned
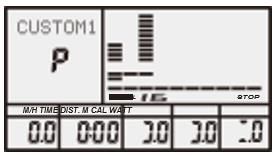
- Use the navigation buttons to set the desired calories burned and confirm with ENTER, then set the load
- Use the navigation buttons to set the load on all parts, always press ENTER to confirm.
- Press START / STOP to start the program
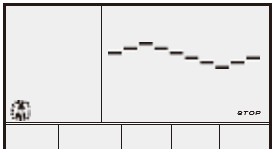
E. BODY FAT MEASUREMENT PROGRAM
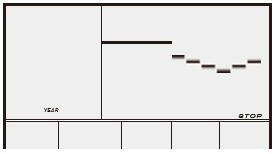
- Use the navigation keys to select the BODY FAT TEST program (Pic. 34)
- Confirm with ENTER
- Use the navigation keys to adjust the height and confirm with ENTER (Pic. 35)
- Use the navigation keys to set the weight and confirm with ENTER (Pic. 36)
- Use the navigation keys to set the age and confirm with ENTER (Pic. 37)
- Use the navigation keys to set the gender and confirm with ENTER (Pic. 38)
- Press START / STOP to start the program


Pic. 33
Pic. 34


Pic. 35
Pic. 36


Pic. 37
Pic. 38


Pic. 39
Pic. 40
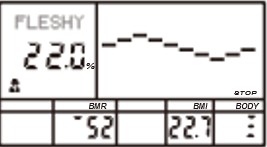
NOTE: Grasp both body pulse plates. FAT%, BMR, BMI and body status results are displayed. (Pic. 40).FAT%: Body fat measured in %.BMR: MetabolismBMI: Body mass indexIf the pulse pads do not work properly and do not transmit a signal during the measurement, ERROR2 is displayed. Press START / STOP and try running the test again. You cannot exit the test after running the test. When finished, press UP / DOWN to exit.F. PULSE RECOVERY TESTA test that compares heart rate before and after exercise. The result is the ability of the heart to recover from exercise.
- Grasp the pulse sensors or attach the chest strap (if applicable to the device)
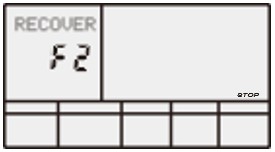
- Press RECOVERY to start the program (Pic. 41)
- The 60-second countdown starts.
- The result is then displayedF1 F6. F1 – excellent / F2 – good / F3 – average / F4 below average / F5 – poor / F6 – worst result


Pic. 41
Pic. 42
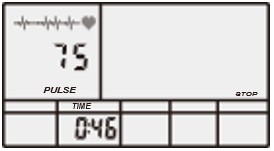
G. MEASUREMENT OF THE PULSEGrasp both pulse sensors. The heart rate is displayed after 3-4 seconds. The heart icon is displayed along with the ECG.
NOTE: Values are for guidance only and not for medical purposes. You can use the chest strap, if supported.
| SPEED | Display speed, range: 0.0 – 99.9 km/h (mil/h) |
| RPM | Displays the RPM, range: 0 – 999 |
| TIME | Displays training time, range: 0:00 – 99:59 min:sec. Settings: 5:00 –99:00 min:sec. |
| DIST | Displays the distance, range: 0.0 – 99.9 – 999 km (mil). Settings: 1.0 – 99.0 – 999. |
| CALORIE | Displays burned calories, range: 0 – 99.9 – 999. Settings 10.0 –90.0 – 990. |
| PULSE | Displays heart rate 30 – 240 beats per minute |
| RESISTANCE LEVEL | Displays the load from 1 – 16 |
| WATT | Displays the result of the WATT program |
ERROR 1 check motor and motor connectionERROR 2 check the pulse sensors
MP3 PLAYER (if available)Connect the audio device to the console. Then start the audio device and then the console. If the console starts audio itself, it should start playing automatically.
USB PORT (if available)Insert the USB device into the console.
|
|
Play next |
| Play the following | |
| START / PAUSE | |
| Volume up | |
| Volume down |
APPLICATION MEPANELYou can find current version of Mepanel manual on your websites.
USE OF ELEPTICAL TRAINERThe elliptical trainer is a popular fitness machine, one of the newest and most effective home training machines. When you are exercising on an elliptical treadmill, your feet move along the elliptical curve. The elliptical treadmill is a frequent replacement for exercise bikes and treadmills because it is gentler for your joints. With the handles, you are also exercising the upper half of your body. During exercise, you transfer the weight from one foot to the other. Try to maintain an upright and natural position. Handlers will help you. Find the perfect place to hold the grip and try to move as naturally as possible.
THE WARM-UP PHASEThis stage helps get the blood flowing around the body and the muscles working properly. It will also reduce the risk of cramp and muscle injury. It is advisable to do a few stretching exercises as shown below. Each stretch should be held for approximately 30 seconds, do not force or jerk your muscles into a stretch. If it hurts, STOP.
 Touching your toesSlowly bend your back from hips. Keep your back and arms relaxed while stretching downwards to your toes. Do it as far as you are able and hold the position for 15 seconds. Bend your knees slightly.
 Upper thighLean against a wall with one hand. Reach down and behind you. Lift up your right or left foot to your buttock as high as possible. Keep for 30 seconds and repeat twice for each leg.
 Hamstring stretchedSit and outstretch your right leg. Rest the sole of your left foot against the inside of your right tight. Stretch out your right arm along your right leg as far as you can. Hold for 15 seconds and relax. Repeat all with your left leg and left arm.
 Inside upper thighSit on the floor and place your feet together. Knees are pointed outwards. Pull your feet as close as possible to your groin. Press your knees carefully downwards. Keep this position for 30-40 seconds if possible.
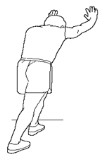 Calves and Achilles tendonLean against a wall with your left leg in front of the right one and your arms forward. Stretch out your right leg and keep your left foot on the floor. Bend your left leg and lean forwards by moving your right hip in the direction of the wall. Hold for 30-40 seconds. Keep your leg stretched and repeat exercising with other leg.
MAINTENANCE
- Use only a soft cloth and a mild detergent.
- Do not clean the plastic parts with abrasives or solvents.
- Wipe the sweat after each use. · Protect the device from moisture and extreme temperatures.
- Protect your device, computer and console from direct sunlight.
- Check the tightening of all bolts and nuts regularly.
- Store in a dry and clean place away from children.
DIAGRAM
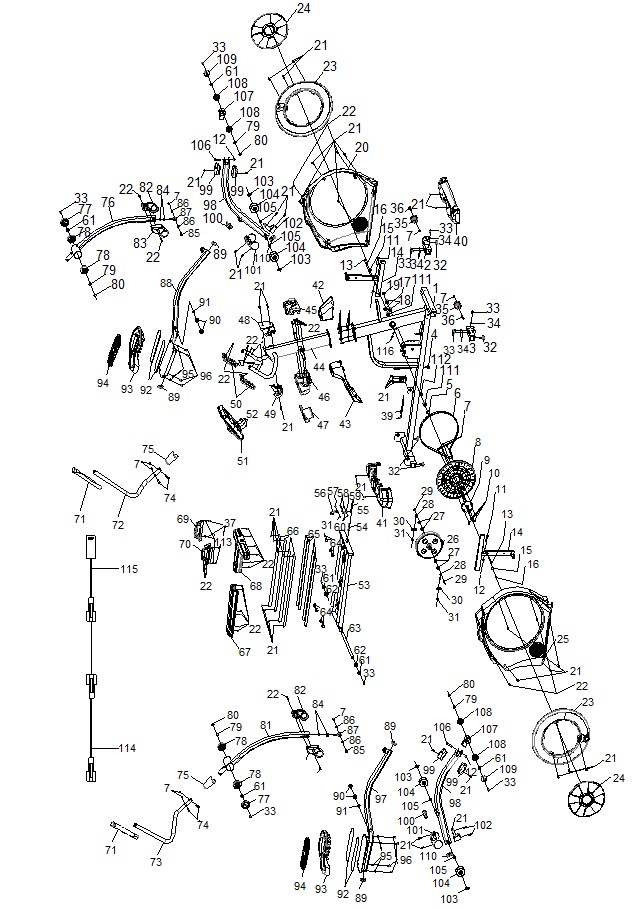
PARTS LIST
|
No. |
Name | Qty. | No. | Name |
Qty. |
| 1 | Main frame | 1 | 36 | Screw M8*70 | 2 |
| 2 | Left front foot tube connection assembly | 1 | 37 | Screw M4*10 | 6 |
| 3 | Right front pipe connecting assembly | 1 | 38 | Motor cable | 1 |
| 4 | Stopper M8 | 1 | 39 | Motor cable | 1 |
| 5 | Short crank sleeve | 1 | 40 | Front support cover | 1 |
| 6 | Belt | 1 | 41 | Rear cover | 1 |
| 7 | Nut M8 | 12 | 42 | Front chain cover | 1 |
| 8 | Belt wheel | 1 | 43 | Rear chain cover | 1 |
| 9 | Straight mandrel assembly | 1 | 44 | Post assembly | 1 |
| 10 | Screw M8*16 | 4 | 45 | Front cover | 1 |
| 11 | Screw M10*55 | 2 | 46 | Middle cover | 1 |
| 12 | Nut M10 | 2 | 47 | Top cover | 1 |
| 13 | Sleeve 15*6*6 | 2 | 48 | Front cover | 1 |
| 14 | Cross assembly | 2 | 49 | Rear cover | 1 |
| 15 | Gasket | 2 | 50 | Pulse sensor plate | 2 |
| 16 | Screw M6*20 | 2 | 51 | Console | 1 |
| 17 | Nut M20*1 | 1 | 52 | Screw M5*10 | 4 |
| 18 | Bearing | 2 | 53 | Guide rail holder assembly | 1 |
| 19 | Spring | 1 | 54 | Spring | 1 |
| 20 | Left chain cover | 1 | 55 | Hand knob | 1 |
| 21 | Screw | 44 | 56 | Button | 1 |
| 22 | Screw ST4.2*13 | 38 | 57 | Screw M6*40 | 1 |
| 23 | Rotary wheel | 2 | 58 | Screw M4*30 | 2 |
| 24 | Rotary wheel cover | 2 | 59 | Button connection block | 1 |
| 25 | Right chain cover | 1 | 60 | Nut M4 | 2 |
| 26 | Flywheel | 1 | 61 | Big gasket | 8 |
| 27 | Flat washer | 4 | 62 | Axle sleeve | 2 |
| 28 | Screw M6*58 | 2 | 63 | Rear axle | 1 |
| 29 | Nut M10*1 | 2 | 64 | Protective pad | 8 |
| 30 | Retaining ring | 2 | 65 | EVA | 4 |
| 31 | Nut M6 | 3 | 66 | Aluminum guide rail | 4 |
| 32 | Stopper | 4 | 67 | Middle guide rail cover | 1 |
| 33 | Screw M8*20 | 18 | 68 | Guide rail front cover | 1 |
| 34 | Washer | 10 | 69 | Left adjusting handle | 1 |
| 35 | Transport wheel | 2 | 70 | Right adjusting handle | 1 |
| 71 | Handle cover | 2 | 94 | Pedal pad | 2 |
| 72 | Left Handle | 1 | 95 | Flat washer | 8 |
| 73 | Right handle | 1 | 96 | Screw M6*15 | 8 |
| 74 | Screw | 4 | 97 | Right pedal assembly | 1 |
| 75 | Crank cover | 2 | 98 | Cover | 2 |
| 76 | Left crank assembly | 1 | 99 | Cover | 4 |
| 77 | Ridge ending | 2 | 100 | Cover | 2 |
| 78 | Crankcase | 4 | 101 | Cover | 2 |
| 79 | Large sealing ring | 4 | 102 | Spacer | 2 |
| 80 | Rotating seal | 4 | 103 | Outer spring | 4 |
| 81 | Right crank assembly | 1 | 104 | Roller | 4 |
| 82 | Left crank cover | 2 | 105 | Gasket | 4 |
| 83 | Right crank cover | 2 | 106 | Screw M10*60 | 2 |
| 84 | Nut | 4 | 107 | Coupling lever | 2 |
| 85 | Screw | 2 | 108 | End cap | 4 |
| 86 | Joint housing | 4 | 109 | Cover | 2 |
| 87 | Joint | 2 | 110 | Cover | 2 |
| 88 | Left pedal assembly | 1 | 111 | Bearing | 10 |
| 89 | End cap | 4 | 112 | Load wheel clamp | 1 |
| 90 | Sleeve | 4 | 113 | Flat washer | 4 |
| 91 | Gasket | 2 | 114 | Top cable | 1 |
| 92 | Anti-slip mat | 4 | 115 | Bottom cable | 1 |
| 93 | Pedal | 2 | 116 | Sensor | 1 |
ENVIRONMENT PROTECTION
After the product lifespan expired or if the possible repairing is uneconomic, dispose it according to the local laws and environmentally friendly in the nearest scrapyard.By proper disposal you will protect the environment and natural sources. Moreover, you can help protect human health. If you are not sure incorrect disposing, ask local authorities to avoid law violation or sanctions.Don’t put the batteries among house waste but hand them in to the recycling place.
TERMS AND CONDITIONS OF WARRANTY, WARRANTY CLAIMS
General Conditions of Warranty and Definition of TermsAll Warranty Conditions stated hereunder determine Warranty Coverage and Warranty Claim Procedure. Conditions of Warranty and Warranty Claims are governed by Act No. 89/2012 Coll. Civil Code, and Act No. 634/1992 Coll., Consumer Protection, as amended, also in cases that are not specified by these Warranty rules.The seller is SEVEN SPORT s.r.o. with its registered office in Borivojova Street 35/878, Prague 13000, Company Registration Number: 26847264, registered in the Trade Register at Regional Court in Prague, Section C, Insert No. 116888.
According to valid legal regulations it depends whether the Buyer is the End Customer or not.“The Buyer who is the End Customer” or simply the “End Customer” is the legal entity that does not conclude and execute the Contract in order to run or promote his own trade or business activities.“The Buyer who is not the End Customer” is a Businessman that buys Goods or uses services for the purpose of using the Goods or services for his own business activities. The Buyer conforms to the General Purchase Agreement and business conditions.These Conditions of Warranty and Warranty Claims are an integral part of every Purchase Agreement made between the Seller and the Buyer. All Warranty Conditions are valid and binding, unless otherwise specified in the Purchase Agreement, in the Amendment to this Contract or in another written agreement.
Warranty ConditionsWarranty PeriodThe Seller provides the Buyer a 24 months Warranty for Goods Quality, unless otherwise specified in the Certificate of Warranty, Invoice, Bill of Delivery or other documents related to the Goods. The legal warranty period provided to the Consumer is not affected.By the Warranty for Goods Quality, the Seller guarantees that the delivered Goods shall be, for a certain period of time, suitable for regular or contracted use, and that the Goods shall maintain its regular or contracted features.The Warranty does not cover defects resulting from (if applicable):
- User’s fault, i.e. product damage caused by unqualified repair work, improper assembly, insufficient insertion of seat post into frame, insufficient tightening of pedals and cranks
- Improper maintenance
- Mechanical damages
- Regular use (e.g. wearing out of rubber and plastic parts, moving mechanisms, joints, wear of brake pads/blocks, chain, tires, cassette/multi-wheel etc.)
- Unavoidable event, natural disaster
- Adjustments made by unqualified person
- Improper maintenance, improper placement, damages caused by low or high temperature, water, inappropriate pressure, shocks, intentional changes in design or construction etc.
Warranty Claim ProcedureThe Buyer is obliged to check the Goods delivered by the Seller immediately after taking the responsibility for the Goods and its damages, i.e. immediately after its delivery. The Buyer must check the Goods so that he discovers all the defects that can be discovered by such check.When making a Warranty Claim the Buyer is obliged, on request of the Seller, to prove the purchase and validity of the claim by the Invoice or Bill of Delivery that includes the product’s serial number, or eventually by the documents without the serial number. If the Buyer does not prove the validity of the Warranty Claim by these documents, the Seller has the right to reject the Warranty Claim.If the Buyer gives notice of a defect that is not covered by the Warranty (e.g. in the case that the Warranty Conditions were not fulfilled or in the case of reporting the defect by mistake etc.), the Seller is eligible to require a compensation for all the costs arising from the repair. The cost shall be calculated according to the valid pricelist of services and transport costs.If the Seller finds out (by testing) that the product is not damaged, the Warranty Claim is not accepted. The Seller reserves the right to claim a compensation for costs arising from the false Warranty Claim.In case the Buyer makes a claim about the Goods that is legally covered by the Warranty provided by the Seller, the Seller shall fix the reported defects by means of repair or by the exchange of the damaged part or product for a new one. Based on the agreement of the Buyer, the Seller has the right to exchange the defected Goods for a fully compatible Goods of the same or better technical characteristics. The Seller is entitled to choose the form of the Warranty Claim Procedures described in this paragraph.
The Seller shall settle the Warranty Claim within 30 days after the delivery of the defective Goods, unless a longer period has been agreed upon. The day when the repaired or exchanged Goods is handed over to the Buyer is considered to be the day of the Warranty Claim settlement. When the Seller is not able to settle the Warranty Claim within the agreed period due to the specific nature of the Goods defect, he and the Buyer shall make an agreement about an alternative solution. In case such agreement is not made, the Seller is obliged to provide the Buyer with a financial compensation in the form of a refund.
CZSEVEN SPORT s.r.o.Registered Office: Strakonická 1151/2c, Praha 5, 150 00, CRHeadquaters: Dlnická 957, Vítkov, 749 01Warranty & Service: Cermenská 486, Vítkov 749 01
CRN: 26847264VAT ID: CZ26847264
Phone: +420 556 300 970 E-mail:[email protected][email protected][email protected]
Web: www.inSPORTline.cz
SKinSPORTline s.r.o.Headquaters, warranty & service center: Elektricná 6471, Trencín 911 01, SK
CRN: 36311723 VAT ID: SK2020177082
Phone: +421(0)326 526 701E-mail:[email protected][email protected][email protected]
Web: www.inSPORTline.sk
References
[xyz-ips snippet=”download-snippet”]

