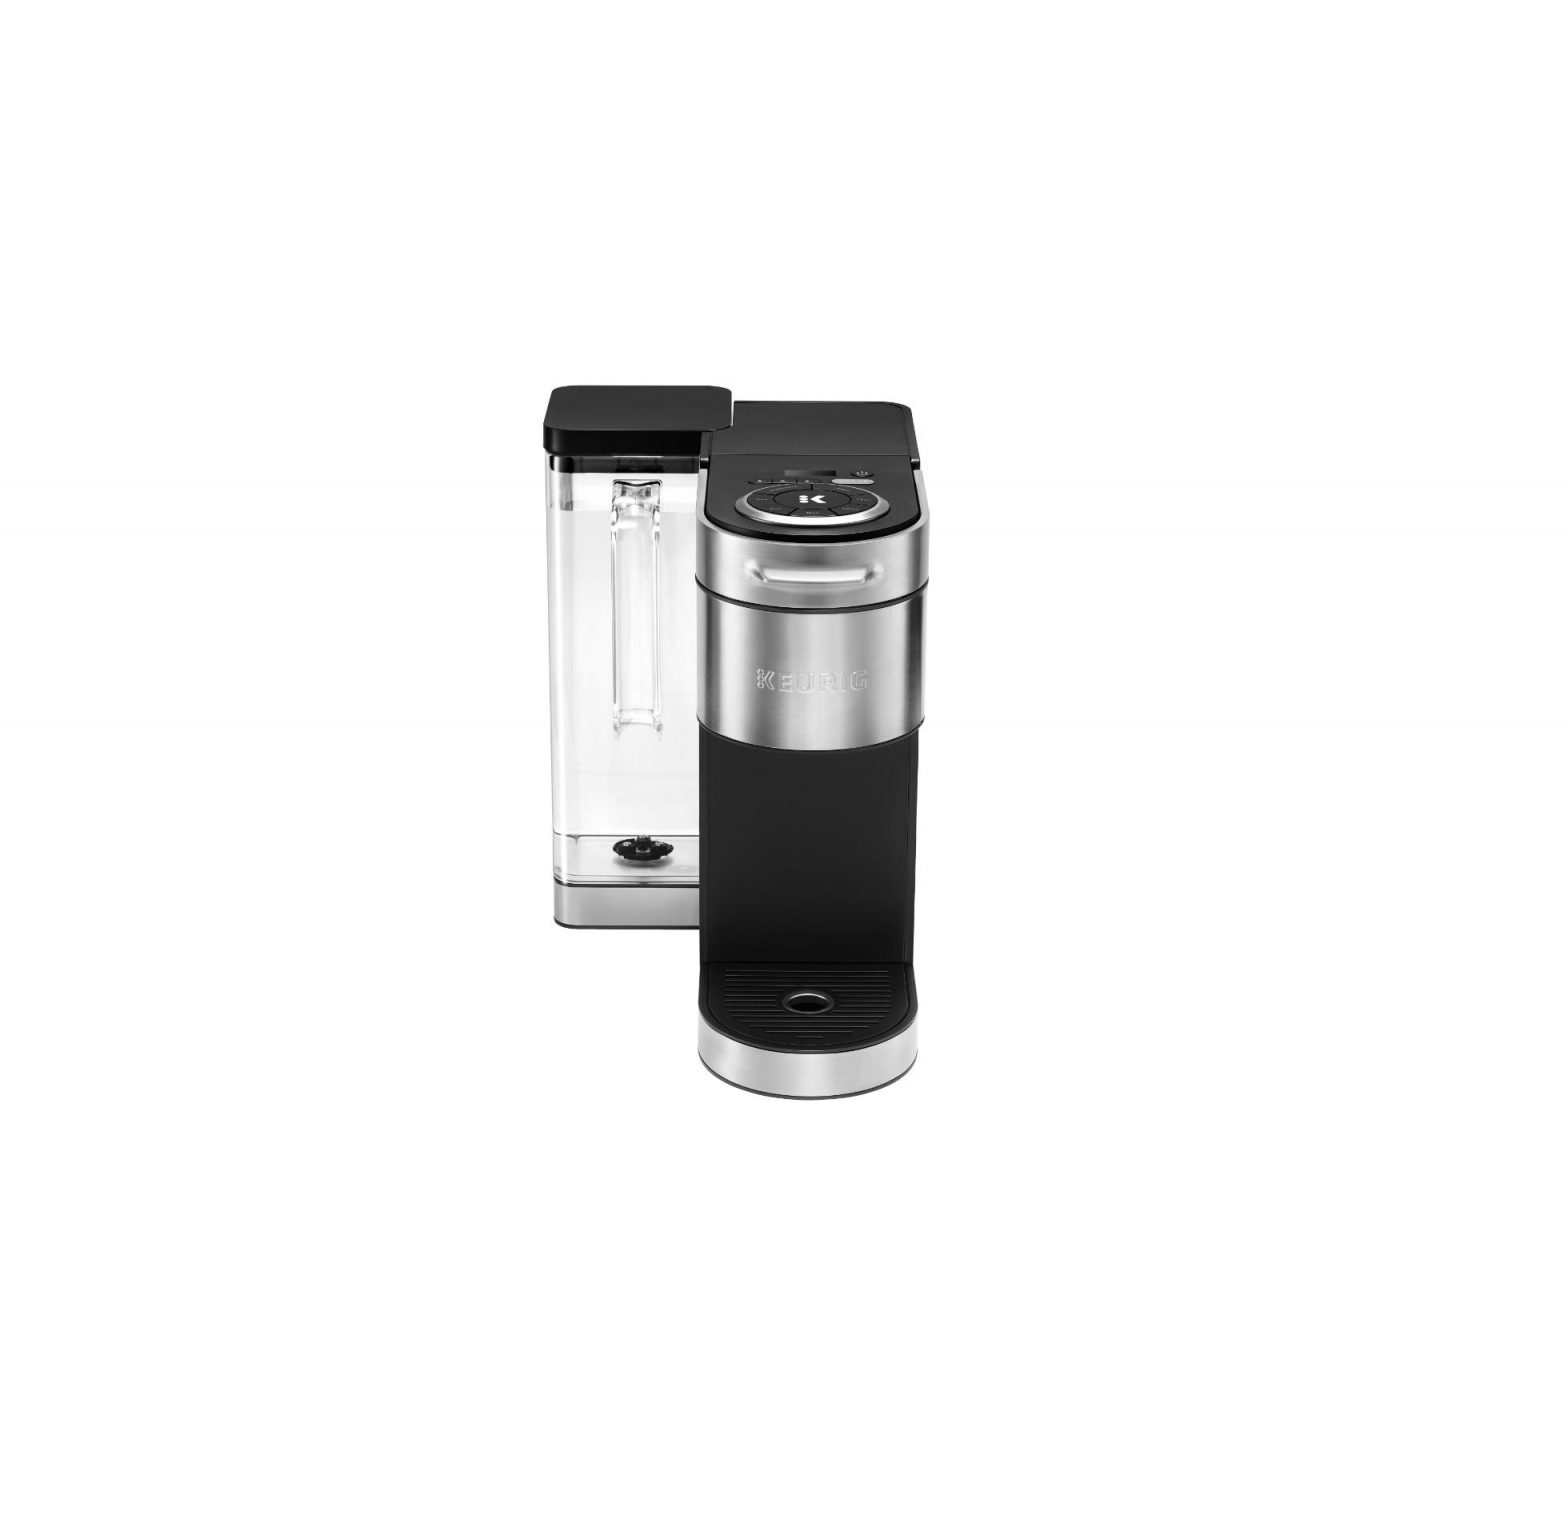
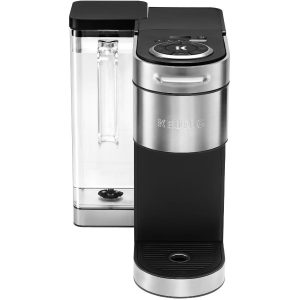
KEURIG Single Serve Coffee Maker
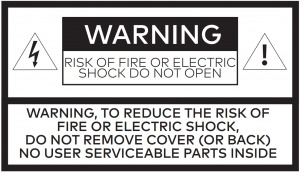
IMPORTANT SAFEGUARDS
When using electrical appliances, basic safety precautions should always be followed, including the following:
READ ALL INSTRUCTIONS
- For household use only.
- Do not use distilled water.
- Scalding may occur if the handle is opened during the brewing process.
- Do not touch hot surfaces. Use handles or knobs.
- To protect against fire, electric shock, and injury to persons do not immerse appliance, cord, or plugs in water or other liquid.
- Close supervision is necessary when any appliance is used by or near children.
- Unplug from outlet when not in use and before cleaning. Allow to cool before putting on or taking off parts, and before cleaning the appliance.
- Do not operate any appliance with a damaged cord or plug or after the appliance malfunctions, or has been damaged in any manner. Return appliance to the nearest authorized service facility for examination, repair, or adjustment.
- The use of accessory attachments not authorized by the appliance manufacturer may result in fire, electric shock, or injury to persons.
- Do not use outdoors.
- Do not let cord hang over edge of table or counter, or touch hot surfaces.
- Do not place on or near a hot gas or electric burner, or in a heated oven.
- Always attach plug to appliance first (if not permanently attached), then plug cord into the wall outlet. To disconnect, turn any control to ″off″ then remove plug from wall outlet.
- Do not use appliance for other than intended use.
- Use brewer in upright position only. Allow brewer to cool (90 min) prior to turning it in any position other than upright.
- Do not immerse brewer in water.
For detailed brewer cleaning and maintenance instructions, videos, and the full Use & Care Guide visit Support.Keurig.com.
- WARNING: Keep all plastic bags away from children.
- CAUTION: Keurig® recommends using only Keurig® My K-Cup® Reusable Coffee Filter and Keurig® approved K-Cup® pods in this appliance. If the pod does not fit, do not force the pod into the appliance. The use of non-Keurig® pods or accessories may cause brewer malfunction or injury.
- WARNING: Used K-Cup® pods should be removed from the pod holder, or in part with the daily cleaning routine.
- WARNING: There is extremely hot water under pressure in the K-Cup® pod holder during the brew process. To avoid risk of injury do not lift the handle or otherwise open the handle during the brew process.
- CAUTION: There are sharp needles that puncture the K-Cup pod; one above the K-Cup® pod holder, and the other in the bottom of the K-Cup pod holder. To avoid risk of injury, be aware of the needle locations.
- POWER CORD INSTRUCTIONS:a. A short power-supply cord is provided to reduce risks resulting from becoming entangled in or tripping over a longer cord.b. Longer detachable power-supply cords or extension cords are available and may be used if care is exercised in their use.c. If a long detachable power-supply cord or extension cord is used:I. The marked electrical rating of the detachable power-supply cord or extension cord should be at least as great as the electrical rating of the appliance.II. If the appliance is of the grounded type, the extension cord should be a grounding type 3-wire cord.III. The longer cord should be arranged so that it will not drape over the counter top or table top where it can be pulled on by children or tripped over.
- CAUTION: HOT COCOA/OTHER NONCOFFEE PODS: Immediately after using a hot cocoa/other non-coffee pod, run a hot water brew cycle without a pod to avoid the possibility of clogging the exit needle. DO NOT assume the next user will do this.
SAVE THESE INSTRUCTIONS
Before You Brew
1. Plug & PlaceRemove packing tape from brewer. Plug into a grounded outlet.Place a large mug (10oz minimum) on the drip tray.NOTE: If changing water tank position to the back, please complete before first brew (refer to instructions include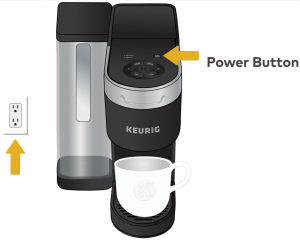
2. Rinse & FillRemove the water reservoir lid, then lift the reservoir straight up to remove it. If you have a Keurig® Water Filter, install it now. Refer to your Water Filter Starter Kit for instructions.Rinse reservoir with fresh water and fill to the MAX FILL line.Replace water reservoir, making sure the lock tabs engage with the brewer. Replace lid.NOTE: Do not use distilled water.
3. Lift & LowerLift and lower the handle. Do not insert a K-Cup® pod. The brewer will power on automatically.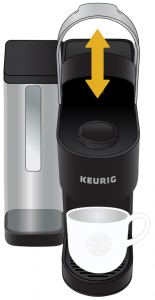
4. Cleansing BrewThe 4 cup sizes will blink. Press the 8oz button, then press the blinking BREW button to start a cleansing brew. Pour the hot water into the sink.The one-time setup process is now complete and you are ready to brew!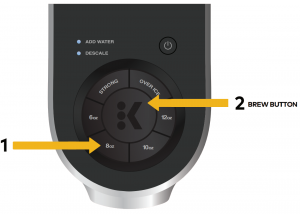
Brew Your First Cup
5. Place Mug & PodPlace a mug on the drip tray. If using a travel mug, remove the drip tray and place the mug on the drip tray base. Lift the handle and place a K-Cup® pod in the K-Cup® pod holder. Lower the handle completely to close the lid.Do not remove the foil lid on the K-Cup® pod.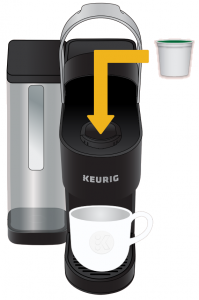
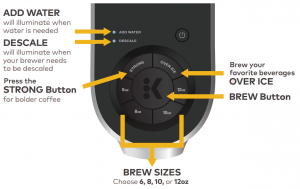
6. Brew & Enjoy!The 4 brew size buttons will blink. Select your brew size, then press the blinking BREW button. For a stronger coffee, press the STRONG button before brewing. The BREW button will remain illuminated while brewing. Brewing is complete when the buttons are no longer illuminated.Lift the handle and dispose of the K-Cup® pod.CAUTION: While brewing, there is extremely hot water in the K-Cup® pod holder. To avoid injury, do not lift the handle during the brewing process.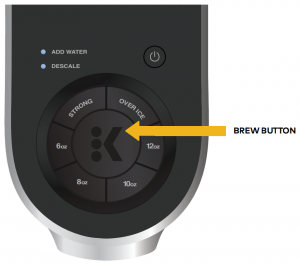
For bolder coffee press the STRONG button, followed by the BREW button.For iced beverages fill a large plastic tumbler with ice. Insertany K-Cup® pod, then press the OVER ICE button, followed by BREW button.NOTE: choose a tumbler large enough to accommodate both the ice and dispensed liquid to prevent overflow.Multi-position Water ReservoirPosition along the left or back of the brewer to optimize counter space.
Brewer Features
Smart Start heats then brews in one simple process.No need to wait for the brewer to heat before selecting brew size. Simply power on your brewer by lifting the handle, add a K-Cup® pod, select your brew size, then press the BREW button. The brewer will heat, then automatically begin brewing. Auto Off automatically turns your brewer off 5 minutes after the last brew for energy savings.
High Altitude To ensure your coffee maker works properly at higher altitudes (5,000 feet) please enable the High Altitude Brewing Mode on your coffee maker.
- Begin with the brewer plugged in and powered off.
- Press and hold the BREW button and 8oz button for 3 seconds. The 12oz button will illuminate to confirm that the High Altitude Brewing Mode has been enabled.
- High Altitude Mode will remain enabled until steps 1-2 are repeated and the 12oz button turns off to confirm that the High Altitude Brewing mode is disabled.
Strong Brew for a bolder, more intense cup.Over Ice brew your favorite beverages over ice.
ATTENTION!This brewer is only compatible with newly designed Keurig Universal My K-Cup™
Do not attempt to use any other reusable filter or previous versions of Keurig My K-Cup; may cause damage to brewer.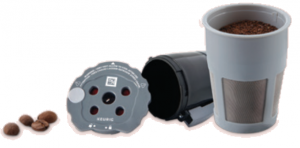
Caring for your Brewer
For great-tasting coffee, keep your brewer running at peak performance by following the recommended maintenance schedule:
| Frequency | Product | Benefit |
| Weekly | Keurig ® Rinse Pods | Rinse away residue and oils for a great tasting cup of coffee every time |
| Every 2 Months | Keurig ® Water Filters | Keep your water fresh and clean to enhance the taste of your coffee |
| Every 3 Months or when the Descale notification turns on | Keurig ® Descale Solution | Eliminate mineral build up to enhance the taste of your coffee and preserve the long-term health of your coffeemaker |
To turn off Descale notification, follow the full descaling procedure as outlined in the Use & Care Guide
If the brewer has been in storage, or hasn’t been used in days, run a cleansing brew before brewing your beverage.Periodically hand-wash the water reservoir and lid and drip tray with warm soapy water and rinse clean. Do not use any vinegar based cleaning products to clean the outside of your brewer.
CAUTION: Parts are not dishwasher safe.NOTE: Do not dry the inside of the water reservoir with a cloth as lint may remain.
For detailed brewer cleaning and descale instructions, videos, and the full Use & Care Guide visit support.keurig.com.
Water Tank Repositioning
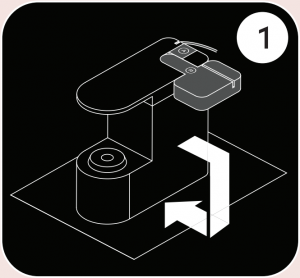
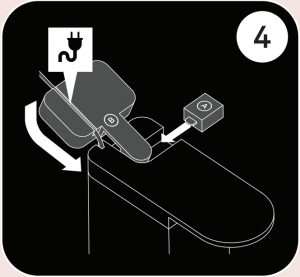
- Flip Brewer OverRemove the drip tray and the water tank and set them aside. On a flat surface, carefully turn the brewer over so the base is facing up.You will see two parts: the water tank base (Part B) and the locking tab (Part A)

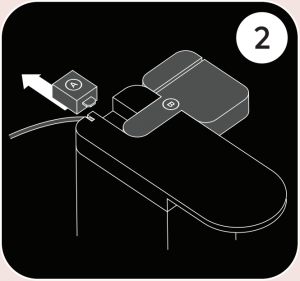
- Remove Part ASlide Part A out of the brewer. It should release freely with little resistance.

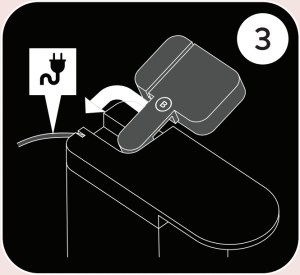
- Lift, Pivot Part BNext, reposition part B.• Gently pull outward to disengage from the brewer.• Rotate upward, as shown above. Part B will remain attached to the brewer.• Part B should now pivot freely to the second position.Remember to move the power cord, so it does not get caught.

- Insert B, Replace AReplace Part B in its new position. Rotate downward so that B is parallel to the base, then slide B back into position. Remember to replace the power cord.Slide Part A back into the second position to lock B in place. Flip the brewer back upright.You are now ready to use your Keurig® brewer!

Coffeehouse taste in your own home.
FIND YOUR PERFECT PODWith over 75 brands and hundreds of varieties, find your match atKeurig.com/new
Have questions? We’re here to help. Visit keurig.com/new for troubleshooting videos, maintenance recommendations, and the full Use & Care Guide.Still need help? Give us a call at 1-866-901-BREW (2739)

References
[xyz-ips snippet=”download-snippet”]

