WAVES Renaissance Reverb Plugin User Guide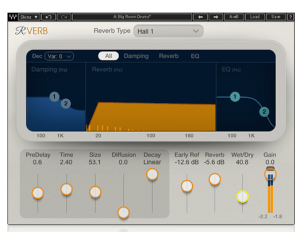
Introduction
Renaissance Reverb is an algorithmic reverb plugin that combines intuitive control with a classic sound. Years after its introduction, Renaissance Reverb remains a favorite choice with FOH, monitor, and studio engineers. It was inspired by the earlier TrueVerb processor. Waves designers took the TrueVerb early-reflection system as a starting point and improved upon it in many ways. They then created a new reverb tail engine and designed an intuitive, powerful interface for detailed control over every step that goes into designing a reverb effect. The result: a tool with a solid reputation, classic sound, and innovative flexibility.
Components
Renaissance reverb has two components: RVerb (stereo) and RVerb (mono-to-stereo).
Getting Started
INSTANTIATE THE PLUGINRenaissance Reverb can be used as a send or insert:
LOAD A PRESETRenaissance Reverb simulates an assortment of halls, chambers, plates, and effects by controlling the parameters that make up reflections, decay, pre-delay, type of reverb, and more. This makes for lots of settings variables, so it usually makes sense to begin designing a sound by loading a preset. RVerb offers a large assortment of presets; open the Load drop-down menu and pick the preset that best describes what you want to accomplish. Then experiment with the controls, one at a time, to customize the preset. If you like what you created, save it as a user preset. Presets are managed in the WaveSystem Toolbar, which is at the top of the interface. Use the bar at the top of the plugin to save and load presets, compare settings, undo and redo steps, and resize the plugin. To learn more, click the icon at the upper-right corner of the window and open the WaveSystem Guide. Presets are helpful tools for learning how controls work together to achieve very different effects, and how subtle changes can greatly alter the feeling of a sound.
Interface
The RVerb interface is divided into two major sections:
- A parameter control section at the bottom
- A graphic control/display panel at the top: three graphs illustrate damping, reverb and EQ. There is also an “All” view (shown below) that displays a comprehensive view of all three graphs.
RVerb Overview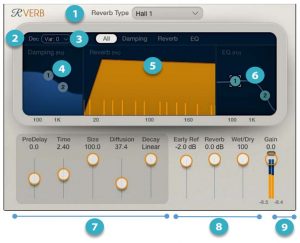
- Reverb type menu
- Decorrelation control
- View select: Damping, Reverb, EQ, All
- Damping controls
- Reverb and early reflections graph
- Reverb tail EQ
- Reverb controls
- Reverb levels controls
- Output
Interface Appearance
You can view the Renaissance Reverb interface in any of three styles. Select a style with the Skins drop-down menu, on the left side of the WaveSystem Toolbar.
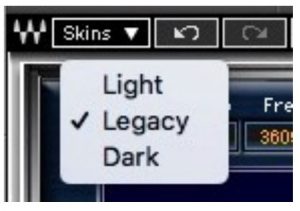
Light View
Dark View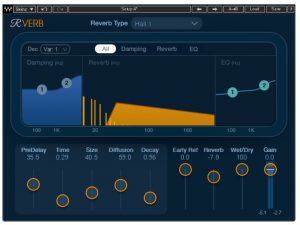
Legacy View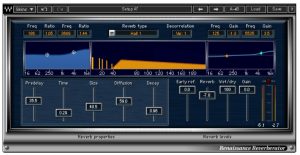
- All three skins have the same controls. When you change skins, the values don’t change.
- The skin of the current instance sets the default view, so new instances will open with that skin.
Getting Started
INSTANTIATE THE PLUGINRenaissance Verb can be used as a send or insert.For Send configuration, insert RVerb on a stereo Aux track. Set Wet/Dry to 100% wet after loading the preset.For Insert configuration, insert RVerb on DAW track or Aux. If you’re setting up your parameters from scratch, a Wet/Dry setting of 50% is a good starting point. If you are beginning with a preset, use its Wet/Dry value.
LOAD A PRESETFind a preset that more or less describes the space or effect you want to create. Study the parameters that make up the preset to help you understand how each setting controls the sound. Change the settings one by one, and, at first, staywithin the same section. Load another preset, note how the parameters changed, and compare that with the new effect.
SUGGESTED WORK SEQUENCE
- Load a preset and set Wet/Dry as described above.
- Set reverb Type.
- Adjust the Reverb Properties for color and flavor.
- Adjust the Reverb Levels for balance of early reflections.
- Tweak the EQ and Damping.
- Change the DE correlation between the channels for subtle flavor changes.
- Save your preset.
Factory presets cannot be modified and then saved. You can, however, save your changes as a user preset, which can be used in other sessions or other hosts. Save presets in the Save menu at the top of the interface For Insert configuration, insert RVerb on DAW track or Aux. Initially set Wet/Dry to 50% after loading the preset.
Graphic Views
The graphic panel displays (and in most cases, controls) damping, reverb, and tail EQ. The All view combines the three views. You can usually work exclusively from this view, referring to the detailed views when you need greater resolution.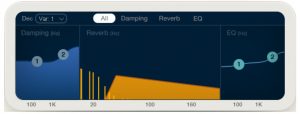
Detailed views enable you to fine-tune time and frequency characteristics.
DAMPING CONTROLS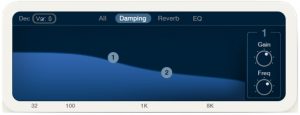 Compensate for low-frequency or high-frequency buildup.
REVERB CONTROLS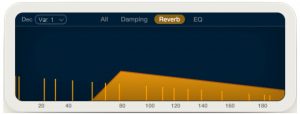 Control pre-delay and reverb properties.
REVERB TAIL EQ Control the equalization of the reverb tai
Controls
General Controls
REVERB TYPE
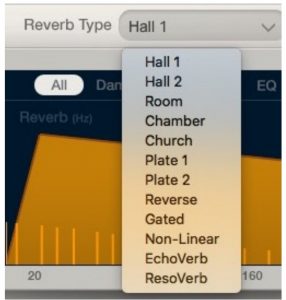
The Reverb Type menu defines reverb and early reflection behavior on a global scale. Selecting a Type (e.g., Hall, Room, Plate) will change the sound significantly. In a way, it’s really changing the engine at the heart of the reverb. The Type can be changed at any time, but this will likely result in large shifts in the nature of the sound.
Range: Hall 1, Hall 2, Room, Chamber, Church, Plate 1, Plate 2, Reverse, Gated, Non-Linear, EchoVerb, ResoVerb
DECORRELATIONThis controls the amount of correlation between the two channels (left and right) within the early reflections. Greater correlation values result in greater corresponding characteristics between the channels. The effect is subtle but can be very important in fine tuning the color of a sound. Cycle through the variations by repeatedly clicking on the button. Range: Variation 0 (least decorrelation) to Variation 6 (greatest decorrelation)
Reverb Properties Controls
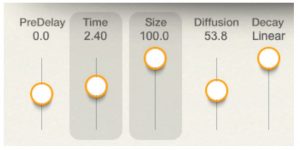
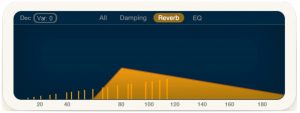
PRE-DELAYPre-delay refers to the amount of time offset between the original dry sound (plus the early reflections) and the onset of the reverb tail. Lengthening pre-delay time will retard the beginning of the reverb tail, thus providing a bit more space for a voice or instrument. Pre-delay times set too long can result in an unnatural sound.
Renaissance reverb allows for a negative pre-delay value, which delays the direct (dry) signal with respect to the early reflections and reverb tail. This is, admittedly, an unusual condition. Just remember that as predelay becomes increasingly negative, your source can become increasingly out of sync. If you want to maintain sync, advance the source track in your DAW to offset the negative pre-delay value. When predelay is negative, the button turns red to warn you that your direct signal (the “dry” part of the wet/dry control) will be delayed.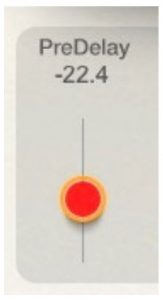
Range: -160 ms to 160 msDefault: 0.0 ms
TIMEThe Reverberation Time (RT) is the time it takes for the sound pressure to decrease by 60 dB, which is effectively the end of the reverb tail.
Range: 0.1 second to 20.0 seconds
SIZEControls the various parameters used to simulate room size, depending on the Reverb Type that is selected. These settings may include early reflection spacing, reverb tail dimension, and others.Range: 1% to 100%
DIFFUSIONServes as a balance control between the direct signal and the early reflections that feed the reverb tail. When set to 0%, diffusion is at its lowest, since the direct signal is feeding the reverb tail. When set to 100.0, diffusion is at its highest, since only the early reflections are used to feed the reverb tail.Range: 1% to 100%
DECAYThis control makes the reverb tail behave in a non-linear manner by ending the tail before the length defined by the other settings. All reverb types and presets can have a nonlinear sound (e.g., “gated reverb”) simply by lowering thevalue of the Decay control. The Reverb Time must be long enough to be gated (i.e., more than one second). We recommend three seconds as a good starting point. Settings vary from linear, at the top to the fader, to most non-linear at the bottom.Range: 0.04 to 3.5 (linear)
Reverb Levels Controls
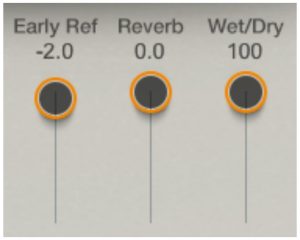
The mix of the Reverb is defined by three gain controls.
EARLY REFLECTIONSControls the output level of the early-reflections generator.Range: 0 dB to -40 dB (off)
REVERBControls the output level of the reverb tail.Range: 0 dB to -40 dB (off)
WET/DRYControls balance between the wet signal (early reflections + reverb tail) and the dry signal.Range: 0% to 100%
Damping Controls
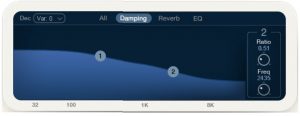
Renaissance reverb can create a perfect space, but the spaces we want to create are rarely perfect. Soft wall surfaces, hard wall surfaces, lots of people in the room, no people in the room—these and countless other variables influence the sound that feeds the reverb tail engine.
Use the Reverb Damping controls to compensate for low-frequency or high-frequency buildup, which can compromise the clarity of the room sound or at least get in the way of what you want to accomplish. You can also use these controls to customize a space.
LOW FREQUENCY (MARKER 1)Controls the “knee” point at which low frequency damping begins.Range: 16 Hz to 1600 Hz
LOW FREQUENCY RATIO (MARKER 1)Controls the Damping Ratio of the reverb’s low frequencies. Reducing the Ratio to below 1.00 yields slower reverbtime only for the low frequencies.Range: 0.10 to 2.00 (multiplication factor)
HIGH FREQUENCY (MARKER 2)Controls the “knee” point at which high frequency damping begins. Ranges from 1000 Hz to 2100 Hz
HIGHFREQUENCYRATIO (MARKER 2)Controls the Damping Ratio of the reverb’s high frequencies. Reducing the Ratio to below 1.00 yields slower reverbtime only for the high frequencies. Ranges from 0.10 to 2.00 (multiplication factor)
Reverb EQ Controls
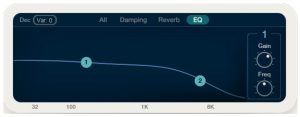
This section controls the equalization of the reverb tail.
LOW FREQUENCYControls the “knee” of the reverb’s low equalization, which is “pre” to the early reflections and reverb.Range: 16 Hz to 1600 Hz
LOW GAINGain control of the shelving EQ. When set to -24.0 dB, the shelf filter becomes a cut filter.Range: -24.0 dB to +12.0 dB
HIGH FREQUENCYControls the “knee” of the reverb’s high equalization, which is “pre” to the early reflections and reverb.Range: 1000 Hz to 2100 Hz
HIGH GAINSimple gain control of the shelving EQ. When equal to -24.0 dB, the shelf filter becomes a cut filter.Range: -24.0 to +12.0 dB
GAINSets the output gain of the plugin.Range: -24.0 dB to 0.0 dBOUTPUT METERFull-scale meter with clip indicator light. Peak indicators at the bottom. Click on the meter to clear clip and peak indicators.
Working with Presets
Renaissance Reverb offers a large collection of presets. These are useful starting points for solving problems and creating effects: load the most relevant preset and go from there. In some cases, a factory preset will give you just the settings you need.There are also Artist presets. These were designed by recording, mixing, FOH, and broadcast engineers, so they capture a personal point of view about sound. They provide a head start with an attitude when you’re creating a specific sound or making a track sound better.Use the bar at the top of the plugin to save and load presets, compare settings, undo and redo steps, and resize the plugin. To learn more, click the icon at the upper-right corner of the window and open the Wave System Guide.
[xyz-ips snippet=”download-snippet”]

