Kraus KPF-1610 Bolden™ Single Handle Commercial Kitchen Faucet Installation Manual
www.kraususa.com | Toll Free: 1.800.775.0703 | © 2018 Kraus USA Inc. | REV. August 5, 2021
Congratulations on the purchase of your new Kraus plumbing fixture!
Please keep the box and packaging materials until your product is completely installed. If you have any questions, require technical assistance or have any problems with your product:

Please contact our Customer Service Team 1-800-775-0703 / [email protected]
Have the model number available and retain a copy of your receipt with purchase date for reference.
If for any reason this product does not meet your expectations, please be sure to repack this product in the original box and packaging material to avoid damage during transit.
Prior to Installation:
- Make sure you have all necessary parts by checking the diagram and parts list. If any part is missing or damaged, please contact Kraus Customer Service at 800-775-0703 for a replacement.
- Turn off the hot and cold water supply at the angle stops and turn on the old faucet to release any built up pressure. Remove existing faucet. Clean sink or countertop to remove any debris, plumber’s putty, or silicone.
- Flush angle stops to release any debris prior to installation.
- Pre-drilled hole size requirement: 1 3/8″ (min) · Max countertop thickness: 2 1/2”
- 1, 2 or 3 hole installation with optional deck plate (sold separately)
For technical assistance or replacement parts, please contact Kraus Customer Service and one of our representatives will be happy to help:
Toll-Free: 800-775-0703 or [email protected]
Tools Required

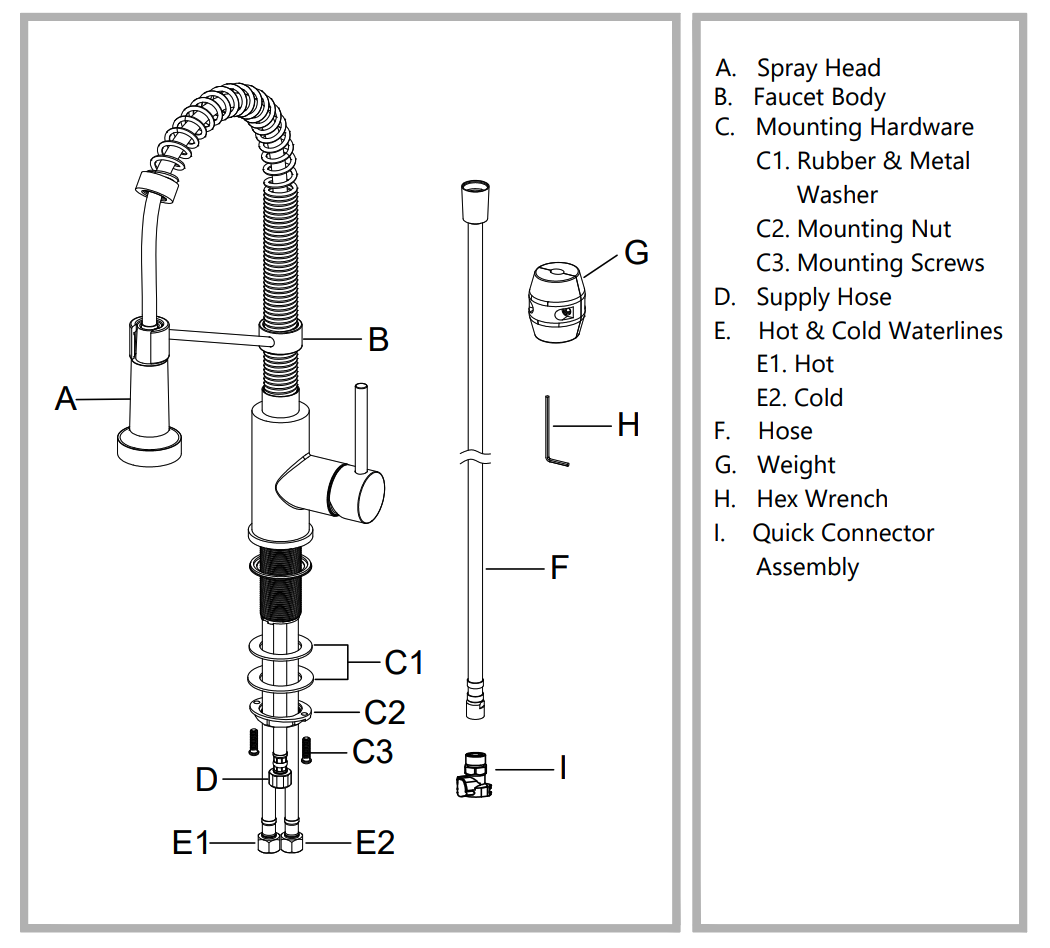
Diagram and Parts List
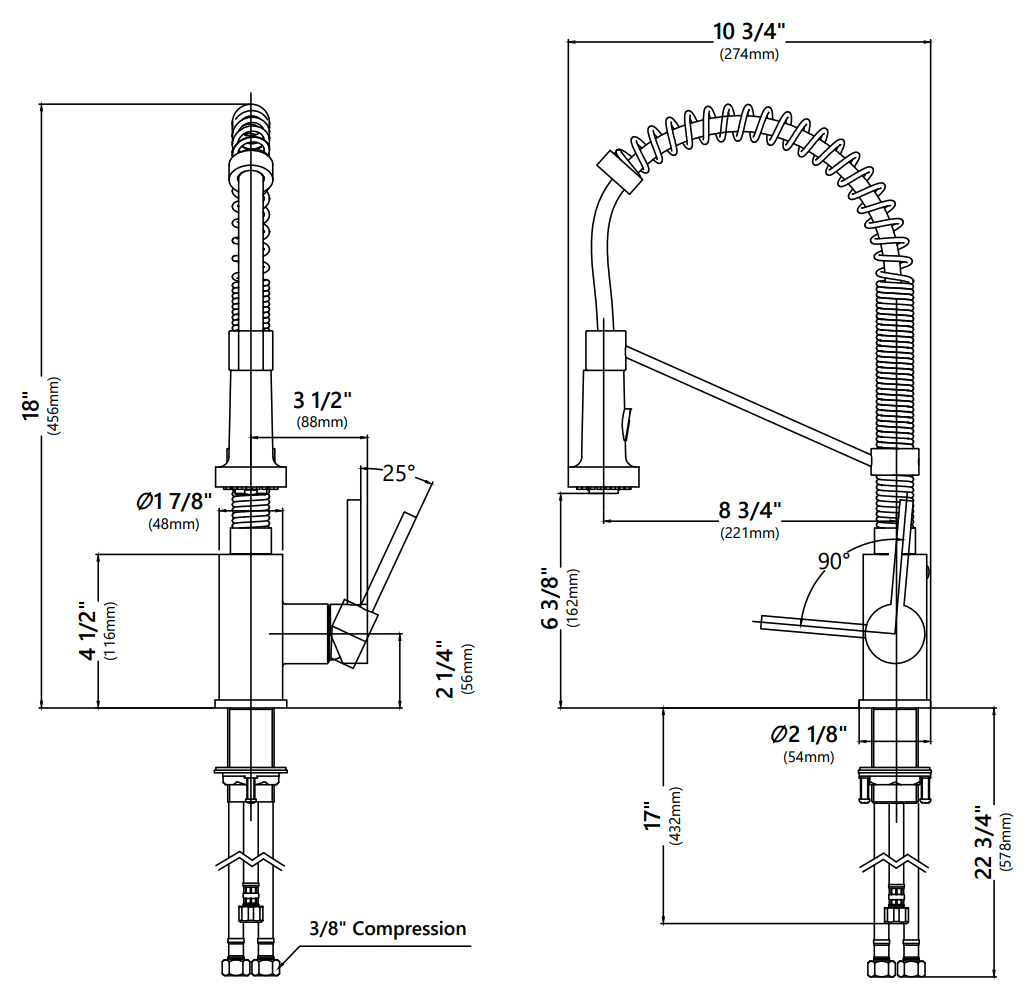
Faucet Dimension
Installer Tip:
Shut off main water supply before installing new faucet.
Step 1. Remove mounting hardware
Remove mounting hardware (C1, C2 & C3) from faucet body (B).
Step 2. Install the faucet and mounting hardware
Insert faucet body through the hole in the sink or countertop.Install the rubber washer and metal washer (C1), mounting nut (C2) and mounting screws (C3) onto the threaded mounting shank.
Step 3. Secure mounting hardware
Thread the nut (C2) onto the mounting shank. Lock the nut (C2) into position by tightening the screws (C3). Do not overtighten.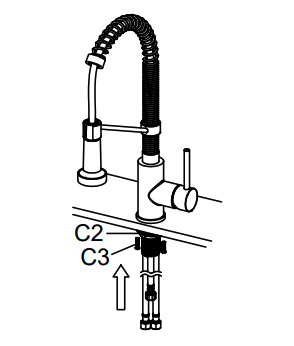
Step 4. Connect the quick connector
Connect the quick connector (I) to the supply hose (D) by twisting clockwise. Push the spray hose (F) firmly upward into quick connector. Pull down moderately to ensure the connection has been made.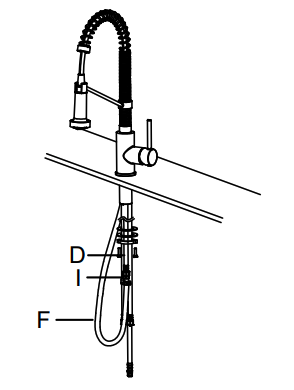
Step 5. Attach the weight
Install the weight (G) on the indicated mark on the spray hose (F).
Step 6. Making the waterline connections
Thread the nut (1) on the supply line onto the outlet of the water supply valve and tighten with a wrench. Do not overtighten.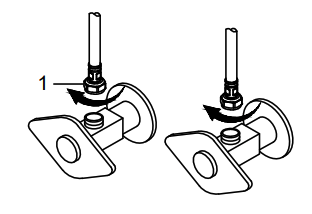
Step 7. Flushing and checking for leaks
Pull the hose assembly out of the spout and remove the spray head by unscrewing it from the hose in a counterclockwise direction. Be sure to hold the end of the hose down into the sink and turn the faucet on to the warm position where it mixes hot and cold water. Flush the water lines for one minute. This flushes away any debris that could cause damage to internal parts. Check for leaks. Re-tighten any connections if necessary, but do not overtighten. Reinstall the spray head by hand tightening it back onto the spray hose. After installation is completed, turn on the hot and cold water supplies. Check for leaks.
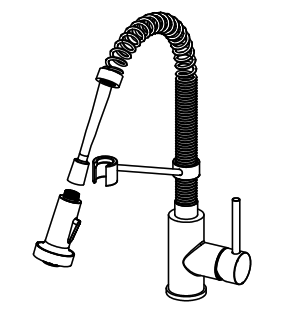
Replacement Parts
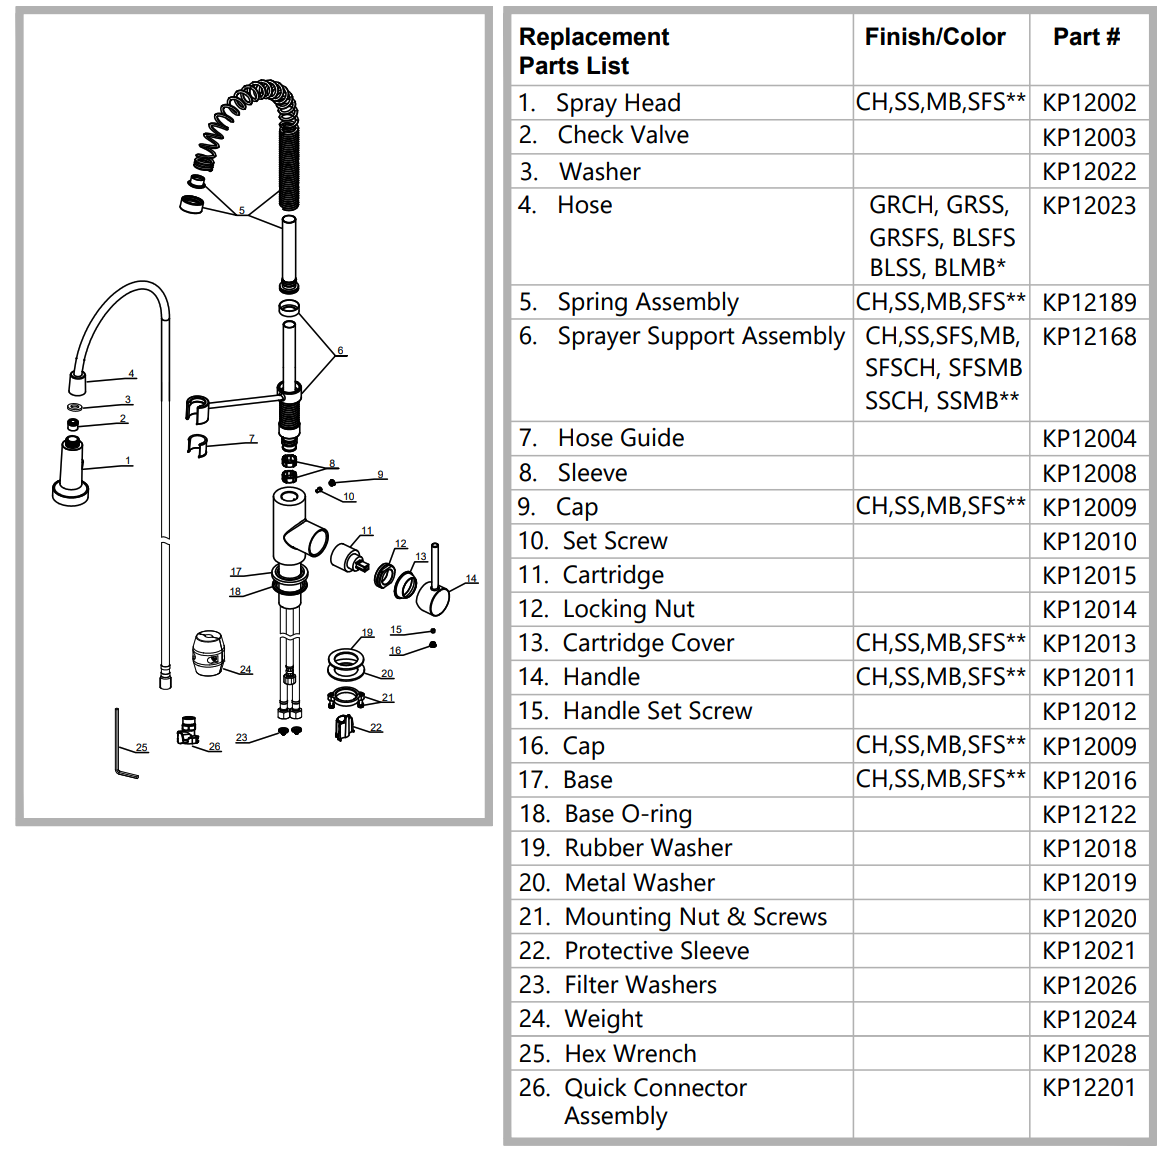
*Denotes spray hose assembly color options: Spray hose assembly color options: Black hose with Matte Black connector (BLMB), Black hose with Stainless Steel connector (BLSS), Gray hose with Chrome connector (GRCH), Gray hose with Stainless Steel connector (GRSS), Black hose with Spot Free Stainless Steel connector (BLSFS), Gray hose with Spot Free Stainless Steel connector (GRSFS)
**Denotes faucet component color options:CH – ChromeSS – Stainless SteelMB – Matte BlackSSCH – Stainless Steel/ChromeSSMB – Stainless Steel/Matte BlackSFS – Spot Free Stainless SteelSFSCH – Spot Free Stainless Steel/ChromeSFSMB – Spot Free Stainless Steel/Matte Black
Trouble-Shooting
If you have followed the instructions carefully and your faucet still does not work properly, take the following corrective steps:

Care & Maintenance
To keep the product clean & shining, follow the steps below:
 Rinse with clean water & dry with a soft cloth
- Do not clean with soaps, acid, polish, abrasives or harsh cleaners
- Do not use cloth with a coarse surface
- Unscrew the aerator and clean when necessary
This installation manual is subject to change without further notice.
Codes/Standards Applicable

IMPORTANT
Register Your Kraus Product
Activate Your Warranty
Access Premium Customer Support
Get Product Information
REGISTER TODAY
http://www.kraususa.com/registration

References
Search results for: \’maintenance\’
Kraus | Kitchen and Bathroom | Sinks, Faucets, and Accessories
Kraus USA Self Help
Warranty | Kraus product warranty coverage & restrictions
Kraus | Kitchen and Bathroom | Sinks, Faucets, and Accessories
Search results for: \’maintenance\’
Warranty | Kraus product warranty coverage & restrictions
Kraus USA Self Help
Kraus USA Self Help
Kraus | Kitchen and Bathroom | Sinks, Faucets, and Accessories
Warranty | Kraus product warranty coverage & restrictions
Search results for: \’maintenance\’
Kraus USA Self Help
Kraus | Kitchen and Bathroom | Sinks, Faucets, and Accessories
Search results for: \’maintenance\’
Warranty | Kraus product warranty coverage & restrictions
[xyz-ips snippet=”download-snippet”]


 Rinse with clean water & dry with a soft cloth