 User GuideCARLSBAD KITCHENSHELVING UNITOVCARLSBKTA
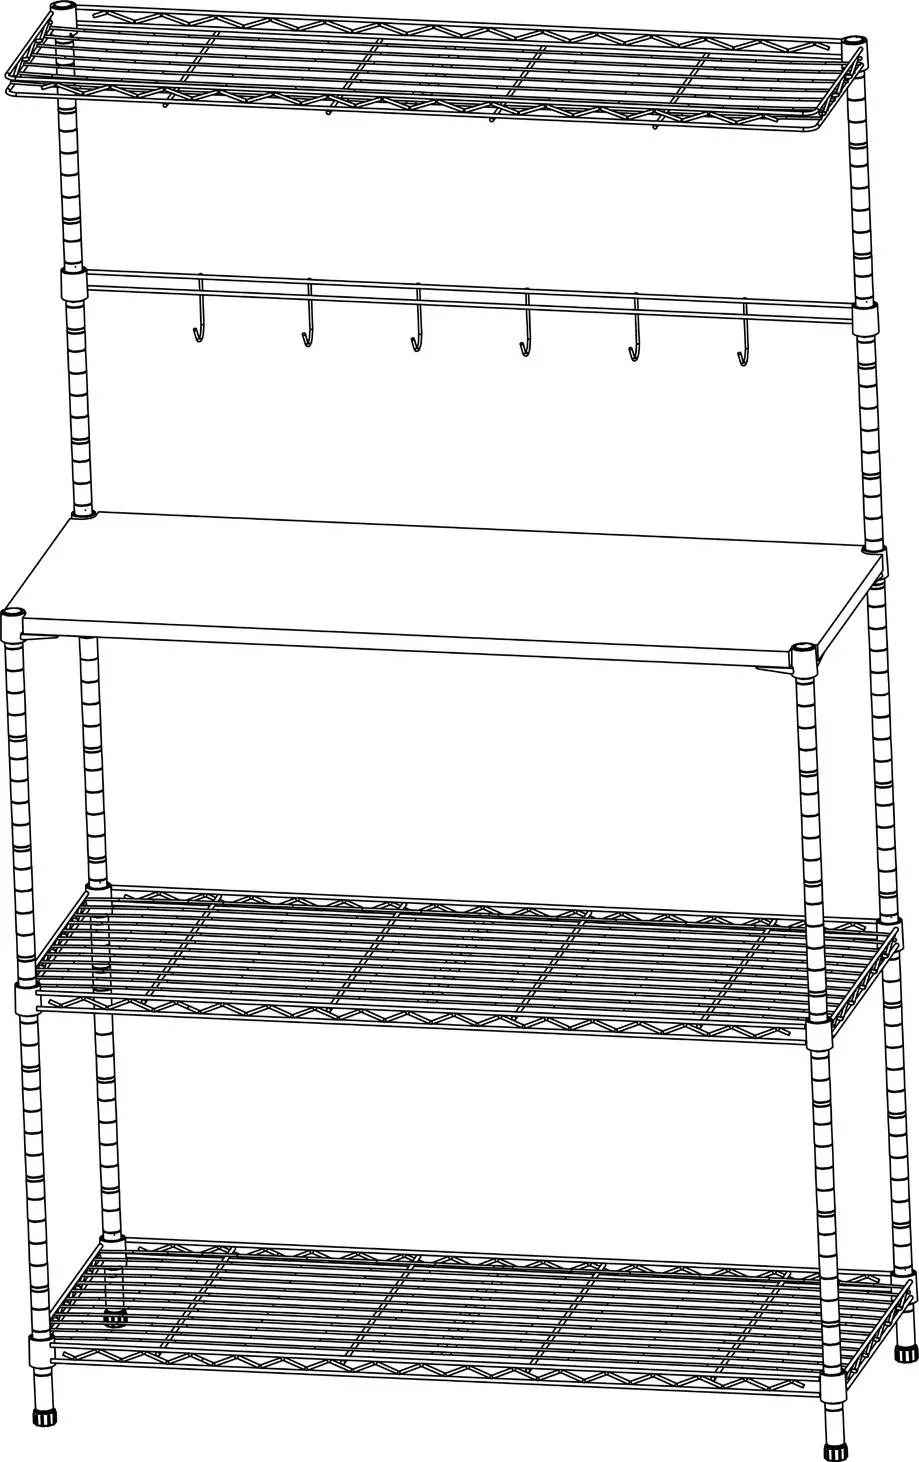
COMPONENTS
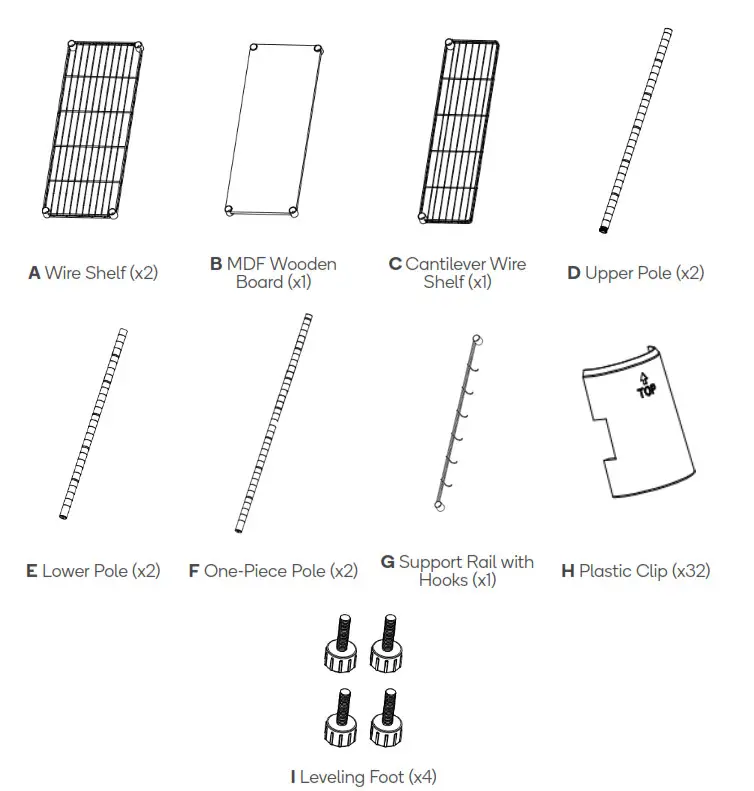
OVERVIEW
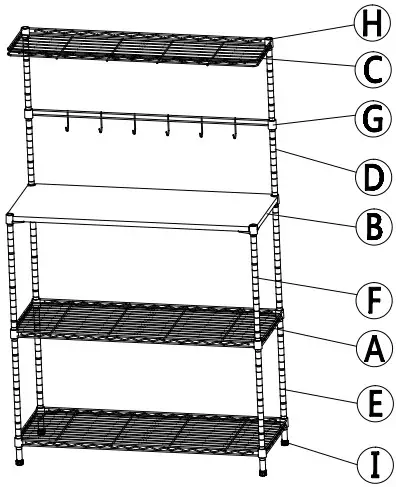
ASSEMBLY
Step 1:Screw the Adjustable Feet (I) into the bottom of each Lower Pole (E) and One-Piece Pole (F), then snap Plastic Clips (H) into the grooves of each pole at the same position.Ensure the arrows on the plastic clips are pointing upward, as shown in the image below.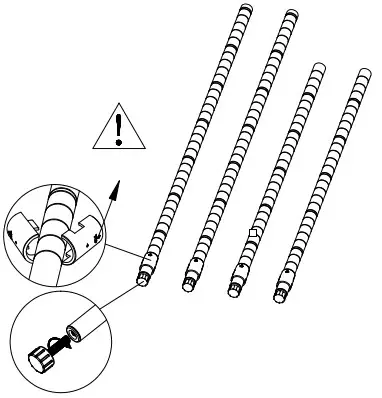 Step 2:Take Wire Shelf (A) and ensure the gap in the collar of each corner is facing down. Hold the shelf on its side and slide the top of lower poles and one-piece poles through the bottom of each shelf at its corners, until there is a snug fit. After all 4 poles have been slid through the shelf collar holes, set the shelf upright.
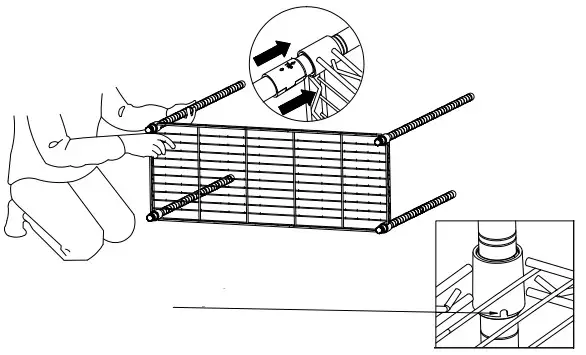 Ensure gap in the collar is pointing down
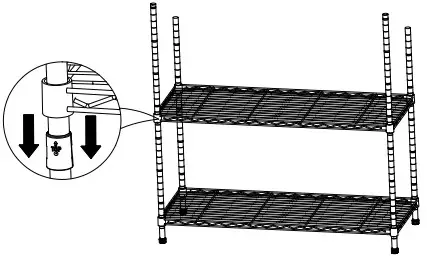
Step 3:Snap the plastic clips into the pole grooves at the desired height for the next wire shelf (A), and slide the shelf down onto the plastic clips.
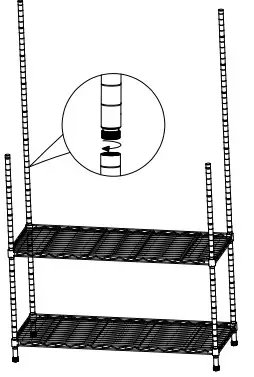
Step 4:The Upper Poles (D) are fitted with screw connectors (shown in the image below). Use these connectors to attach the upper poles to the lower poles.
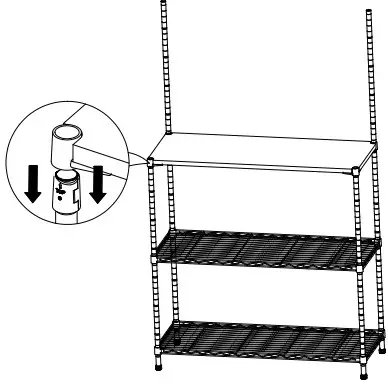
 Step 5:Snap the plastic clips into the upper pole grooves at the desired height for the MDF Wooden Board (B), and slide the MDF wooden board down onto the plastic clips.
Step 6:Snap plastic clips into the upper pole grooves at the desired height for the Support Rail with Hooks (G), and slide the support rail down onto the plastic clips. Fit plastic clips at the top of upper poles and place the Cantilever Wire Shelf (C) into position on top, pushing firmly down on every shelf at corners. Use a rubber mallet to ensure the shelf is firmly in place over the plastic clips.
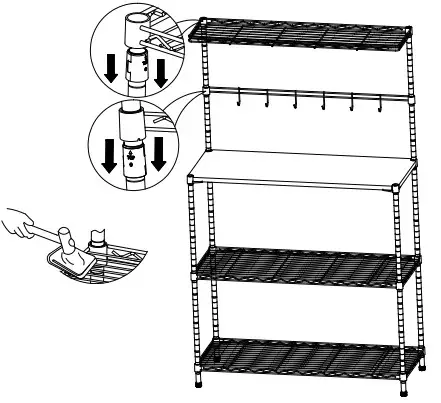
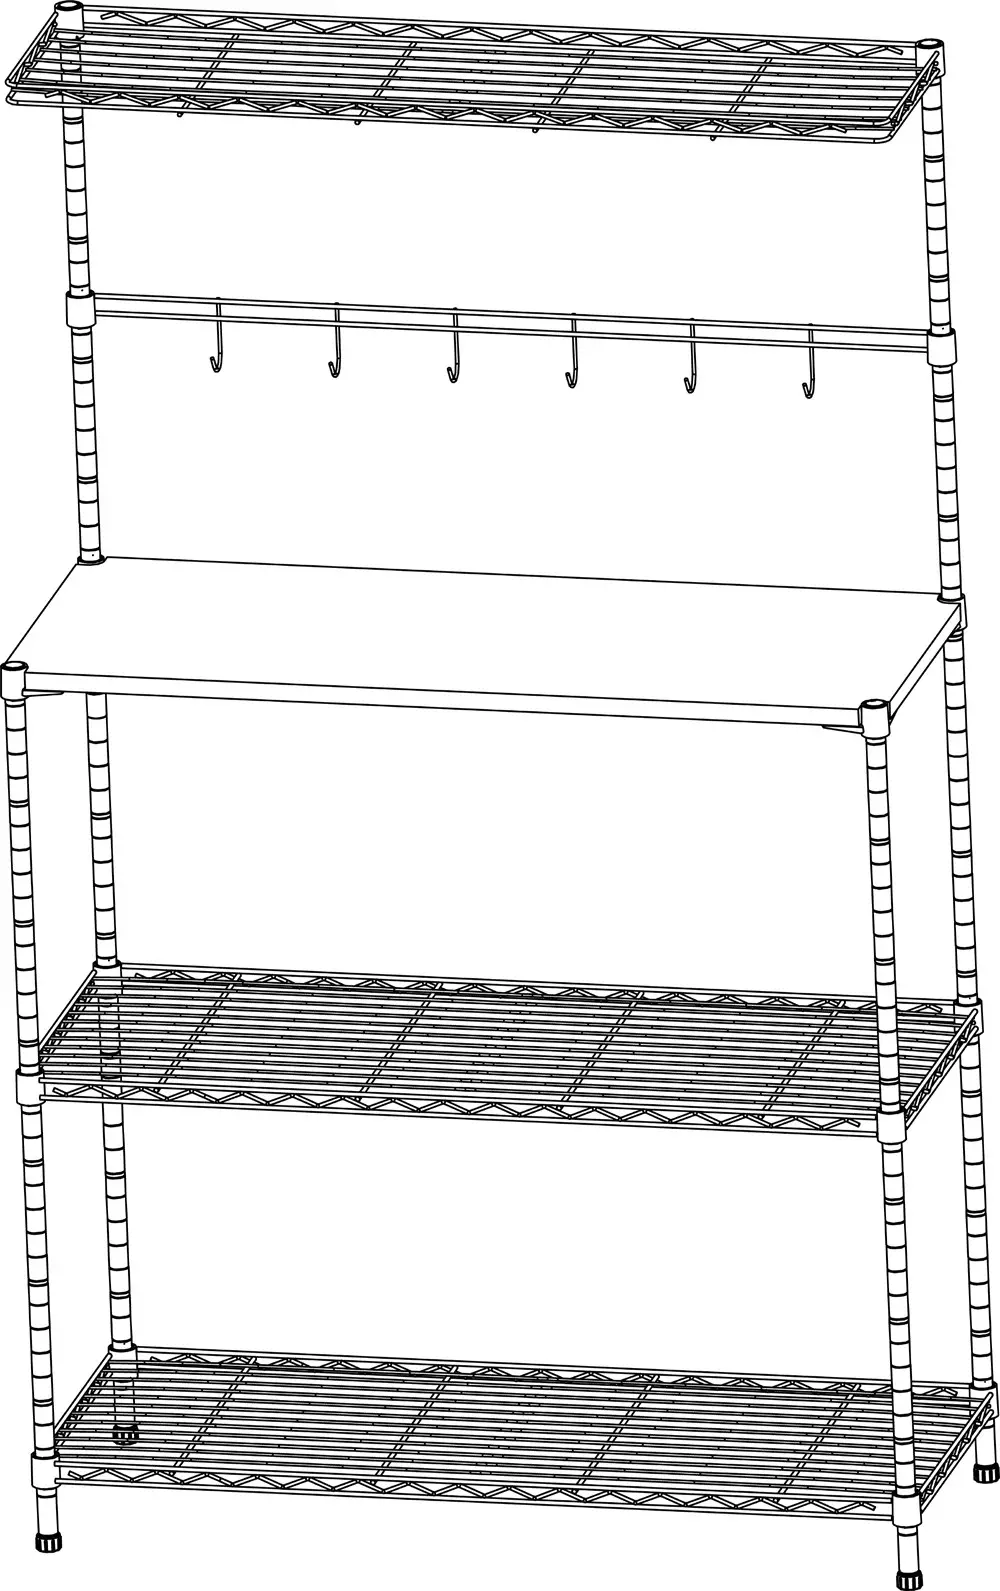 Assembly complete
Need more information?We hope that this user guide has given you the assistance needed for a simple setup. For the most up-to-date guide for your product, as well as any additional assistance you may require, head online to help.kogan.com.

[xyz-ips snippet=”download-snippet”]

