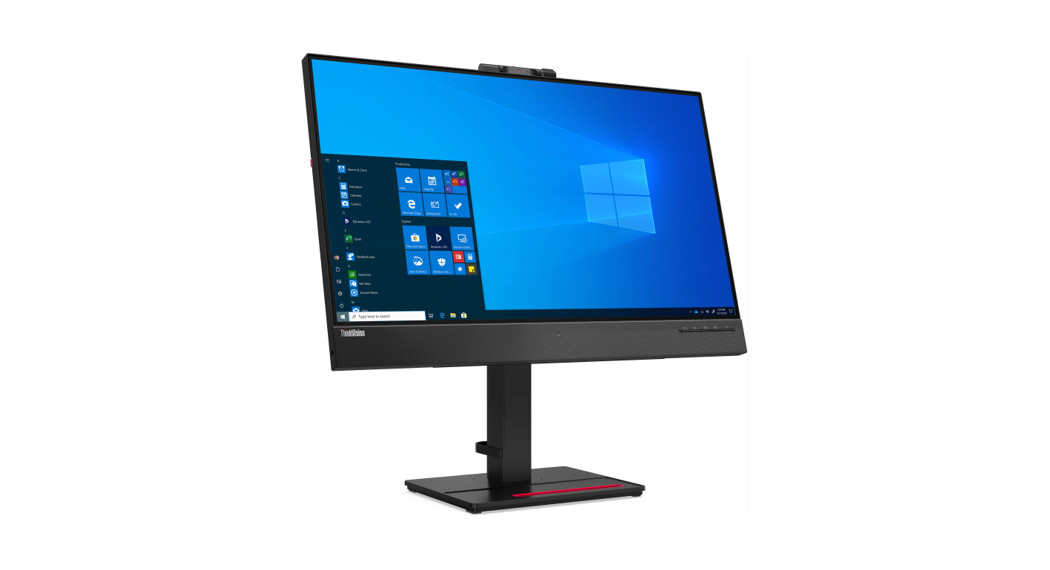
 ThinkVision
The drivers and files for this monitor can be downloaded from
 https://pcsupport.lenovo.com/solutions/t27hv_20 or scan QR code
![]() ThinkVision T27hv-20 supports Lenovo Display Control Center – ThinkColor & Glance by
ThinkVision T27hv-20 supports Lenovo Display Control Center – ThinkColor & Glance by
 |
|
 |
|
 |
 |
 |
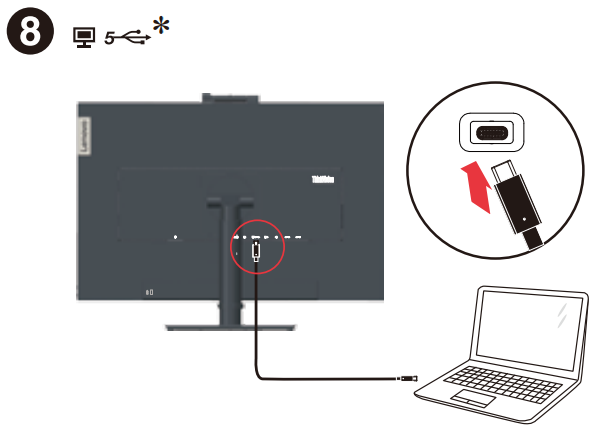 |
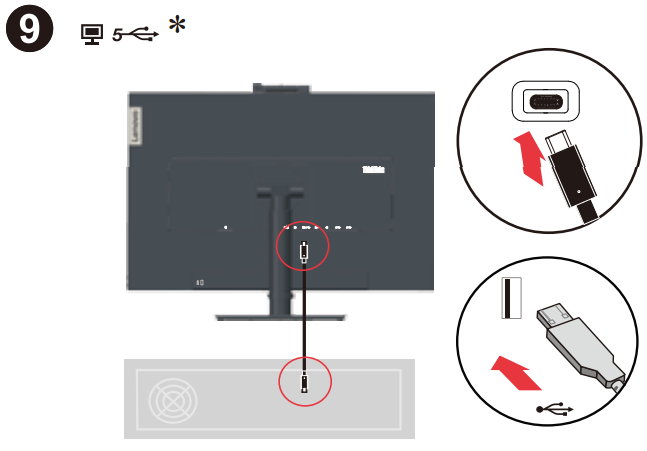 |
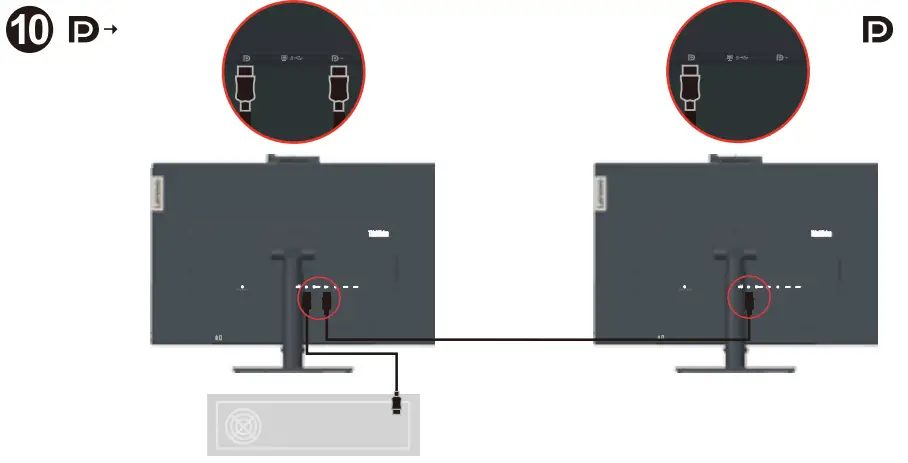 |
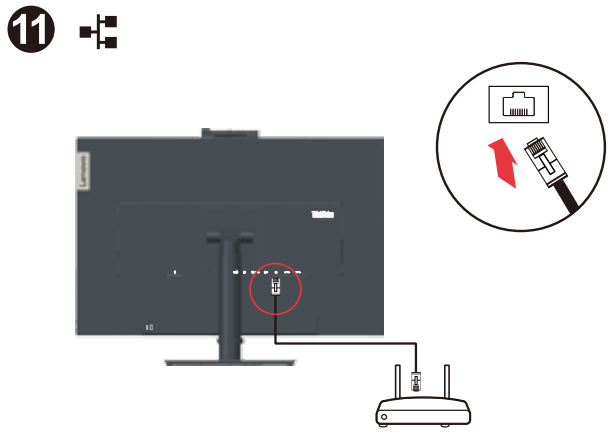 |
 |
 |
 |
 |
 |
 |
 |
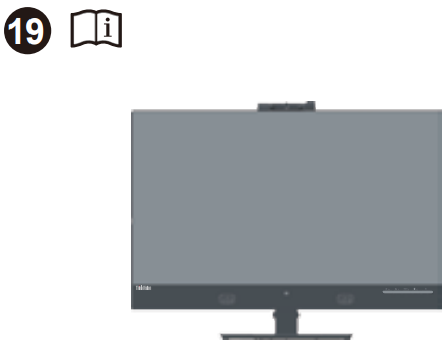 |
Smart Feature
Please refer to the user guide for detailed information on each smart feature.
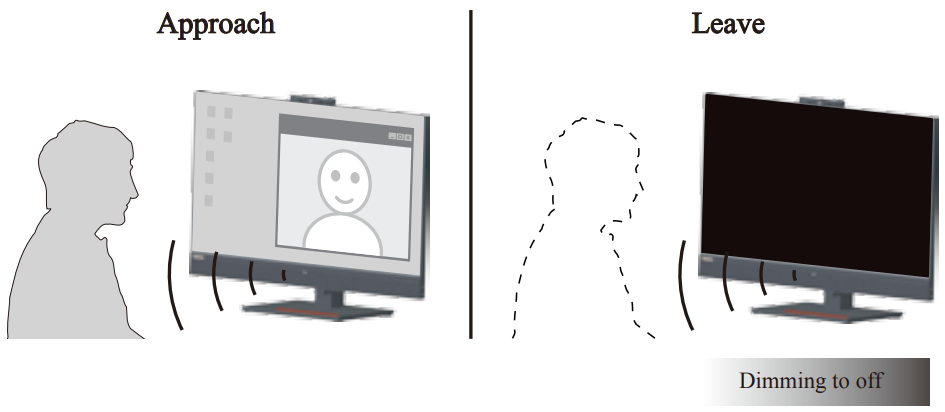
- Smart Energy: Off/OnWith Smart Energy enabled the monitor can detect the user presence in front of the monitor. The backlight will be switched off if the user is not in front of the monitor. (PLEASE DO NOT TOUCH THE SENSOR)

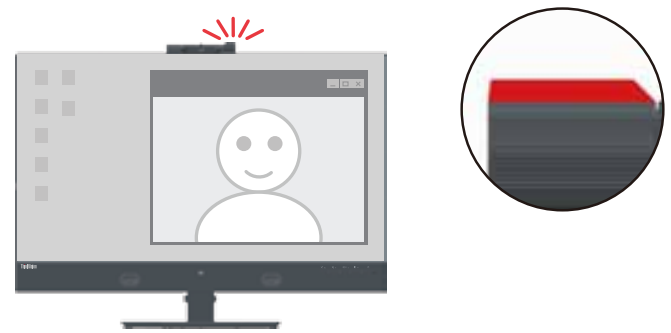
- Smart Traffic Light: Off/On/AutoLED light indicator

Smart Audio: Off/On
Off: No sound suppression around the microphone.On: Microphones mainly catch the sound of the front area.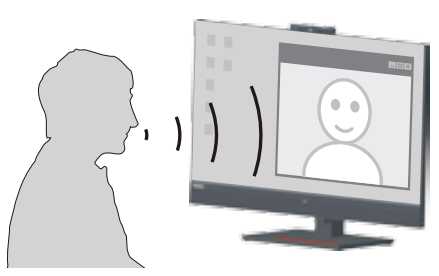 The drivers and files for this monitor can be downloaded from https://pcsupport.lenovo.com/solutions/t27hv_20 or scan QR code.https://pcsupport.lenovo.com/solutions/t27hv_20.

Safety information
 DANGER
- To avoid a shock hazard:
- Do not remove the covers.
- Do not operate this product unless they stand is attached.
- Do not connect or disconnect this product during an electrical storm.
- The power cord plug must be connected to a properly wired and grounded power outlet.
- Any equipment to which this product will be attached must also be connected to properly wired and grounded power outlets.
- To isolate the monitor from the electrical supply, you must remove the plug from the power outlet. The power outlet should be easy! accessible.
Handling:
- If your monitor weighs more than 18 kg (39.68 lb), it is recommended that it be moved or lifted by two people.
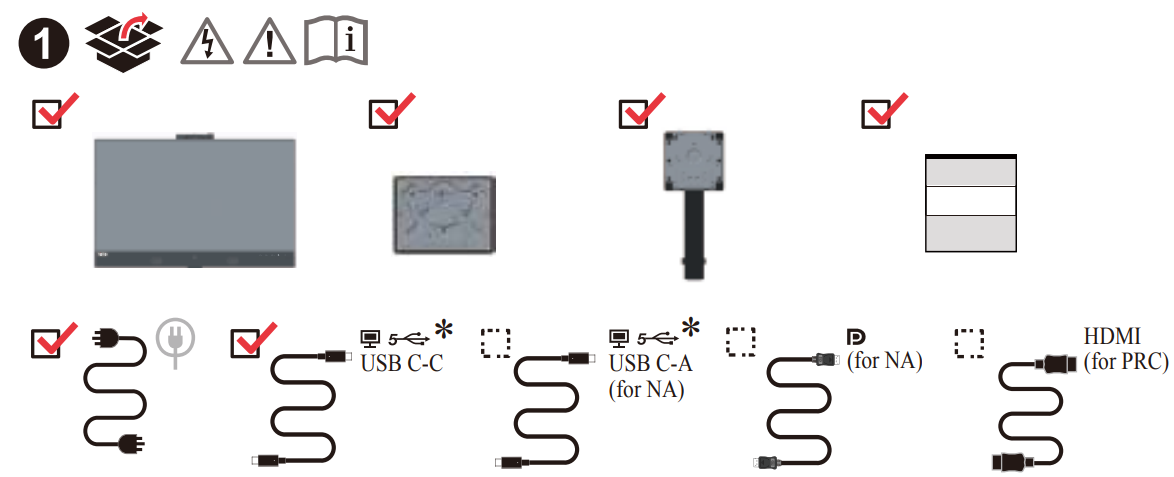
*: Depending on many factors such as the processing capability of peripheral devices, file attributes, and other factors related to system configuration and operating environments, the actual transfer rate using the various USB connectors on this device will vary and is typically slower than the data rates as defined by the respective USB specifications: – 5 Gbit/s for USB 3.1 Gen 1; 10 Gbit/s for USB 3.1 Gen 2 & 20 Gbit/s for USB 3.2.
Troubleshooting information
If you have a problem setting up or using your monitor, you might be able to solve it yourself. Before calling your dealer or Lenovo, try the suggested actions that are appropriate to your problem.
Troubleshooting
| Problem | Possible cause | Suggested action |
| The power indicator is not lit and there is no image |
|
|
| The power indicator is white, but there is no image. | The video signal cable is loose or disconnected from the system or monitor. | Be sure the video signal is connected with the system properly. |
| The monitor brightness and contrast levels are at the lowest setting. | Adjust the brightness and contrast setting on the OSD (On Screen Display) menu. | |
| The image quality is unacceptable. | The video signal cable is not connected with the monitor or system completely. | Be sure the signal cable is firmly plugged into the system and monitor. |
| The color settings may be incorrect. | Select another color setting from the OSD menu. | |
| The automatic image setup function was not performed. | Perform automatic image setup. | |
| There is a screen message that reads Out of range”,
There is no image and the power-on indicator is flashing white. |
The system is set to a display mode which is not supported by this monitor.
for your new monitor. |
|
For additional troubleshooting information, please refer to the User’s Guide.
Lenovo Limited Warranty – Customer Notice
Lenovo Limited Warranty – Customer Notice
Please read the Lenovo Limited Warranty (LLW) Which is available in 33
languages. You can visit http: / /www.lenovo.com/warranty to read it.
If you cannot access the LLW this way, contact your local Lenovo office or dealer to obtain a printed version.
Warranty Information applicable to your Machine:
- Warranty Period: 3 years
- Type of Warranty Service: Customer Replaceable Unit (“CRU”) and
Customer Carry-In or Mail-In Service
- Lenovo Limited Warranty Version: L505-0010-02 08/2011
For warranty service consult the telephone list at www.lenovo.com/support/ phone. Phone numbers are subject to change without notice.
Stability Hazard
The product may fall, causing serious personal injury or death. To prevent injury, this product must be securely attached to the floor/wall in accordance with the installation instructions.
A product set may fall, causing serious personal injury or death. Many injuries, particularly to children, can be avoided by taking simple precautions such as:
- ALWAYS use cabinets or stands or installation methods recommended by the manufacturer of the product set.
- ALWAYS use furniture that can safely support the
- ALWAYS ensure the product is not overhanging the edge of the supporting
- ALWAYS educate children about the dangers of climbing on furniture to reach the product or its controls.
- ALWAYS route cords and cables connected to your product so they cannot be tripped over, pulled or grabbed.
- NEVER place a product in an unstable location.
- NEVER place the product on tall furniture (for example, cupboards or bookcases) without anchoring both the furniture and the product to a suitable support.
- NEVER place the product on cloth or other materials that may be located between the product and supporting
- NEVER place items that might tempt children to climb, such as toys and remotecontrols, on the top of the product or furniture on which the product is
- If the existing product is going to be retained and relocated, the same considerations as above should be
Prevent Tipping
When using the display, fasten the LCD to a wall using a cord or chain that can support the weight of themonitor in order to prevent the monitor from falling
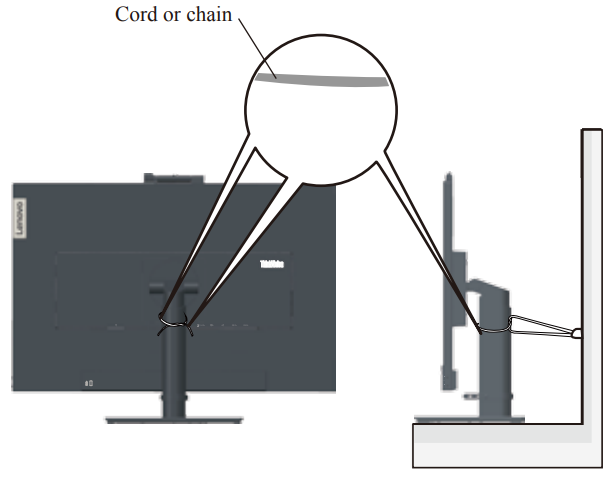
Note: Installing must be done by a qualified technician, and please contact your supplier for more information.
 This device complies with Part 15 of the FCC Rules. Operation is subject to the following two conditions: (1) this device may not cause harmful interference, and (2) this device must accept any interference received, including interference that may cause undesired operation.
Part Number: SP40W81767Printed in China
(1p) P/N
References
[xyz-ips snippet=”download-snippet”]

