ASUS ZS661KSCL ROG Kunai 3 Bluetooth Gamepad User Guide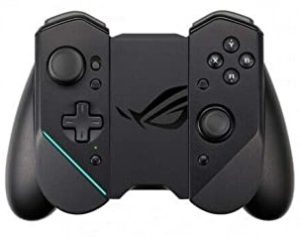
Safety notices for your ROG Kunai 3 Gamepad
WARNING!
- This product should only be used in environments with ambient temperatures between 5°C (41°F) and 35°C (95°F).
- The power adapter may become warm to hot while in use. Do not cover the adapter and keep it away from your body while it is connected to a power source.
- Do not leave your ROG Kunai 3 Gamepad connected to the power source once it is fully charged. Your ROG Kunai 3 Gamepad is not designed to be connected to the power source for extended periods of time.
Safety notices
- Do not remove the non-detachable Li-on battery as this will void the warranty.
- Do not remove and replace the battery with a non approved battery.
- Do not remove and soak the battery in water or any other liquid.
- Do not remove and short-circuit the battery, as it may overheat and cause a fire. Keep it away from jewelry or metal objects.
- Do not remove and dispose of the battery in fire. It could explode and release harmful substances into the environment.
- Do not remove and dispose of the battery with your regular household waste. Take it to a hazardous material collection point.
Specifications summary
| Product name | ROG Kunai 3 Gamepad | |
| Model name | ZS661KSCL | |
| Dimensions | Handheld Mode: 260.7 x 106.3 x 37.9mm | |
| Gamepad Mode (All-in-One): 154.75 x 110.25 x 66.8mm | ||
| Gamepad Mode (Mobility): 117.2 x 106.3 x 40.9mm | ||
| Weight | Handheld Mode: 136g | |
| Gamepad Mode (All-in-One): 198.8g | ||
| Gamepad Mode (Mobility): 135g | ||
| Connection | Wired | USB Type-C |
| Wireless | Bluetooth v4.2 | |
| Battery | At least 6 hours in Bluetooth mode | |
| Control buttons | A,B,X and Y buttons; D-pad Left joystick with a push-button Right joystick with a push-button RB, LB; RT, LT (Analog input) M1, M2; 4 x Shortcut keys | |
| Light indicators | Status indicator / Charging indicator | |
| Aura lighting | Static/ Breathing/ Color Cycle/ Strobing (in the wired connection mode) | |
| Package contents | 1 x ROG Kunai 3 Gamepad1 x Type-C to USB A cable 1 x Protective pouch1 x User guide1 x Warranty card |
Product overview
ROG Kunai 3 Gamepad is portable, providing you with both an indoor and outdoor gaming experience. To achieve this goal, we have modularized the Gamepad, and integrated the ROG series of accessories to fulfill different using scenarios.
|
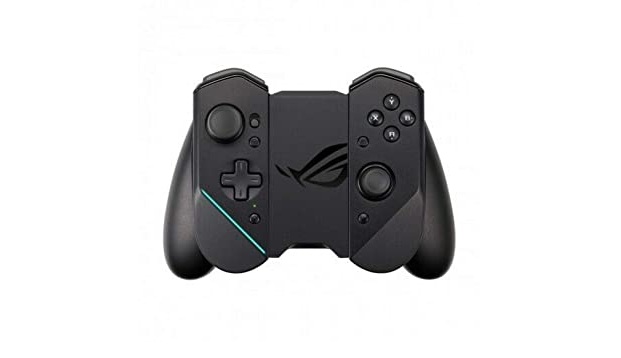
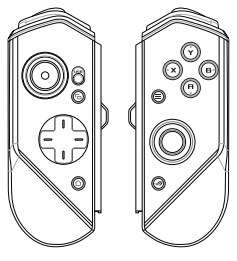
ROG Kunai 3 controllers |
The ROG Kunai 3 controllers have basic action buttons and can be applied on either the ROG Kunai 3 charger or the ROG Kunai 3 bumper. |
|
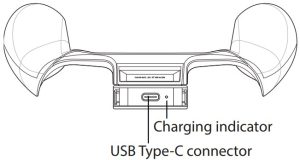
ROG Kunai 3 charger |
The ROG Kunai 3 charger charges the battery in the ROG Kunai 3 controller. |
|
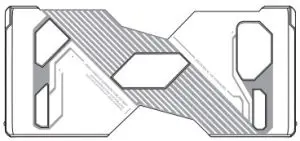
ROG Kunai 3 bumper |
A ROG Phone 3 proprietary bumper, which provides a wired connection between the mobile and ROG Kunai 3 controllers to achieve nearly zero latency. |
|
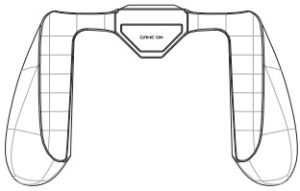
ROG Kunai 3 grip |
The ROG Kunai 3 grip, improves the ergonomic feeling, allowing you to play longer without soreness. |
Hardware features
- Front view

- Rear view

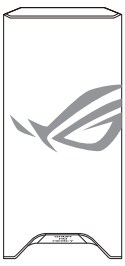
- Top view

Device charging
To charge your ROG Kunai 3 Gamepad:
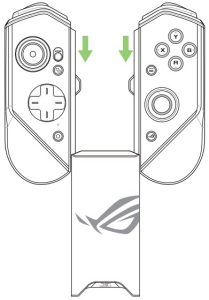
- Slide down the ROG Kunai 3 controllers onto the ROG Kunai 3 charger.

- Connect the USB cable to your Gamepad and a power adapter.NOTE: The charging indicator turns solid white when the charger charges your Gamepad.
Device installation
Handheld Mode
- Place your ROG Phone 3 into the ROG Kunai 3 bumper.

- Slide down the ROG Kunai 3 controllers onto the ROG Kunai 3 bumper.
 NOTE: We recommend that you use USB connection for Handheld Mode.
Gamepad Mode (Mobility)
- Slide down the ROG Kunai 3 controllers onto the ROG Kunai 3 charger.
 NOTE: Refer to the Frequently Asked Questions (FAQs) section for the details on Bluetooth pairing.
Gamepad Mode (All-in-One)
- Slide down the ROG Kunai 3 controllers onto the ROG Kunai 3 charger.

- Put the ROG Kunai 3 charger into the ROG Kunai 3 grip, and gently push down the charger until you hear a click.
 NOTE: Refer to the Frequently Asked Questions (FAQs) section for the details on Bluetooth pairing.
LED indicators
Charging indicator
| LED status | Indications |
| Solid white | Charging |
| Off | Not charging |
Status indicator (USB Mode/Bluetooth Mode)
| LED status | Indications | |
| Controller status | Remark | |
| Blinking blue rapidly | Waiting for pairing | N/A |
| Blinking blue slowly | Waiting for auto pairing | N/A |
| Solid red | Connected/Paired | Battery level: 0% – 25% |
| Solid yellow | Connected/Paired | Battery level: 25% – 90% |
| Solid green | Connected/Paired | Battery level: 90% -100% |
| Off | Off | N/A |
Frequently Asked Questions (FAQs)
Q1: How to pair my ROG Kunai 3 Gamepad with my ROG Phone for the first time?
A1:
- Move the connection switch on the left controller to Bluetooth.
- Press the Home button on your Gamepad once to power it on. The status indicator blinks blue slowly.
- Press and hold the Home button on your Gamepad for 3~5 seconds then release it. The status indicator blinks blue rapidly indicating that the Gamepad is ready for pairing.
- Turn on Bluetooth on your ROG Phone and search for Bluetooth devices.
- Tap ROG Kunai 3 Gamepad in the list of available devices to pair it with your phone.
NOTE: If your ROG Kunai 3 Gamepad turns off before pairing with your phone successfully, repeat steps 2~5.
Q2: How to pair my ROG Kunai 3 Gamepad with my previously paired ROG Phone?
A2: Press the Home button on your Gamepad once to power it on. The Gamepad will automatically pair with your previously paired phone.
Q3: How to turn off my ROG Kunai 3 Gamepad?
A3:
- In the Bluetooth mode, press the Home button on your Gamepad for around 10 seconds until the status indicator turns off.
- In the USB mode, physically disconnect your Gamepad from your phone. The status indicator turns off.
[xyz-ips snippet=”download-snippet”]



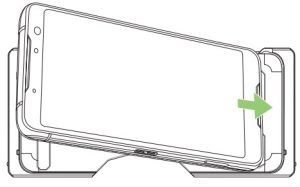
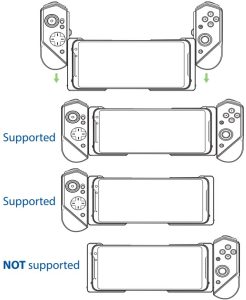 NOTE: We recommend that you use USB connection for Handheld Mode.
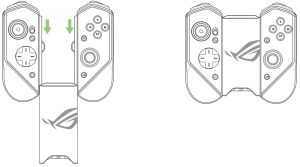 NOTE: Refer to the Frequently Asked Questions (FAQs) section for the details on Bluetooth pairing.
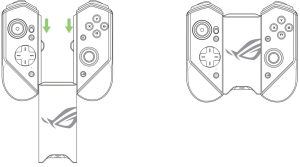
 NOTE: Refer to the Frequently Asked Questions (FAQs) section for the details on Bluetooth pairing.