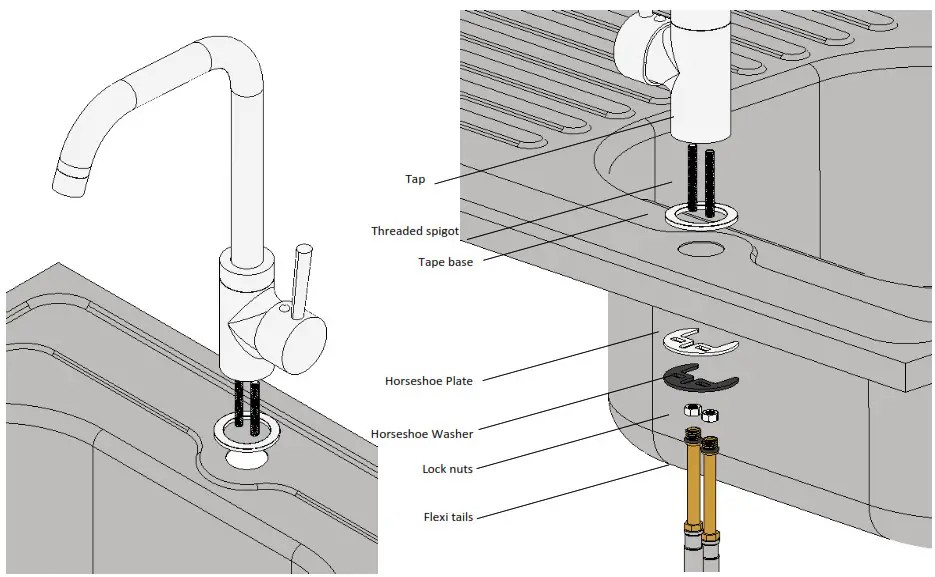
Kitchen tap fitting example
To ensure the correct installation is executed it is recommended that you use a qualified competent installer to install this product.
Step 1 Insert threaded spigots into the tapStep 2 Insert Flexi tails into the tap. Only hand tighten. Do not let the Flexi tails coil. Do not loop them. Do not overtighten.Step 3 Place the tap on the sink. Make sure the baseplate and O-ring are situated to seal around the tap hole if applicable.Step 4 On the underside of the sink place the horseshoe plate, horseshoe washer, and then the lock nuts onto the threaded spigots.Step 5 Tighten the nuts using an appropriate box spanner or adjustable spanner.Step 6 Connect hot feed to hot tail and tighten using spanners.Step 7 – Do the same for the cold side (the tap from the front on – cold is right, hot is left.)Step 8 – Turn the water on to test for leaks.

Connecting the Flexi tails to the water supply

Customer Care GuideTo clean your tap use water or soapy water only. Do not use abrasive cleaners. Do not allow limescale to build up in hard water areas Do not use abrasive products on any surfaces Bathroom products are vulnerable to acid attack and some household consumables such hair dye, disinfectants, denture cleaners etc can contain such acids. Contact with these materials should be avoided.This installation guide is for illustration purposes and may not be an exact representation of the physical product. This is a generic instruction guide. There is likely to be a discrepancy between this guide and that of the actual product. The latter should be taken as standard.For full terms and conditions, please refer to the manufacturerIf further assistance is required, please contact your retailer or alternatively call our customer services team on 01924 666590
[xyz-ips snippet=”download-snippet”]
