![]()
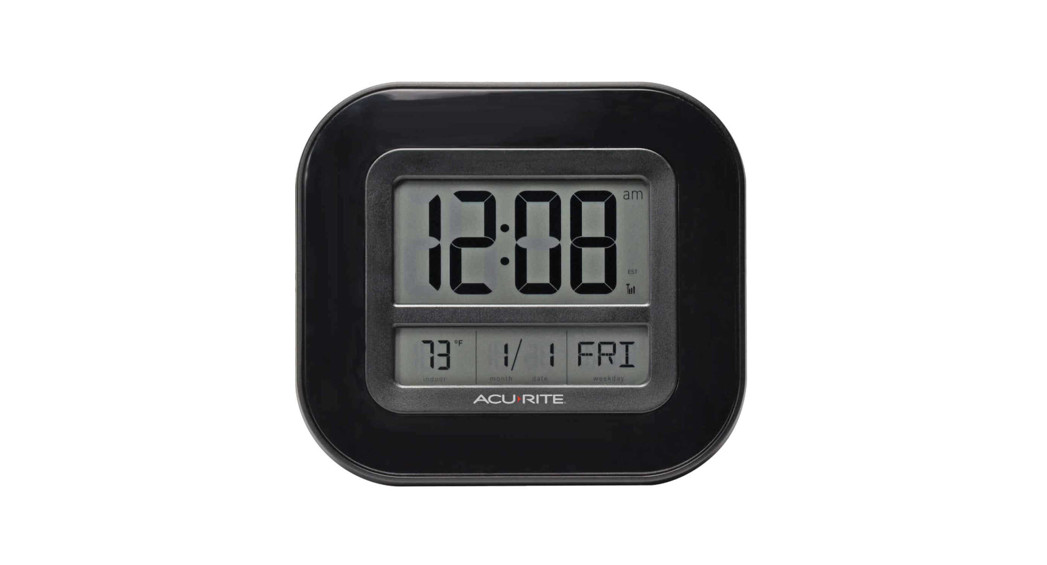
Atomic Wall Clockwith calendar and indoor temperatureModel # 75172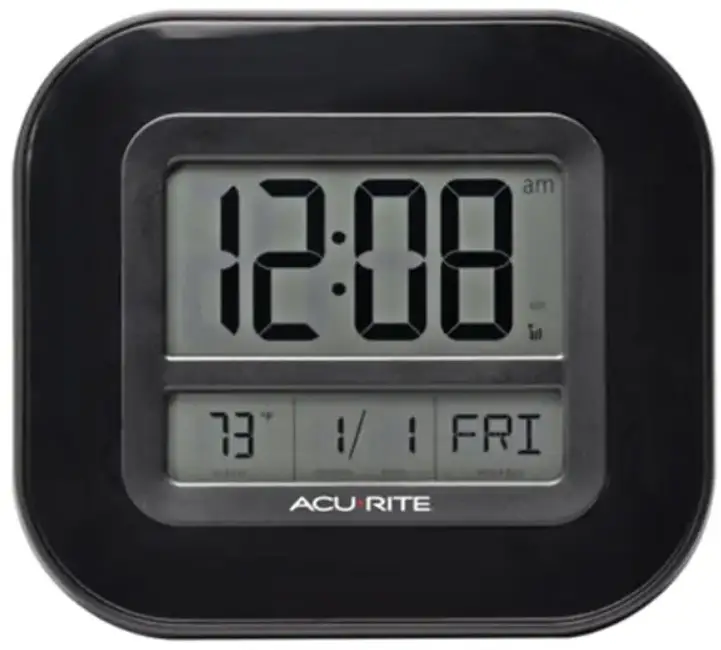
USER GUIDE
Package Contents:(1) Atomic Wall Clock(1) User GuideWhat You’ll Need:(2) AA Batteries
NOTE: A clear protective film is applied to the LCD at the factory that must be removed prior to using this product. Locate the dear tab and simply peel to remove.Congratulations on your new AcuRite product. To ensure the best possible product performance, please read this manual in its entirety and retain it for future reference.
IMPORTANT
PRODUCT MUST BE REGISTEREDTO RECEIVE WARRAN SERVICE PRODUCT REGISTRATIONRegister online to receive 1-year warranty protectionwww.AcuRite.corn
WHAT IS AN ATOMIC CLOCK?
An Atomic clock is a timepiece that maintains accuracy up to one second per million years using the most precise method of time synchronization, radio signals.In North America, the National Institute of Standards and Technologies (NIST) operates an Atomic clock in Fort Collins, Colorado, that transmits the time codes via the radio station WWVB.This quality AcuRite clock includes a built-in receiver that picks up this Atomic radio signal from WWVB. To maintain the best possible reception, place the unit so that the backside faces in the general direction of Colorado.PLEASE NOTE: Due to solar radiation in the atmosphere, the atomic clock signal is weaker during the day. Most synchronization will happen at night when there is less interference.This clock is designed for wall OR tabletop placement.We have included a wall-hanging hole as well as an integrated swing-out stand.
BASIC SETUP
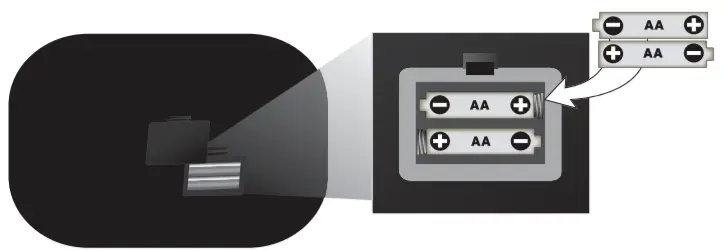
- Battery Installation — Remove the battery compartment cover on the back of the unit and install 2 FRESH “AA” batteries as shown here.

- Initial Setup — once the batteries are installed, the clock will power up. The display will appear as follows:The clock will begin searching for the Atomic signalIf the signal is AVAILABLE— the clock will receive the local time in 3-5 minutes. The full-strength signal indicator bars will appear on the display.If the signal is NOT readily available — you can manually set the clock and calendar (SEE MANUAL SETTING INSTRUCTIONS)After the clock acquires the Atomic clock radio signal (this may take 24-48 hours) the time, date, and daylight saving time changes will update automatically, giving you maintenance-free operation and perfect time precision.
- Choose Your Time Zone — You must set your time zone so the clock will display accurate time once the atomic signal is received:a. Select your time zone by repeatedly pressing the () ARROW until you see your time zone displayed on the LCD screen.
| HAST | AKST | PST | MST | CST | EST | AST |
| Hawaii AleutianStandard Time | Alaska Standard Time | Pacific StandardTime | Mountain StandardTime | Central StandardTime | Eastern StandardTime | Atlantic StandardTime |
In the event you wish to manually change the clock settings, please use the instructions on the following page.
SETTING THE CLOCK MANUALLY
Manual Button Functions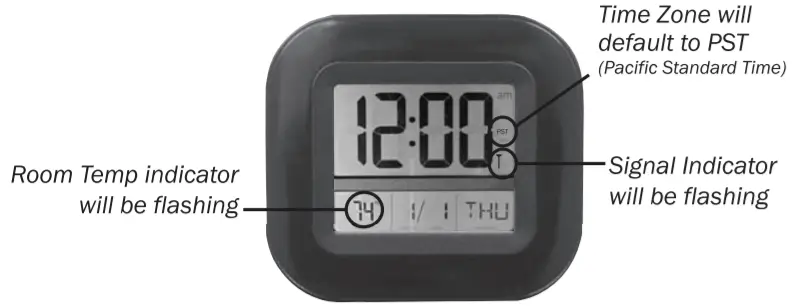
| 1) SETTING THE CLOCK & CALENDAR
Press the “SET” button for several seconds until the LCD screen is flashing. |
||
| a) Press the UP (A) ARROW button to select 12 Hr. (standard) or 24 HR. (Military) time format. Press “SET” to confirm. | ||
| b) The HOUR will flash | Press the UP ( |
Press “SET” to confirm. |
| c) The MINUTE will flash | Press the UP ( |
Press “SET” to confirm. |
| d) The YEAR will flash | Press the UP ( |
Press “SET” to confirm. |
| e) The MONTH will flash | Press the UP ( |
Press “SET” to confirm. |
| f) The DATE will flash | Press the UP ( |
Press “SET” to confirm. |
| g) The ATOMIC CLOCK CONTROL will flash | Set the Atomic Clock ON or OFF by pressing the UP ( |
Press “SET” to confirm. |
| h) The DST will flash | Set DST (Daylight Saving Time)
ON or OFF by pressing the UP ( |
Press “SET” to confirm. |
| i) The F./C° will flash | Select F°/C° (Fahrenheit or Celcius) by pressing the UP ( |
Press “SET” to confirm. |
Customer Support
AcuRite customer support is committed to providing you with best-inclass service. For assistance, please have the model number of this product available and contact us in any of the following ways:![]() [email protected] Visit us at www.AcuRite.com
[email protected] Visit us at www.AcuRite.com
►Installation Videos ►Register your Product
►Instruction Manuals ► Support User Forum►Replacement Parts ► Submit Feedback & Ideas
TROUBLESHOOTING
| PROBLEM | POSSIBLE SOLUTIONS |
Poor Atomic Clock ReceptionNo bars |
Relocate or reposition the clock, making sure the backside of the unit is facing in a direction toward Colorado from your location.Heavy stone or metal walls can obstruct the signal and disrupt reception.Place the clock at least 3 feet (0.91 m) from other electronic devices (i.e. TVs, microwaves, computers, etc.) that can interfere with wireless signals. |
| Display Not Working | Check to make sure the batteries are installed correctly. Use only fresh STANDARD “AA” batteries, not generic or extra strength.Make certain that the batteries are FRESH. If the expiration date on your batteries is less than 6 years away, they may not contain a full charge and can be weak |
Product Specifications
 report this ad
Indoor Temp. Range = 32°F to 122°F (0°C to 50°C)Power Requirements = (2) “AA” Alkaline Batteries (not included)
BATTERY SAFETY:
Clean the battery contacts and also those of the device prior to battery installation. Remove batteries from equipment that is not to be used for an extended period of time. Follow the polarity (+/-) diagram in the battery compartment. Promptly remove dead batteries from the device. Dispose of used batteries properly. Only batteries of the same or equivalent type as recommended are to be used. DO NOT incinerate used batteries. DO NOT dispose of batteries in fire, as batteries may explode or leak. DO NOT mix old and new batteries or types of batteries (alkaline/standard). DO NOT use rechargeable batteries. DO NOT recharge non-rechargeable batteries. DO NOT short-circuit the supply terminals.PLEASE DISPOSE OF OLD OR DEFECTIVE BATTERIES IN AN ENVIRONMENTALLY SAFE WAY AND IN ACCORDANCE WITH YOUR LOCAL LAWS AND REGULATIONS.If your AcuRite product does not operate properly after trying the troubleshooting steps, visit www.AcuRite.com or email [email protected] for assistance.LIMITED ONE YEAR WARRANTY – Chaney Instrument Company warrants that all products it manufactures be of good material and workmanship and to be free of defects if properly installed and operated for a period of one year from the date of purchase. REMEDY FOR BREACH OF THIS WARRANTY IS EXPRESSLY LIMITED TO REPAIR OR REPLACEMENT OF DEFECTIVE ITEMS. Any product which, under normal use and service, is proven to breach the warranty contained herein within ONE YEAR from the date of sale will, upon examination by Chaney, and at its sole option, be repaired or replaced by Chaney. In all cases, transportation costs and charges for returned goods shall be paid for by the purchaser. Chaney hereby disclaims all responsibility for such transportation costs and charges. This warranty will not be breached, and Chaney will give no credit for products it manufactures which shall have received normal wear and tear, been damaged, tampered with, abused, improperly installed, damaged in shipping, or repaired or altered by others than authorized representatives of Chaney.
©Chaney Instrument Co. All rights reserved. AcuRite is a registered trademark of the arethe property of their respective owners. AcuRite uses patented technology.Chaney Instrument Co. Lake Geneva, WI 53147.All other trademarks and copy-rights Visit vnwr.AcuRite.com/patents for details.Printed in China73172111ST 102020
References
[xyz-ips snippet=”download-snippet”]