AcuRite 00277DIX Digital Cooking Thermometer Instruction Manual
Congratulations on your new AcuRite product. To ensure the best possible product performance, please read this manual in its entirety and retain it for future reference.
Unpacking Instructions
Remove the protective film that is applied to the LCD screen prior to using this product. Locate the tab and peel off to remove.
Package Contents
- Thermometer display
- Temperature probe & cord
- Instruction manual
Note: This product is not intended for use in cooking environments that exceed 232ºC (450ºF), as the probe may melt or catch fire, creating a hazard to the user.
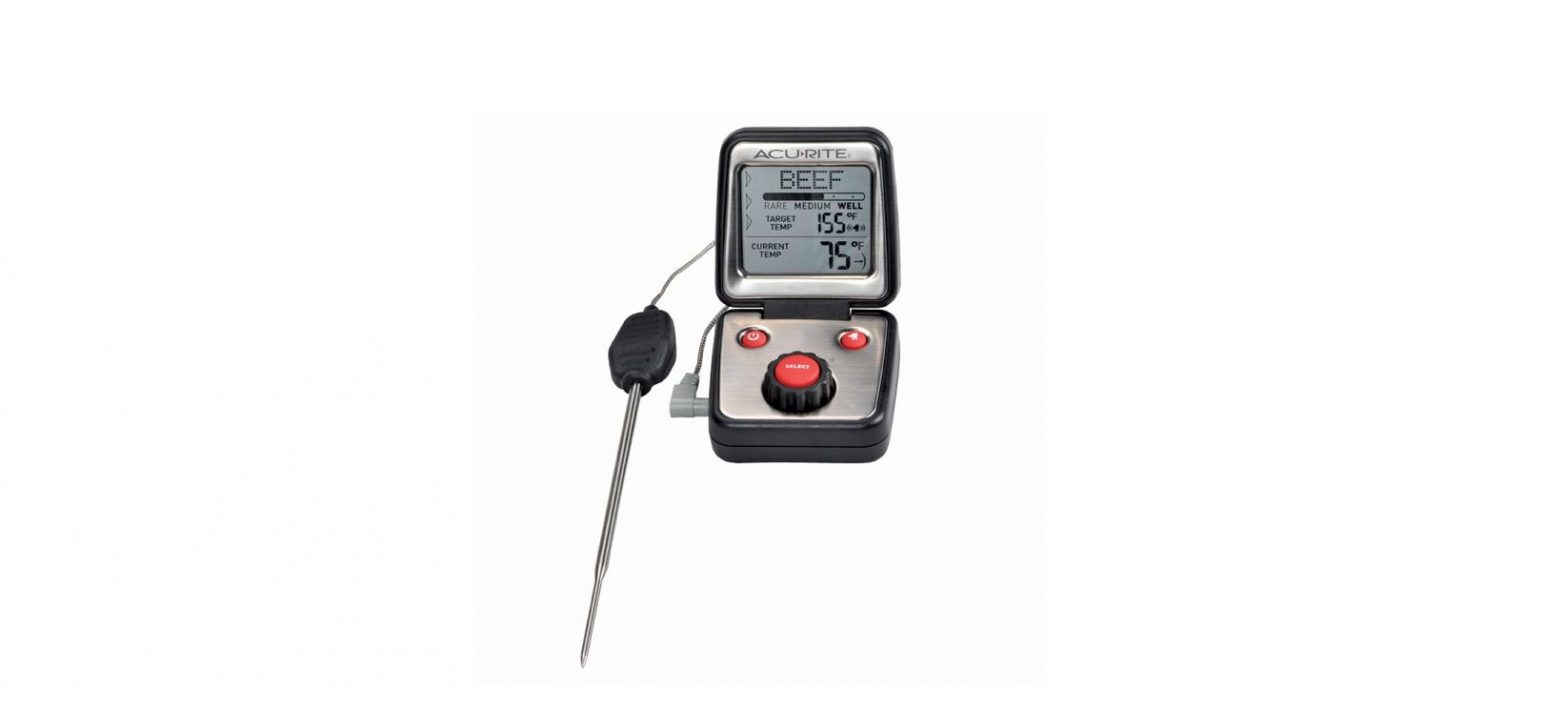
Features & Benefits

FRONT
- Meat Type Setup IndicatorSelect Beef, Veal, Chicken, Pork, Poultry, Lamb, Fish, Custom or Boil.
- Meat Doneness Setup IndicatorSelect Rare, Medium or Well done; temperatures based on USDA recommended guidelines.
- Target Temperature Setup IndicatorSelect target temperature from -10°C to 232°C (14ºF to 450ºF)
- Check Probe IndicatorIndicates probe error, shown with diagnostic code (see page 7).
- Power ON/OFF Button
- SELECT buttonfor setup preferences.
- Rotary Dialfor setup preferences.
- Meat Type Selection
- Meat Doneness Selection
- Target Temperature
- Alarm ON IndicatorAn audible alert will sound when target temperature is reached.
- Current TemperatureArrow icon indicates the direction the temperature is trending and rate of temperature change.
- ALARM ButtonEnables and mutes audio alertSIDE
- . Probe Plug-in
SETUP
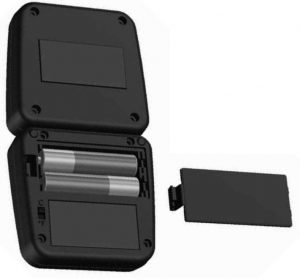
Install or Replace Batteries
AcuRite recommends high quality alkaline batteries for the best product performance. Heavy duty or rechargeable batteries are not recommended.
- Slide off the battery compartment cover.
- Insert 2 x AAA batteries into the battery compartment, as shown.Follow the polarity (+/-) diagram in the battery compartment.
- Replace the battery cover.

Select Degrees Fahrenheit or CelsiusTo select between degrees Celsius (ºC) or Fahrenheit (ºF) temperature units, press the “ºC/ºF” button located on the back of the thermometer.
PLEASE DISPOSE OF OLD OR DEFECTIVE BATTERIES IN AN ENVIRONMENTALLY SAFE WAY AND IN ACCORDANCE WITH YOUR LOCAL LAWS AND REGULATIONS.BATTERY SAFETY: Clean the battery contacts and also those of the device prior to battery installation. Remove batteries from equipment which is not to be used for an extended period of time. Follow the polarity (+/-) diagram in the battery compartment. Promptly remove dead batteries from the device. Dispose of used batteries properly. Only batteries of the same or equivalent type as recommended are to be used. DO NOT incinerate used batteries. DO NOT dispose of batteries in fire, as batteries may explode or leak. DO NOT mix old and new batteries or types of batteries (alkaline/standard). DO NOT use rechargeable batteries. DO NOT recharge non-rechargeable batteries. DO NOT short-circuit the supply terminals.
OPERATION
Food Preparation
Consuming raw or undercooked meats, poultry, seafood, shellfish, or eggs may increase your risk of food-borne illness, especially if you have certain medical conditions. The USDA recommends certain guidelines be met when preparing meat and seafood. Please adhere to the recommended cooking temperatures.
| USDA Recommended Guidelines | |
| Product | Minimum Internal Temperature & Rest Time |
| Beef, Pork, Veal & Lamb
Steaks, chops, roasts |
62.8 °C (145 °F) and allow to rest for at least 3 minutes |
| Ground meats | 71.1 °C (160 °F) |
| All Poultry | 73.9 °C (165 °F) |
| Fish & Shellfish | 62.8 °C (145 °F) |
For more information on food preparation safety, visit:http://www.fsis.usda.gov
Using the Thermometer
- Before operating, plug the temperature probe into the thermometer display.
- When batteries are installed, partial LCD display information will appear.
- Press the “ ” button to turn the thermometer display ON. Full LCD display information can then be viewed.
- Press the “ ” button to enable or disable the audio alert. With the function enabled, you will hear a beep each time a selection is made during setup and when target cooking temperatures are reached.
- Magnet-mountable design allows you to stick the thermometer on the oven door or fridge.
Meat Type Setup
- When first powered on, the Meat Type will flash on the display.
- To adjust the meat type, turn the rotary dial clockwise to move forward through the selections and counterclockwise to move backward through the selections.The preference set order is as follows: BEEF, VEAL, CHICKEN, PORK, POULTRY, LAMB, FISH, CUSTOM, BOIL
- To save your selection, press and release the “SELECT” button when the desired meat type is displayed.
Meat Doneness Setup
- Once Meat Type has been selected, Meat Doneness will flash on the display.
- To adjust the meat doneness, turn the rotary dial clockwise to move forward through the available meat doneness selections and counterclockwise to move backward through the selections.The preference choices are: RARE, MEDIUM RARE, MEDIUM, MEDIUM WELL and WELL DONENOTE: Not all meat types offer all five doneness options. In some cases, a doneness option is not available at all.
- As you move through the options, Target Temperature shown on the display will automatically update based on the selection.
- To save your selection, press and release the “SELECT” button when the desired meat doneness is displayed.
Target Temperature SetupAs noted above, Target Temperature shown on the display will automatically set based on the Meat Doneness selection. To adjust, turn the rotary dial when the Target Temperature is flashing on the display.
- Make your Meat Type and Meat Doneness selections and press “SELECT”.
- To adjust Target Temperature, turn the rotary dial clockwise to increase the target temperature and counterclockwise to decrease the target temperature.
- As you make the adjustment, the Meat Type shown on the display will change to Custom.
- To save your selection, press and release the “SELECT” button.
Current Temperature
- Insert the narrow end of the temperature probe into the thickest part of the food being cooked. Be sure the tip is not touching bone, gristle, the pan or inserted into the cavity of fowl
- Hold steady for several seconds.
- Current internal temperature of the meat will show on the display.
- The arrow next to the current temperature reading indicates the direction temperature is trending and the rate of change.
- When the current temperature of the food reaches the target temperature the thermometer will beep.
Be careful when touching the temperature probe and probe wire if it has been in or near hot food or surfaces.
Power the Unit ON/OFFThe thermometer will automatically power off after several minutes of inactivity.Press the “![]() ” button to resume operation. To power off manually, press the “
” button to resume operation. To power off manually, press the “![]() ” button.
” button.
Warning MessagesWhen display reads “LO BAT”, replace batteries.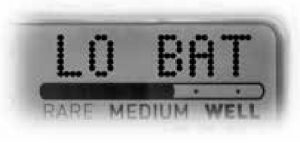
Check Probe“CHECK PROBE” indicates a probe error and is shown with a diagnostic code:
| Diagnostic Code | Problem | Solution |
| No | Probe cord is not connected to the thermometer. | Verify cord connection is secure or reconnect cord. |
| SC | Probe cord is not functioning properly. Cord may have been damaged or exposed to extreme heat. | Check the wire and connection for damage or excessive heat. Replace cord. |
Troubleshooting
| Problem | Possible Solution |
| Inaccurate temperature |
|
| Check Probe |
|
| Display screen not working |
|
If your AcuRite product does not operate properly after trying the troubleshooting steps, visit www.AcuRite.com or call (877) 221-1252 for assistance.
Care & Maintenance
Store in a dry location at room temperature. Clean thermometer with a soft, damp cloth. Temperature probe should be wiped clean with warm water immediately after direct contact with foods.
DO NOT place display unit on or near hot surfaces. DO NOT heat beyond thermometer’s temperature capacity. DO NOT use in oven. DO NOT wash in dishwasher. DO NOT immerse in water or use caustic cleaners or abrasives.DO NOT allow any part of the temperature probe or probe wire to come into direct contact with flames or flare-ups. DO NOT bend or crimp the temperature probe cord. DO NOT lift or move the thermometer by the temperature probe wire connection.
Specifications
| TEMPERATURE RANGE | 10ºC to 232ºC (14ºF to 450ºF)
Probe cord heat resistant up to 371ºC (700ºF) |
| POWER | 2 x AAA alkaline batteries |
Customer Support
AcuRite customer support is committed to providing you with best-inclass service. For assistance, please have the model number of this product available and contact us in any of the following ways:
![]() (877) 221-1252
(877) 221-1252![]() [email protected]
[email protected]
24/7 support at www.AcuRite.com
- Installation Videos
- Register your Product
- Instruction Manuals
- Support User Forum
- Replacement Parts
- Submit Feedback & Ideas
- Weather Stations
- Temperature & Humidity
- Weather Alert Radio
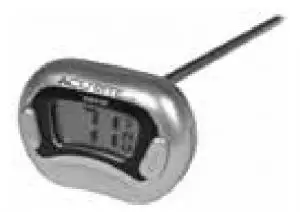
- Kitchen Thermometers & Timers
- Clocks
It’s more than accurate, it’sAcuRite offers an extensive assortment of precision instruments, designed to provide you with information you can depend on to Plan your day with confidence™.www.AcuRite.com
![]()
References
[xyz-ips snippet=”download-snippet”]