ACURITE 00590A1 Wireless Thermometer and Self-Setting Clock Instruction Manual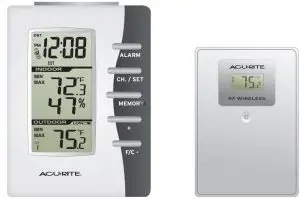
Thank You! We appreciate you for purchasing this wireless thermometer.We hope you enjoy using this versatile wireless thermometer!
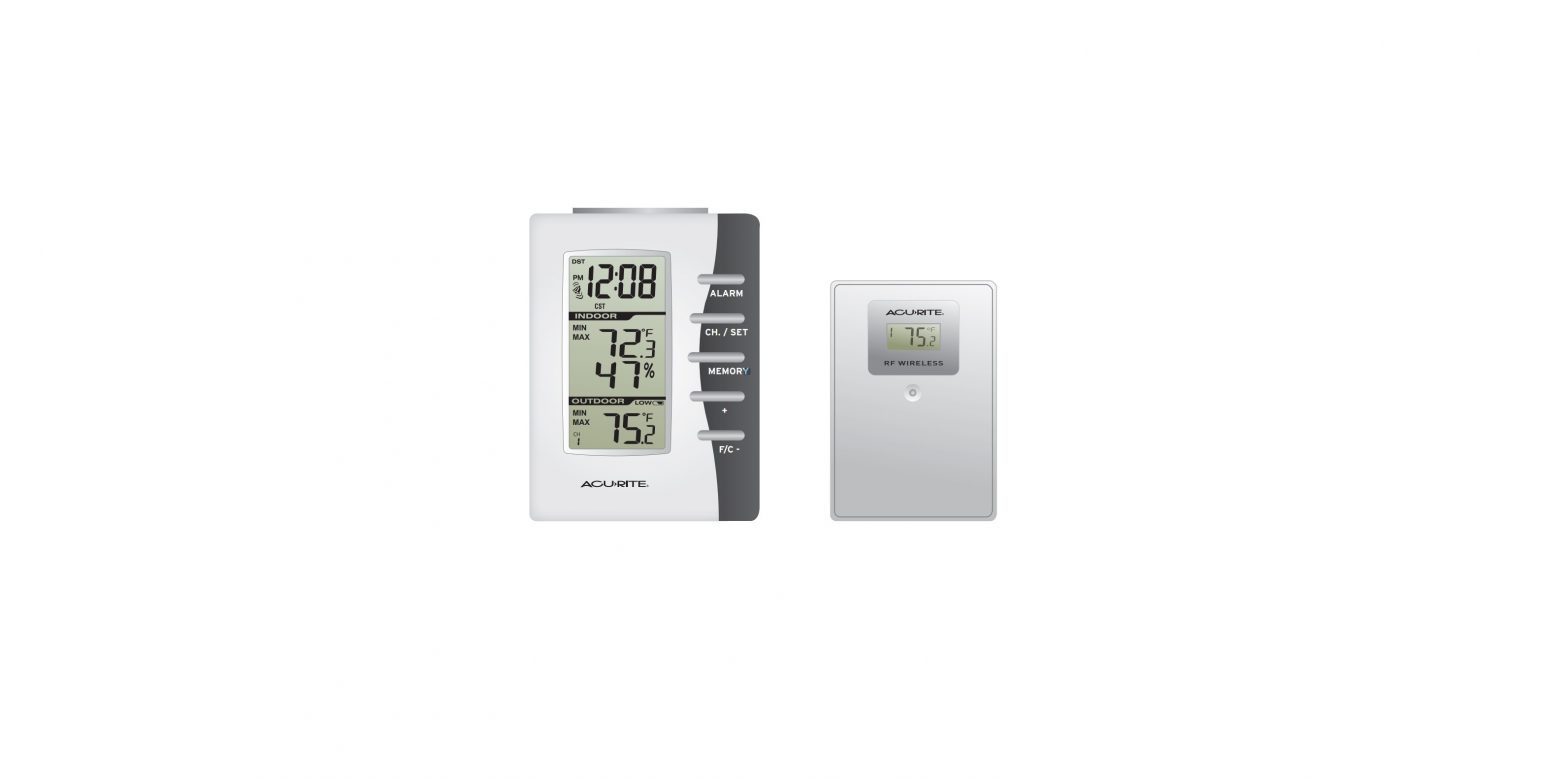
Main Unit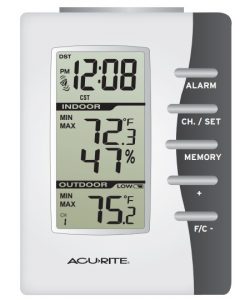 Wireless Sensor(model #0103R)
Features:
- Main unit with indoor temperature & humidity and outdoor temperature LCD display.Clock automatically sets itself, you just select your time-zone.
- Wireless Sensor – range is 100’ (33m).
- Temperature measurement ranges:
- Indoor main unit: +32º F to +122º F ( 0ºC to +50ºC )
- Outdoor wireless sensor: -4º F to +158º F (-20ºC to +70ºC )
- Battery operated. (batteries not included 4x “AA”)
CHECK PACKAGE CONTENTS
- ) Main unit – dimensions: 4.25″ x 3.25″ x 1.25″ * *Dimensions are approximate.
- Wireless Sensor – dimensions: 3.75″ x 2.5″ x 1″ *
- Instruction Manual
NOTE: Carefully remove the units from their packaging. Discard the packaging and save the instructions.
READ
Please read these instructions carefully before you set up the thermometer. In this way you can become familiar with all of the thermometer’s features and get the most benefit from them.
INITIAL SETUP
NOTE: The main unit is intended for indoor use only. Choose a dry location away from dust, dirt, mold, smoke and avoid temperature extremes. Do not drop the clock. It is a sensitive electronic device and not designed to withstand high impact blows of any kind
Install 2 “AA” batteries into the main unit FIRST. The clock immediately displays the correct time for the eastern (U.S.) time zone. Next, Install 2 “AA” batteries (lithium is recommended for areas where the temperature may fall below -4ºF) into the wireless sensor.
Operating Range of Batteries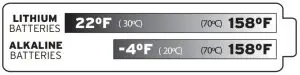
Severe cold (below -4º F/-20º C) can cause alkaline batteries to freeze and function improperly. Use lithium batteries in extremely low temperature conditions to ensure continued operation for wireless sensors placed outdoors.
SET TIME ZONE & DST SETTINGS
To set the time zone, press and hold the “CH./SET” button for 4 seconds. The currently selected time zone will flash below the time display. Press the “+” button to cycle through the time zone options (see below for more information on timezones). When you have selected the desired timezone, press the “CH./SET” button to confirm and move on to selecting your Daylight Saving Time (DST) setting. Press the “+” button to cycle through the DST setting options (see below for more information on DST options).
TIME ZONE MAP
TIME ZONE
- AST: Atlantic
- EST: Eastern
- CST: Central
- MST: Mountain
- PST: Pacific
- AKST: Alaska
- HAST: Hawaii Aleutian
| NEW DST | OLD DST | OFF |
| 2007 and beyond: Time changes 2:00 am 2nd Sunday in March 2:00 am 1st Sunday in November | 2006: Time changes 2:00 am 1st Sunday in April 2:00 am last Sunday in October | No DST time changes |
CHOOSE WHERE TO PLACE THE MAIN UNITS and WIRELESS SENSOR
Main Unit: Choose wall mount or table-top placement.
- Choose a location for main unit that is at least 10 feet away from other electronic devices that may interfere with the wireless signal.
- Wall mounting: Use the mounting slot on the back of main unit to hang on the wall.
- Table-top placement: The main unit has an integrated fold-out stand for table-top placement.
Wireless Sensor: When placing the sensor, consider these things:
- Although the sensor is designed for outdoor use, placement in a protected area will prolong its life.
- Mounting: Use the mounting slot on the back of the unit to hang it from a wall or vertical surface.
- The sensor must be within 100 feet (30 meters) of each of the main units.
- The sensor is resistant to weather and to water. It is NOT WATERPROOF.
- Prolonged exposure to cold weather may cause damage to the LCD panel.
- Wireless sensor must be placed outdoors to observe outdoor temperatures.
PLACEMENT SUGGESTION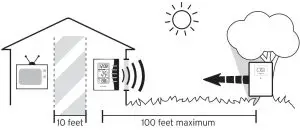
USING the MAIN UNIT
Set an Alarm Time
- Press and hold the “ALARM” button for 5 seconds, the hour flashes on and off.
- Adjust the HOUR setting by pressing the “+” or “-” buttons (NOTE the AM & PM).
- Confirm and move on to the MINUTE setting by pressing the “ALARM” button.
- Adjust the MINUTE setting by pressing the “+” or “-” buttons.
- Confirm and exit alarm setting mode by pressing the “ALARM” button again.
Note that the alarm is automatically set to ring after you adjust the alarm time (The bell icon is present on the main display). Press and release the “ALARM” button to turn the alarm on or off.
Turning the Alarm OffTo turn the alarm off (while it is ringing) for 24 hours, press the “ALARM” button.
Snooze/Light:Press the SNOOZE button to silence the alarm for 10 minutes. During this time, the “ZZ” flashes in the display. When the snooze period is over, the alarm sounds again. You may press the SNOOZE bar as many times as you want. The “SNOOZE” bar also activates the backlight for 8 seconds.
Set the Time Manually:If you want to set your alarm clock a little ahead or if the unit ever loses time for any reason, the time can be set manually by following these steps.
- Press and hold the “CH./SET” button for seven seconds to begin the manual time set mode. (2 BEEPS) The hour will flash on and off.
- Adjust each setting by pressing the “+” or “-” buttons. Confirm and move on to the next setting by pressing the “CH./SET” button.
MANUAL TIME ADJUST SEQUENCE: hour, minute, year, month, date
Internal Batteries: (2 x L1142)We suggest replacement of the internal batteries every five years if the clock has been in continuous use over that time. However, if the clock has not been plugged in and powered for long periods of time, we recommend replacing the internal batteries more frequently –o nce a year.
NOTE: the internal batteries provide power for the internal calendar. The internal batteries will NOT power the alarm functions in the event of a power outage.
Changing the internal Batteries:NOTE: You have less than one minute after the old internal batteries are removed to install fresh batteries. The clock needs constant power so the internal calendar memory (self-setting clock feature) will function properly.
To change the backup batteries:
- Slide the battery compartment cover off and remove the 2 “AA” batteries.
- Remove the small screw that keeps the Internal battery compartment cover in place.
- Remove the compartment cover to access the batteries.
- Take note of how the batteries are positioned, and remove the old batteries.
- Replace the two “L1142” button cell batteries with fresh ones, and replace the cover.
USING the WIRELESS SENSOR
Choose a Temperature Display (ºC or ºF)Press the “C/F” button to select either Fahrenheit or Celsius mode for the small display on the wireless sensor.
Reset Button:Press the reset button to reset the wireless sensor.
MULTIPLE WIRELESS SENSORS
The main unit supports up to three wireless sensors. Each additional wireless sensor must be designated a different channel number. Assigning different channel numbers differentiate each sensors temperature readings for the main units’ display. This is done automatically by the main unit and companion.
TO ADD A SECOND (or THIRD) WIRELESS SENSOR:To add 2nd or 3rd remote sensor, either re-insert batteries in the main unit, or hold “+” and “-” buttons together for 3 seconds to enter wireless sensor search mode. Then turn on wireless sensor(s) one by one (up to 3 total). Press “CH/SET” button to switch between channels 1,2,3.
Additional wireless sensors are sold seperately. Call 1-800-556-2548 to order. WIreless Sensor model # 0103R
ADDITIONAL INFORMATION
MAIN UNIT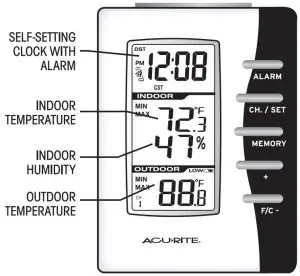
- Temperature Measurement Range:32ºF to 122ºF (0ºC to 50ºC)
- Power requirements:MAIN BATTERIES: 2 x “AA” (alkaline)
- INTERNAL BATTERIES:(located in compartment below main batteries; access with small screwdriver)
2 x “L1142” (alkaline) button-cell for internal calendar- self setting clock feature.
FOR INDOOR USE ONLY
WIRELESS SENSOR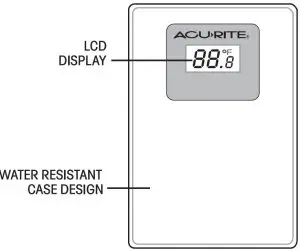
- Temperature Measurement Range:-4ºF to 158ºF (-20ºC to 70ºC)
- Power requirements:2 x “AA” alkaline(when temperature is above -4ºF)
- 2 x “AA” lithium(when temperature is below -4ºF)
FOR INDOOR OR OUTDOOR USE (place in an area protected from direct weather elements when using outdoors)
This device complies with Part lS of the FCC Rules. Operation s subject tothe following two conditions:
- This device maq not cause harmful interference. and
- This device must accept anq interference received. including interference that maq cause undesired operation.
NOTE: THE MANUFACTURER IS NOTRESPONSIBLE FOR ANY RADIO OR TV INTERFERENCE CAUSED BYUNAUTHORIZED MODIFICATIONS TO THIS EQUIPMENT. SUCH MODIFICATIONS COULD VOID THE USER AUTHORITY TO OPERATE THE EQUIPME
 NOTE: This equipment has been tested and found to comply with the limits for a Class B digital device, pursuant to Part 15 of the ~ FCC Rules. These limits are designed to provide reasonable protection against harmful interference in a residential installation. This equipment generates, uses and can radiate radio frequency energy and, if not installed and used in accordance withthe instructions, may cause harmful interference to radio communications. Hwever, there is no guarantee that interference will not occur in a particular installation.If this equipment does cause harmful interference to radio r television reception, which can be determined by turning the equipment off and on, the user is encouraged to tryto correct the interference by one or more of the following measures:
- Reorient or relocate the receiving antenna.
- Increase the separation between theequipment and receiver.
- Connect the equipment into an outlet on a circuit different from that to which the receiver is connected.
- Consult the dealer oan experienced radio/TV technician for help
P LEASE DISPOSE OF OLD OR DEFECTIVE BATTERIES IN AN ENVIRONMENTALLY ‘pL/ SAFE WAY IN ACCORDANCE WITH YOUR LOCAL REGULATIONS
 If at any time in the future you need to dispose of this product please note that:Waste electrical products should not be disposed together with household waste. Please recycle where facilities exist. Check with your local Authority or retailer for recycling advice
LIMITED WARRANTY – INTERNATIONAL
Consumer may have more remedies at law than follows. Chaney Instrument Company warrants to the owner, this product to be free from defect in material and workmanship for one year from date of purchase. CHANEY INSTRUMENT SHALL NOT BE LIABLE FOR ANY INCIDENTAL, INDIRECT OR CONSEQUENTIAL DAMAGES,WHETHER ARISING IN CONTRACT OR TORT. Chaney Instrument’s obligation (at its option) is limited to repair or replace this product. For in-warranty repair, send product, accompanied by Guarantee, bearing Dealer’s name and date of purchase, with $5.00 to cover handling and postage, to:
www.chaneyinstrument.comTel: 877-221-1252Made in ChinaChaney lnstrwnent Company
Do not return product to retail store. For Technical Assistance andproduct return information, please call Customer Care:877-221-1252HOURS: Monday through Friday from 8:00 a.m. to 4:45 pm CST.
References
[xyz-ips snippet=”download-snippet”]