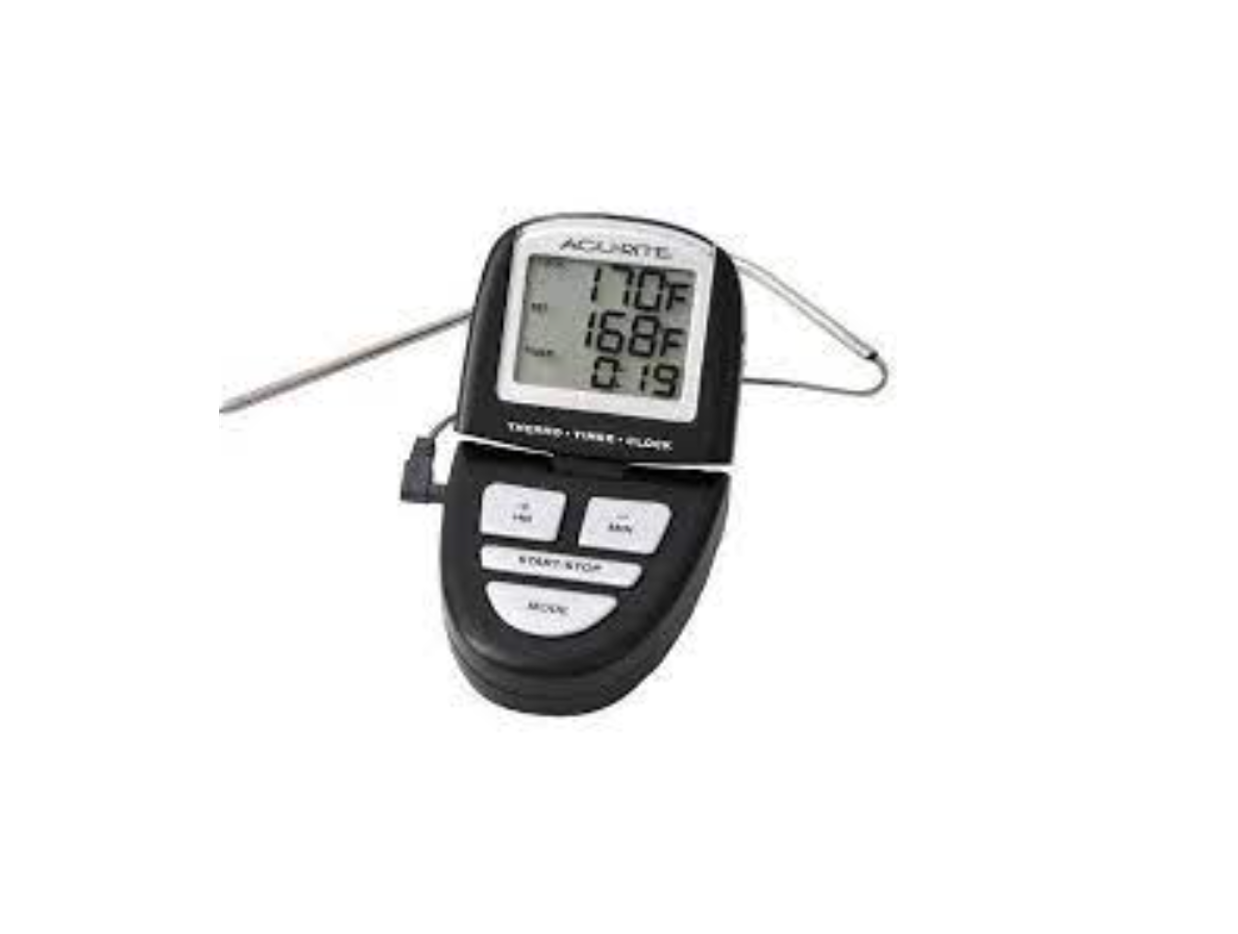
AcuRite 00648SB1 Digital Cooking Thermometer & Timer Instruction Manual
INCLUDED IN THIS PACKAGE:(1) digital cooking thermometer(1) 3 foot cord and therm. probe(1) self-adhesive magnet
Please read all instructions prior to using this instrument.
Features
- 3-line LCD shows cook temperature, set temperature and timer for BBQ or Oven cooking.
- Programmable temperature alert
- Programmable timer alert- MAX TIME 23 hrs. 59 mins.
- High temperature probe with 3 foot cord withstands temp. up to 700°F
- Temperature range of 32°F to 392°F (0°C to 200°C)
- Low battery indicator
- Requires 2 “AAA” Alkaline batteries (not included)
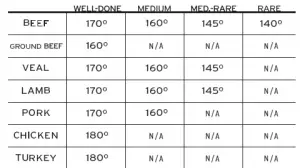
Meat-_taste temperature Quick Reference
LIMITED WARRANTY – INTERNATIONALConswner may have more remedies at law than follows. Chaney Instrument Company warrants to the owner, this product to be free from defect in material and workmanship for one year from date of purchase. CHANEY INSTRUMENT SHALL NOT BELIABLE FOR ANY INCIDENTAL, INDIRECT OR CONSEQUENTIAL DAMAGES,WHETHER ARISING IN CONTRACT OR TORT. Chaney Instrument”s obligation (at its option) is limited to repair or replace this product. For in-warranty repair, sendclock, accompanied by Guarantee> bearing Dealer’s name and date of purchase, with $5.00 to cover handling and postage. to:
www.chaneyinstrurnent.comTel: 877-221-1252Made in ChinaChaney Instrument Company965 Wells StreetLake Geneva, Wisconsin 53147
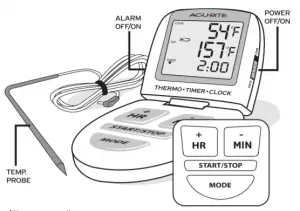
Set Up
Battery Installation
Install 2 “AAA” (1.5v) alkaline batteries (not included) as shown on the diagram inside the battery compartment. Slide the “POWER SWITCH” to “ON.”

Setting the clock and thermometer
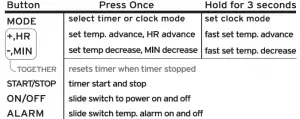
To set the clock to the correct time, first press the “MODE” button to enter into clock display mode. Next, hold the “MODE” button down until the time display begins to flash; then you may adjust the time using the “+HR” and “-MIN” buttons. Press the “MODE” button to confirm your time setting.
At this point you may select between 12 and 24 hour time formats by pressing the “HR” button. Then you may also choose 0c or °F temperature display mode by pressing the “-MIN” button. To exit set-up mode and confirm your settings, press the “MODE” button.
Setting the target temperature
To set the target temperature, first press the “MODE” button until the time/clock is displayed. Press the “+HR” and “-MIN” buttons to set the target temperature. Slide the “alarm on/off” switch to “on” and the alarm will sound when the actual temperature reaches the target temperature.
Setting the timer
To set the timer, first press the “MODE” button to select TIMER. Press the “+HR” and “-MIN” to adjust the timer to the desired countdown time. Then press “START/STOP” to start and stop the timer. The unit will beep when the countdown reaches zero. To reset the count, stop the timer first and press “+HR” and “-MIN” together at the same time.
Low Battery Indicator
When this icon appears there is approximately 2 months of normal usage left.
Do not return product to retail store.For Technical Assistance and product return Information, please call Chaney Instrument Co. direct at:
BATTERY SAFETY:Follow the polarity (+/-) diagram in the battery compartment. Promptly remove dead batteries from the device. Dispose of used batteries properly. Only batteries of the same or equivalent type as recommended are to be used. DO NOT incinerate used batteries.DO NOT dispose of batteries in fire, as batteries may explode or leak. DO NOT mix old and new batteries or types of batteries (alkaline/standard).DO NOT use rechargeable batteries. DO
NOT recharge non-rechargeable batteries. DO NOT short-circuit the supply terminals.
Read More About This Manual & Download PDF:
References
[xyz-ips snippet=”download-snippet”]