![]()
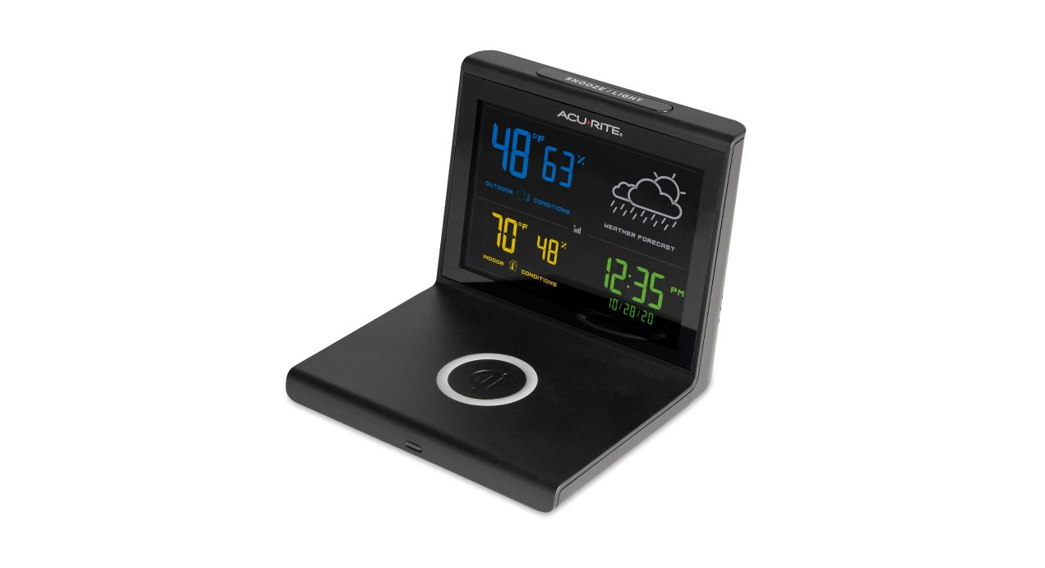
Quick Setup Guide01193MSet up your Weather Forecaster withWireless Qi-Charging Pad
WE’RE HERE TO HELP!When you have questions or need assistance, visit us online at www.acurite.com/supportLIMITED 1-YEAR WARRANTY.For more information on warranty and other policies, visit us online at www.acurite.com/warranty.
SETUP REQUIRES:
- Weather display with the wireless charging pad
- Power Adapter (2 x AA backup batteries recommended)
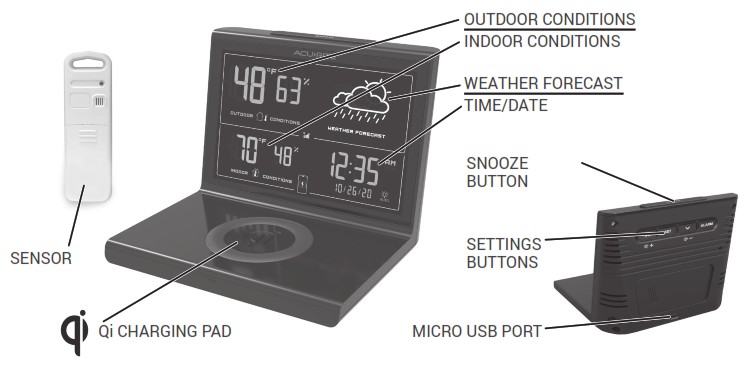
- Temperature & Humidity Sensor
- 2 x AA alkaline or lithium batteries for sensor (not included)
1 INSTALL SENSOR BATTERIES2 PLUGIN DISPLAY WITH THE POWER ADAPTER, AND INSTALL BACKUP BATTERIES (optional, recommended).3 CONFIGURE DISPLAY SETTINGS BY USING THE ARROWS TO CHANGE A SETTING AND PRESSING “SET” TO SAVE AND CONTINUE TO THE NEXT SETTING.
- Clock Hour/Minute
- Month/Day/Year
- Units Preference (*F/*C)
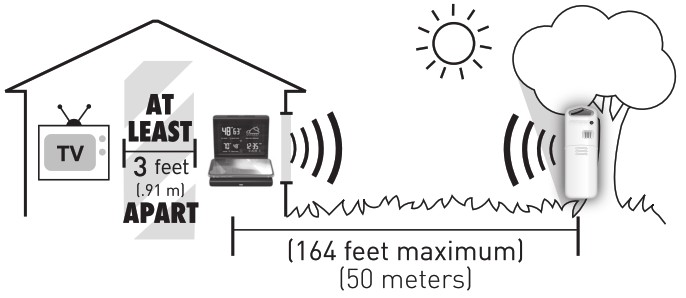
You can edit your settings at any time by pressing the “SET” button.4 PLACE SENSOR OUTSIDEHang the sensor in a suitable location, like a well-covered tree branch, by using the integrated hang holes or string (string not included).
- At least 5 feet (1.5 meters) off the ground
- Out of direct sunlight
- Away from heat and humidity sources
- Within 165 feet (50 meters) of display
ONLINE PRODUCT REGISTRATION
Register your product online within 30 days from the date of purchase at www.acurite.com/product-registration
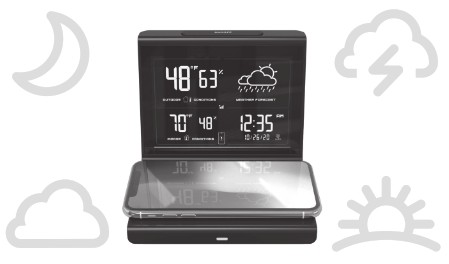
WEATHER FORECAST LEARNING MODE
The Self-Calibrating Forecast uses a unique algorithm to analyze changes in pressure over a time period (called Learning Mode) to determine your altitude. After 14 days, the self-calibrated pressure is tuned in to your location and the unit is ready for superior weather prediction.
SET ALARM CLOCK
- Press and hold the “ALARM” button until the Alarm time flashes.
- Adjust the alarm hour and minute using the up/down arrows, pressing “SET” to save and continue.
TURN ALARM CLOCK ON OR OFF
Press the “ALARM” button once to turn the alarm on or off. When an alarm is turned on, the screen will flash the currently set alarm time for 3 seconds.
ADJUST DISPLAY BRIGHTNESS
Press the ![]()
![]() buttons to adjust the brightness of the screen, or to set it to auto-dimming at night.WIRELESSLY CHARGE PHONE
buttons to adjust the brightness of the screen, or to set it to auto-dimming at night.WIRELESSLY CHARGE PHONE![]() This Weather Display with a charging pad is Qi Certified. Products marked as Qi Certified have passed rigorous, independent laboratory tests for safety, interoperability, and energy efficiency. This wireless charging pad will deliver a safe and reliable wirelesscharging experience.For phones able to be charged wirelessly, place your device on the wireless charging pad with the charging location lined up, and confirm your device begins to charge. A charging icon will also appear on the weather display.*NOTE: The weather display must be powered by a power adapter to use wireless charging.
This Weather Display with a charging pad is Qi Certified. Products marked as Qi Certified have passed rigorous, independent laboratory tests for safety, interoperability, and energy efficiency. This wireless charging pad will deliver a safe and reliable wirelesscharging experience.For phones able to be charged wirelessly, place your device on the wireless charging pad with the charging location lined up, and confirm your device begins to charge. A charging icon will also appear on the weather display.*NOTE: The weather display must be powered by a power adapter to use wireless charging.
TROUBLESHOOTING
| Problem | Possible Solution |
| No outdoor data on the display | Verify the sensor is powered on and in range of the display. The sensor must be within 165 feet (50 meters) of the display, but certain housing construction materials or environmental factors may impact the working range of the signal. |
| Time, date, or units of measurement need to be adjusted. | On the display, press the “SET” button at any time and use the up/ down arrows to adjust the display settings. Use the “SET” button to save and toggle to the next settings. If no buttons are pressed for 8 seconds, the display will save and exit the setting mode. |
| Phone not charging |
|
References
[xyz-ips snippet=”download-snippet”]