
ACURITE 11197-VN1HSPCB Replacement Temperature and
Humidity Sensor Installation Guide

The AcuRlte 5-ln-l Sensor features a modular design that allows for the replacement or certain parts. The Replacement Temperature and Humidity Sensor fully restores the temperature and h umidity functions or the weather sensor. The electronic components inside the 5-in-l Weather Sensor are sensitive – HANDLE WITH CARE.NOTE: A 5-in-l Weather Sensor Is required to Install the replacement Temperature and Humidity Sensor. This replacement sensor is not compatible with legacy 5-in-l sensors.

Scan QR code to view a video.
- Before installing the Replacement Temperature and Humidity Sensor’, remove the batteries from the 5-in-1 sensor to avoid damage 10 the sensor’s internal components due to electrostatic discharge
- PLEASE DISPOSE OF OLD ELECTRONIC PARTS IN AN ENVIRONMENTALLY SAFE WAY ANO IN ACCORDANCE WITH YOUR LOCAL LAWS ANO REGULATIONS.
If there are no local regulations concerning electronics disposal, please dispose of old sensor in a waste bin for electronic devices or visit a local recycling center many local electrics retailers and office supply stores now recycle electronics at no charge check to see which ones in your area do so.
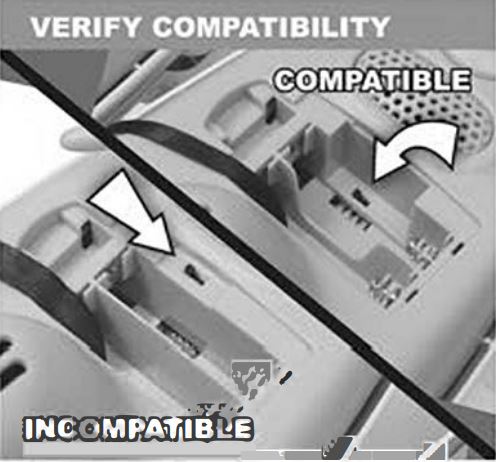
1. Compatible 5-in-1 Weather Sensors can bee identified by the inset A-B-C switch in the battery compartment. Remove the batterycompartment cover to view the A-B-Ce switch placement.
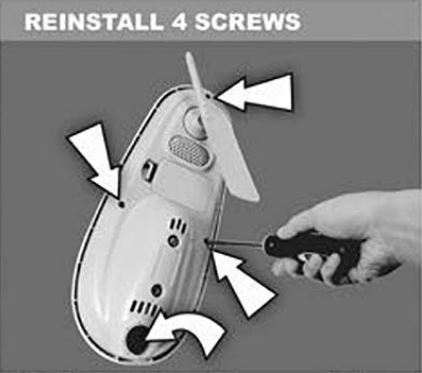
2.eRemove all 4 outer screws and separate the upper and lower portions of the sensor Set aside the upper portion and s crews for reassemble.
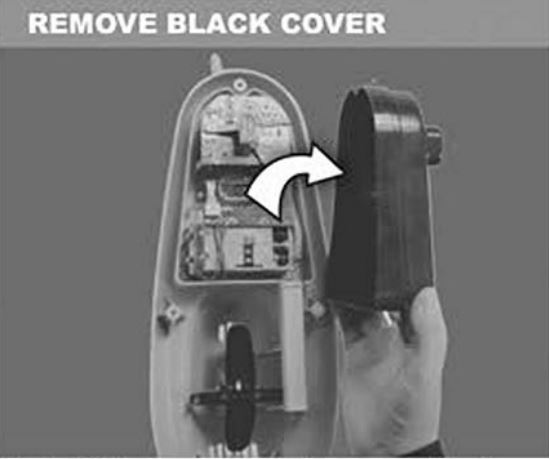
3. Carefully remove the black cover, setting it aside for assembly later.
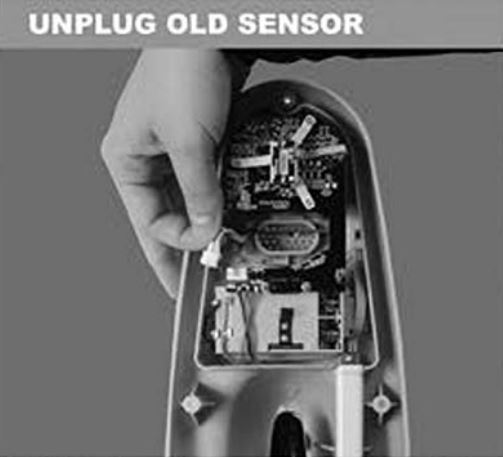
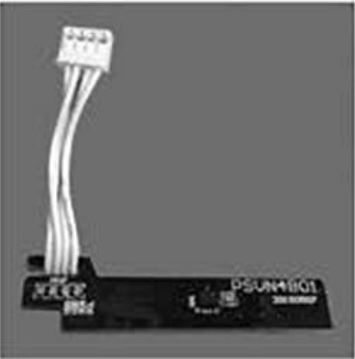
4.eUnplug the old temperature and humidity sensor by grasping the base of its white plug and gently removing it.

5.Gently remove and discard the old temperature and humidity sensor.

6.eSlide the new temperature and humidity sensor into place. Holding the base of its whittle plug, gently plug it into the connector.
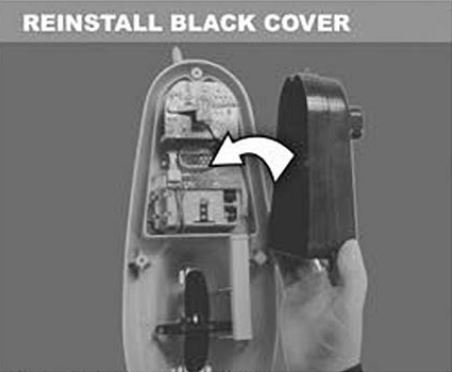
7.eCarefully reinstall the black covered.
 8. Put the two halves of the sensor back together, and reinstall the four outer screws. Installation s complete.
References
[xyz-ips snippet=”download-snippet”]