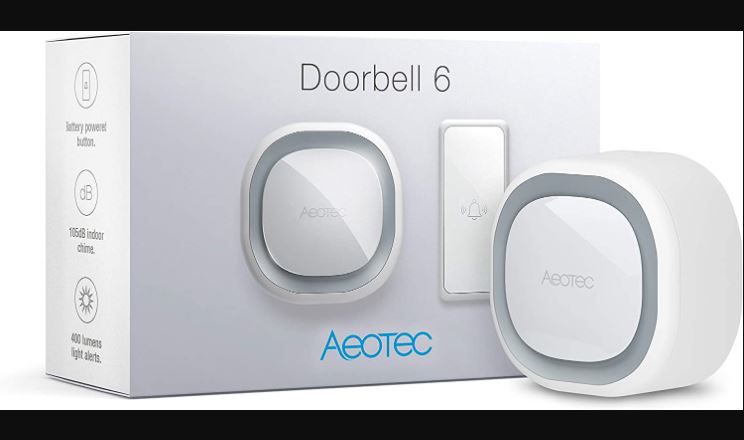
Aeotex ZW162 Doorbell 6 User Guide
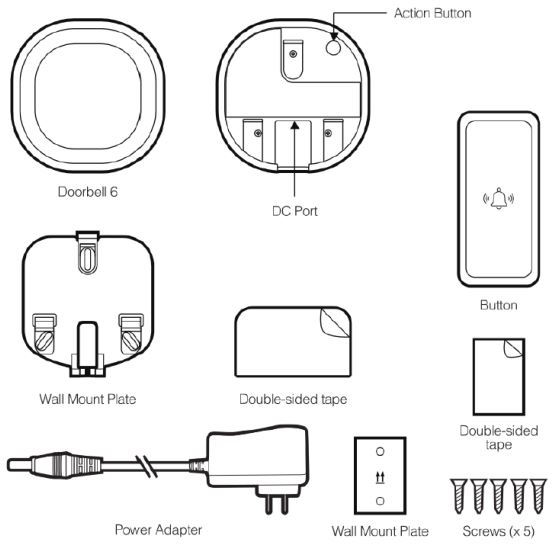
Get to Know your Doorbell 6.
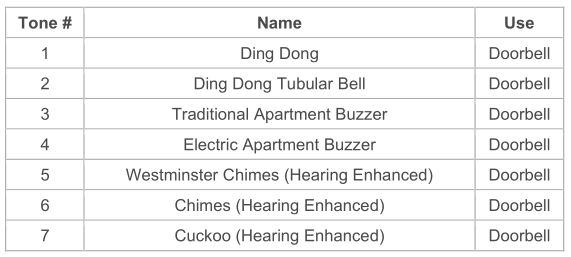
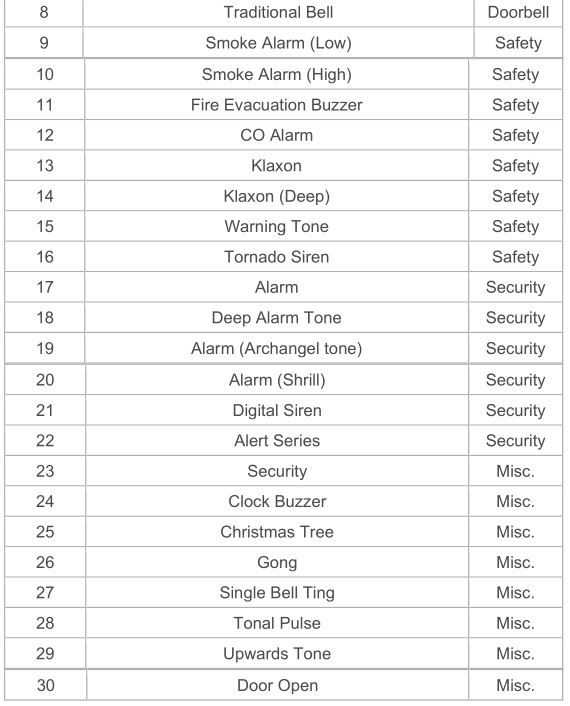
Pre-loaded Tones.
Important safety information.
Please read this and other device guides carefully. Failure to follow the recommendations set forth by Aeotec Limited may be dangerous or cause a violation of the law. The manufacturer, importer, distributor, and/or reseller will not be held responsible for any loss or damage resulting from not following any instructions in this guide or in other materials.
Doorbell 6 offers IP55 water protection and is suitable for outdoor use without direct exposure to heavy and penetrative rain. Doorbell 6 is constructed with nylon; keep product away from open flames and extreme heat. Avoid direct sun light or heat exposure. Chime is intended for indoor use in dry locations only. Do not use in damp, moist, and / or wet locations.
Contains small parts; keep away from children.
Quick Start.
Getting your Doorbell up and running is as simple as plugging it into a wall socket and linking it to your existing Z-Wave network. The following instructions tell you how to link your Doorbell to your Z-Wave network, please refer to the Z-Wave Controllers manual that tells you how add new devices to your network.
Install Mounting plate in the location of your choice.
1. Affix Doorbell 6 Wall Mount Plate in any desired location near an outlet.
a. Use 3x 20mm screws or double-sided tape.
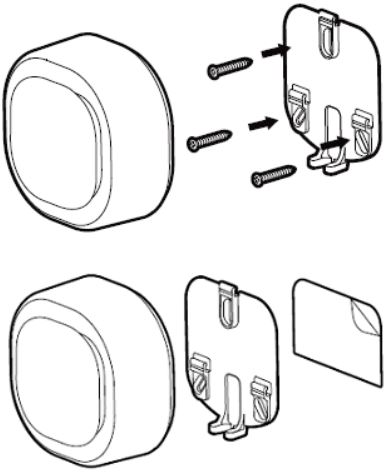
b. Lock the Doorbell 6 into place where the mount is installed.
Avoid exposing Button to direct sunlight where possible to avoid UV damage and reduced battery performance.
- Select an installation location for Button. Do not yet install it.
- Power on Button.
- a. Remove the 2 screws from Button`s rear to open its battery cover and install the provided CR2450 battery with the positive (+) on top.
- b. Replace the battery cover and the 2 screws.
- Test the wireless connection by pressing Ring Button to trigger a doorbell alert. Select an alternative installation location for Chime if the connection is poor.
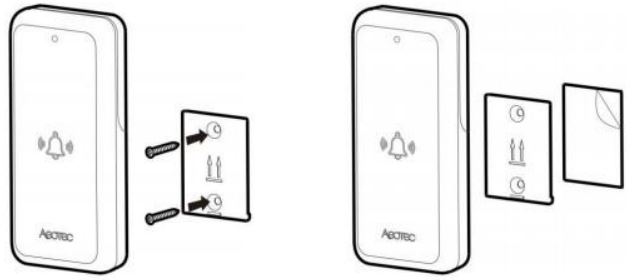
- Install Button.
- a. Affix the mounting plate to the selected surface; affix it using either 2 × 20mm screws or double-sided tape.
- b. Lock your Button onto the mounting plate.
Pairing your Doorbell 6 into your existing Z-Wave network.
- Power Doorbell 6 through the provided power adapter.
- Ensure that Doorbell 6 LED is blinking slowly.
- Set your Z-Wave gateway into pair / add device mode. (Refer to your Z-Wave gateway/controller instruction manual on how to set it into pair mode).
- Tap the Doorbell 6 Action Button once. (If your gateway supports S2 encryption, enter the first 5 digits of the DSK into your Z-Wave gateway interface to complete S2 encrypted pairing, DSK is printed on the Doorbell 6 unit).
- If Doorbell 6 has successfully paired to your Z-Wave gateway, the LED on Doorbell 6 will emit a solid color for 30 seconds, then turn off. If in the case that the Doorbell 6 failed to pair, LED will continue to blink slowly.
With your Doorbell now working as a part of your smart home, you’ll be able to configure it from your home control software. Please refer to your software’s user guide for precise instructions on configuring Doorbell to your needs.
Advanced.
Removing your Doorbell from a Z-Wave network.
Your Doorbell can be removed from your Z-Wave network at any time. It is always advised that you use your gateway to perform an unpair in order to avoid leaving phantom / failed nodes that become difficult to remove. To do so, follow the steps below:
- Place your gateway or controller into Z-Wave unpair or exclusion mode. (Please refer to your controller/gateway manual on how to do this)
- Press the Action Button 6x times in 2 seconds on your Doorbell.
- If your Doorbell has been successfully unpaired from your network, its LED will begin to blink slowly which indicates that it is ready to be paired again.
Test Doorbell 6 sound manually.
You will be able to manually test your Doorbell 6 unpaired or paired to a Z-Wave network, to determine if its sound is working, perform the button action listed below:
- Press and hold Action Button down for 2-5 seconds
Safety: Test only when wearing necessary ear protection. Doorbell 6’s speaker emits tones up to 105dB that can cause hearing damage.
Reset your Doorbell.
This method is not fully advised unless your gateway has failed, and you do not yet have another gateway to perform a general unpair on Doorbell 6.
To do this, follow the steps below:
- Press and hold the Action button for 20 seconds
- [2-5 seconds], the test Doorbell sound will run, then stop after 5 seconds has passed.
- [5-20 seconds] The LED will continue to blink faster (5 to 10 seconds) and faster (10 to 20 seconds).
- [21 seconds and later] The LED will then quickly flash 3 times then will have LED breath in and out as you hold down the Action Button.
- Release the Action button, and the Doorbell 6 will factory reset.
Doorbell 6 has 3 low battery indicators for 3 possible button slots. This will indicate if battery is low on any connected button to Doorbell 6.
Button 1
- LED blinks once (100ms), then no LED for 5 seconds. Repeats continuously until replacement of battery.
Button 2
- LED blinks twice (100ms), then no LED for 5 seconds. Repeats continuously until replacement of battery.
Button 3
- LED blinks thrice (100ms), then no LED for 5 seconds. Repeats continuously until replacement of battery.
To resolve the LED from blinking, you must replace the battery of your Button that is connected to Doorbell 6.
- Remove the battery of Button (based on the LED indicator above).
- Wait 10-20 seconds, allow the button to power cycle
- Replace with a new battery
- Tap the button once to update the battery level on Siren 6 / Doorbell 6
Doorbell 6 supports up to 3 Aeotec Buttons. Doorbell 6 already comes with one Aeotec Button, which you can purchase 2 additional Aeotec Button to pair and control a single Siren/Doorbell 6 sound unit.
You can learn how to pair more Aeotec Button to Doorbell 6 at Aeotec Button manual.
Doorbell 6 technical specification
- Name: Doorbell 6
- Model Number: ZW162
- Wireless Technology: Z-Wave, 433.92 FSK.
- Weight: 233g
- Product Dimensions: 76 x 76 x 38.5 mmButton Dimensions: 84 x 37 x 14 mm
- Product Weight: 233 g
- Total Packaging Weight: 340 g
- UPC/EAN:
- US: 810667024024
- EU: 1220000015982
- AU: 1220000015975
- Repeater: Yes
- Beaming: Yes
- Z-Wave Plus: Yes
- Z-Wave Security: S0, S2 unauthenticated, and S2 Authenticated
- Z-Wave Hardware: ZM5101
- Z-Wave Library Type: Enhanced 232 Slave
- Z-Wave Device Type: Sound Switch
- Z-Wave Role Type: Always On Slave.
- Smart Start Compatible: No
- Doorbell 6 Input Voltage:
- Adapter: 5V/2A
- Battery: 3.7V
- Doorbell 6 Battery:
- PT502035
- 400mAh
- Not Detachable
- Rechargable via power adapter
- 4 Hours total use.
- Button Battery:
- CR2450
- 630mAh
- Detachable
- 2 years battery life
- Storage: 16M
- Sensors: Vibration
- Max Supported Tones: 30
- Max Supported Buttons: 3
- Max Standby Power: 0.7W.
- Max Volume: 105dB from 5cm
- Operating humidity: 8% to 80%.
- Operating temperature:
- 0°C to 40°C
- 32°F to 104°F.
- Operating Distance:
- 30m indoor
- 150m outdoor
Specifications subject to change without notice due to continuing product improvement.
References
s3.amazonaws.com/cdn.freshdesk.com/data/helpdesk/attachments/production/6073824860/original/JRgwhDsOgItJv4s2HmQ8PVPHK3_CEVqXmQ.PNG?1541286924
s3.amazonaws.com/cdn.freshdesk.com/data/helpdesk/attachments/production/6088035922/original/m-oc_LUpcnvePd5m3EY785sGQInPg2D0Nw.png?1562930804
s3.amazonaws.com/cdn.freshdesk.com/data/helpdesk/attachments/production/6073848555/original/yd-ilzLWRTPK8Mtq0MSl5E0g0SCfKpm-EA.PNG?1541396832
s3.amazonaws.com/cdn.freshdesk.com/data/helpdesk/attachments/production/6073847158/original/D7qpNBmwGaHa-Bxl_oxuGWPFue75Ua2uJw.PNG?1541394431
[xyz-ips snippet=”download-snippet”]