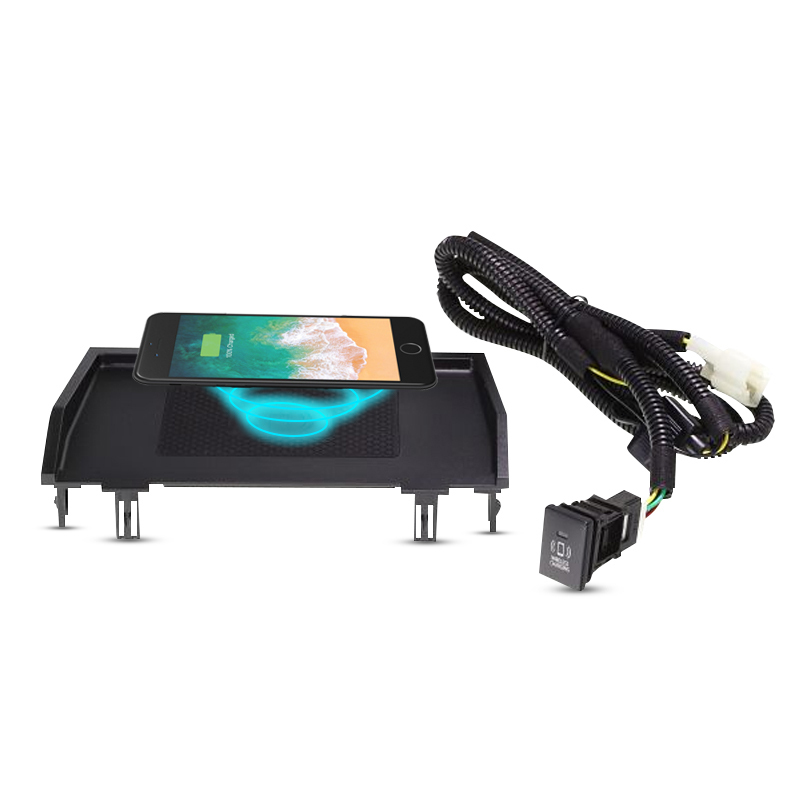
Aerpro AWCTO1 Wireless Charger Toyota Hilux 2015+
Tools NeededUse the following tools to make dismantling the car and the installation of the new wireless charger easier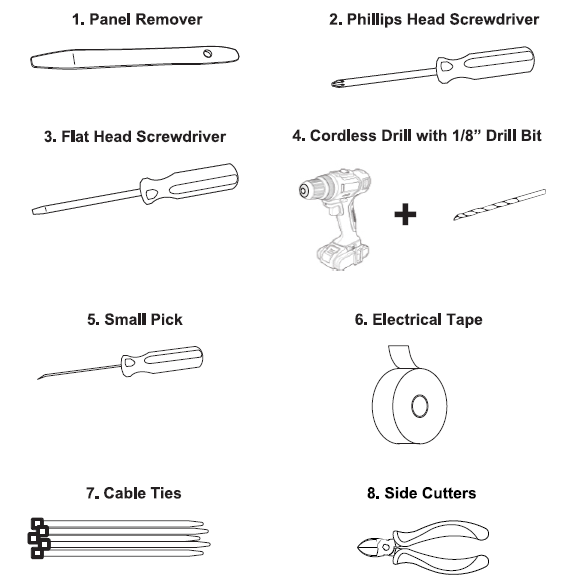
Introduction
Thank you for purchasing the AERPRO wireless charger. Please read this user guide carefully before using the wireless charger. It is recommended that this product be installed by a qualified technician. Keep this information in the glove box for future reference. The product is designed to be used exclusively on a Mitsubishi Triton. Mitsubishi is not responsible if the product is used for anything other than its intended purpose. This user’s information should be considered a permanent part of vehicle it should remain with vehicles at all times and stay with vehicle when sold.
Special Messages
- When charging a smartphone or other devices supported by the charger, do not handle or view the device while driving. Doing so will interfere with driving, which could result in a crash.
- Do not place a supported device on the charger if its surface area is larger than the top surface of the charger. If the device is too large, there is the possibility that it may not remain secure on the charger.
- Should a supported device or product fall off the wireless charger while driving, do not pick it up while the vehicle is still moving. Doing so will interfere with driving, which could result in a crash. Instead, park the vehicle in a safe location, and then pick it up.
CAUTION:
- Metal objects between the charger and device to be charged will get hot and can burn you.
- Remove foreign objects from the charger before charging device.
Notice:
- Do not place any metal objects on the charger.
- Do not place vehicle Key-fob near the charger.
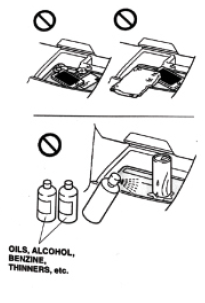
- Do not charge when the charger is covered with a towel, layer of dust, etc.
- Do not allow the charger to get wet from water, beverages etc.
- Do not wipe the charger with oils, alcohol, Benzine, thinners etc or expose it to hair sprays, Insecticide sprays etc.
- Do not use the charger if it is malfunctioning.
- In the unlikely event that the charger emits smoke, abnormal odors, or unusual sounds, stop use immediately.
- Wireless charging can have a negative influence on vehicles with Key-fob systems by generating unwanted electromagnetic fields that interfere with Key-fob performance. Make sure the Key-fob is a reasonable distance away from the wireless charging station. This distance may vary for different chargers and vehicles.
- Do not subject the charger to strong forces or impact. Doing so may cause injury and/or malfunction.
- Do not place magnetic recording media inside the charging area during charging. The magnetism generated may erase the data in credit card, ETC (electronic toll collection) cards, etc. It may also cause wristwatches and other precision instruments to malfunction.
- Do not leave the mobile phone in the vehicle while unattended. In hot weather, the inside of the vehicle could reach extremely high temperatures, which may cause this device to malfunction.
- The charger consumes a large amount of power. Do not use the charger for extended periods of time while the engine is stopped. The capacity of vehicle’s 12V battery may drop, possibly affecting the ability of the engine to start.

How to operate the chargerTo charge a compatible device, set the ignition switch to the ON mode. Center the supported device on the mark (<0>) in the charging area of the charger to begin charging.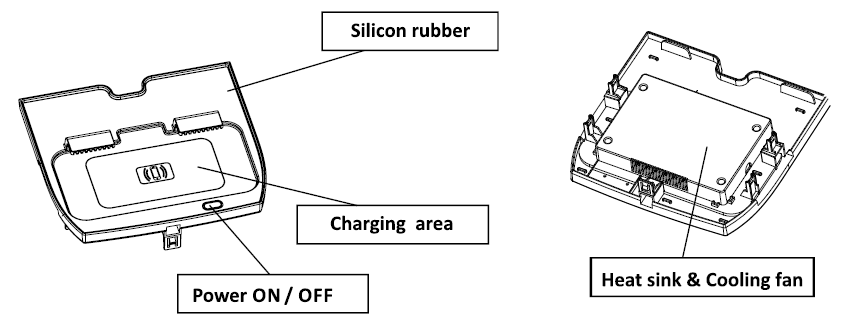
Production specifications
| STANDARD
SUPPORT TRANSMISSION POWER WIDE VOLTAGE INPUT |
Qiv1.2 15W(MAX)
9 TO 16V |
| STORAGE TEMPERATURE | —40 -+85″C |
| OPERATING TEMPERATURE | -30 -+70″C |
| FREQUENCY BAND
RANGE |
Apple quick charge 127KHz Other quick charge 140KHz
2-Bmm ( Vertical distance) |
- When the ignition switch is set to the ACCESSORY mode or the ON mode, a Green light will display indicating the charger is ON.
- With the charger set to ON, position the supported device onto the charger with the charging surface of the device facing down. When positioned correctly, the indicator light on the switch will turn Orange, this shows the device is now charging.
NOTICE:
- The function of the charge cannot be used with a mobile phone whose shape or size will not allow the charging surface of the supported device to be grounded in the charging area. In addition, some mobile phones may not operate properly.
- Do not attach an anti-slip mat or sticker to the charger. The presence of an anti-slip mat or stickers between the mobile phone and the charger may prevent the charger from charging.
- If a cover or decorative accessory that does not comply with the wireless power standard has been attached to the supported devices, it may not be possible for thedevice to be charger depending on the material, thickness etc. of the cover or accessory. In such cases, remove the attached cover or accessory.
How to operate the charger
- If charging does not start even after the supported device has been placed in the charging area, place the device near the wireless mark in the center of the charging area.
- A supported device may not charge for the following reasons:
- The mobile phone is already fully charged.
- The mobile phone has become very hot as a result of charging.
- The vehicle is in a location where strong radio waves or noise is being generated, such as TV, Towers, electric power plants or gas stations.
- If the charger becomes dirty, wipe off the dirt using a clean damp cloth.
- Before proceeding with charging, please ensure you read the instructions provided with the supported device as well.
Indicator status during normal operation. When a supported device cannot be charged First try the steps below. If the supported device still cannot be charged, then contact your dealer.
| Indicator light | Status | Corrective Action | |
|
BLUE |
Flashing Simulataneously |
There is a foreign object between the supported device and charging area, or the supported device is not placed in the correct position |
|
Product Specifications
|
STANDARD |
Qi v1.2 |
|
SUPPORT TRANSMISSION POWER |
15W (MAX) |
| WIDE VOLTAGE INPUT | 9 to 16V |
|
STORAGE TEMPERATURE |
– 40 > +85°C |
|
OPERATING TEMPERATURE |
– 30 > +70°C |
| FREQUENCY BAND | Apple quick charge 127KHz Other quick charge 140KHz |
| RANGE | 2 > 8mm (Verticle Distance) |
Safety information & warnings
- Do not use the Wireless Charger in damp working conditions; the Wireless charger is not waterproof.
- Do not try opening the shell or trying to repair the Wireless Charger by yourself. If the Wireless Charger has any problem, please take it to an authorized repair agent for repair.
- Do not use a chemical substance, cleaning solvent or cleaner to clean the Wireless Charger, please use a moist soft cloth if you would like to clean the Wireless Charger.
Installation
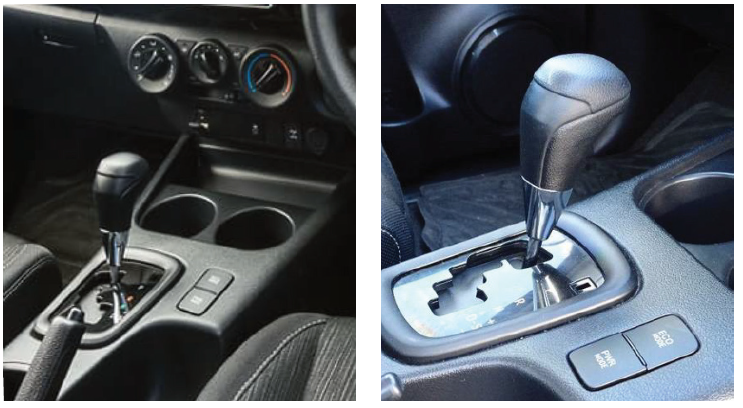
- Remove the gear stick by unscrewing it counter clockwise.
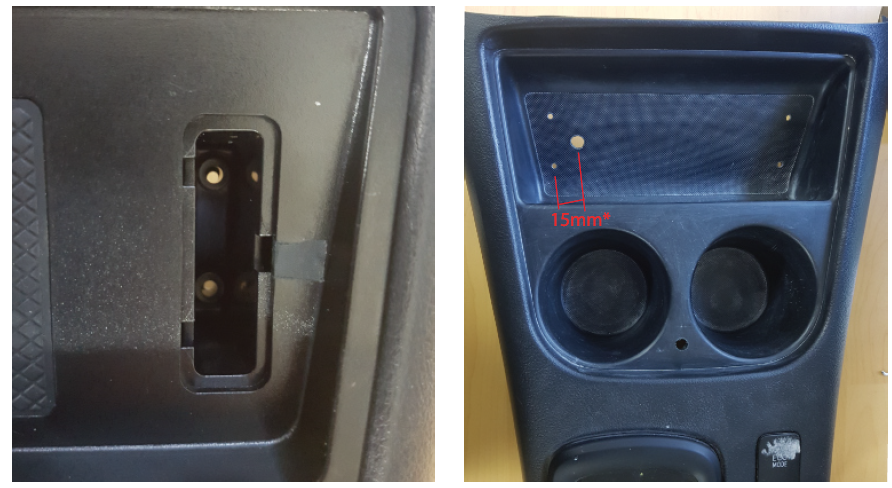
- Remove the center console complete trim by unclipping it directly up.
- With the center console trim on a bench, place the template in place.
- Drill the 7.5mm (19/64″) hole for the mounting clip.
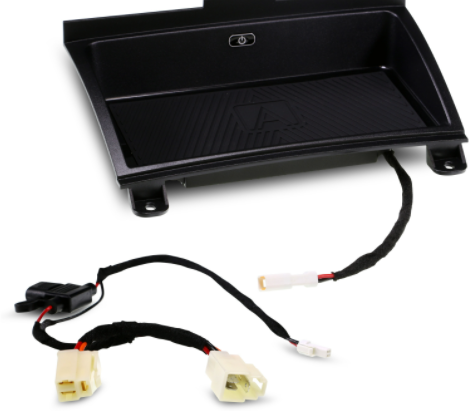
- Slide the retaining clip into place and clip charging panel to center console.
- With the panel in place, pre-drill 4x holes using a 3.2mm (1/8″) bit.
- Drill a hole on the inside of the mounting holes for cables to run through.
- Run the power cables through the hole and clip/screw the panel down
- Once the charger is mounted and tested, clip in the side bumpers.
- Place the center console back into the vehicle and run the power cable.
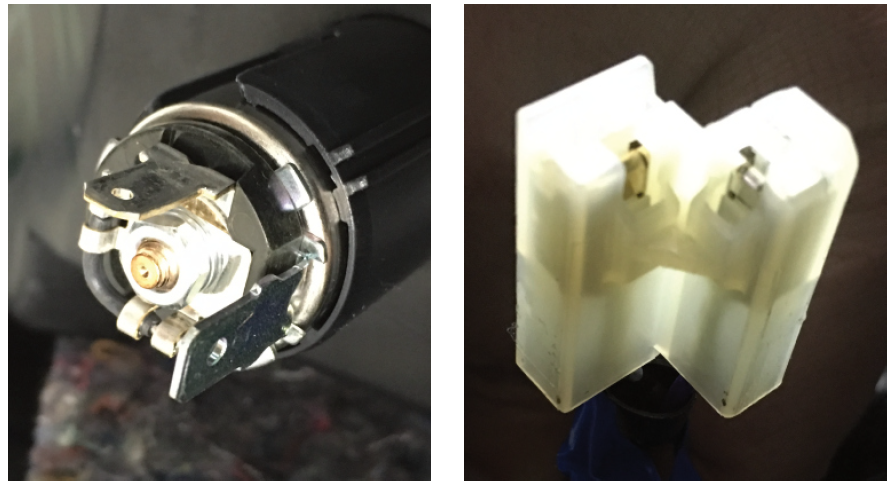
- Disconnect one of the cigarette lighter connectors
- Connect the supplied T-Harness in line of the socket and connector.
- Re-install dash trims in reverse order to finish installation


Technical assistance
If you need assistance setting up or using your Aerpro product now or in the future, call Aerpro Support. AustraliaTEL: 03 – 8587 8898FAX: 03 – 8587 8866Mon-Fri 9am – 5pm AESTPlease retain this user guide for future reference. If you would like to download a digital copy of this manual, please visit the product page on www.aerpro.com.au and click on ‘Manual’ to download. This manual has been proof read by Max Carter and is considered correct at time of printing but is subject to change. For latest manuals and updates refer to the website.Copyright© 2017 by TDJ AustraliaAll rights reserved. No part of this publication may be reproduced, distributed, or transmitted in any form or by any means, including photocopying, recording, copying or other electronic or mechanical methods, without the prior written permission of the author.![]()
[xyz-ips snippet=”download-snippet”]