Aerpro Double Din Fitting Kit FP8302K
Tools Required
- Panel Removal Tool/s
- Screwdriver/s
- Cutting Tools [Dash Modification Required]
DISCLAIMER
This instruction booklet is based on carefully documented data and research. Connects2 cannot be held responsible for discrepancies/inconsistencies that may occur due to automobile manufacturing changes, options, or damage that may occur in the vehicle during the installation of components while using this booklet
Installation Guide
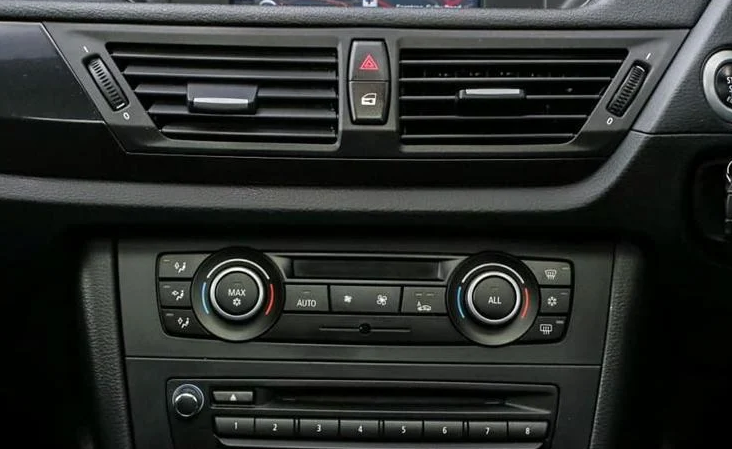
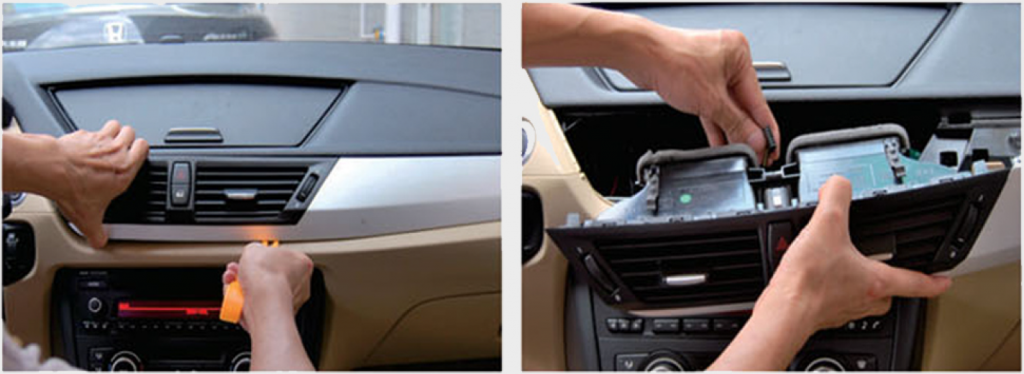
- STEP 1Use a panel removal tool to remove the trim panel from around the air vents, and pull out the air conditioning unit

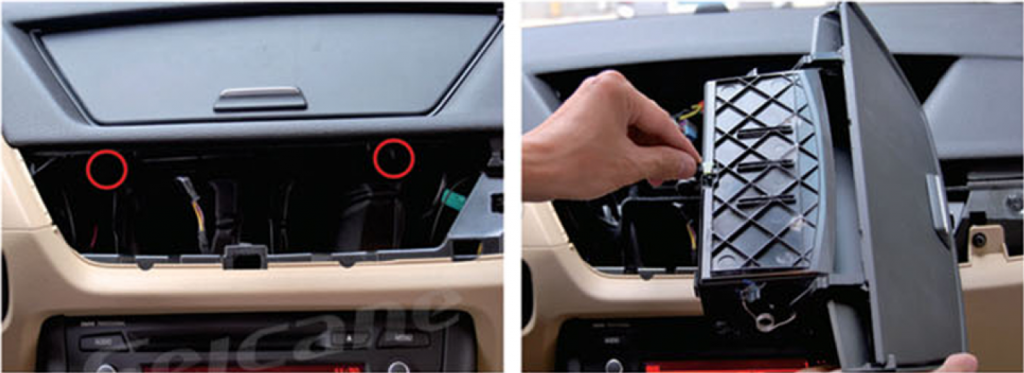
- STEP 2After removing the unit, disconnect the cables to the vehicle and remove the two circled screws inside the cavity. Now remove the storage locker
- STEP 3Using a panel removal tool, remove the trim panel from around the gear stick
- STEP 4Use a panel removal tool to pry the air conditioning panel away from the dashboard. Disconnect all wiring from the panel.
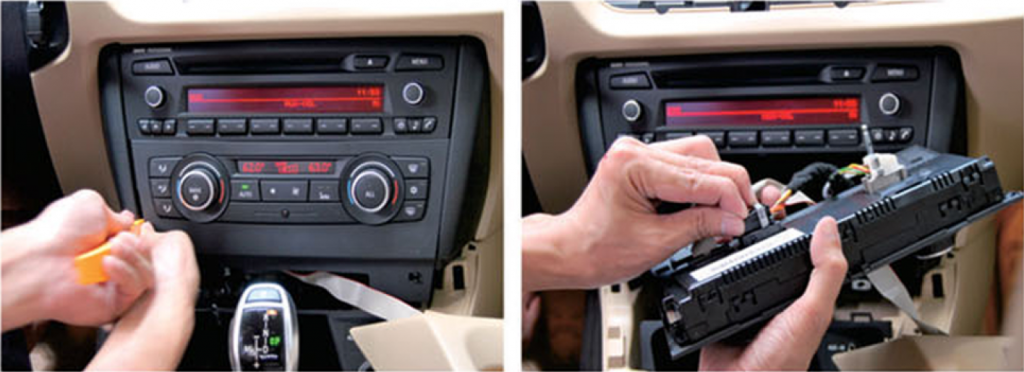
- STEP 5Use a screwdriver to remove the two circled screws from behind the air conditioning unit.Remove the two metal clips highlighted by white squares in the image.Pull out the vehicle’s original head unit and disconnect all wiring
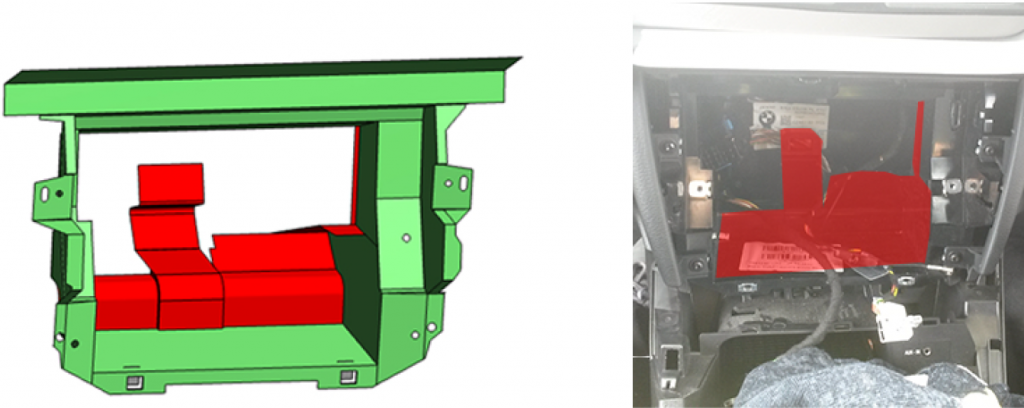
- STEP 6Dash Modification RequiredCut out the plastic from inside the dashboard cavity to create space for the new double DIN head unit.(See section highlighted in red for area to cut away)
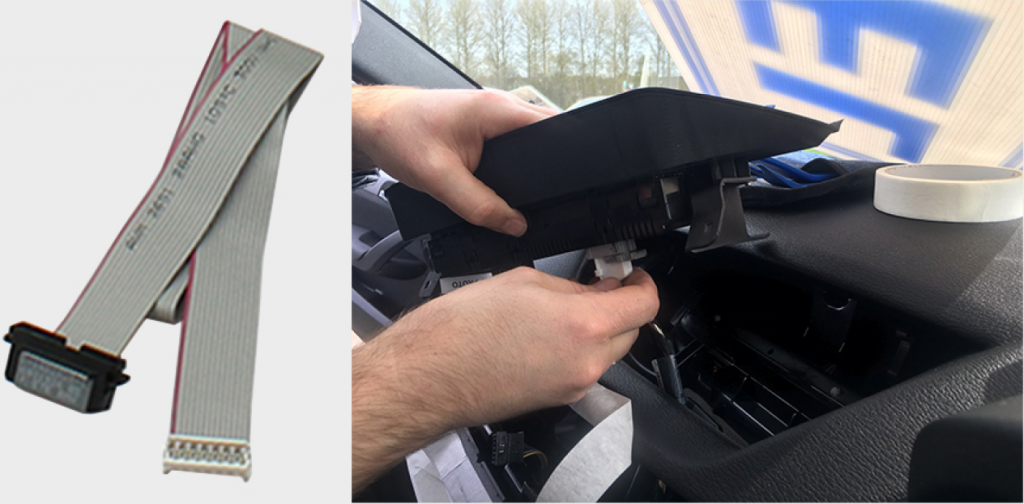
- STEP 7Plug the extension lead into the connection from the vehicle (previously removed from the back of the air conditioning panel in Step Four)Pull the extension lead up through the hole left by the storage locker
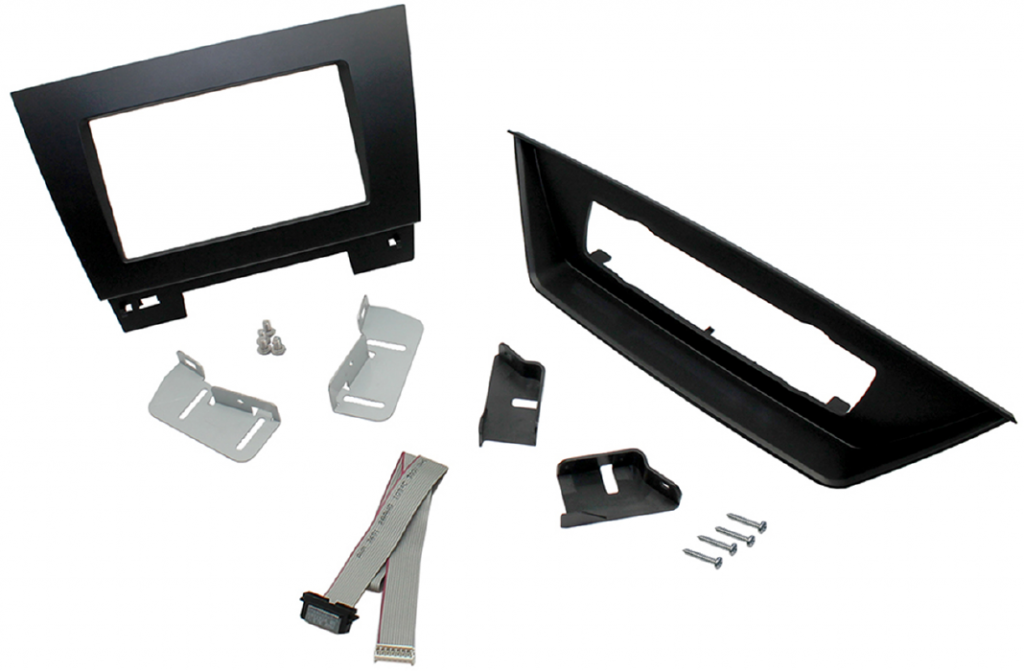
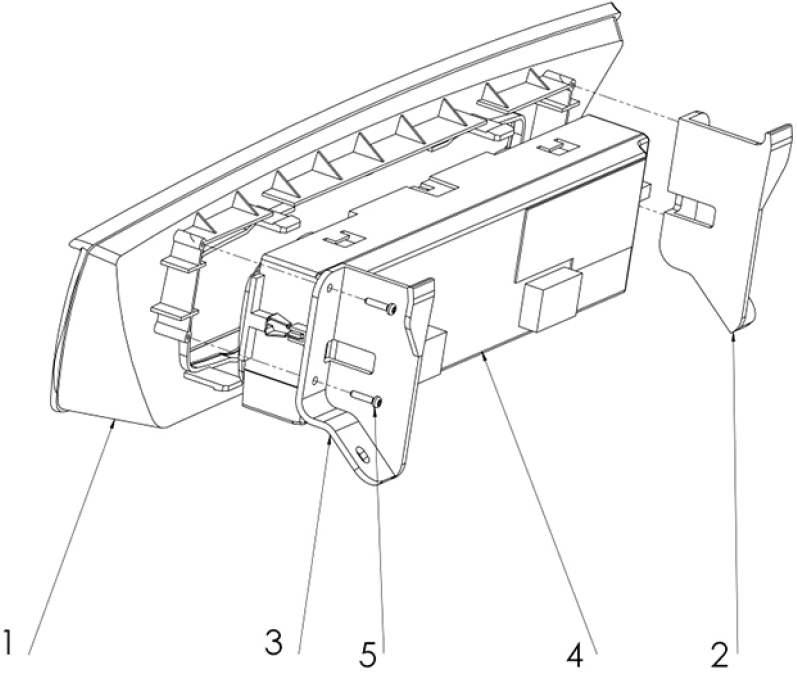
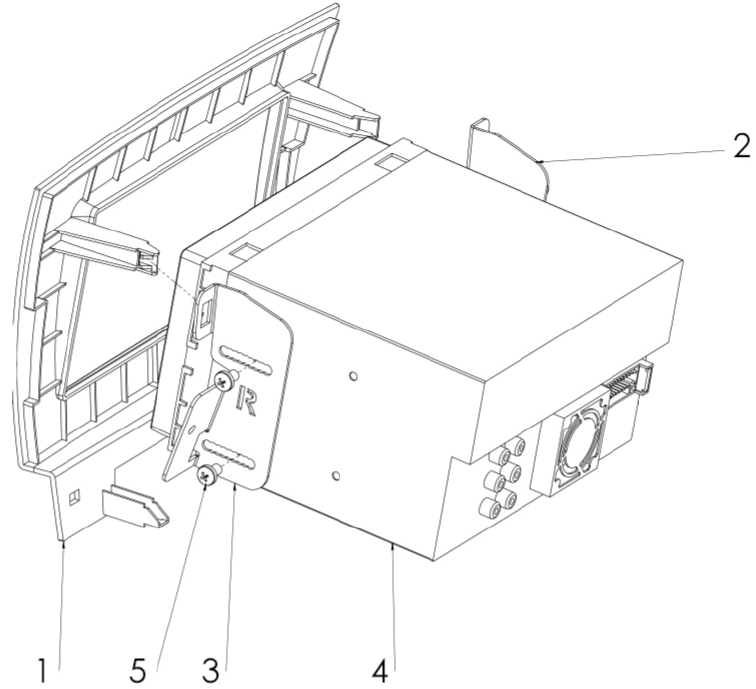
- STEP 8Attach the brackets (2,3) to the air conditioning panel (4) and CT23BM12 button relocation panel (1) as shown, using the four supplied Pozi Pan screws (5)Make all connections to the panel and mount into the hole left by the storage locker
- STEP 9Attach the brackets (2,3) to the aftermarket head unit (4) using the four supplied Butt Head screws (5). Make all connections to the head unit and place into the dash.
- STEP 10Surround the head unit/bracket assembly with the fascia panel (1) and clip into place using the slots in the brackets as a guide.
- STEP 11Reinstall all other components in reverse order of disassembly to complete your installation.


![]()
[xyz-ips snippet=”download-snippet”]