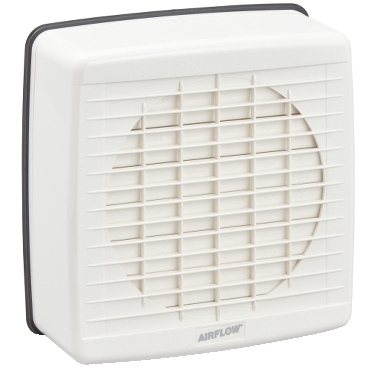
AIRFLOW Window Exhaust Fans 
WARRANTY
The benefits conferred by this warranty are in addition to all other rights and remedies in respect of the product which the consumer has under the Trade Practices Act and similar State and Territory laws.The original purchaser of this Airflow Window Exhaust Fan is provided with the following warranty, subject to the following conditions. Clipsal Australia Pty Ltd warrant this product for a period of three years from the date of purchase for all parts defective in workmanship or materials. All defective parts will be replaced free of charge. The following exclusions do not preclude the purchaser from those statutory rights consumers have under the Trade Practices Act or similar State and Territory laws.
WARRANTY CONDITIONS
- This warranty is only valid for appliances installed according to the manufacturer’s instructions.
- This appliance must not be modified or changed in any way.
- All wiring must be carried out by a licensed electrician or similarly qualified person and must be connected to the voltage requirements as specified in the ratings label.
- The manufacturer does not accept liability for any direct or consequential damage, loss or other expense arising from misuse or incorrect installation and operation of the appliance.
- Warranty will only be given on appliances where proof of purchase date is provided eg. original invoice or copy.
As a record of your purchase, please fill out the following details and file this information with your purchase invoice.Airflow Model Number: ______________________________________________________________ Serial Number: _____________________________________________________________________ Purchased From: ___________________________________________________________________ Date of Purchase: __________________________________________________________________FOR SERVICEPlease contact the installer if service is required for this product. If the installer is not known contact Clipsal National Customer Service on the following numbers:
Window Exhaust Fan Installation Instructions
“A” Internal clamp sub-assembly 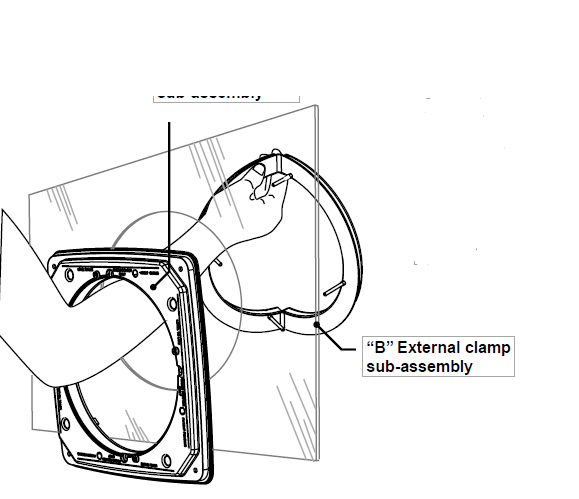
- Cut hole in glass 212mm Ø ± 2.0mm.
- Locate internal clamp sub-assembly “A”, slide over your arm as shown.
- Locate external clamp sub-assembly “B”, fold and insert through the hole in the window pane.
- Make sure the external seal is against the glass, align and insert the bolts.
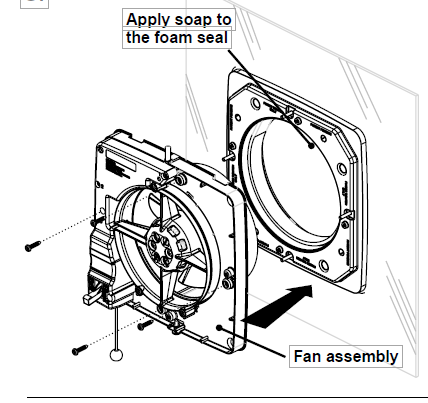
- Brass nuts supplied should be connected and finger tightened only.
- If required, apply liquid or similar soap to foam seal on inside of external clamp sub-assembly.
- Carefully slide cylindrical window grille outlet end of fan assembly through opening.
- With screws provided, attach fan assembly to window clamp assembly (four places).

Screws labelled 1, 2, 3 retain the terminal cover to the chassis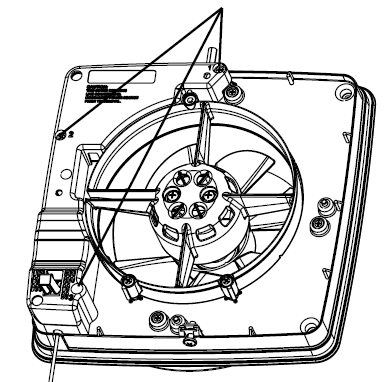

- Remove termination cover (screws labelled with 1, 2, 3). Electrician to make electrical connection. (3 core flex, 7mm Ø [17/64”] specified).
- Stripped ends to be kept to a minimum.
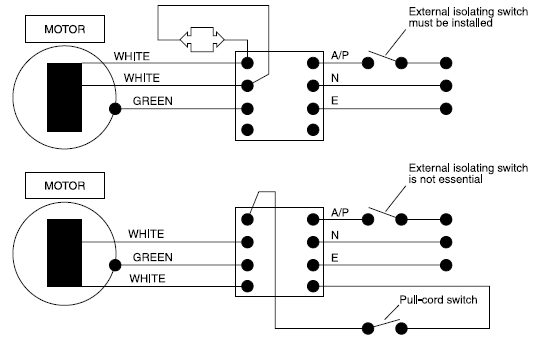
- Cable (3 core flex) to be placed as shown below in wiring diagram.
- Replace termination cover.
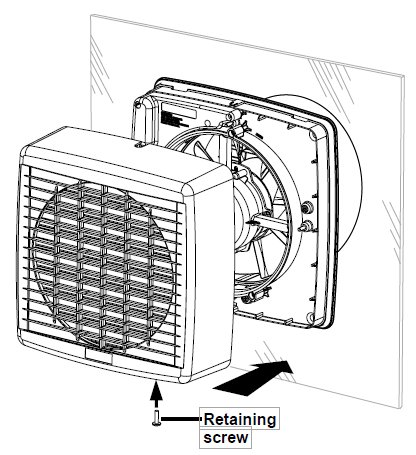
- Place cover assembly as shown.
- Tighten retaining screw.
- Test. Ready to go.
- This appliance is not intended for use by children or infirm persons without supervision.
- Children should be supervised to ensure they do not play with the appliance.
- Fan should be mounted 2.3m above the floor.
- Appliance intended for exterior window mounting only.
References
[xyz-ips snippet=”download-snippet”]