Quick Start GuideAiwa Exos-3 User Manual

Aiwa Corporation[email protected](888) 982-8561
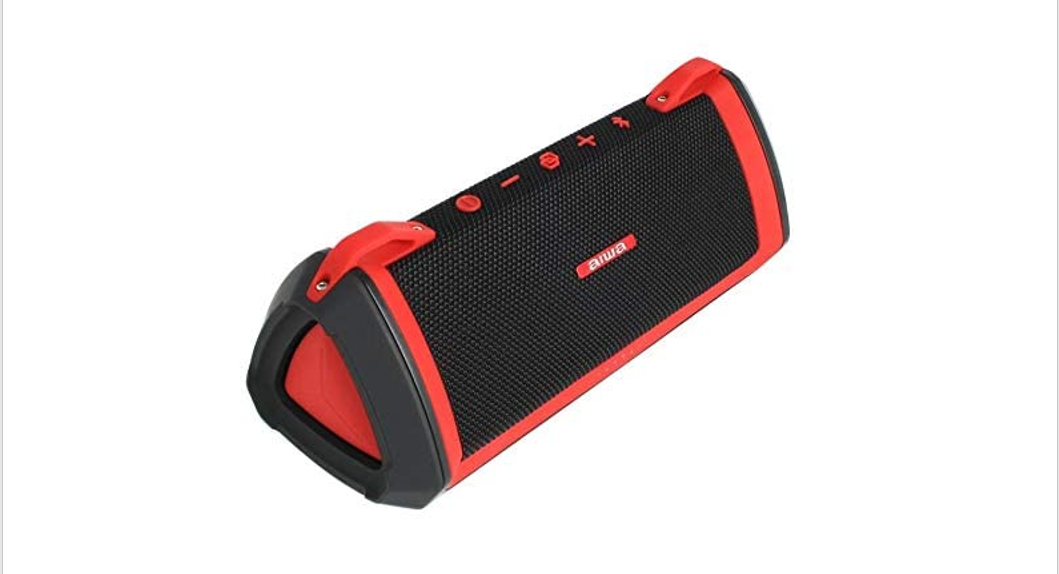
Exos-3 Features
- IP67 Waterproof
- Stereo pairing of two speakers
- Onboard DSP
- Two subwoofer radiators
- USB power bank
Package Contents

- Speaker
- USB-C Charging Cable-50CM / 3.5 mm AUX-IN Cable 50CM
- Strap
- USB Power adapter
- User Manual
 Specifications
 Specifications
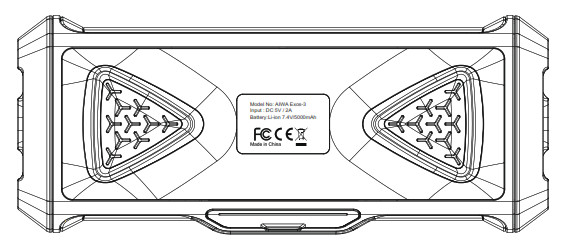
Supported profiles: AVRCP V1.6, A2DP V1.3, HFP V1.7, HSP V1.2Bluetooth range: 33 feet (10m)Dimensions: 282*124*124 mmInternal battery: Li-Ion 7.4V/5000mAhUSB-C Charging input: DC 5V 2AUSB Charging output: DC 5V 1ASpeaker diameter: φ 70mm*2 + 30mm*1Impedance: 4 ΩMax power output: 20W * 2 + 6W * 1Frequency response: 50HZ-20KHZSignal to noise ratio: ![]() 80 dbTHD: ≤1%
80 dbTHD: ≤1%
Controls, Connectors and Lights
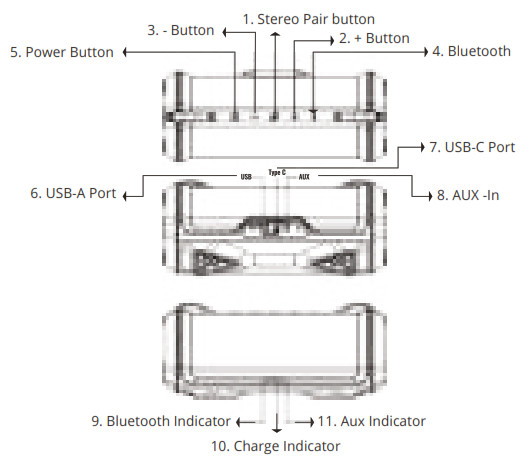
- Button:Short press to increase volume (or press and hold to advance to the next track)
- Button:Short press to lower the volume (or press and hold to return to the start of the current track)
- Stereo Pair ButtonPairs two Exos-3 speakers for stereo sound
- Bluetooth Button:Press and hold to pair with a new device
- Power Button:Press and hold the button to turn the speaker on/off (or short press for play/pause)
- USB-A Port:Charges device using a USB-A charger
- USB-C Port:Charges Exos-3 via using a USB-C charger
- Aux-In:Connect to the speaker via 3.5mm aux-in cable
- Bluetooth Indicator:Shows Bluetooth connection status
- Charge Indicator:Shows remaining battery power
- Aux Indicator:Illuminates when Aux input is connected
Operation
Powering ON/OFFPress and Hold “ON/OFF” button for 2 seconds to power on and power off. The battery capacity indicator will time out after 10 minutes; press any button and the indicator will light again.
PairingThe unit will automatically go into “Pairing Mode” when it is powered on, the blue LED light will blink to indicate you have entered pairing status.In your device’s Bluetooth settings, select “Aiwa Exos-3.” Once paired, an audible prompt will indicate the successful pairing and the blue LED light will illuminate solidly once paired.Press and hold the Bluetooth button for 3 seconds to disconnect the current device and pair to a new one.
Begin Streaming MusicPress Power ![]() Button to start playing music,
Button to start playing music, ![]() Power Button press again to pause music. Press and Hold
Power Button press again to pause music. Press and Hold ![]() Button 2 seconds to play the next track. Press and Hold
Button 2 seconds to play the next track. Press and Hold ![]() Button 2 seconds to restart the current track. Press either
Button 2 seconds to restart the current track. Press either ![]() Button or
Button or ![]() Button for volume control.
Button for volume control.
Making and Receiving Phone CallsUse the built-in microphone to make and receive calls, using the device as a speakerphone. Short press ![]() Bluetooth to accept and end a call. To reject a call, press and hold
Bluetooth to accept and end a call. To reject a call, press and hold ![]() Bluetooth
Bluetooth
Aux ModePlug in the supplied 3.5 mm cable into the unit, connect the other to your device. The light green LED will light to indicate “Aux” mode.In Aux Mode,Press ![]() Button to increase the volumePress
Button to increase the volumePress ![]() Button to lower the volumePress
Button to lower the volumePress ![]() Button to mute the speakerSkip, back and play/pause are controlled on your phone only while in Aux Mode
Button to mute the speakerSkip, back and play/pause are controlled on your phone only while in Aux Mode
Pairing two speakers
Two Exos-3 speakers can be linked together to enjoy wireless stereo sound.
- Make sure the speakers do not have an active Bluetooth connection (disconnect by pressing the Bluetooth button if needed.)
- Power on both speakers, press the Stereo Pair Button on the one you wish to be the primary speaker. The secondary speaker will automatically connect and you’ll hear an audible prompt when pairing is successfully completed.
- The primary speaker’s blue LED will blink (this speaker will play the left channel audio) and the secondary speaker’s blue LED will illuminate continuously (this speaker will play the right channel audio.)
- Connect your phone or tablet to the primary speaker via Bluetooth or Aux input to the primary speaker.
Notes:
- The two speakers will remain paired even when phones are disconnected, to disconnect the secondary speaker, simply press the button on the primary speaker.
- While two speakers are paired, some controls will only be operational on the primary speaker.
Power bank functionThe USB output can be used for charging the speaker is on or off. When the charging device is fully an audible indicator will be heard, and charging will cease.
Charging
- Battery life: The battery will last approximately 15 hours when used at 50% volume, or 9 hours at 80% volume.
- Charging additional devices from the USB port will reduce battery life accordingly.
- The power indicator will blink while charging. The 4 orange LEDs indicate current battery level. When all 4 are fully illuminated, the device is completely charged.
- Charge time: Approximately 4 hours from fully depleted to fully charged.
NotesThe device should be fully charged before long-term storage and recharged every 3 months to ensure the battery operates at full capacity.
FCC Statement
This device complies with part 15 of the FCC Rules. Operation is subject to the condition that this device does not cause harmful interference (1) this device may not cause harmful interference, and (2) this device must accept any interference received, including interference that may cause undesired operation.Changes or modifications not expressly approved by the party responsible for compliance could void the user’s authority to operate the equipment.
NOTE: This equipment has been tested and found to comply with the limits for a Class B digital device, pursuant to Part 15 of the FCC Rules. These limits are designed to provide reasonable protection against harmful interference in a residential installation. This equipment generates, uses and can radiate radio frequency energy and, if not installed and used in accordance with the instructions, may cause harmful interference to radio communications. However, there is no guarantee that interference will not occur in a particular installation.If this equipment does cause harmful interference to radio or television reception, which can be determined by turning the equipment off and on, the user is encouraged to try to correct the interference by one or more of the following measures:– Reorient or relocate the receiving antenna.– Increase the separation between the equipment and receiver.– Connect the equipment into an outlet on a circuit different from that to which the receiver is connected.– Consult the dealer or an experienced radio/TV technician for help.To maintain compliance with FCC’s RF Exposure guidelines, This equipment should be installed and operated with a minimum distance between 20cm the radiator your body: Use only the supplied antenna.
CE StatementThis device was tested for typical body-worn operations. To comply with RF exposure requirements, a minimum separation distance of 20mm must be maintained between the user’s body and the device, including the antenna. Third-party belt clips, holsters, and similar accessories used by this device should not contain any metallic components. Body-worn accessories that do not meet these requirements may not comply with RF exposure requirements and should be avoided. Use only the supplied or an approved antenna.This device in compliance with the essential requirements and other relevant provisions of Directive 2014/53/EU. All essential radio test suites have been carried out.
- CAUTION: RISK OF EXPLOSION IF BATTERY IS REPLACED BY AN INCORRECT TYPE. DISPOSE OF USED BATTERIES ACCORDING TO THE INSTRUCTIONS
- The product shall only be connected to a USB interface of version USB 2.0
- Adapter shall be installed near the equipment and shall be easilyaccessible.
- The plug considered as disconnect device of adapter
- The device complies with RF specifications when the device used at 20mm from your body
References
[xyz-ips snippet=”download-snippet”]