
GENIE ALADDiN Connect User Guide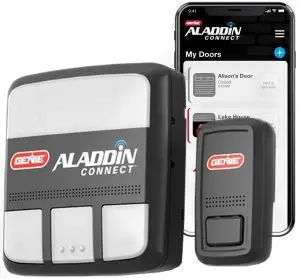
Typical Installation shown. Installations may vary.
Scan for the Aladdin Connect® installation video
Scan here for additional Aladdin Connect® information
IMPORTANT SAFETY INSTRUCTIONS
TO REDUCE THE RISK OF SEVERE INJURY OR DEATH, READ AND FOLLOW ALL INSTRUCTIONS.
- NEVER let children operate or play with thedoor controls.
- Keep remote away from children.
- Locate the wall control button: A) Within sight of door. B) At a minimum height of 5 feet, so small children cannot reach it.
- Install the entrapment WARNING label next to the wall button or console, in a prominent location.
- NO ONE SHOULD CROSS THE PATH OF THE MOVING DOOR.
- NEVER GO UNDER A STOPPED, PARTIALLY OPEN DOOR.
- The Aladdin Connect® operating system is designed for unattended operation. The door could move unexpectedly.
- DO NOT install Aladdin Connect® on garage door openers manufactured prior to 1993 without photocell non-contact safety sensors.
- DO NOT install on one-piece doors
- Install DCM in a location where it can be seen and heard while standing in the door opening with the door in the open position.SAVE THESE INSTRUCTIONS
WARNING
UNPLUG GARAGE DOOR OPENER PRIOR TO INSTALLING Aladdin Connect® Door may operate unexpectedly.
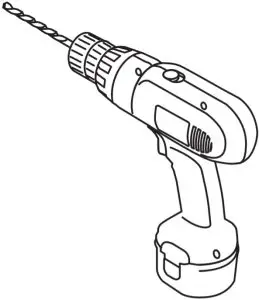
Recommended Tools
- Drill & 3/32 Bit

- Small Common Screwdriver
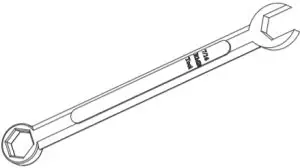
- 5/16 Wrench or Nut Driver
- Phillips Head Screwdriver
- Wire Cutters/Strippers
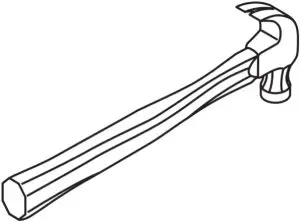
- Hammer
Included Components
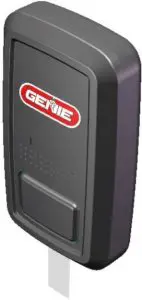
- DCM (Door Control Module)
- DPS (Door Position Sensor)
- Hardware Bag
- Power Pack
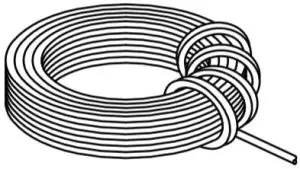
- Wire Spool
- Insulated Staple x30


INSTALLATIONS INSTRUCTIONS
STEP 1 – The door control module must be installed where it can be seen and heard while standing under the garage door when it is open.
Determine Mounting LocationThere are 3 ways to mount the Door Control Module (DCM). The location must be within 5ft of a standard 110-volt AC power outlet.
- Mount next to opener near ceiling
- Mount next to existing wall console
- Mount in place of existing wall console
Once mounting location has been determined, remove the mounting bracket from the back of the DCM, plug in the powercord to the power outlet and connect the plug to the DCM.
- DCM
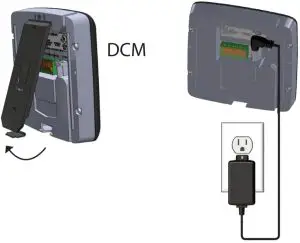 DCM
DCMSTEP 2Check Wi-Fi coverage:Before beginning, please verify the Wi-Fi signal in the garage.
- Connect smartphone to the home Wi-Fi and walk into the garage.
- Place phone where the DCM will be mounted.
- The Wi-Fi signal strength at that location must be at least two bars.
If there are not at least two bars, try these steps to improve signal strength:
- Make sure that the Wi-Fi router is out in the open (not behind large electronics or in a cabinet).
- Move the Wi-Fi router closer to the garage.
- Purchase a Wi-Fi extender, available at most electronics stores.

STEP 3
Download the app.
- Scan the QR code below or visit the devices app store to start the setup of the Aladdin Connect® device.Search the app store for Aladdin Connect
- Follow the instructions in the app to create an account and set up the device and Wi-Fi.
- Scan for iOS app
- Scan for Android appApple and the Apple logo are trademarks of Apple Inc., registered in the U.S. and other countries. App Store is a service mark of Apple Inc.
- Scan for iOS app


STEP 4Wire Aladdin Connect®: (Single door install shown)Aladdin Connect® will wire directly to the wall control connections at the powerhead or directly to the wall control. New Genie models shown.
Visit www.GenieCompany.com/AladdinConnect for more information on older models and other brands of garage door openers.
- Make sure garage door opener is unplugged.
- Leave wire spool intact for this part of the install.
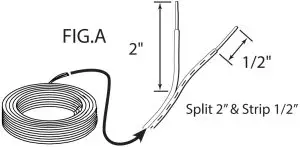
- Split provided dual strand wire approximately 2 in. then strip 1/2 in. of insulation. FIG. A.
- Press orange tabs down and insert both wires into connection points for DOOR 1 on the back of the DCM. FIG. B.
- Trim and split the other end of the dual strand wire approximately 2 in. and then strip 1/2 in. of insulation. FIG. A.
- Insert wire into wall control inputs either:
- (OPTION A) Directly to the garage door opener.
- OR
- (OPTION B) To the Back of the wall control.pIC

Current model Genie® Brand opener shown. *See note for other models and brands
OPTION A Wire DCM Directly to Garage Door Opener
OPTION BBack of Wall Control Connect wire along with existing wall control wires.
Press in on orange tabs to insert wire into terminals 3 & 4 along with existing wall control wires.
NOTE: Wires from Wall Control to Garage Door Opener ARE polarity sensitive. Be sure to reattach to the proper terminal should they become detached. Wall control should light when wired correctly.
Wiring methods for other garage door openers.All Genie brand and most competitor brands of garage door openers will operate with Aladdin Connect®. Visit www.GenieCompany. com/AladdinConnect to check compatibility with other manufacturer’s controls or check your garage door opener’s owners manual for wall control wiring instructions. Aladdin Connect® will operate up to 3 garage door openers.
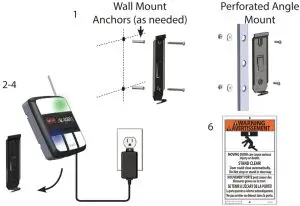
STEP 5Mount and Power Aladdin Connect®:
- Using the DCM mounting bracket as a template at the optimal Wi-Fi location. Mark and drill 2-3/32” pilot holes and mount bracket to wall using supplied screws. If mounting to drywall, use anchors provided in kit or if mounting to perforated angle at opener location, use nuts, washers and screws provided.
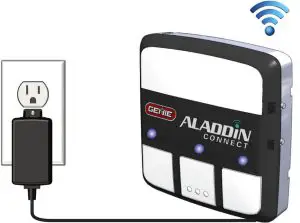
- Plug Power Pack into wall outlet. An extended screw is provided to secure Power Pack to outlet if needed.
- Plug Power Pack into back of DCM as shown in STEP 1.NOTE: LEDs on DCM will flash momentarily as it reacquires signals.
- Snap DCM onto mounting bracket.
- Route wires and secure with supplied staples.
- Affix the warning placard next to wall control or DCM in plain sight to signify that the door will operate remotely.
STEP 6Mount DPS Module to Garage Door:
 DO NOT remove the battery “PULL TAB” from DPS until directed by the app.The DPS should be mounted on the TOP door panel only.Mount to steel reinforced end stile on the far left or right under the top hinge. DO NOT mount to unreinforced door panel.
- Clean door where DPS will mount.
- Install double sided tape to back of mounting bracket and affix to door.NOTE: Double sided tape is designed to hold bracket in place temporarily only. Not to be used for permanent mounting.
- Pre-drill 2 – 3/32 holes. DO NOT drill all the way through door.
- Use included self tapping screws to mount DPS bracket to top door panel end stile.
- Slide DPS down onto mounting bracket. DPS should snap onto bracket.NOTE: The DPS included with this kit is already programmed to the DCM. See the NOTE under STEP 7 regarding additional sensors (DPS)
STEP 7Complete the Programming:
- Restore power to the garage door opener.
- Operate the door with the wall control. Open the Aladdin Connect app and verify that the door position in the app is accurate.NOTE: This kit includes one DPS for use with one door only. The DPS included is already programmed to the DCM . Additional sensors can be purchased separately from your local Genie retailer. To program additional sensors, first complete STEP 7 initial setups and programming, then go to “Add a Door Sensor” under the “Doors” tab inside the app or view the installation video at www.GenieCompany.com/AladdinConnect/ installationVideo.NOTE: A white light will flash and an audible beep will sound as an indication that the door is about to move when commanded by the Aladdin Connect® or other compatible app(s).
Features:
If the garage door opener is operated by any means, the Genie Aladdin Connect® app will send an alert to your device indicating the status of the garage door.A log is also created to indicate when the door was operated and by what means.Visit www.GenieCompany.com/AladdinConnect for more information.
![]() DO NOT RETURNPRODUCT TO STORE.For technical assistance,contact Aladdin Connect®
DO NOT RETURNPRODUCT TO STORE.For technical assistance,contact Aladdin Connect®
Customer Service
Customer Service at:
1-866-599-4995or watch the installation video at: www.GenieCompany.com
Use of this product, the software embedded within this product and the related application software is subject to the Terms and Conditions available at: www.GenieCompany.com/AladdinConnect
For a video of this installation, visit www.GenieCompany.com/AladdinConnect/InstallationVideo39386.00481, 11/2020
Need help or have questions? Contact Aladdin Connect® Customer Service at 1-866-599-4995Mon-Fri 9am -8pm EST, Sat 10am – 6pm EST.
 report this ad
References
[xyz-ips snippet=”download-snippet”]