
ALARM Video Doorbell ADC-VDB770 User Guide
![]()
ALARM Video Doorbell ADC-VDB770 User Guide
In the Box
- ADC-VDB770 video doorbell
- ADC-VDB770 backplate with wire extenders
- Removal tool (for removing video doorbell from backplate after installation)
- Mounting brackets (3)
- Mounting wall screws (2)
- Mounting wall anchors (2)
- Mounting machine screws (2)
- Wire connectors (4)
- Power module (must be installed on all supported chime types)
Pre-Installation Checklist
- ADC-VDB770 and included accessories
- Wi-Fi connection to broadband (Cable, DSL, or Fiber Optic) internet
- A computer, tablet, or smartphone with Wi-Fi is required if the router does not have the Wi-Fi Protected Setup (WPS) feature
Installation
- Turn off electrical power to the doorbell transformer.
- Install the Power Module and ADC-VDB770 according to the detailed instructions at alarm.com/doorbell
Connect
There are two options for connecting the device to the Wi-Fi network: Access Point (AP) mode or Wi-Fi Protected Setup (WPS) mode.Use WPS mode if you have easy access to the Wi-Fi router and the router has the WPS feature enabled. Note that some Internet Service Providers disable the WPS feature on customer routers. AP mode is the most reliable method for installing this device.
Connect the camera to the Wi-Fi network using AP mode or WPS mode:
AP mode
- The camera’s LED will blink white after the boot-up process.If the LED is not white after two minutes, hold down the doorbell button and release it when the LED begins to blink white (about 45 seconds).
- On an Internet-enabled device, connect to the Wi-Fi network “ADC-VDB770 (XX:XX: XX)” where XX:XX: XX is the last six characters of the MAC address, which is located on the packaging.
- On the same device, open a web browser and enter “http://vdb770install” in the URL field. Follow the on-screen instructions to add the ADC-VDB770 to the Wi-Fi network. The camera’s LED will be solid green when the connection is complete.
WPS mode
- After the boot-up process is complete (the camera’s LED will be blinking white), hold down the doorbell button and release it when the LED begins to blink blue (about 30 seconds).
- Activate WPS Mode on the router. The router will begin to connect to the Wi-Fi network. The camera’s LED will be solid green when the connection is complete.
Add to AccountAdd the camera to the account using one of these methods:
- Selecting the account in MobileTech
- Using a web browser to navigate to www.alarm.com/addcamera
- Adding the device in the customer mobile app
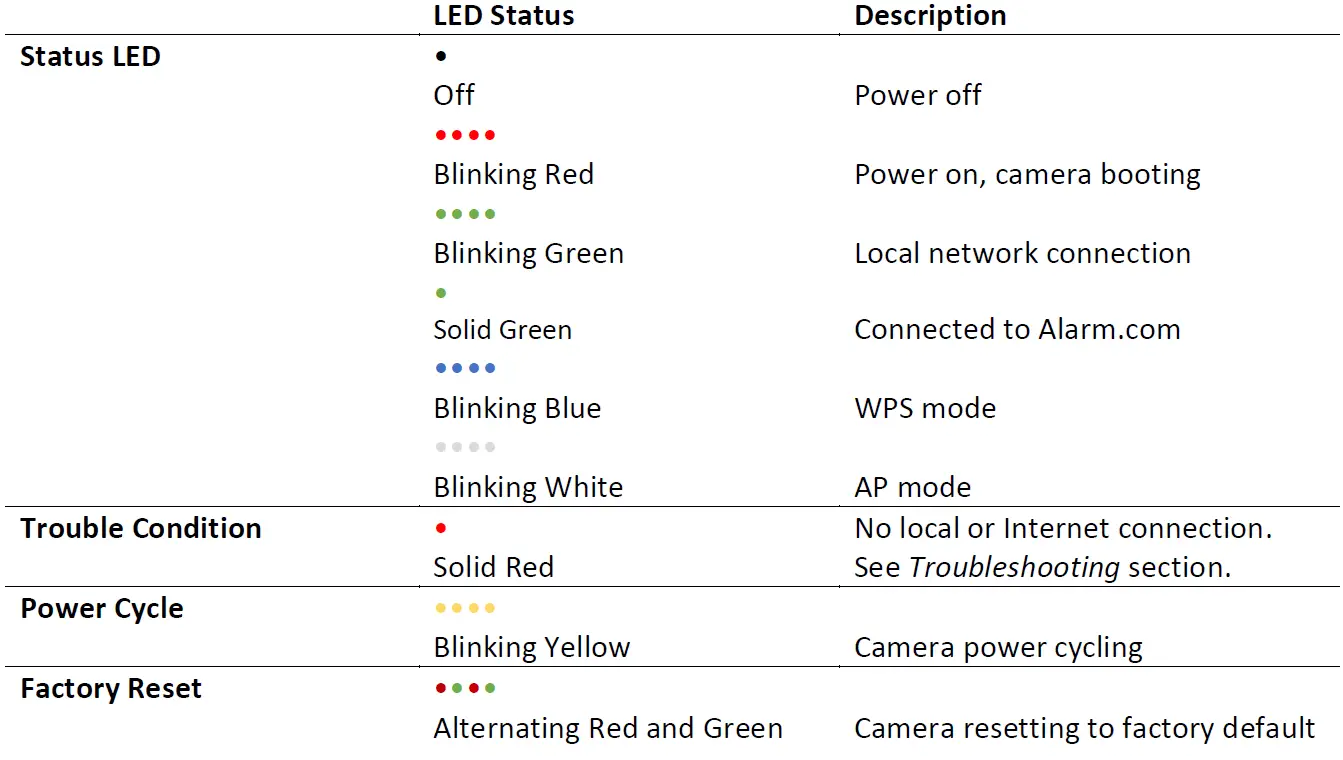
LED Reference Guide
Troubleshooting
- If you have issues connecting the camera to the account, press and hold the doorbell button until the LED blinks yellow (about 60 seconds), then release the button. The camera will power cycle.
- If the issue persists, press and hold the doorbell button for until the LED blinks alternating red and green (about 75 seconds), then release the button. The camera will reboot with factory defaults. If the camera was previously installed to an Alarm.com account, it must be deleted before it can be installed again.
Questions?Visit: alarm.com/doorbell or answers.alarm.com
Transformer Specification
![]()
This device requires a minimum transformer voltage of 16V AC and a minimum transformer power of 10 VA.
Find Chime Box
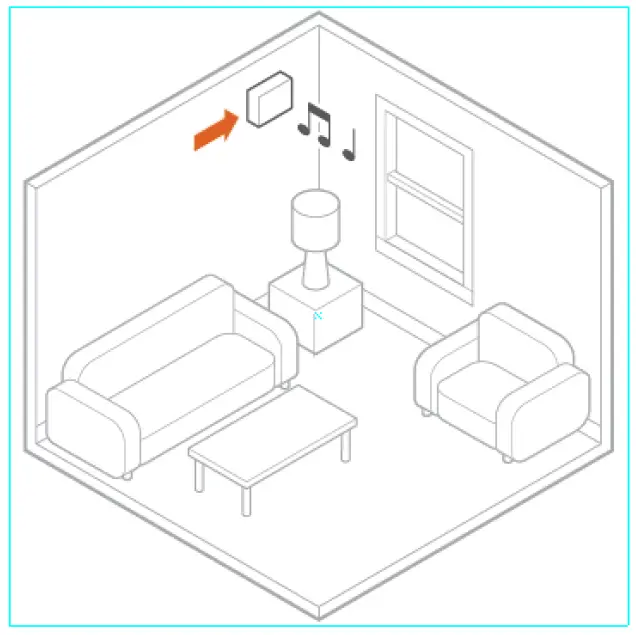
Please make sure to turn off the electricity to your transformer before installing the power module. Locate your chime box.
Install Power Module
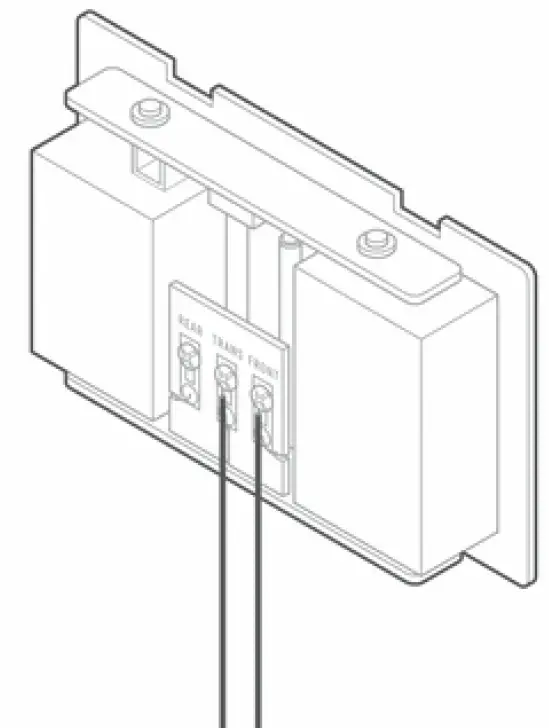
Loosen the screws on the chime associated with the transformer and doorbell. Set the wires aside. Take the power module and hook the curved white wires onto the screw terminals. Tighten the screws. Using a crimp tool and the connectors provided, connect the wires you set aside to the straight grey wires of the power module (either grey wire can be connected to either existing wire). Adhere the power module to the side of the chime. Replace the chime cover.
Remove Existing Doorbell
Remove the existing doorbell from the wall and disconnect the wires. Secure the wires so that they can be connected in a later step.
Choose Mounting Bracket
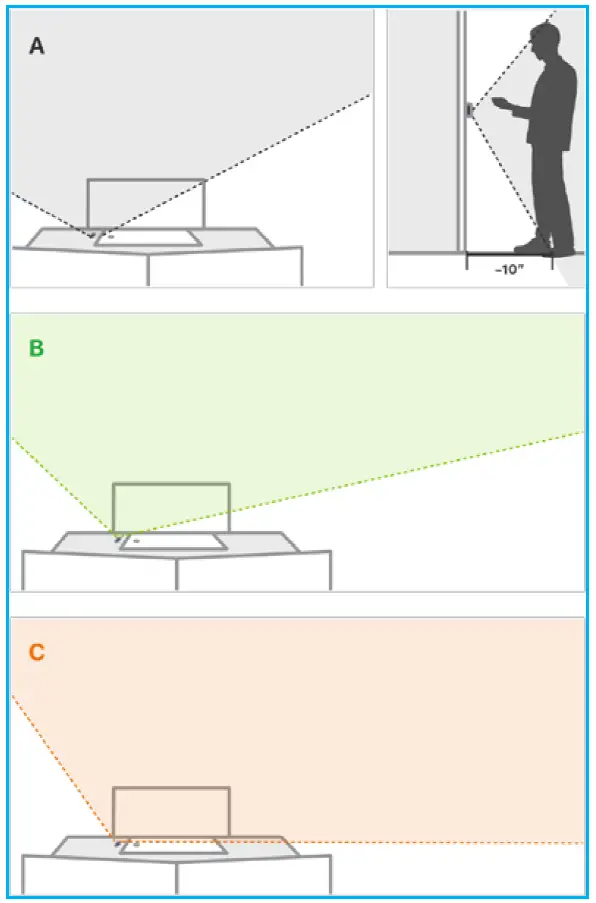
At the installation location, an angled mounting bracket can be used to modify the field of view. Choose a mounting bracket type best suited for your installation setup. Installation scenarios corresponding to mounting bracket types A, B, and C are provided below to guide your decision.
Install Mounting Bracket

Thread the existing wires through the mounting bracket. Install the mounting bracket to the wall using the included mounting screws.
Thread Wire Extenders
Thread the wire extenders through the backplate. Remove the wire caps.
Crimp Wires
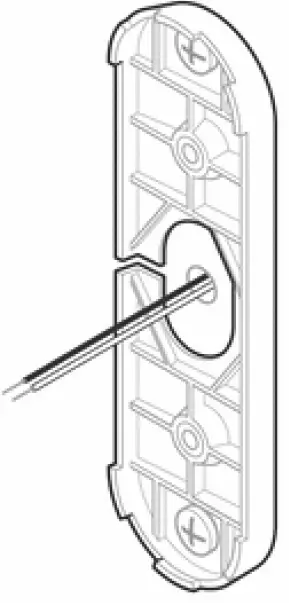
Crimp the two wires coming through the backplate to the existing wires threaded through the mounting bracket.
Mount Doorbell Backplate
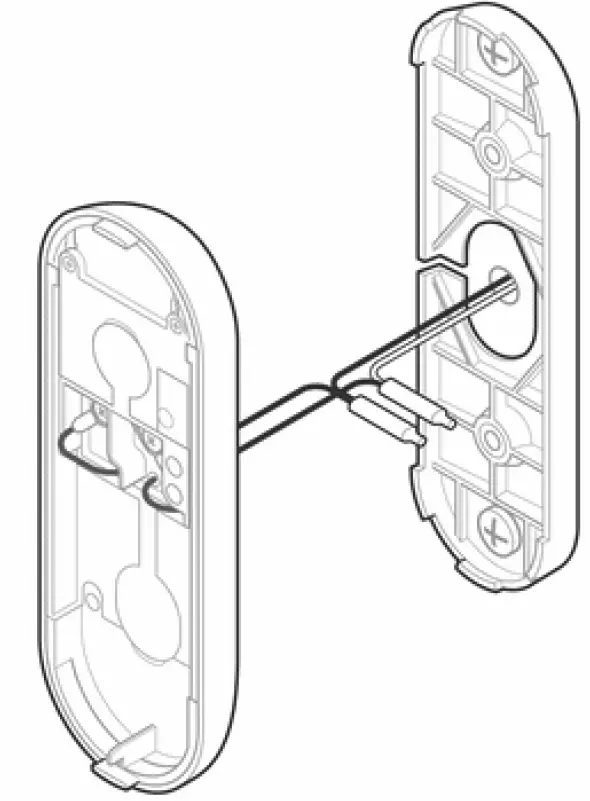
Install the doorbell backplate to the mounting bracket using the included machine screws.
Verify LED Light
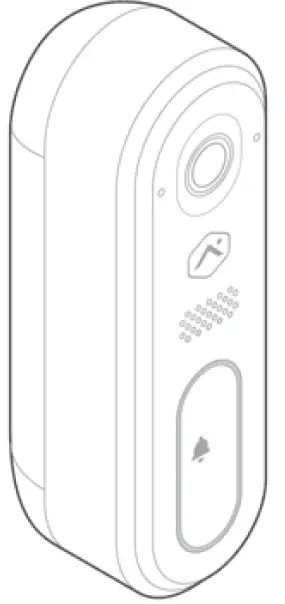
Attach the doorbell to the backplate and turn the electricity back on. Check that the doorbell camera’s light is flashing white after the boot process is complete. If the LED is solid red, press and hold the button until the light begins alternating green and red.
Federal Communication Commission Interference StatementThis equipment has been tested and found to comply with the limits for a Class B digital device, pursuant to Part 15 of the FCC Rules. These limits are designed to provide reasonable protection against harmful interference in a residential installation. This equipment generates, uses, and can radiate radio frequency energy and, if not installed and used in accordance with the instructions, may cause harmful interference to radio communications. However, there is no guarantee that interference will not occur in a particular installation. If this equipment does cause harmful interference to radio or television reception, which can be determined by turning the equipment off and on, the user is encouraged to try to correct the interference by one or more of the following measures:
- Reorient or relocate the receiving antenna.
- Increase the separation between the equipment and receiver.
- Connect the equipment into an outlet on a circuit different from that to which the receiver is connected.
- Consult the dealer or an experienced radio/TV technician for help.
FCC Caution: Any changes or modifications not expressly approved by the party responsible for compliance could void the user’s authority to operate this equipment.
This device complies with Part 15 of the FCC Rules. Operation is subject to the following two conditions: (1) This device may not cause harmful interference, and (2) this device must accept any interference received, including interference that may cause undesired operation.This device and its antenna(s) must not be co-located or operating in conjunction with any other antenna or transmitter.For products available in the USA/Canada market, only channel 1~11 can be operated. Selection of other channels is not possible.
FCC Radiation Exposure Statement:This equipment complies with FCC radiation exposure limits set forth for an uncontrolled environment. This equipment should be installed and operated with a minimum distance of 20cm between the radiator & your body.
FAQS
No power only.
It is hardwired, no battery in this unit.It does work with my telus home.
Here are the following types of devices and partners you can choose to have installed and configured in your home:Smart Thermostats – Lux, Trane, Linear, Lennox and Radio Thermostats.Video Doorbells – Skybell.Sensors – image, temperature, motion and window (glass break)Door Locks – danalock, Yale, Schlage and Kwikset.
The ADC-VDB770, Alarm.com’s next-generation video doorbell camera and the latest installment in the Design Studio Series product line, has an expansive 150° vertical Field of View (FOV), allowing you to monitor the entire doorway area.
Alarm.Com ADC-VDB770 Video Doorbell by alarm.com Incorporated.
All Alarm.com IP cameras, the 2GIG-HD100 and most analog cameras with a BNC connection (when attached to an Alarm.com video server) are compatible. The Alarm.com Video servers do not support the HDCVI (HD over Coax) input type.
No, the Skybell HD and Skybell HD Slim Line doorbells are compatible with Alarm.com video service.
The transformer is a metal box with two terminals connected to the doorbell wires. It takes the standard electrical voltage in your home, in most cases 110 to 120 volts, and lowers it to about 10 to 24 volts. This keeps doorbells powered at the right voltage for optimal operation.
The streaming video recorder (SVR) is a device that allows indoor and outdoor cameras to record 24/7. It has a built-in hard drive that stores all videos and typically holds 1TB of storage.
Alarm.com uses a Java web player to live-stream video from your home security cameras to your browser, the Java player source code is easily decompiled and can grant an attacker access to the camera and home network.
No, you cannot use Alarm.com Cameras without service. All Alarm.com Security Cameras require that the user has active monitoring service. The monitoring plan needs to include video surveillance service. Alarm Grid customers need a Platinum Plan, a Self-Platinum Plan, or a Video-Only Plan.
But users should be aware that the Arlo Pro will not work with the Total Connect 2.0 and Alarm.com services. However, the Arlo Pro is still a great accessory for pairing with systems that connect with these platforms as a way for conveniently adding video surveillance to the home.
Ring says its app will support any camera using the Open Network Video Interface Forum standard, or ONVIF. This is a standard that lets smart devices talk to each other, regardless of the manufacturer.
A home can have multiple Ring video doorbells, all functioning simultaneously. Each device can be given a unique name and ring sound in the Ring app so that the user knows which door a visitor is at. If you have a large home with multiple exterior doors, this feature works great.
Doorbells are low-voltage applications and they will not work without a transformer.
Doorbell transformers are usually tucked away along an exterior wall in your garage, basement, or attic. It will be in the general vicinity of your doorbell(s), typically close to the ceiling of that room. It will be attached to the side of a wall-mounted electrical junction box.
Continuous Recording. Capture 24/7, high-definition, continuous recording with the Stream Video Recorder (SVR). The SVR is bandwidth optimized so it won’t slow your internet connection. Like a traditional security system or a cell phone plan, Alarm.com systems have an up-front equipment cost and a monthly service fee.
VIDEO
 report this ad
![]()
References
[xyz-ips snippet=”download-snippet”]