ALLEGION VON DUPRIN Rim Panic Exit
Device Installation Guide

OVERVIEW AND DOOR PREPARATION
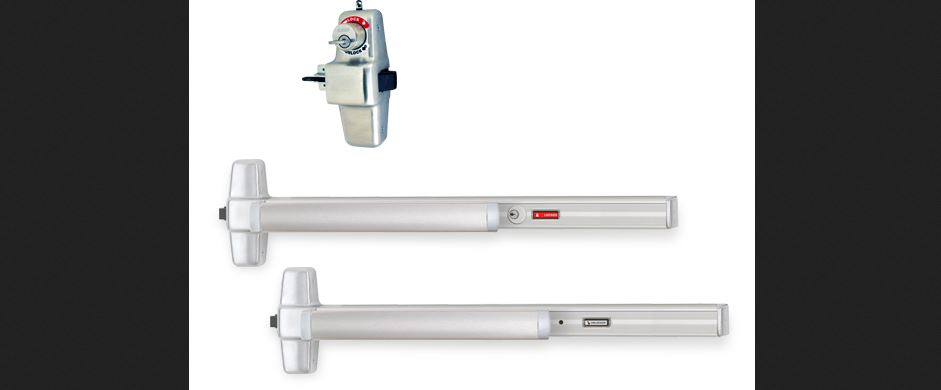
98/9950WDC
Instead of traditional rods, concealed vertical cables are utilized, making use of a proven technology that enables quick installation and allows for easy maintenance. Simplified sizing, ease of adjustment and greater door integrity make the Wood Door Concealed exit device a more secure solution, without the complexity associated with traditional concealed systems. Another key benefit of the system is the ability to make adjustments to the system by simply removing the scalp plate from the edge of the door.
If you have any questions or comments please visit the resources below or give us a call so we can help get you on your way. Thank you for your continued support of Von Duprin.
Technical Support hot line: 877-671-7011
Scan this QR code or visit us online at kc.allegion.com to access the Allegion Knowledge Center.

Need a reader for your phone?For iPhone: QR ReaderFor Android: QR Barcode Scanner
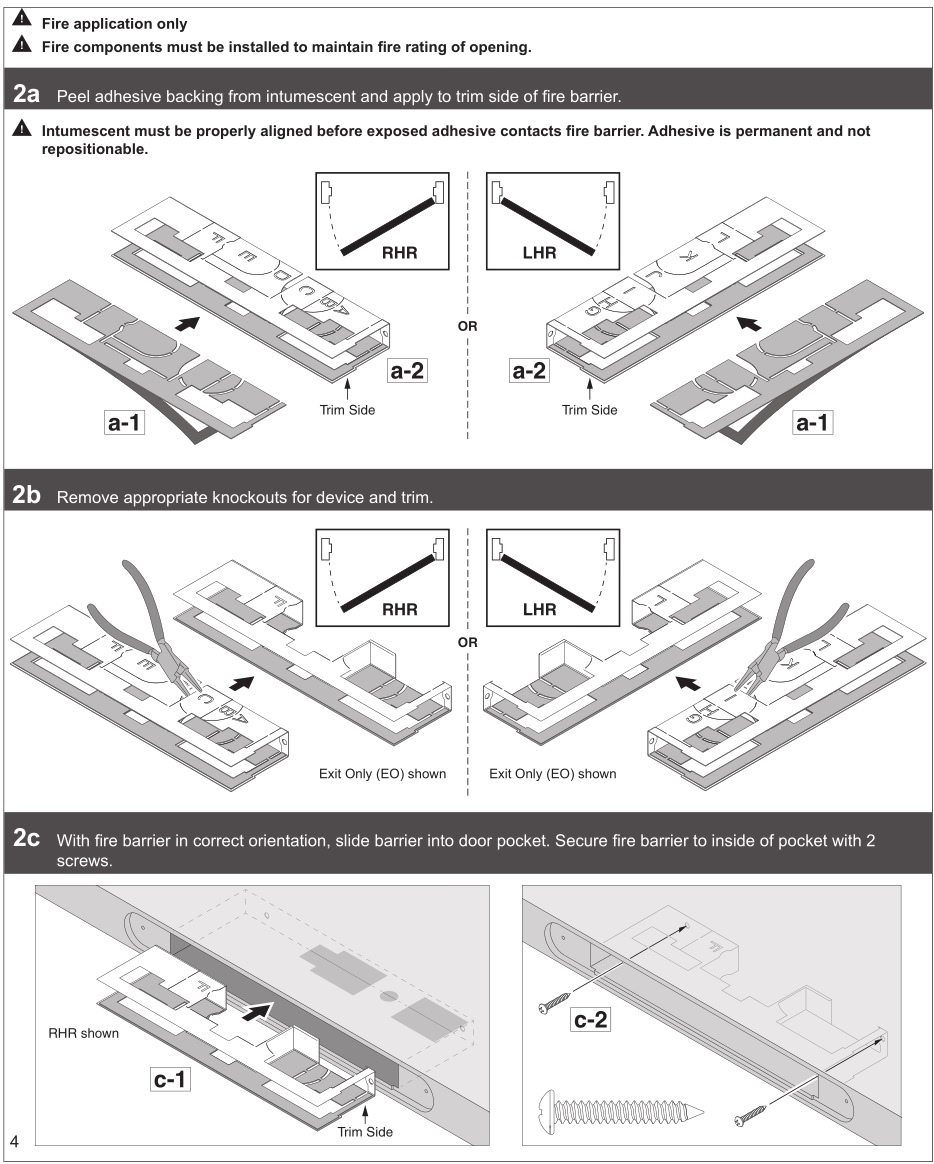
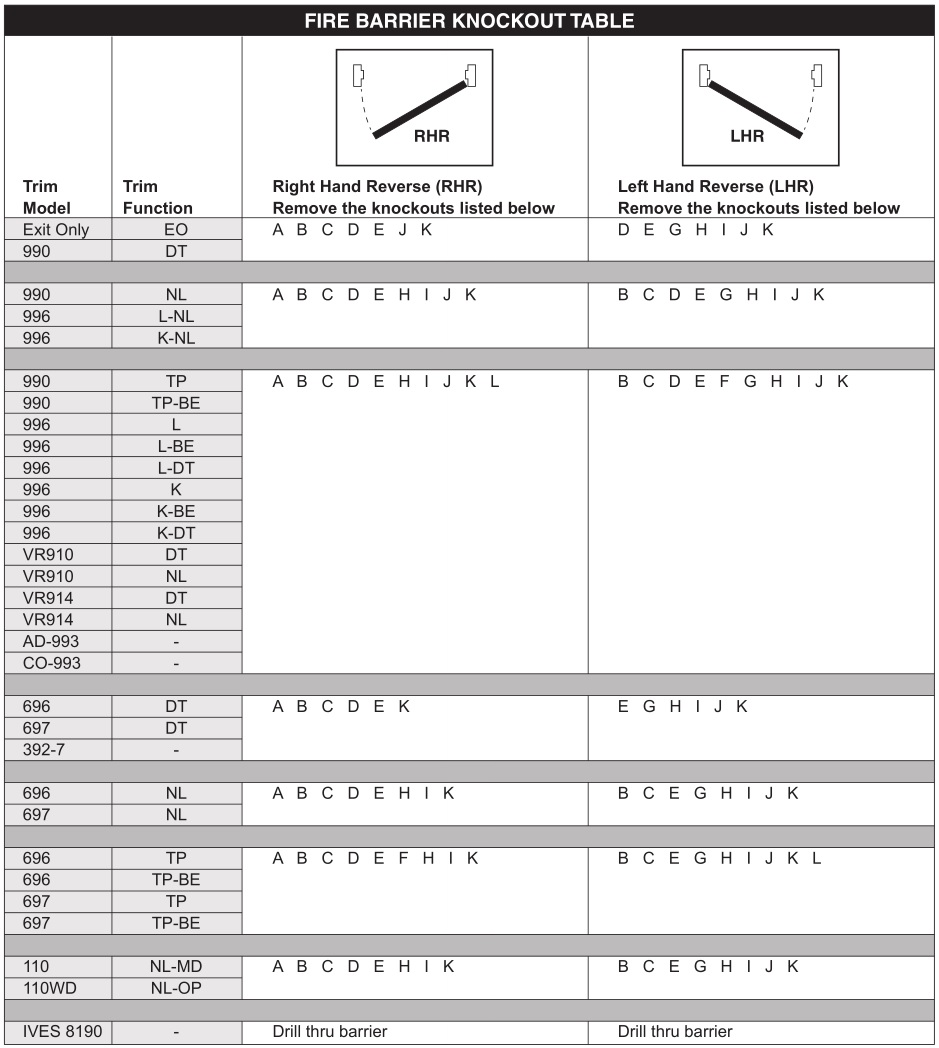
FIRE BARRIER
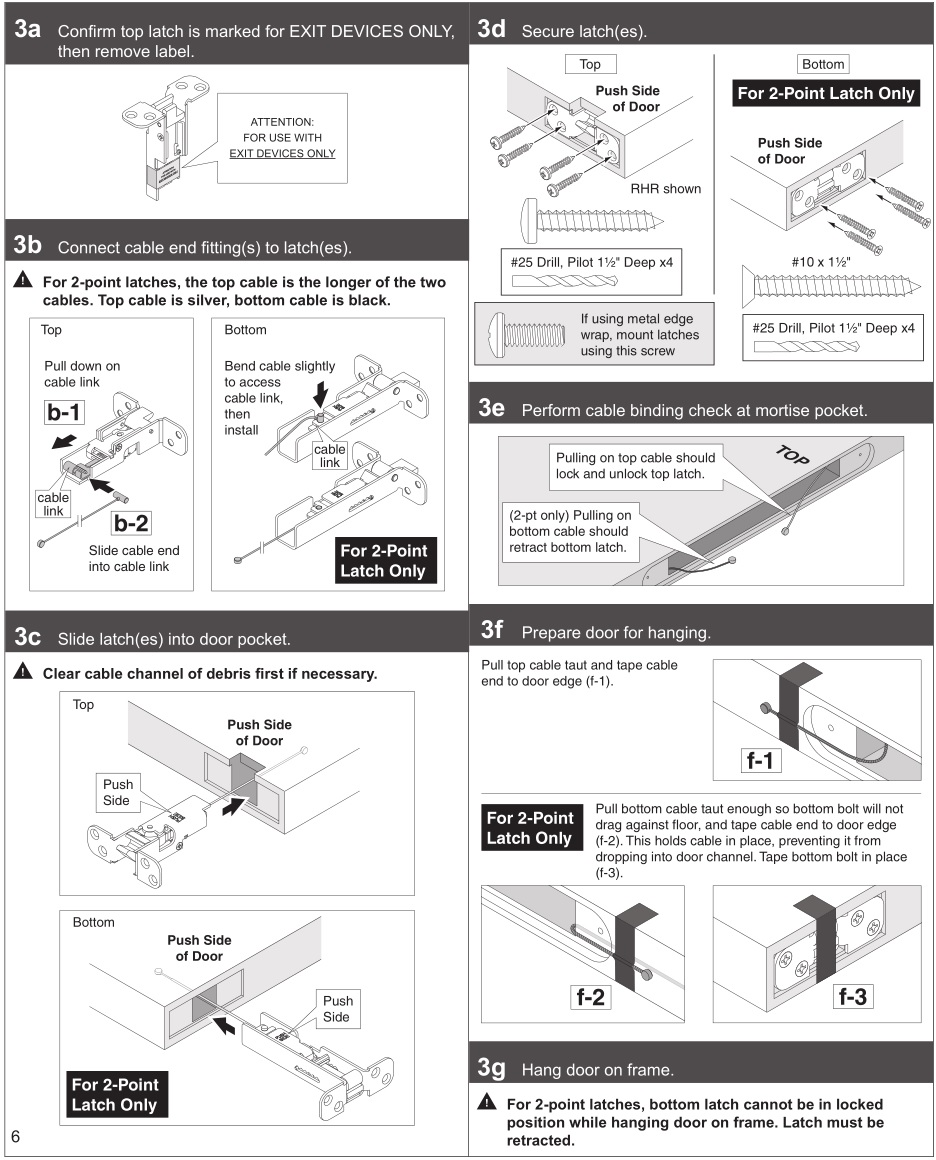
LATCH INSTALLATION
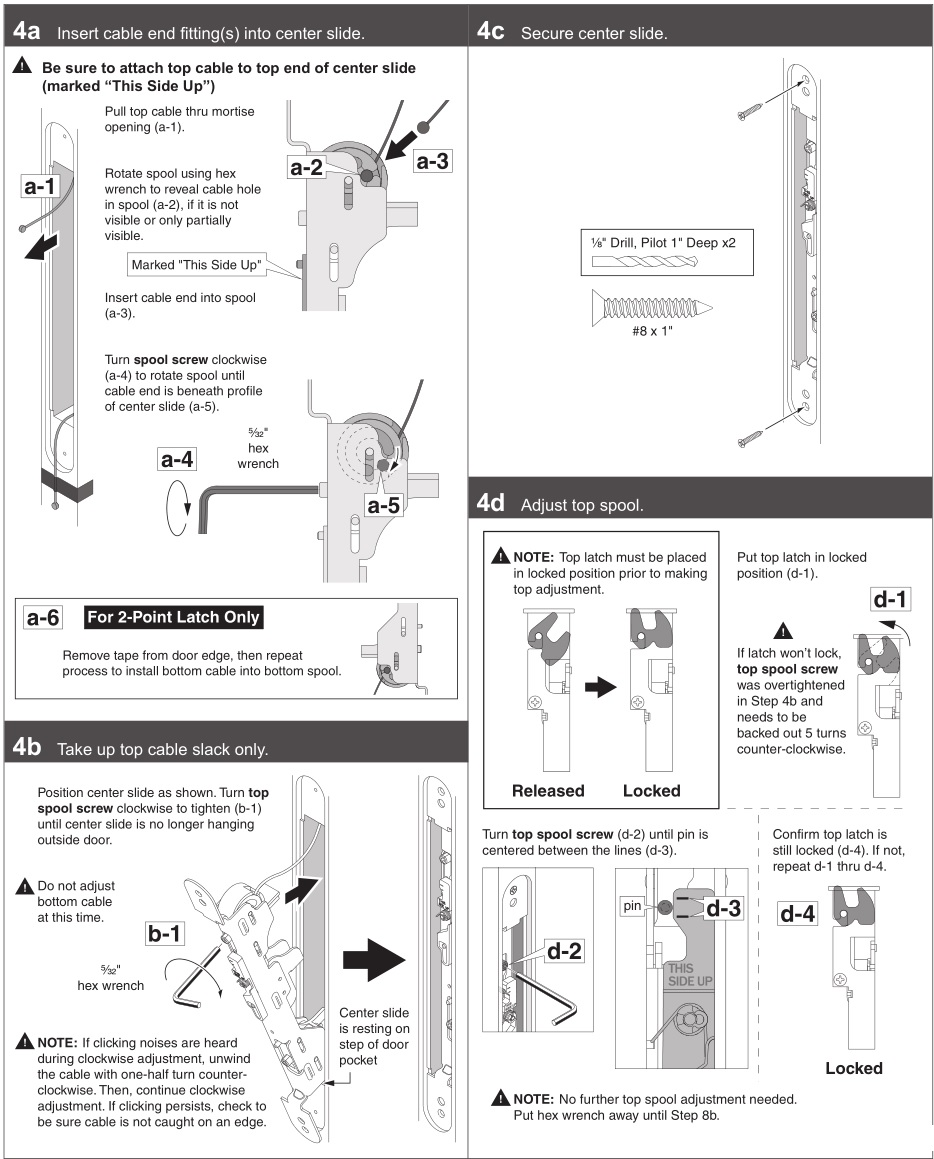
CABLE INSTALLATION
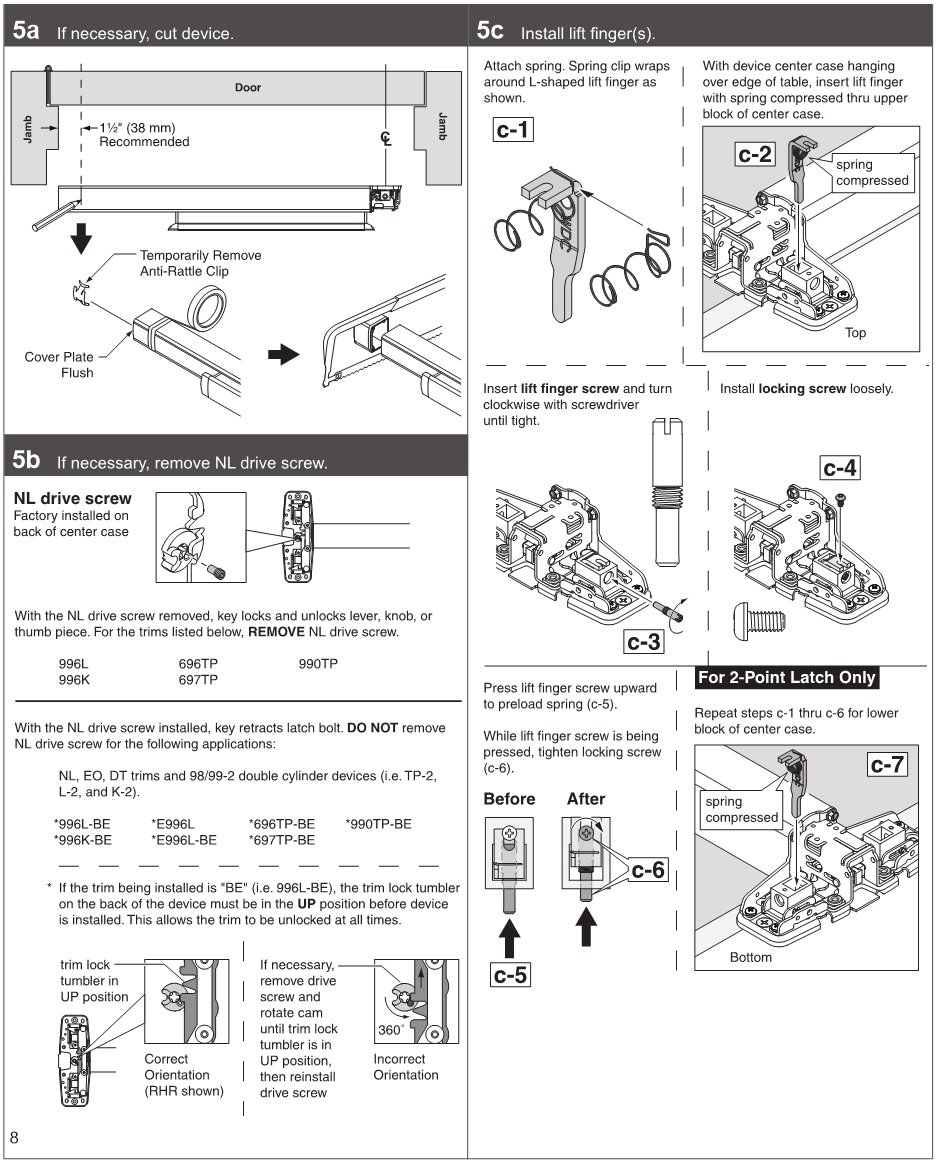
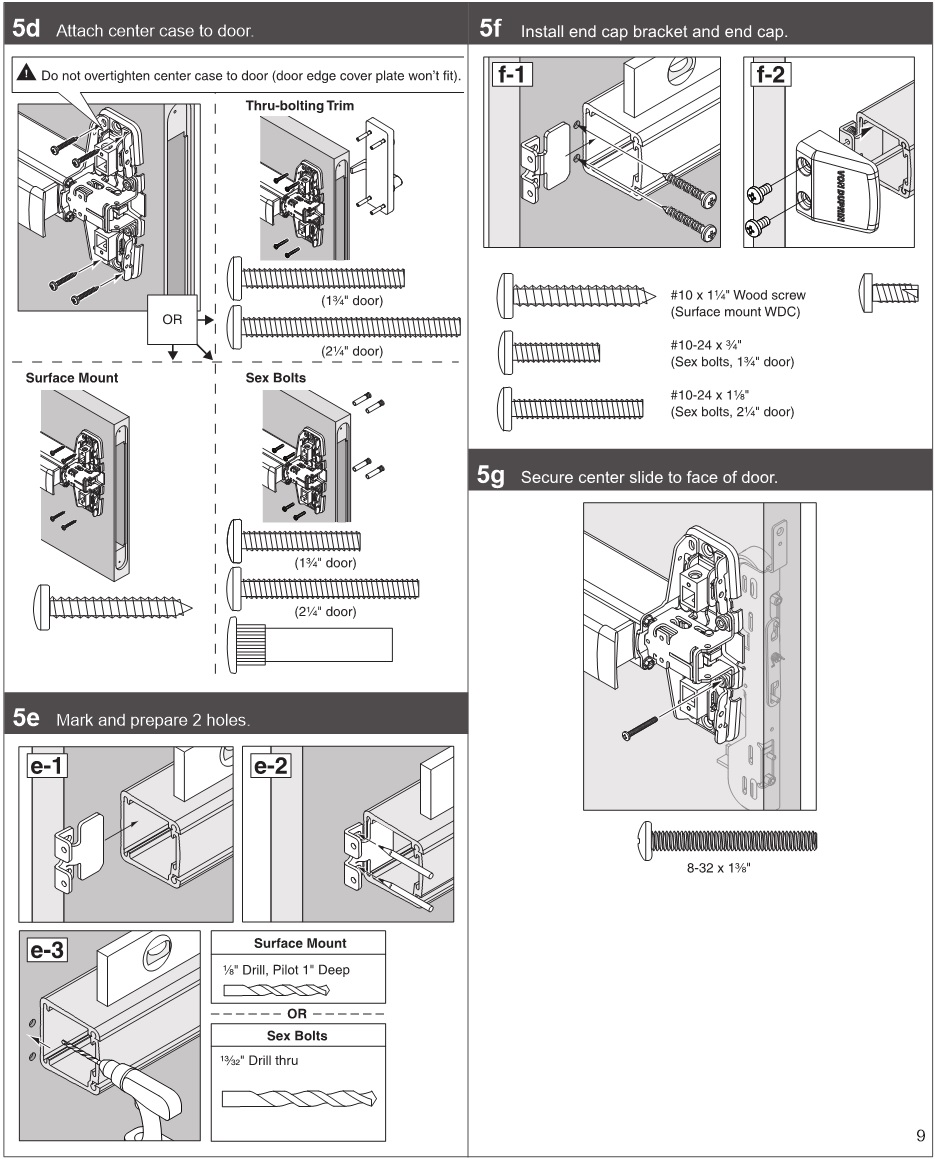
DEVICE INSTALLATION
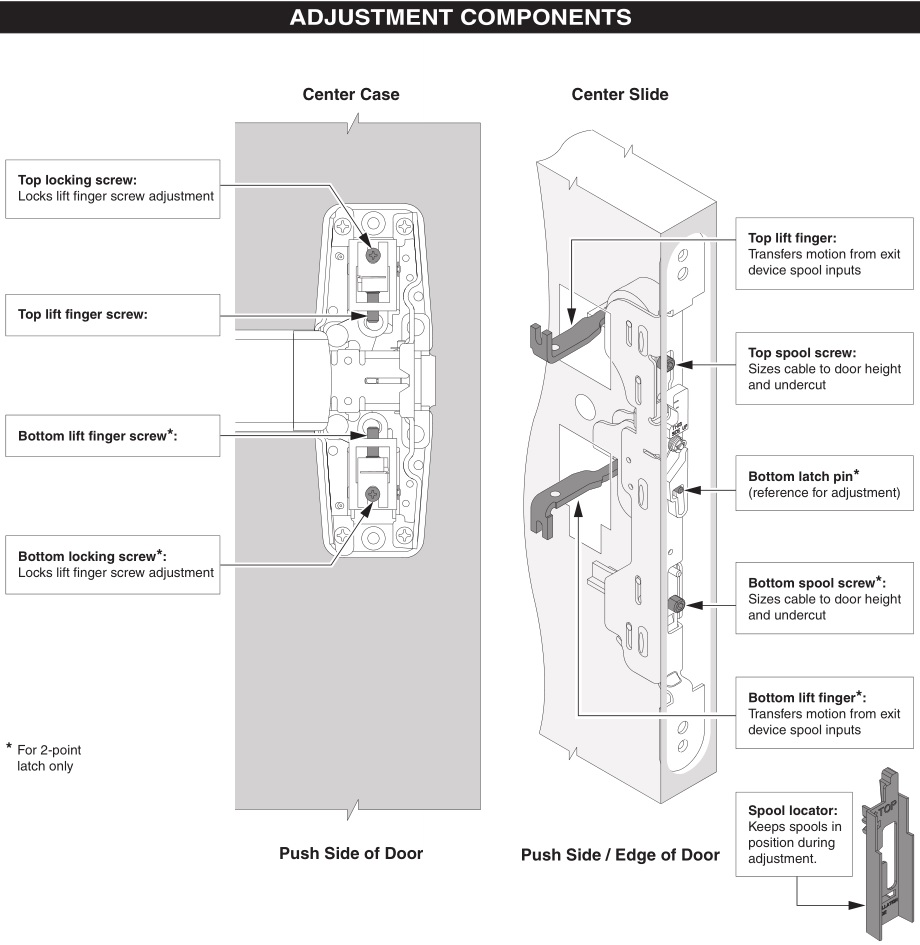
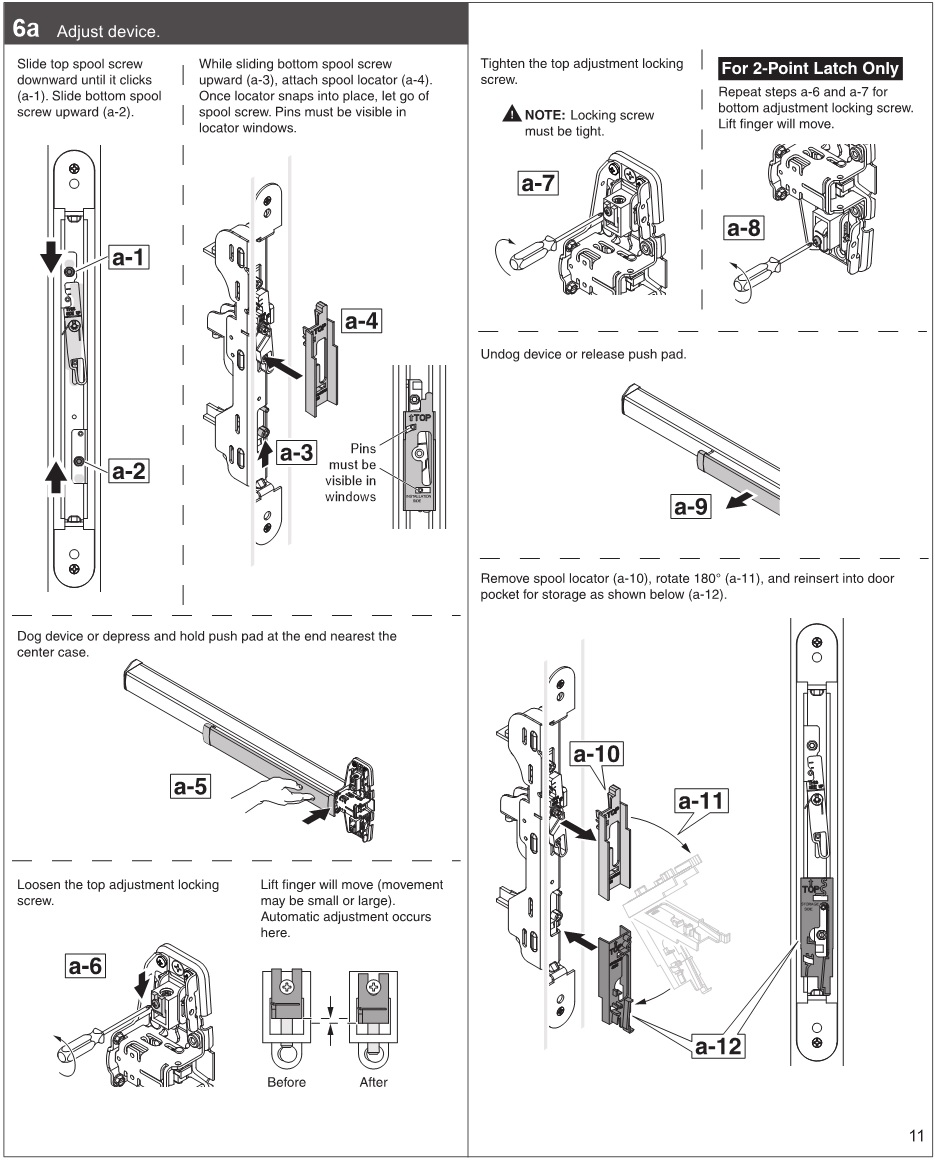
DEVICE ADJUSTMENT
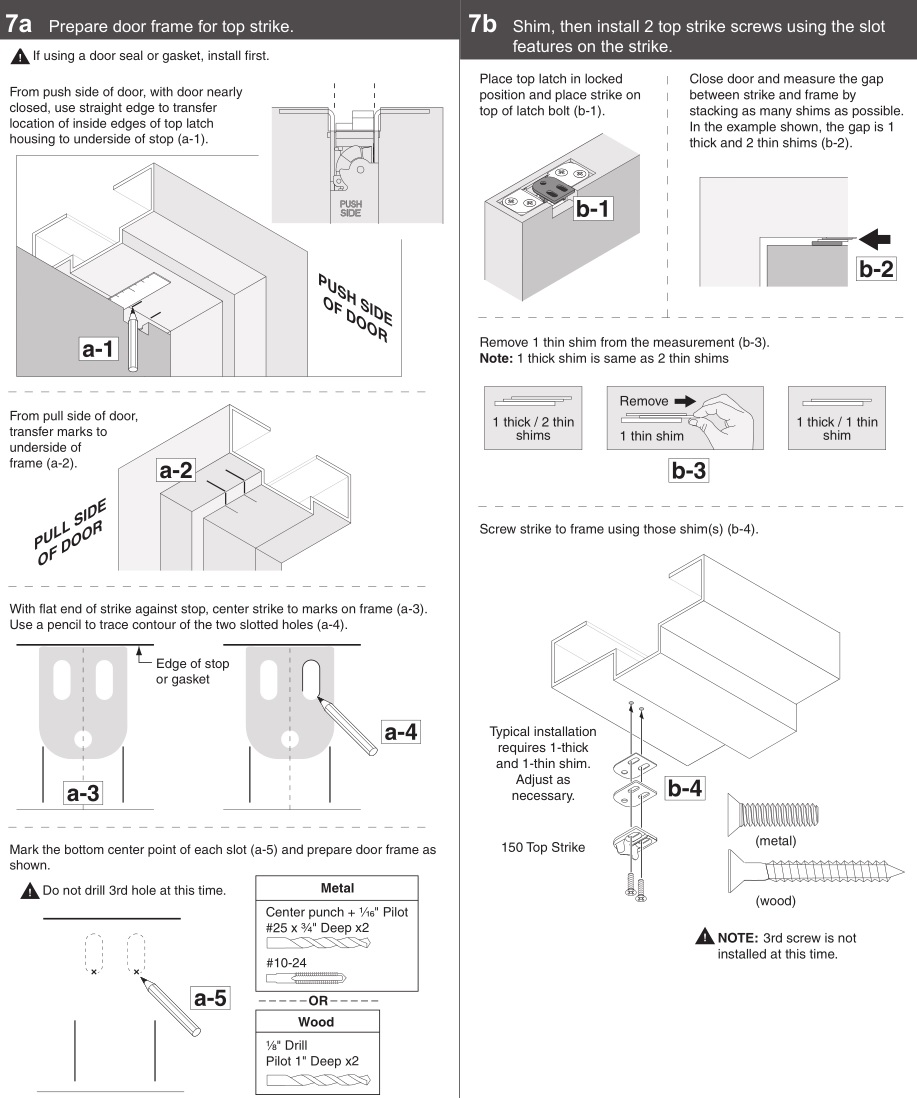
STRIKES AND FIRE PIN
BOTTOM LATCHBOLT CLEARANCE
![]()
TOP STRIKE AND COVERS
TROUBLESHOOTING
If latches do not retract when pushpad is depressed:
Remove cover plate from edge of door
- Pull down on top spool screw. If the top latch fails to actuate, readjust top spool (Steps 4d-1 thru 4d-4).
- Pull up on bottom spool screw. If the bottom latch fails to actuate, readjust bottom latch clearance (Steps 8b-1 thru 8b-4).
- If both actuate and the door is not functioning, proceed to next steps.
Remove center case cover
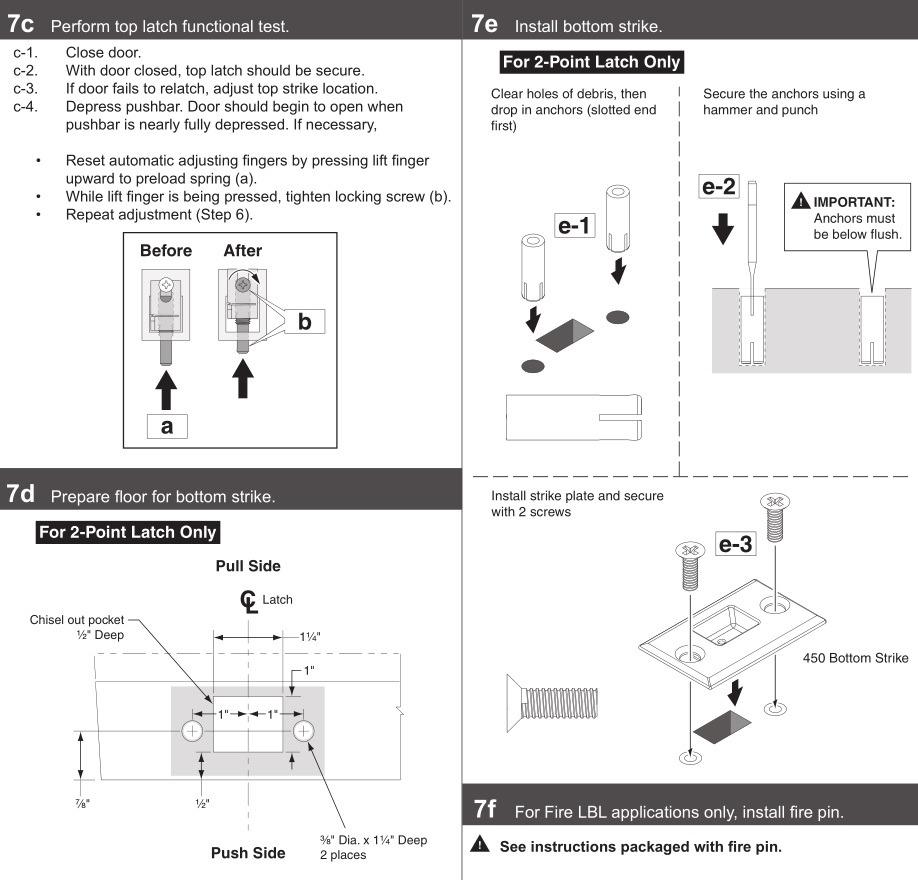
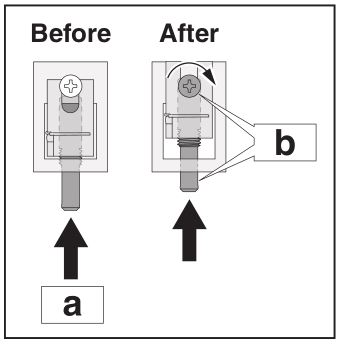
- Reset automatic adjusting fingers by pressing lift finger upward to preload spring (a).
- While lift finger is being pressed, tighten locking screw. (b)
- Repeat adjustment (Step 6).
If bottom bolt does not stay up while door is open:
- Confirm mounting screw is securing center slide to face of door (Step 5g).
- Confirm top latch is sufficiently shimmed (Step 7b).
- Turn top spool screw in Step 4d-2 one click (¹⁄₄ turn) counterclockwise (CCW).
Customer Service1-877-671-7011www.allegion.com/us
![]()
© Allegion 2019Printed in U.S.A.24739468 Rev. 08/19-f
References
[xyz-ips snippet=”download-snippet”]