Instruction Manual
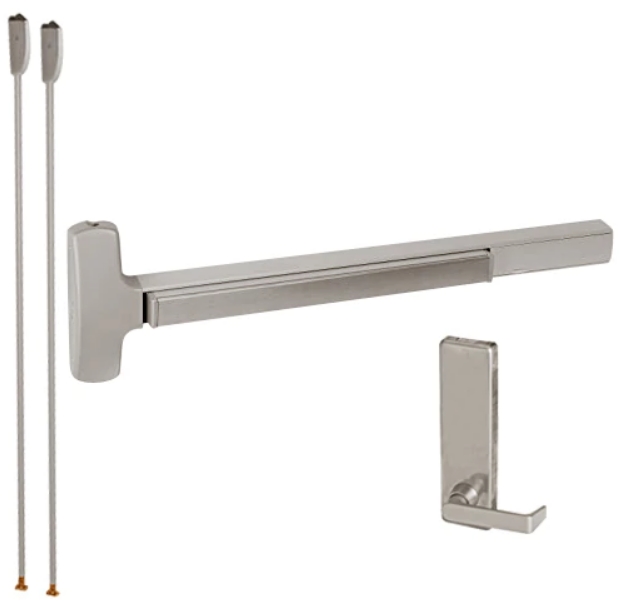
Falcon 25-C/F-25-C/F-25-WDC-90
Parts
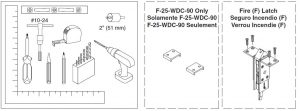
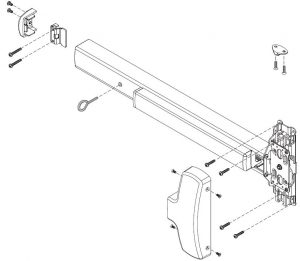
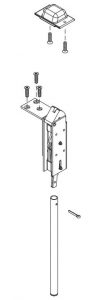
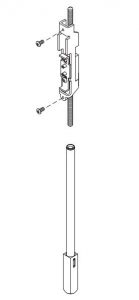

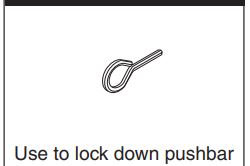
 If sexbolts are in box, see Sexbolt Preparation on page 7
Installation Instructions
- Prepare Door Cutout
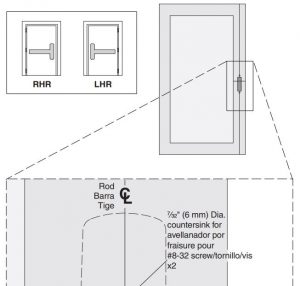
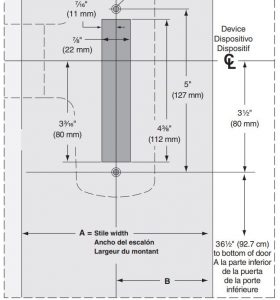
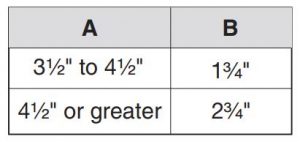
2. Mark 4 Holes
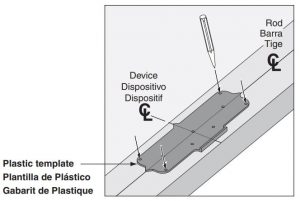
3. If Installing Trim, Go To Trim Instructions
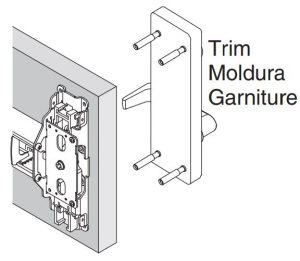
4. Prepare 4 Holes

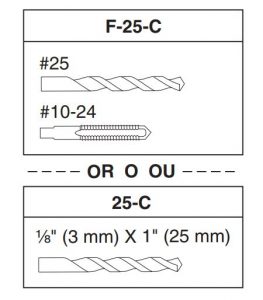
5. Prepare Top Latch Holes
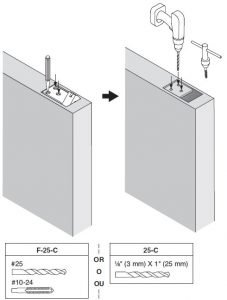
6. Prepare Bottom Latch Holes
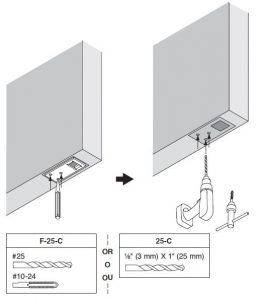
7. Prepare Hole for Release Bracket
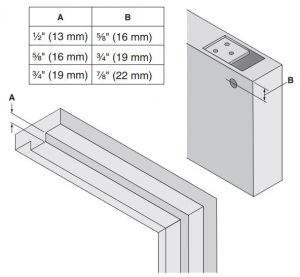
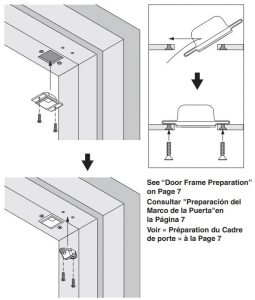
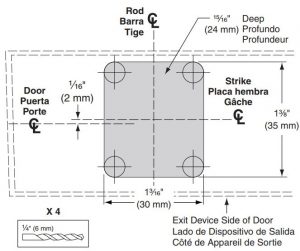
8. Install Top Strike & Release Bracket
9. Prepare Top Rod Length
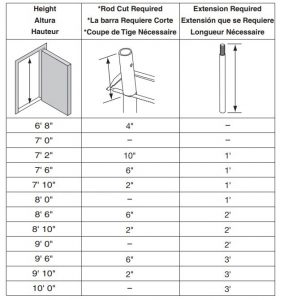
*Do not cut threaded end of top rod
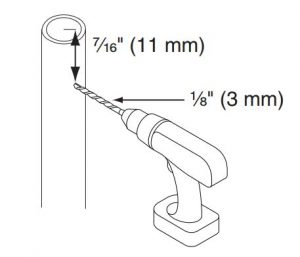
10. Drill New Hole, if Necessary
11. Attach Top Rod to Latch
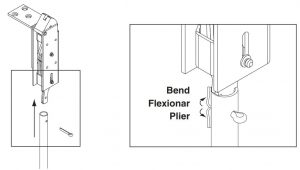
12. Assemble Rods & Latches
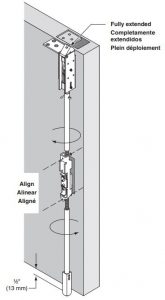
13
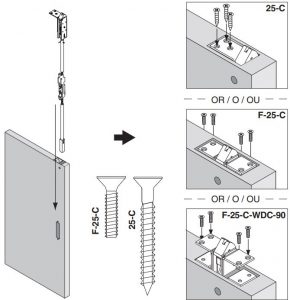
14.
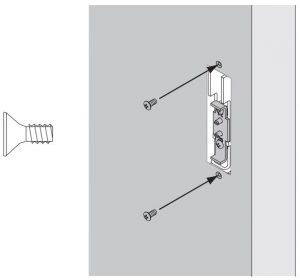
15
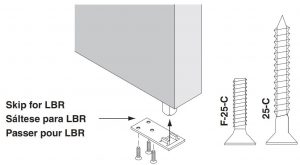
16. Grout Strike Into Floor
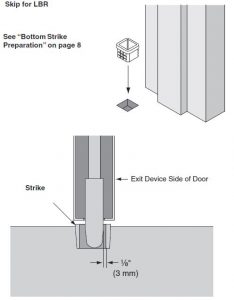
17. Attach Door to Frame
18. Adjust Center Slide with Latch Fully Extended
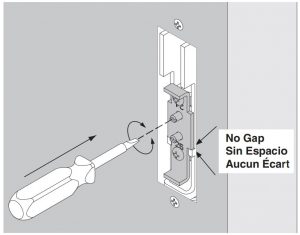
19. Verify Latch Retraction
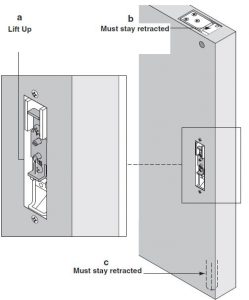
20. Verify full latch extension
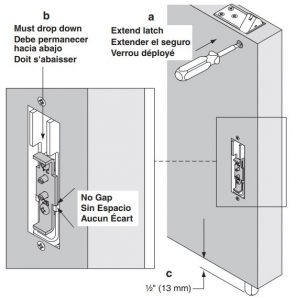
21. If Necessary, Cut Device
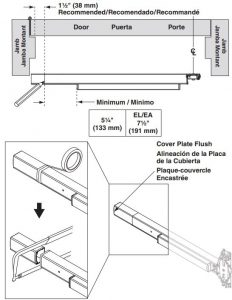
22. If Necessary, Reverse Handing
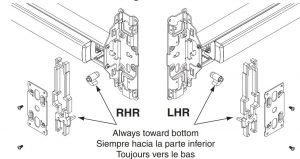
23
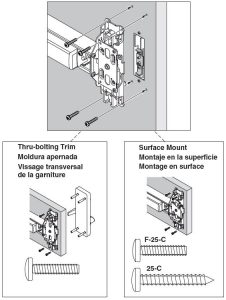
24. If Necessary, Adjust per Steps 19 & 20
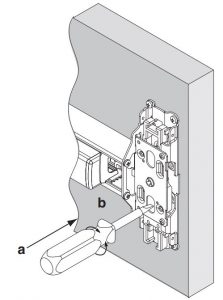
25. Mark and Prepare 2 Holes
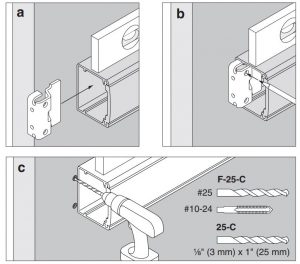
26
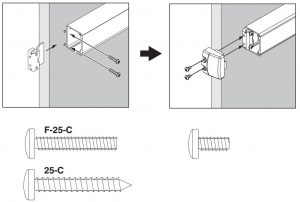
27
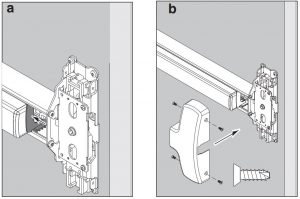
Sexbolt Preparation
 If sexbolts are in box, during steps 4 and 26 prepare holes and install them as shown below.
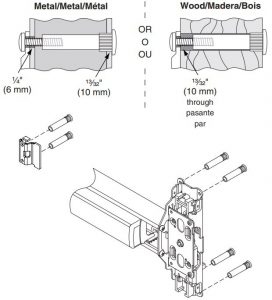
Door Frame Preparation
Do not use slots for position. Drill as directed here.
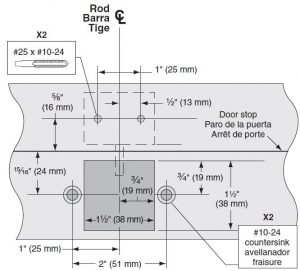
Door & Frame Preparation
Top Latch (Fire)
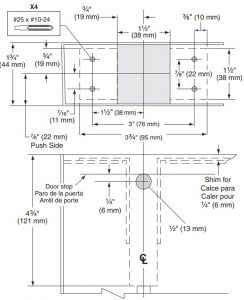
Bottom Bolt Guide
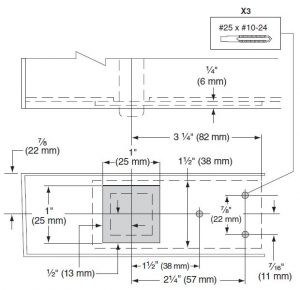
Top Latch (Panic)
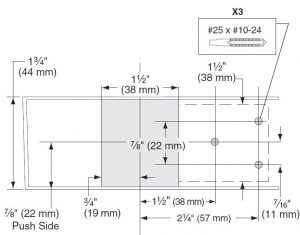
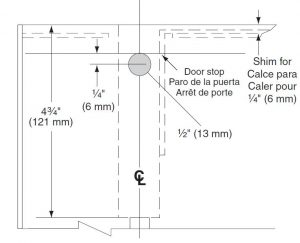
Bottom Strike Floor Cavity
Customer Service
Call: 1-877-671-7011
Visit: www.allegion.com/us

© Allegion 2019 Printed in U.S.A. 640009-00 Rev. 03/19-g
Falcon 25-C/F-25-C/F-25-WDC-90 Instruction Manual – Falcon 25-C/F-25-C/F-25-WDC-90 Instruction Manual –
Questions about your Manual? Post in the comments!

