Instruction Manual

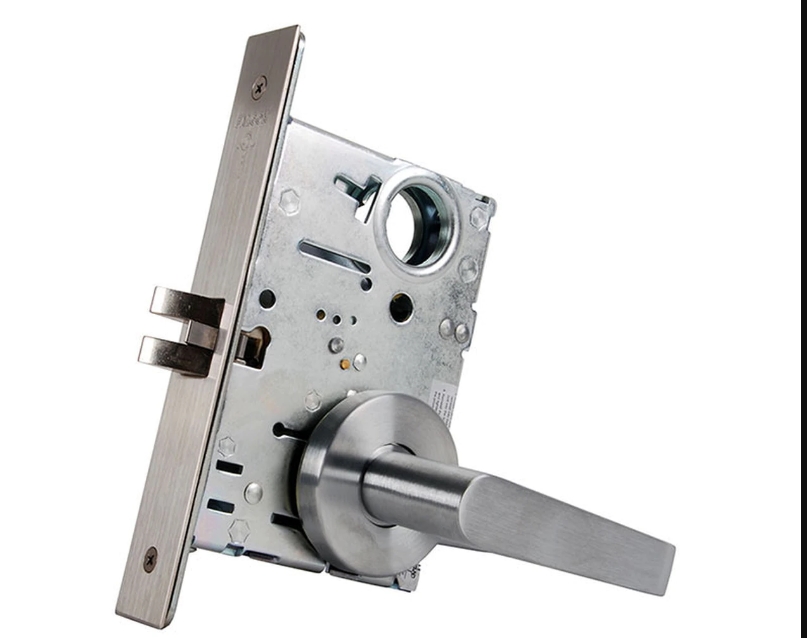
Falcon MA-Lock MA12
Installation Instructions
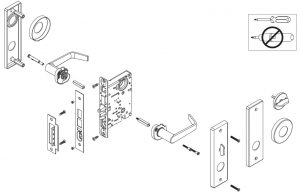
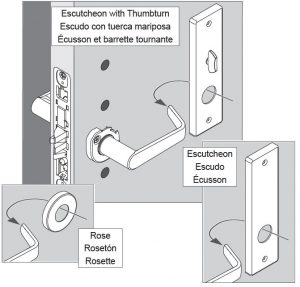
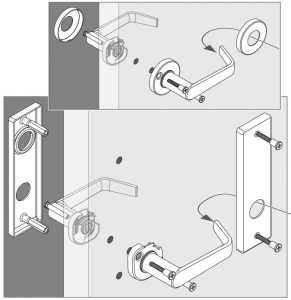
Parts
For MA12, MA18, and MA161 function installation, see page 5.
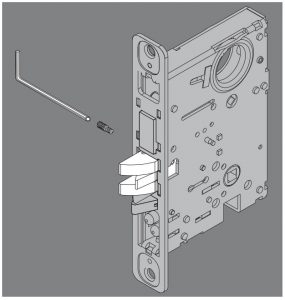
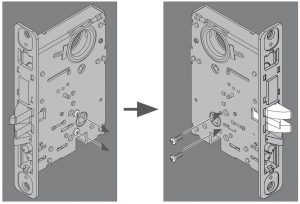
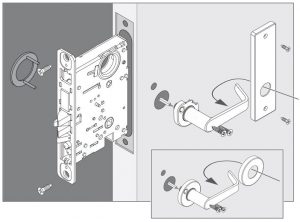
- Install lockcase.
2. Install spindles and screw together.

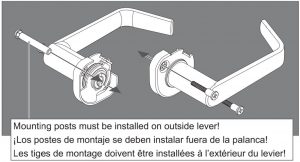
3. Install lever posts and screws
4. Install lever assemblies.

5. Identify trim and install.
Alternative lever and trim install.(Longitude and Latitude only)
a. Install Spring Cage.

b. Install Rose, Escutcheon or Escutcheon with Thumbturn. c. Install Lever and tighten Set Screw.
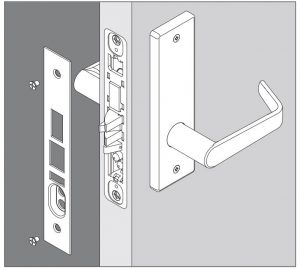
6. Identify trim and secure to door.

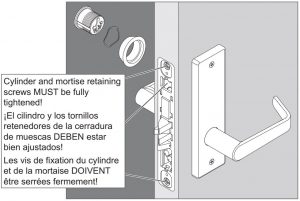
7. If included, install cylinder.
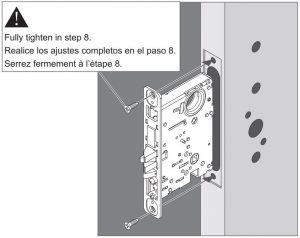
8. Install Armor Front.
Mortise Rehanding (if required)
a. Remove screw.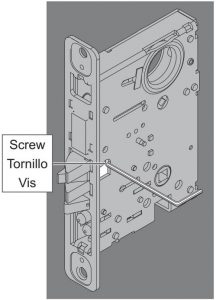 b. Remove latch bolt and rotate 180.˚
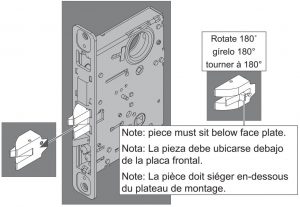
c. Reinstall latch bolt and screw.
d. Move handing screws to opposite side.
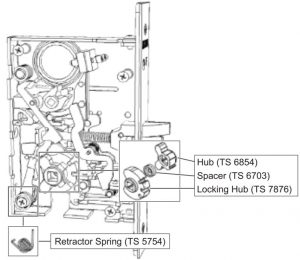
MA551 Holdback Lock Handing
- Remove cover (not shown).
- Remove retractor spring.
- Reverse the order of hub and locking hub.
- Replace the retractor spring and cover.
- Change direction of latch bolt head if necessary.
MA551 Holdback
To activate holdback function:
- From the unlocked position, rotate outside knob/lever to retract latch bolt.
- Rotate key 360˚ counterclockwise.
- Release lever/knob.
To deactivate holdback function:Insert key and rotate 360˚ clockwise.
Special Function Installation
MA12 – Single Dummy Installation

MA18 – Double Dummy Installation
MA161 – Exit or Communicating Lock
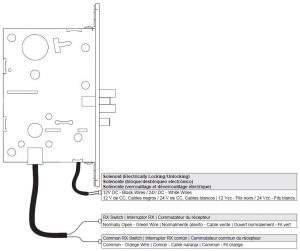
Electrically Locking
MA851 Electrically Locked (Fail Safe):Outside trim is continuously locked electrically. The latchbolt is retracted by a key outside or by the knob/lever inside. Switch or power failure allows the outside knob/lever to retract the latchbolt.
The auxiliary latch deadlocks the latchbolt when the door is closed. The inside knob/lever is always free for immediate exit.
MA881 Electrically Unlocked (Fail Secure):Outside trim is unlocked electrically. During switch or power failure, the latchbolt is retracted by a key outside or by knob/lever inside. The auxiliary latch deadlocks the latchbolt when the door is closed.The inside knob/lever is always free for immediate exit.

Typical Installation:All installations should be in accordance with local electrical codes and National Electrical Code NFPA #70. It is recommended that each lock have its own 12 or 24 volt transformer. Be sure to select the proper transformer for the lock. Two or more locks may be operated in parallel from a single transformer provided it has the necessary current rating. DO NOT connect locks in series from a higher voltage rated transformer.
Damage to locks may occur if they connect to a supply circuit that also contains electromagnetic devices. The transient voltage must be suppressed at the equipment producing them before connecting the locks to a circuit. A varistor rate at 35 volts (at peak current) may be used for transient voltage protection. IMPORTANT: Cable must be routed and tucked to fit. Ensure that there are no wires exposed or pinched during positioning.
Request to Exit (RX) Only
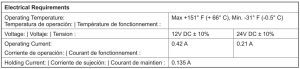
Specifications

- Prepare mortise pocket in door per template. Access for the wiring to be per installer’s requirements. It is recommended that an access channel is bored to provide contact from the electric transfer hinge or other means of transfer to the mortise pocket.
- Connect wires as necessary (some options may not be used), and slip the mortise into the prepared pocket in the door. Take care to ensure wires are not pinched or damaged.Note: It is recommended that all wiring be done by a licensed electrician familiar with the supporting equipment.
- Always ensure door operates properly before locking!
Customer Service
Call: 1-877-671-7011 Visit: www.allegion.com
![]()
© Allegion 2020Printed in U.S.A.Q513-067 Rev. 07/20-h
Falcon MA-Lock MA12 Instruction Manual – Falcon MA-Lock MA12 Instruction Manual –
Questions about your Manual? Post in the comments!