
User Manual
Quick Start Guide
Interactive Experience
For an improved installation experience, follow the link below or scan the QR code for online interactive instructions, warranty, and reference information.
https://instructions.allegion.com/instr/86/2110

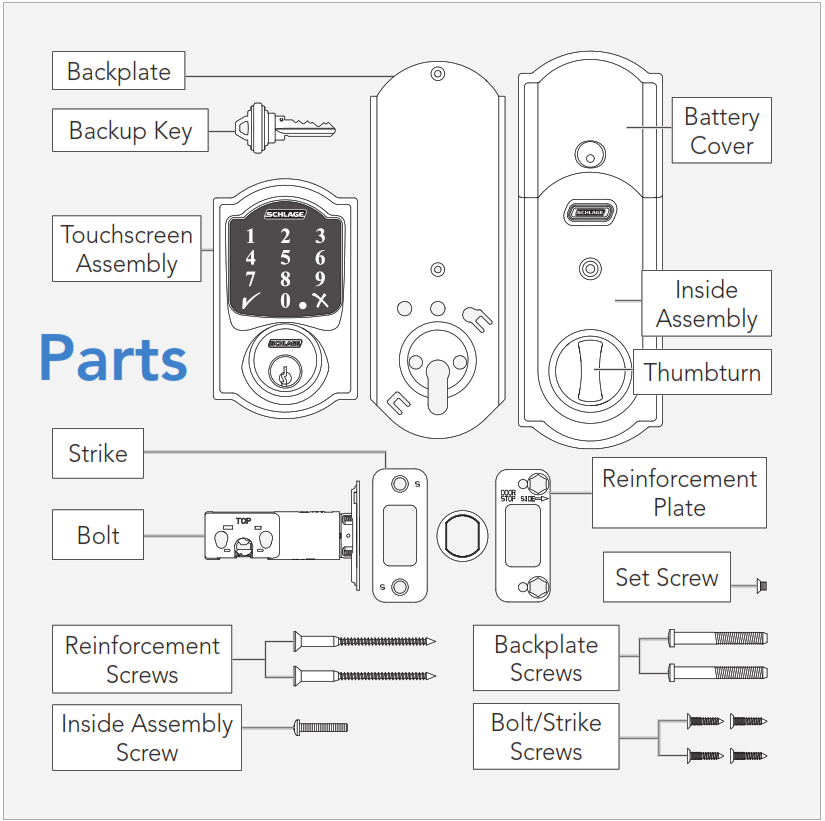
Tools

Phillips screwdriver Don’t use a power drill!
Support
![]() U.S.A.: 888-805-9837Canada: 800-900-4734Mexico: 018005067866
U.S.A.: 888-805-9837Canada: 800-900-4734Mexico: 018005067866
Setup Guide
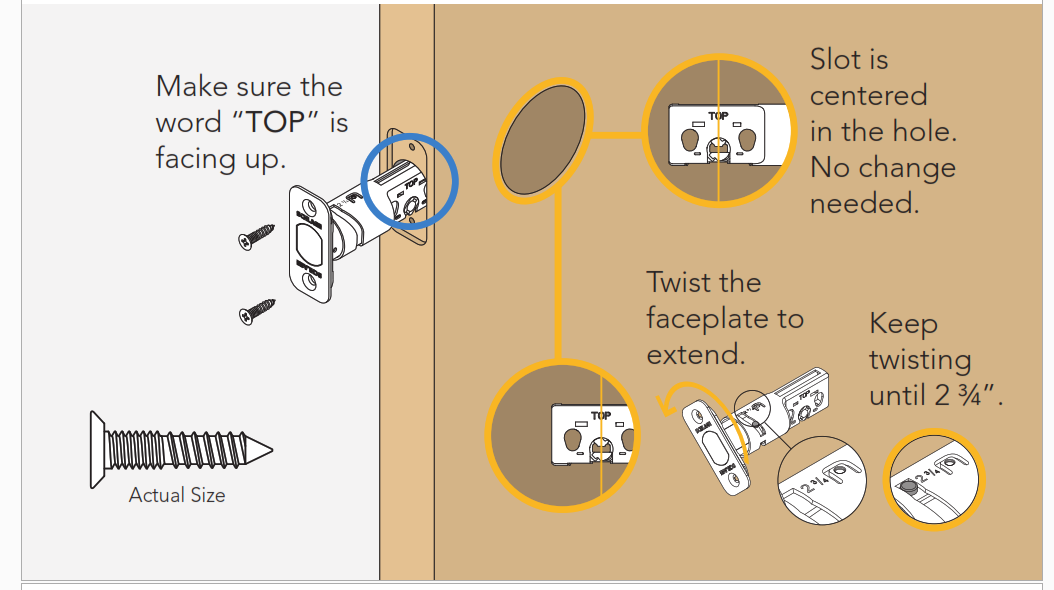
Step 1: Install the bolt.
You may have to adjust your bolt length. Make sure the slot in the bolt is centered in the hole.
Need Help?See “Help with Step 1” in the online instructions. The link is on the back cover or the third page of this guide.
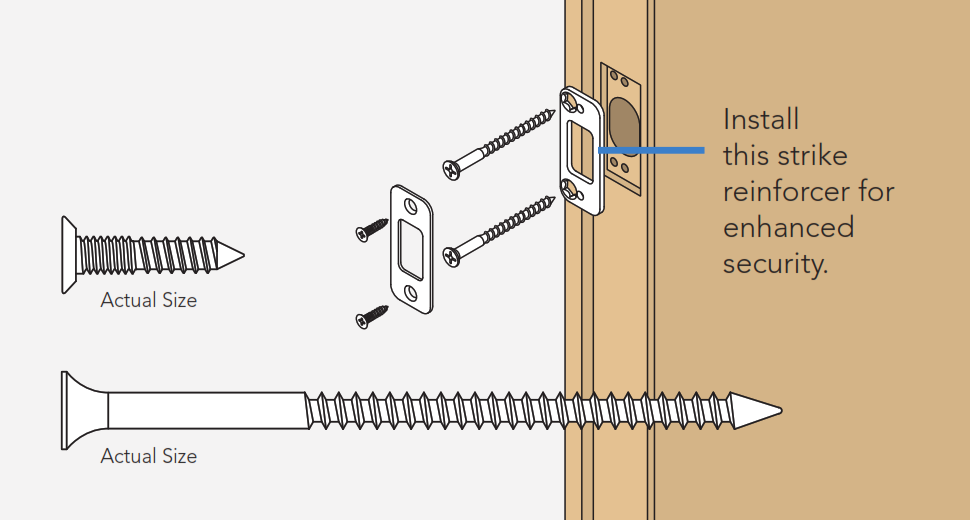
Step 2: Install the strike into the door frame.
If you have a window next to your door, you may not be able to use the longer wood screws to install the reinforcer.
Need Help?Trouble installing the strike reinforcer? See “Help with Step 2” in online instructions.
Step 3: Install the touchscreen.
Route the cable through the door BELOW the bolt. Align the tailpiece as shown and push the touchscreen onto the door.
Is it hard to install the touchscreen?Is the tailpiece not installing correctly?If the hole through your door seems too small, you may need to remove the spacer. See the online instructions.

Step 4: Install the inside backplate.
Phillips screwdriverDon’t use a power drill!You may damage your lock!
Route the cable below the bolt and through the hole on the bottom of the backplate. Secure the backplate with screws.

Step 5: Take off the battery cover.

Step 6: Connect the cable.

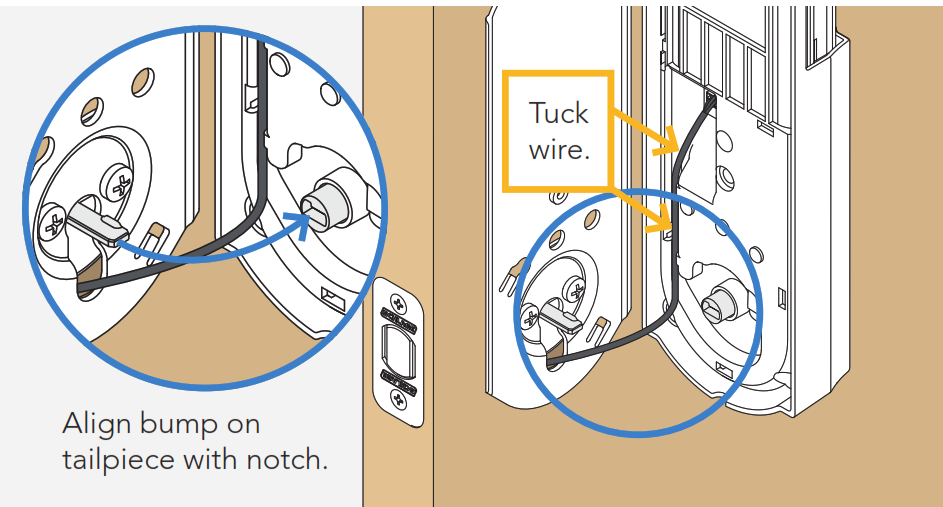
Step 7: Secure the lock to the door.
If the bump on the tailpiece doesn’t align with the slot in the back of the inside assembly, make sure your thumbturn is vertical (up and down). Tuck the wire into the channel.
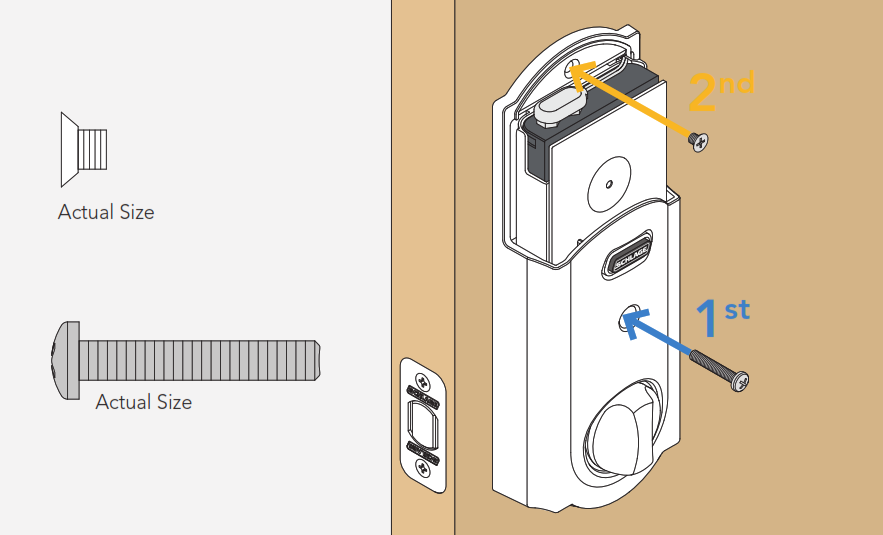
Step 8: Install the screws.
Install the lower screw first.
Phillips screwdriverDon’t use a power drill!You may damage your lock!
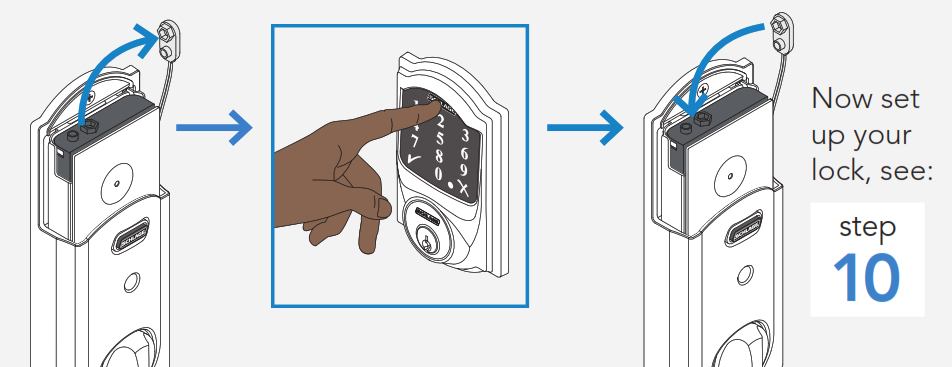
Step 9: Install batteries and slide the cover on.

Step 10: Set up your lock.
-
-
- Open your door!
- Enter one of the two default user codes. The codes are located on the back of this guide and on the back of the inside assembly. You need to remove the inside assembly to see the label.
- Your lock will enter a setup routine.
-
When the bolt stops moving, setup is complete.
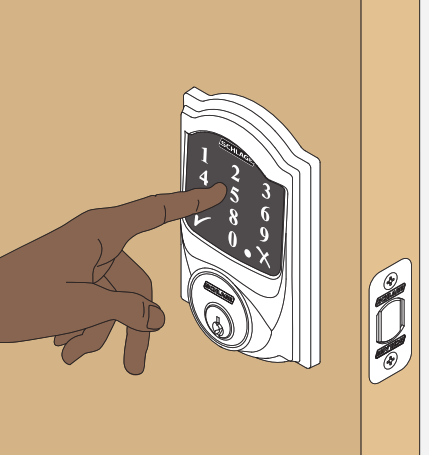
Step 11: Test your lock.
Need Help? If the bolt doesn’t extend or retract during testing, see the online instructions and make sure spindle is aligned properly.
-
-
- Close your door.
- Extend and retract the bolt using the inside thumbturn.
- Make sure the bolt retracts smoothly. If it doesn’t your door and frame may not be aligned.
- Open your door.
- Extend the bolt using the inside thumbturn.
- Now enter a user code at the touchscreen to check that the bolt retracts.
-
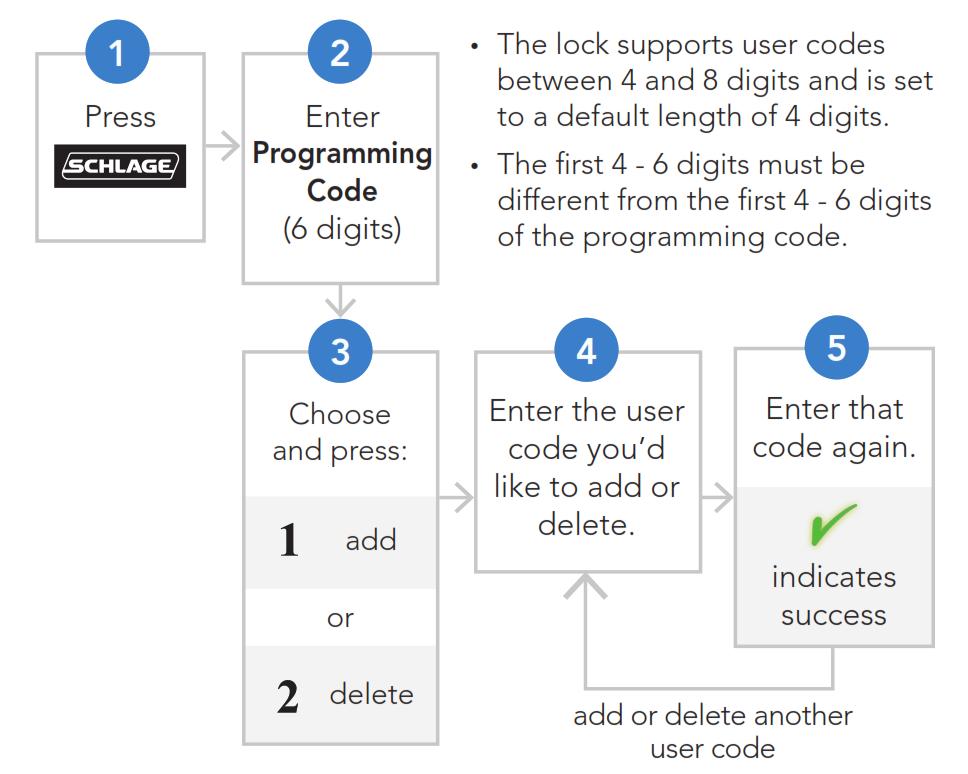
Step 12: Enroll your lock.

-
-
- Place your smart home system or panel into enrollment mode (see documentation for that device for details).
- Remove the battery cover.
- Press then release button.
- A yellow flashing light indicates enrollment is in progress.
- A solid green light indicates successful enrollment.
-
i A red light indicates an enrollment issue, try repeating steps 1-3.
Lock and Unlock
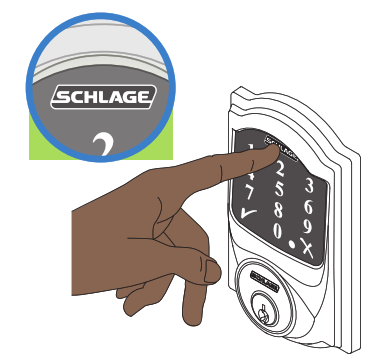
To lock your door just tap the ![]() logo.
logo.
You can also lock your door by entering a user code while the door is closed or by turning the thumbturn toward the door edge.
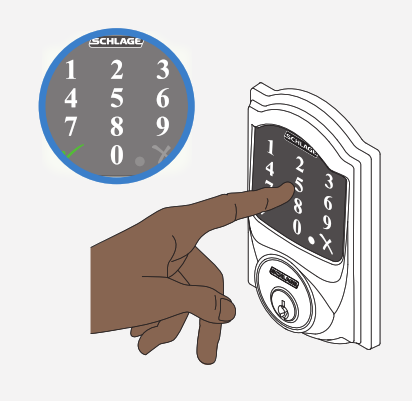
To unlock your door enter a user code.
You can also unlock your door from inside by turning the thumbturn away from the door edge.
Add and Delete Codes
Factory Default Reset
If you have forgotten your programming code, you can restore the default codes. If you want to move the lock to a different door, you need to restore default settings. Move the lock to the new door, and then set it up again.
-
-
- Disconnect your batteries.
- Press and hold down the
 logo.While you are pushing the logo, reconnect your batteries.
 - Test your lock with one of your default codes, located on the back of this guide.
-
Save This Guide!

Access step-by-step instructions and help.
https://instructions.allegion.com/instr/86/2110

© Allegion 2018Printed in U.S.A.P518-669 Rev. 06/18-b
√ Read More About This Manual & Download PDF
Schlage Connect Smart Deadbolt User Manual – Schlage Connect Smart Deadbolt User Manual –
Questions about your Manual? Post in the comments!