
![]()
welcoming • sophisticated • inspiring

ALLEN+ROTH and logo design are trademarks or registered trademarks of LF, LLC. All rights reserved.
ITEM #2694628
VANITY WITH TOP
Model #BV-6510O-48
Serial Number ___________ Purchase Date _____________
Questions, problems, missing parts? Before returning to your retailer, call our customer service department at 1-866-439-9800, 8 a.m. – 8 p.m., EST, Monday – Sunday. You could also contact us at [email protected] or visit www.lowespartsplus.com.
![]()
SM 20653
PACKAGE CONTENTS

|
PART |
DESCRIPTION |
QUANTITY |
|
A |
Vanity | 1 |
|
B |
Top (pre assembled to Vanity (A)) |
1 |
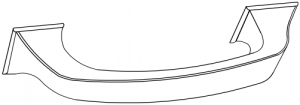
| C | Backsplash |
1 |
HARDWARE CONTENTS
AA
Touch-Up PenQty: 1
 SAFETY INFORMATION
Please read and understand this entire manual before attempting to assemble, operate or install this product.
WARNING
- Keep small parts away from children.
- Installing the item will require more than one person.CAUTION
- DO NOT try to pry off top from vanity. Damage to top or vanity may occur.
- Use care when assembling the vanity; take your time and follow the assembly instructions closely.
KEEP THESE INSTRUCTIONS FOR FUTURE REFERENCE.
PREPARATION
Before beginning assembly of product, make sure all parts are present. Compare parts with package contents list and hardware contents list. If any part is missing or damaged, do not attempt to assemble the product.
Estimated Installation Time: 20-30 minutes (24 hours for adhesive to dry).
Tools Required for Installation (not included): Silicone compound, Utility knife.
INSTALLATION INSTRUCTIONS

Step 1: Vanity Drawer Removal
1a. Open the preassembled drawer as far as possible.1b. Simultaneously press the plastic cards on the bottom of drawer left side and right side inward.1c. Once both plastic cards are held in the indicated position, pull the drawer straight out.
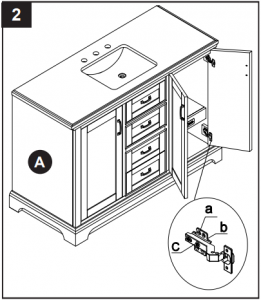
Step 2: Hinge Adjustable for Door Alignment
2. If the doors preassembled to vanity (A) require adjustment, follow the below options as needed: To adjust door up or down, loosen screws (a), adjust door and retighten screws. To adjust door left and right, turn screw (b) in or out. To adjust door in and out, loosen screw (c), adjust door and retighten screws.
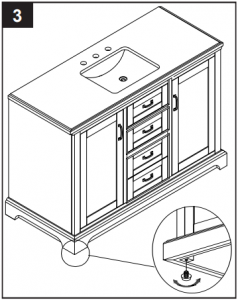
Step 3: Adjustable Level
3. In case of uneven floors, floor levelers are provided at the bottom of the vanity. If necessary, adjust floor leveler by hand to correct tilting and /or level doors.

Step 4: Plug into Socket
4. Take the power cord from the back of vanity (A) and plug it into the wall socket.
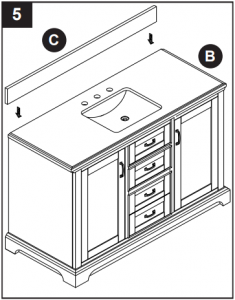
Step 5: Backsplash Installation
5. To mount the backslash (C) to the wall, apply a thin bead of silicone compound (not included) to the unpolished back side and bottom of the backsplash (C). Position backsplash (C) as shown onto vanity top (B) and against the wall. Clean any excess silicone compound before allowing it to dry.
CARE AND MAINTENANCE
- Dust the vanity regularly with a soft, non-lint producing cloth or household dusting product.
- You can clean the vanity with a gentle, non-abrasive household cleaner.
- Make sure to dry the wood immediately with a soft cloth or towel.
- The stone top can be cleaned using standard marble cleaning agents available at your local supplier.
- Tips for using touch-up pen (AA): For scratches, stroke in direction of scratch. Rub off excess colorant promptly with a soft cloth.
IMPORTANT
The vanity top and backsplash are made from stone slabs. Due to its natural stone beauty, every stone top will have its own unique characteristics such as veining, color variances and natural surface textures.
- Use caution placing items such as soap or any fragranced material on the stone surface. Use a soap dish,coaster or similar item to protect the surface if placing any soap of fragranced products on the stone.
- If soap or fragranced products come in contact with the stone top, rinse the surface with water and dry using a soft non-abrasive cloth.
- DO NOT use products to clean the stone top that contain acetone, lemon, vinegar or other acids as these may cause damage to the stone surface.
- This vanity top is pre-sealed at the factory, periodically reseal is required. As it is porous and various by nature, more frequent application is recommended and may be required depending on the usage. Follow sealer manufacturer’s recommendation.
- Stone care products are available at your local home center store. Follow the manufacturer’s directions on how to use.
WARRANTY
The manufacturer provides a one year limited warranty for residential use that the vanity combo will be free from manufacturing defects, provided the original purchaser resides in or owns the home of installation, and provided the vanity combo is installed and maintained according to the installation and maintenance instructions contained within and supplied by the manufacturer. The liability will be limited to cost of products only. This warranty is in lieu of any other express warranties. This warranty applies only to the original purchaser. This warranty does not apply to any damage on the product by accident, misuse, or modified,improper installation or by affixing accessories not produced by the manufacturer. There is no further expressed warranty. The manufacturer shall not be legally responsible for incidental, consequential or special damages arising at or in connection with product use or performance except as may otherwise be accorded by law. The manufacturer disclaims any and all implied warranties.
REPLACEMENT PARTS LIST
For replacement parts, call our customer service department at 1-866-439-9800, 8 a.m. – 8 p.m., EST, Monday – Sunday. You could also contact us at [email protected] or visit www.lowespartsplus.com.

![]()
![]()

C AA D E F


G H I J K L
| PART | DESCRIPTION | PART# |
| C | Backsplash | BV-6510O-48-01 |
| AA | Touch-up Pen | BV-OF-0010 |
| D | Short Pull | BV-6510O -H01 |
| E | Long Pull | BV-6510O -H02 |
| F | Hinge | BV-002-CR |
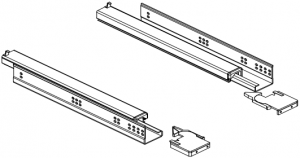
| G | Short Soft Glide Track Set | BV-GT300-R |
| H | Long Soft Glide Track Set | BV-GT400-L |
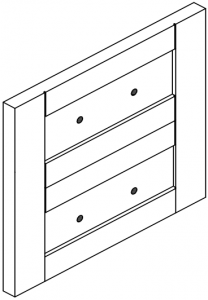
| I | Small Drawer Panel | BV-6510O-48-02 |
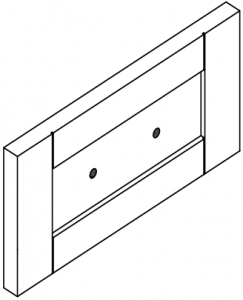
| J | Large Drawer Panel | BV-6510O-48-03 |
| K | Left Door Panel | BV-6510O-48-04 |
| L | Right Door Panel | BV-6510O-48-05 |
Printed in VietnamAllen & Roth and logo design are registered trademark of LF, LLC. All Rights Reserved.
![]()
References
[xyz-ips snippet=”download-snippet”]