
allen roth Granite Kitchen Sink
Allen & Roth and logo design are trademarks or registered trademarks of LF, LLC. All rights reserved.
Questions, problems, missing parts?Before returning to your retailer, call our customer service department at 1-866-439-9800, 8 a.m. – 8 p.m., EST, Monday – Sunday. You could also contact us at [email protected] or visit www.lowespartsplus.com
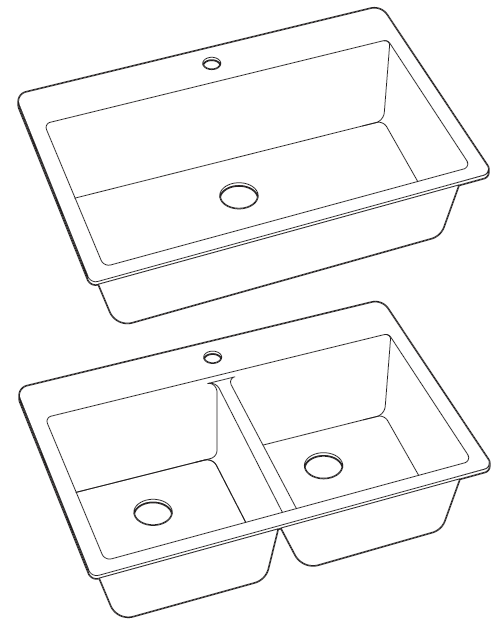
PACKAGE CONTENTS
| PART | DESCRIPTION | QUANTITY |
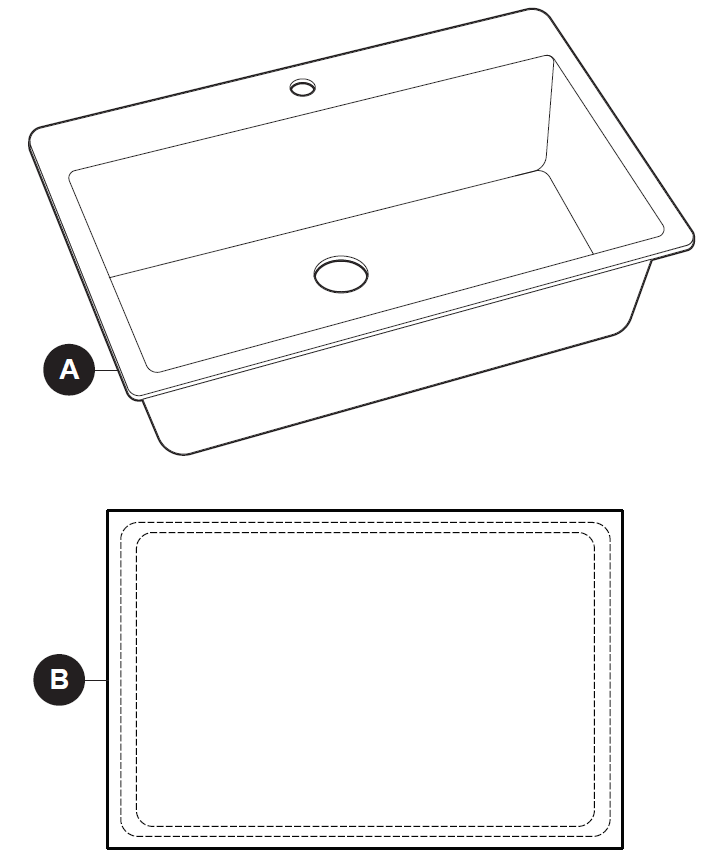
| A | Single Bowl Sink | 1 |
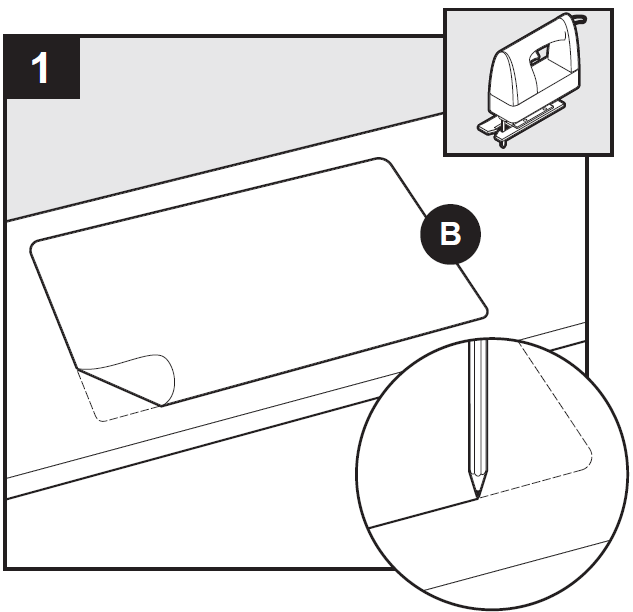
| B | 2-in-1 Template | 1 |
| PART | DESCRIPTION | QUANTITY |
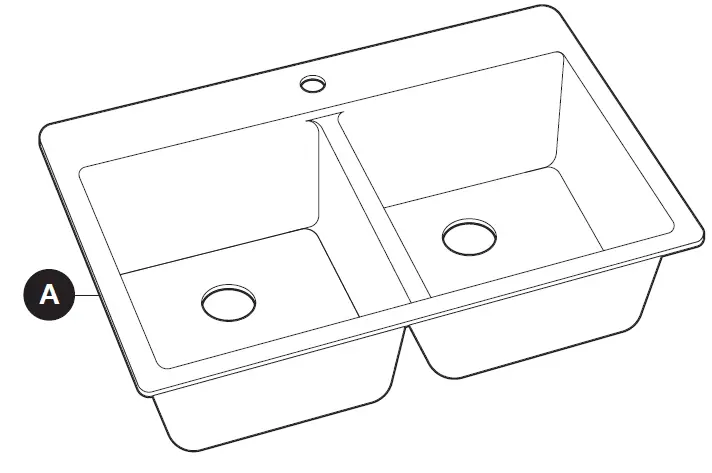
| A | Double Bowl Sink | 1 |
| B | 2-in-1 Template | 1 |
HARDWARE CONTENTS

SAFETY INFORMATION
Please read and understand this entire manual before attempting to assemble, operate or install this product.
WARNING
- Keep all packaging materials out of the reach of children to prevent possible choking or suffocation.
- Use caution when installing the sink. There is a risk of crushing your fingers when inserting the sink into the installation location.
CAUTION: NEVER place hot objects such as hot pans on the sink. Wait until the object has cooled or use a heat resistant plate when placing hot objects on the sink surface.
NOTICE
- Avoid leaving wet sponges, salt, and corrosive substances on the sink for long periods of time. Lines and scratches may be caused by improper use of the sink.
- DO NOT place the sink on its side as there is a risk of damage.
KEEP THESE INSTRUCTIONS FOR FUTURE REFERENCE.
PREPARATION
Before beginning installation of product, make sure all parts are present. Compare parts with package contents list and hardware contents list. If any part is missing or damaged, do not attempt to install the product.
Estimated Installation Time: 30 minutes.
Tools Required for Installation (not included): jigsaw, silicone sealant, phillips screwdriver, hammer, flathead screwdriver, tungsten rasp, safety goggles, pencil.
INSTALLATION INSTRUCTIONS
TOPMOUNT
Preparing the installation locationIf necessary, disconnect the water supply lines underneath the sink and remove the old sink.Place the 2-in-1 template (B) on sink installation location. Using a pencil, mark the correct location onto the sink.Using a jigsaw, cut out the location for the sink.
Preparing the sink for installationPlease skip this step unless additional holes are necessary for your faucet and/or accessories.Gently place sink into countertop cut out to support the outer ledge of your sink. With a flathead screwdriver and hammer, proceed to punch out holes.Finish the hole with a small tungsten rasp and remove the stickers on the sink for any pre-marked holes not needed.
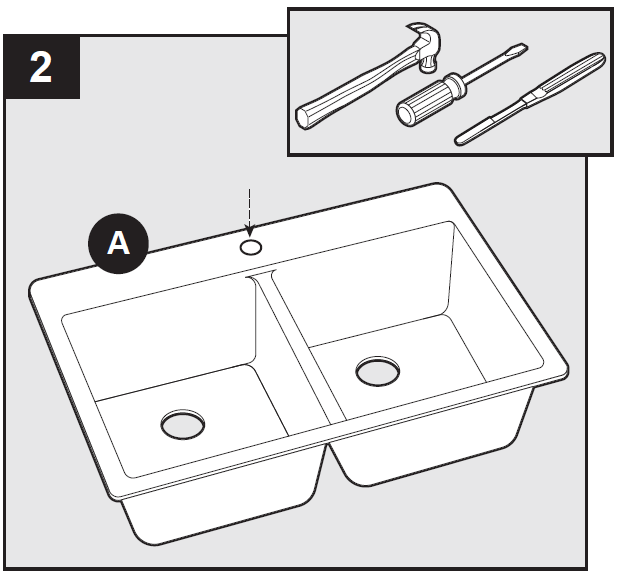
Note: A round sticker on the sink indicates where the knock-out holes have been prepared. Check that this sticker has not been moved. Also note that one hole has already been prepared.
CAUTION: DO NOT turn the sink over in order to push out the pre-scored hole on the sink. This will damage the sink. Punch out the pre-scored hole as shown.
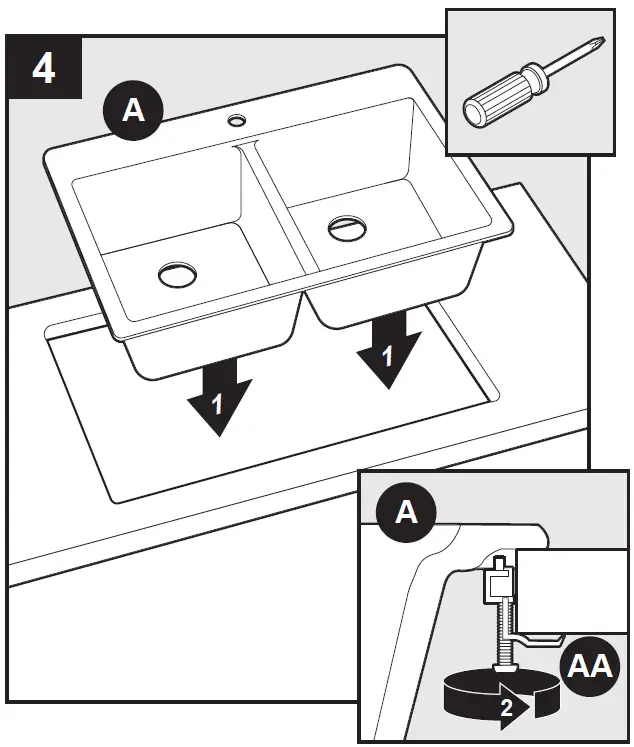
Installing the mounting bracketsTurn the sink over and press the mounting clips (AA) into the pre-drilled holes along the rim of the sink (A) until they are flush on the base of the sink (A).Hammer in the spreader bolts on both sides of the mounting clips (AA) as far as the stop, using either a screwdriver or hammer.Apply silicone sealant (not included) along the edge of the sink (A).
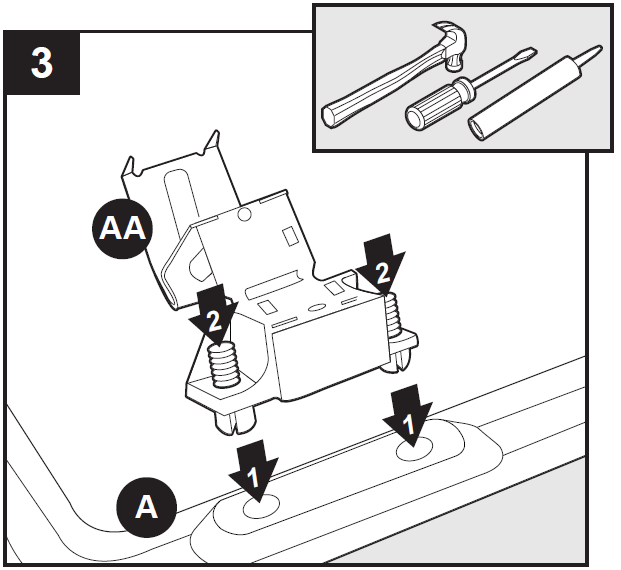
Hardware Used

Installing the sinkPlace the sink (A) into the countertop and remove any excess sealant that comes out from the edges.Tighten the screws on the mounting clips (AA) underneath the sink to anchor the sink (A).
UNDERMOUNT
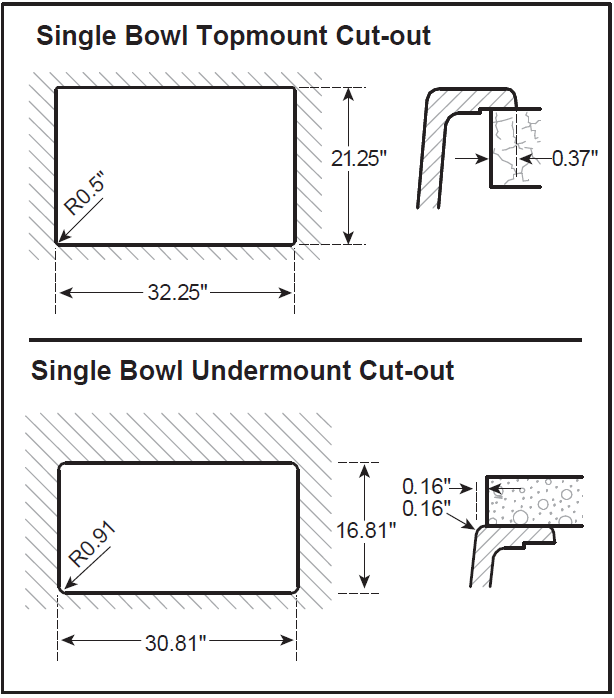
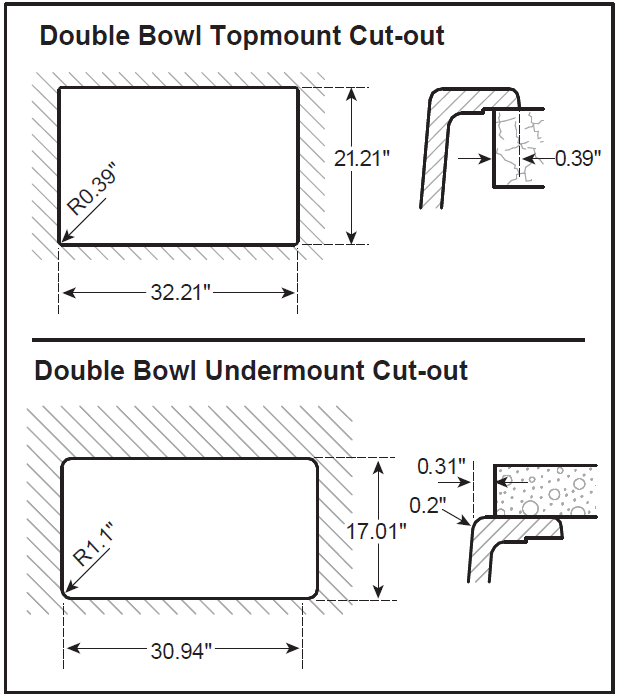
Preparing the installation locationIf necessary, disconnect the water supply lines underneath the sink and remove the old sink.Using a pencil mark the measurements (from the insets) onto the sink location.Using a jigsaw, cut out the location for the sink.

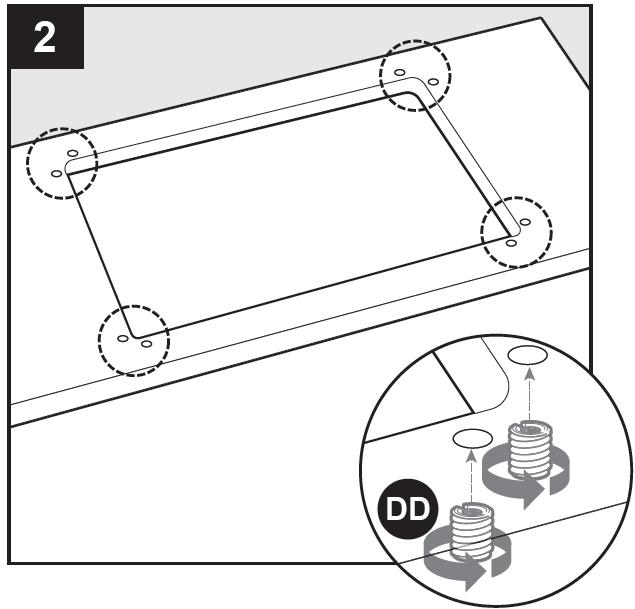
Preparing to mount the sinkFrom underneath the countertop, prepare 30 mm holes around the perimeter of the installation location. A typical installation will have two holes at each corner of the sink.Place the threaded nuts (DD) securely into each of the holes underneath the counter.
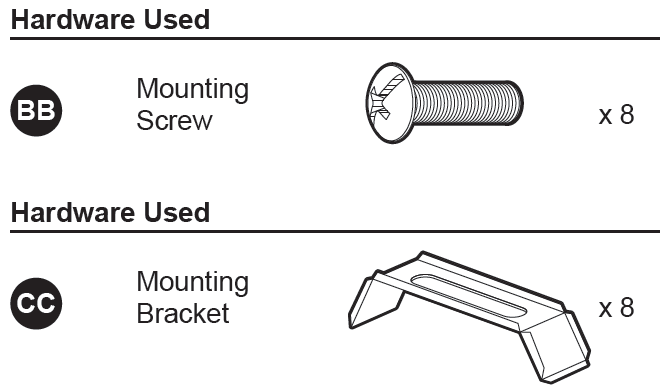
Hardware Used

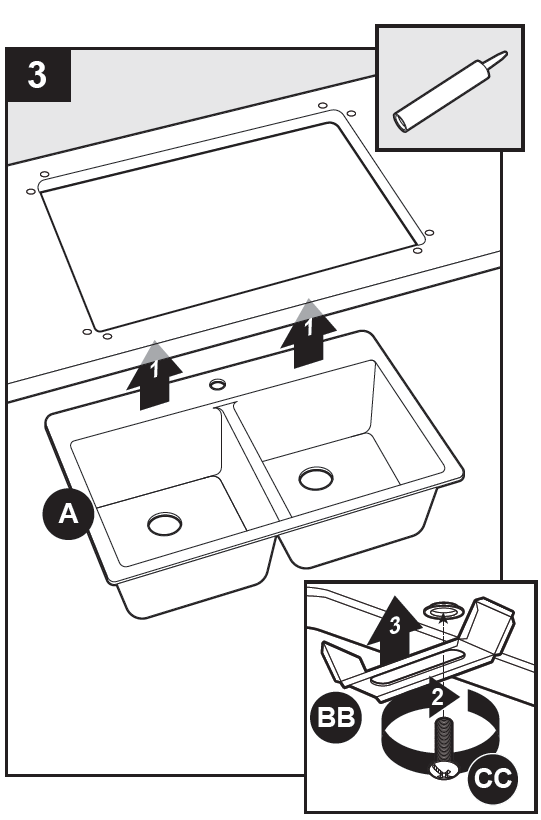
Mounting the sinkFrom underneath the countertop, apply silicone sealant around the perimeter of the installation location.Place the sink (A) underneath the countertop by inserting mounting screws (BB) through the mounting brackets (CC) and into the installed threaded nuts (DD).Tighten the screws in a crisscross pattern to ensure that the sink is installed evenly underneath the counter.
![]()
References
[xyz-ips snippet=”download-snippet”]