
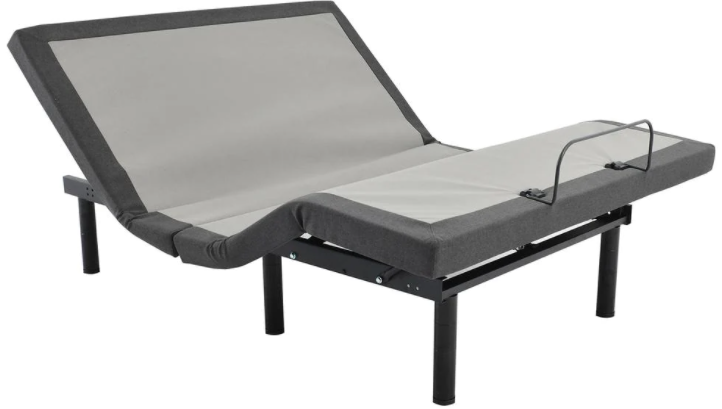
Allewie TXL Adjustable Beds Wireless Remote Controller-NL20F
Please note: For questions about your product, please contact Future Foam directly at 866-223-9095
ADVISORY
Attention: Read the following information before using this product. Use of a surge protector is recommended.
WARNING: Do not open or tamper with the transformer, control box, motors, or remote control (with the exception of battery compartments).
SMALL CHILDREN AND PETSImmediately dispose of all packing materials as it can smother small children and pets. Do not allow any persons or pets under the bed while adjustable motors are in use. Children should not operate the bed without adult supervision.
HOSPITAL OR CONVALESCENT USE DISCLAIMER:Adjustable beds are designed and engineered for a life style of in-home comfort and are not intended for hospital use or for a bed-ridden patient on an extended recovery. Adjustable beds are not equipped with bars to help patients get safely in and out of bed and are not intended to be used around tent-type oxygen therapy or explosive gases.
PRODUCT RATINGS:The bed lift motors are designed for no more than 2 minutes of continuous use in an 18-minute period, or approximately 10% duty cycle.
WEIGHT LIMIT:The limitation for a twin extra long bed frame is 550lbs. The bed frame will structurally support these weights, provided it is evenly distributed across the head and foot sections. This product is not designed to support or lift this amount in the head or foot section alone. Exceeding this weight restriction could damage the bed frame and/or cause injury. Enter or exit the bed in a flat position and do not sit on the head or foot sections while in the raised position.
LIFTING AND LOWERING MECHANISMS:It is normal for the raising and lowering feature on this bed to emit a minimal humming sound during operation.
NOISE WARNING:The level of sound experienced in a room is directly related to the environment within that location. To reduce the resonance, place a piece of carpet or rubber caster cups under the legs. The rubber caster cups also prevent the bed from sliding when located on an uncarpeted floor.
CORD MAINTENANCE:Always unplug the base from the electrical outlet before cleaning or servicing the base. If the cord or plug is damaged, discontinue use of the bed base and contact Future Foam at 866-223-9095 for further instructions. Make sure the base is in a flat position, before unplugging from the power source.
EMERGENCY BATTERY BACKUP:This foundation is equipped with a battery backup that will assist in returning the base to a flat position during a power outage. To use this feature, simply install two 9 volt batteries into the battery backing transformer. Use the reset button on the control box (black box attached to bottom of bed) to return the base to a flat position. Please do not use batteries for normal operation of the base.

SETUP and INSTALLATION
Important: We strongly recommend two able-bodied adults setup and assemble this product.
Step 1:Check to verify all parts are included before discarding any packing materials.All electronics and components that need to be installed are located in boxes under the base or attached to the frame.
A) Wireless Remote Control (1)B) Input Power Cord (1)C) Transformer Power Supply (1)D) Legs (6)E) Mattress Retainer Bar (1)F) Manual
Step 2:With the help of your able-bodied assistant, place the carton on the floor with the arrows pointing downwards.
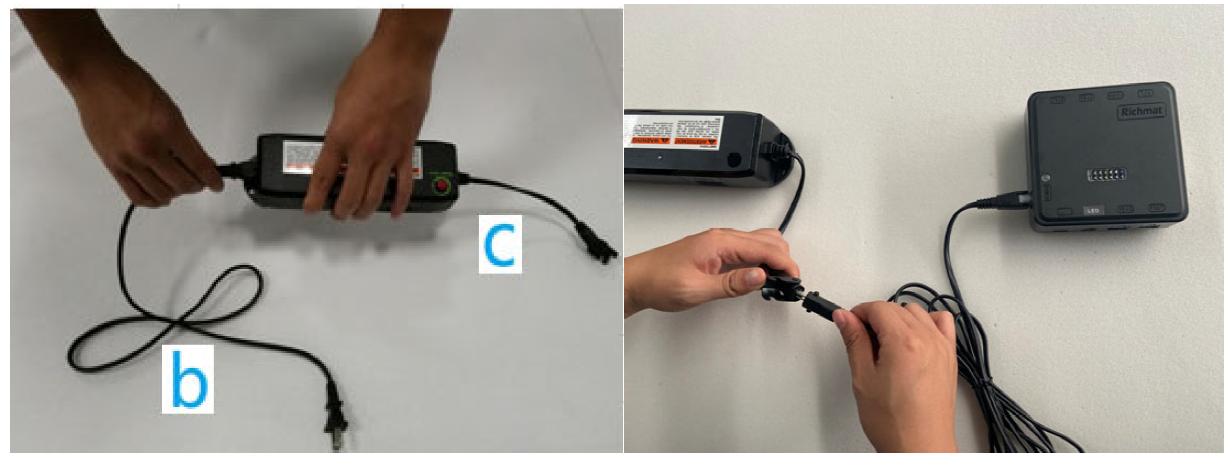
Step 3:Extend the input power cord (labeled “b” in the photograph below) and plug it into the transformer power supply (labeled “c” in the photograph below). Connect the transformer power supply to the control box. The control box is the black box attached to the bottom of the bed.
Step 4:
- Unplug the Power Cord.
- Install the six legs firmly into the base of the frame. The legs screw into the threaded holes on each corner of the adjustable base frame (See Figure below).
- Do not over tighten.

Step 5:Synchronize the remote with the control box. First, make sure batteries are in the remote control, per Figure 3. Next, find the white circle show the Head up button and Foot up button on the wireless remote. Hold both the Head up button and Foot up button on the remote within 10 seconds after plug in the adjustable bed. You will hear three quick beeping sounds. Press the Head Up button and quickly release; the adjustable bed should be working after matching the remote with the control box.

Step 6:With the help of your able-bodied assistant, carefully lift the adjustable bed frame and set it in place upright on its legs. Excessive pressure may damage the legs. Remove all protective plastic covering.Note: check to make sure that all power cords are clear and do not interfere with any Adjustable Bed Mechanisms.
Step 7:Note: Get the Mattress Retaining Bar from packaging. Carefully insert the mattress retaining bar into 2 holes on the foot end of bed base. (See Figure below.)

Step 8:Plug in the adjustable base. You are ready to enjoy!
PROGRAMMING THE REMOTEButtons “M1″and “M2” are the memory positions of your favorite positions. Adjust the head and foot to desired position, then Press and hold the button “M1” or “M2” until the backlight flashing, the bed will automatically go to that position when you press “M1” or “M2” next time. To re-program, repeat these steps.
SYNCHRONIZING TWO BASES
The bed base is designed to allow two twin X-LONG bases to become one KING base, using remote A to control both bases.
Step 1:Plug base A and base B (both bases) to the power source.

Step 2:Make sure remote A was already paired to Base A and Remote B was paired to Base B. If not, please pair them by following step 5 of the setup & installation instructions above.
Step 3:Pair remote A to Base B, then base A and base B can be simultaneously operated by remote A. (Refer to step 5 of the setup & installation instructions above for help on how to pair.)

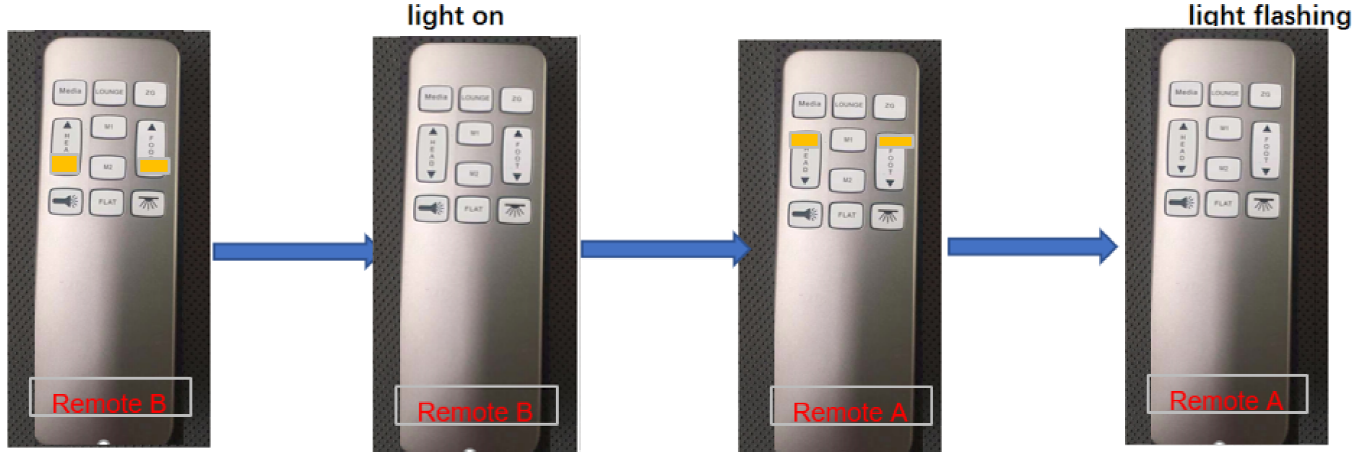
Programming Remote B to also control both bases.Press and hold head down and foot down buttons on remote B, the flashlight will be on for 10 seconds. Meanwhile press and hold head up and foot up buttons on remote A; the pairing process is successful when the flashlight on remote B start to flash. Now both remotes will be able to operate both bases simultaneously.
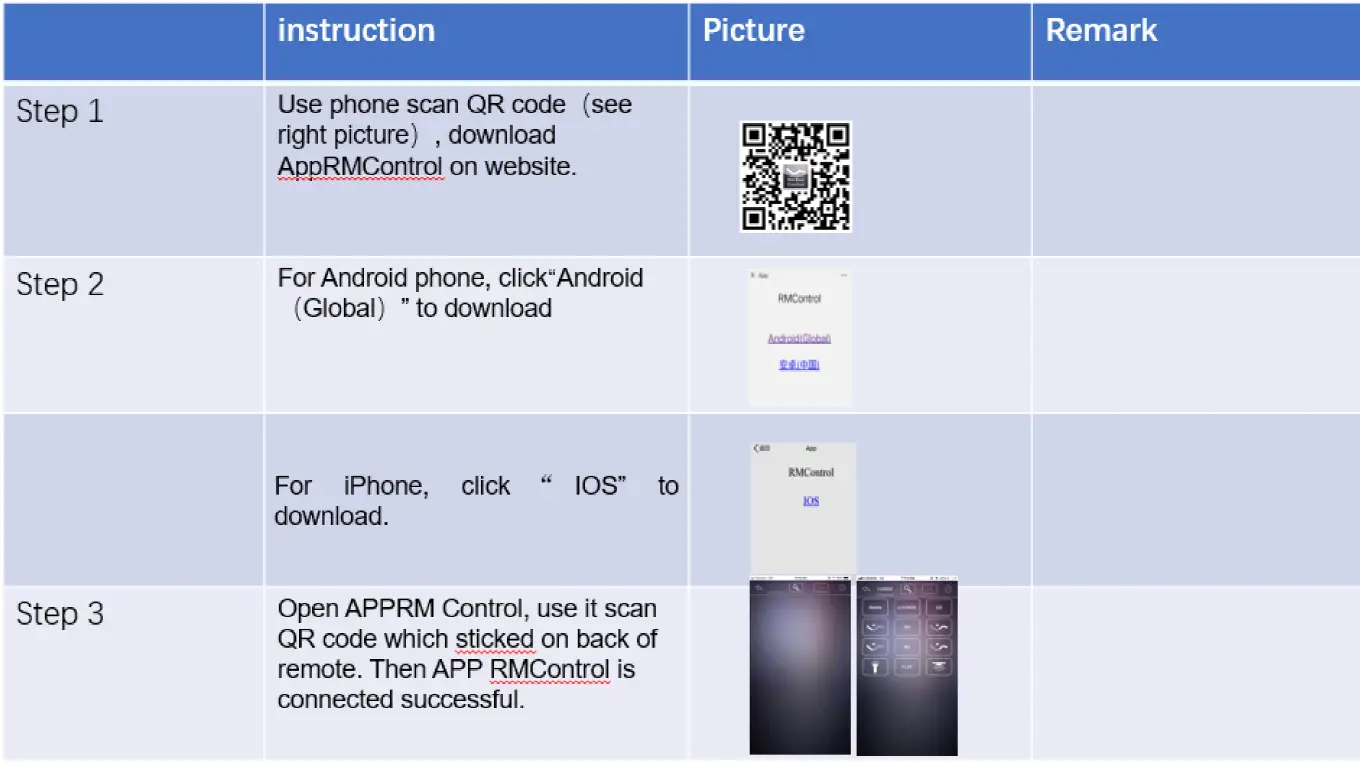
How to connect app to base
Setup is now complete. Plug it in and enjoy.
To Unpair RemotesUnplug remote A (take the battery off the remote) then press and hold “head‐up” buttons while putting back the battery into remote A, remote A will be flashing that means remote A has been separated from remote B. Pair remote A with base A and remote B with base B (Refer to step 5 of the setup & installation instructions above for help on how to pair), remotes should work independently now.

![]()
[xyz-ips snippet=”download-snippet”]