![]() Hang KitInstruction Guide
Hang KitInstruction Guide
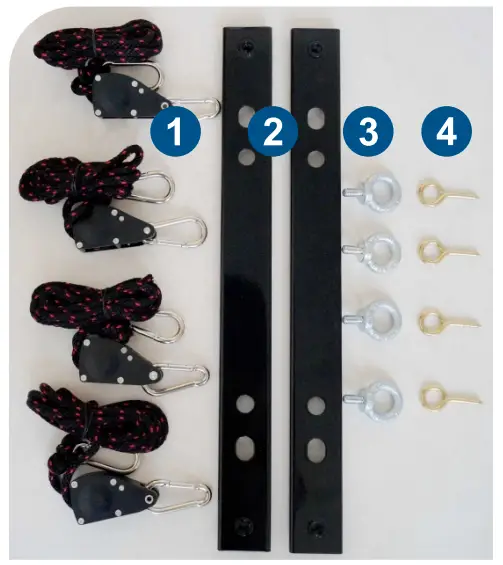
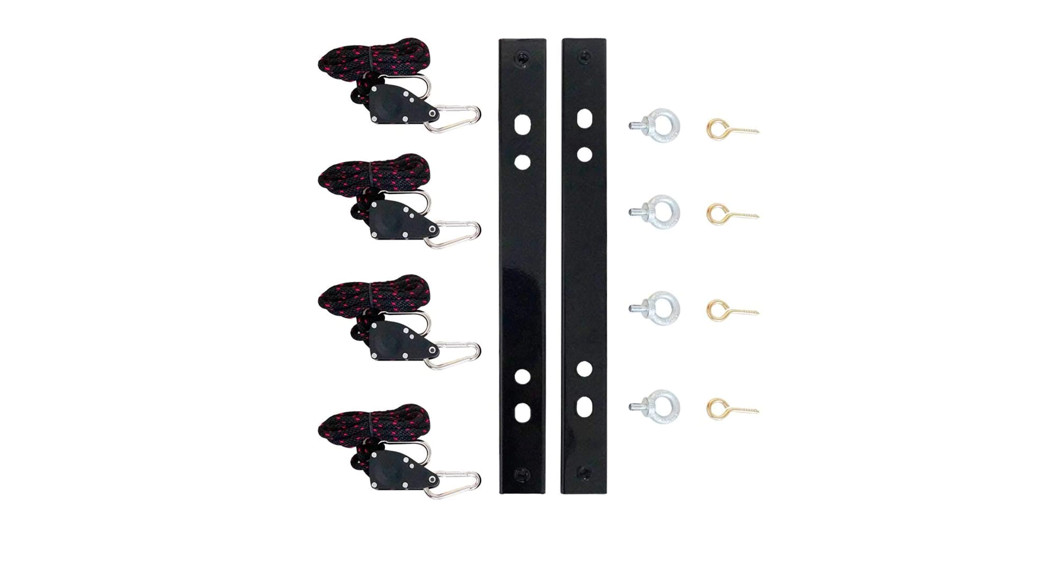
Parts Included:
- Ratchet Straps X4
- Brackets X2
- Hanging ring X4
- Eye Bolts X4
Tools Required:
- Tape Measure
- Level
- Screw Driver (Phillips or Regular) to use as leverage for Eye Bolts
- Screws for T JI joists (only applies if you have T JI joists)
Optional Tool:
- Power Drill with 1/4″ Drill Bit (to pre-drill Eye Bolt holes)
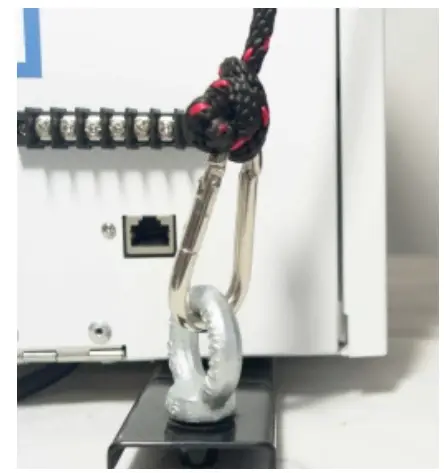
Step 1.
Screw-in the hanging ring to secure the hanging ring to the brackets. Gently tilt the unit back in order to the bottom 4-foot pads can be removed. There are four leveling feet to screw in on each dehumidifier.
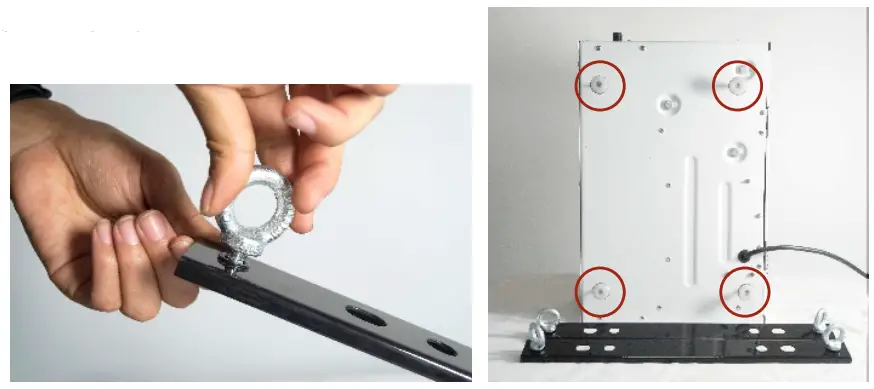
Step 2.
Line up the pre-drilled holes on the brackets with the leveling feet holes on the unit. Once lined up, screw in the leveling feet to secure the brackets to the dehumidifier. Once in place, return the machine to a horizontal position.

Step 3
Determine the position of the unit and turn/screw your first eye bolt into position on the bottom of the floor or rim joist. Use a screwdriver as leverage to tighten the eye bolt. Screw in until the threads are no longer visible.
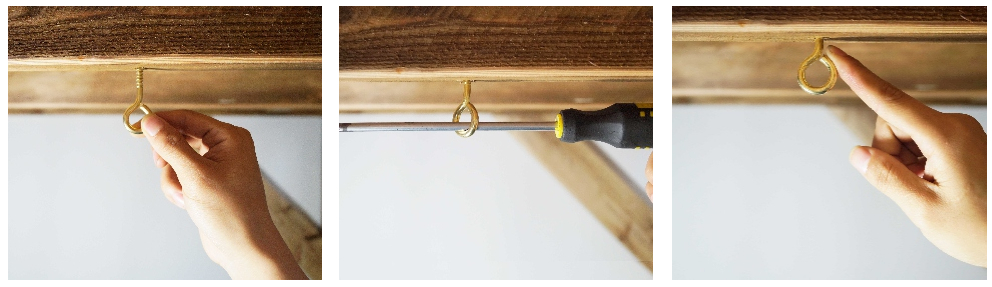
Step 4
Place the second eyebolt “greater than the length of the unit” away from the first eye bolt on the same joist and tighten it into place.
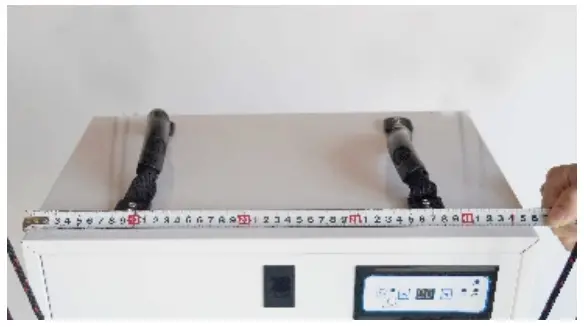
Step 5
Skip a joist to place the remaining two eye bolts on the joist parallel to the joist used for the first two eye bolts; leaving one joist not used between the two joists. Eye up the location of the remaining two eye bolts and position them straight across from the first two eye bolts used in steps 3 and 4. The placement should be close but does not need to be precise. Make sure that the two eyebolts are separated by a distance greater than the length of the machine itself

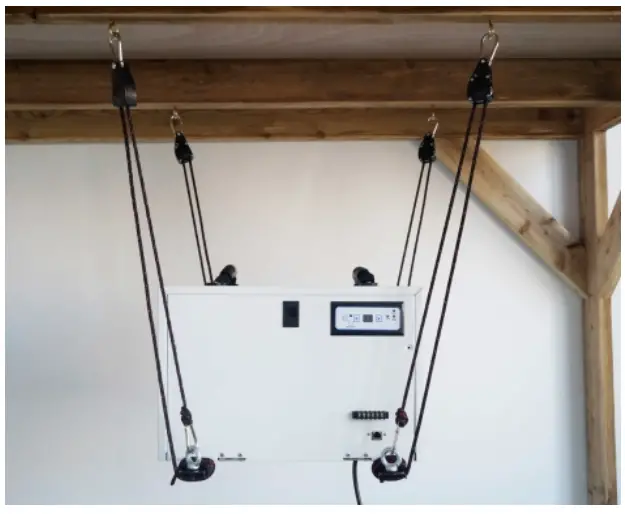
Step 6
Position the unit directly below the eye bolts. Attach the four ratchet straps to the hanging ring on the hang kit brackets using the non ratchet clip end.
Step 7
Using the ratchet end of the ratchet strap, attach each strap to the eye bolts above the unit. If additional slack on the rope is needed, push the trigger on the ratchet end of the strap up and feed the rope through as needed.

Step 8
Pull down on the ratchet rope, lifting the unit in place. We recommend pulling down on each individual ratchet rope 6- 12 inches at a time until level.
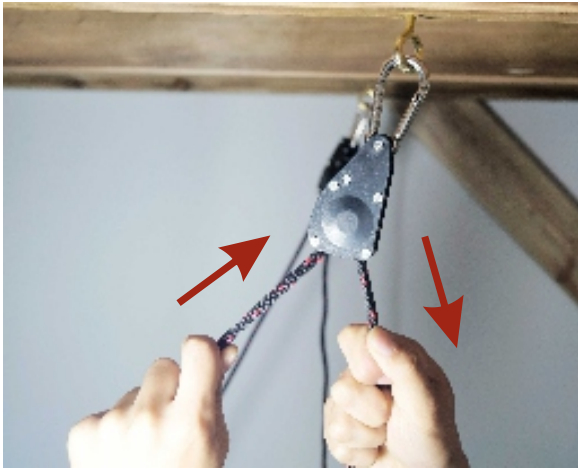
Simultaneously pull up on the rope attached to the unit and down on the ratchet rope for better results.
| MAKE SURE THE UNIT IS LEVEL AFTER INSTALLATION. |
MOVING THE STRAPS TOO QUICKLY CAN CAUSE
THE UNIT TO ROCK AND TIP.
|
![]() AlorAir Solutions INC.Tel: 1-888-990-7469E-mail: [email protected]Add: 2048 E. Francis St Ontario CA 91761
AlorAir Solutions INC.Tel: 1-888-990-7469E-mail: [email protected]Add: 2048 E. Francis St Ontario CA 91761
[xyz-ips snippet=”download-snippet”]