
USER MANUAL
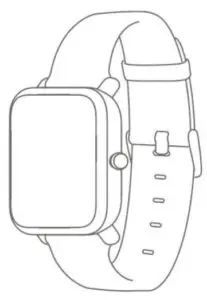
Amazfit Bip watch has a trans-reflective color LCD touch screen and a side button to set it.
You can navigate the screen by swiping up, down, left and right. The watch displays the dial interface by default.
- Swipe up to view notifications history.
- Swipe down to access DND (Do Not Disturb) Mode setting and check the battery power and watch connection status.
- Swipe left and right to view all APP features.
Keys Instruction
1. Short Press:
- Wake up the watch screen when the watch is locked
- Return to dial interface when the watch is on sub-interface
- Return to the previous screen when the watch is on other interfaces
- View the activity details when the watch is on sports interface
2. Long Press:
- Turn on the watch
- Quickly start the activity if “Long press the button” is turned on
- Help reset the watch after you click “Factory reset”
- Pause the activity when the watch is on sports interface
Wrist Placement and Charging
1. All-day Wearing
Please wear your watch two fingers’ width below your wrist bone to ensure that the optical heart rate monitor can monitor the data properly during all-day wearing.
2. Wearing in Sports
Please DO NOT wear your watch too tight and it should also be slightly tighter (snug, but not constricting) during exercise than during all-day wearing.
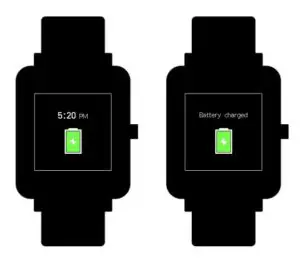
3. Charging
To charge your Amazfit Bip:
- Please attach the USB end of the charger to your PC or a normal charging adapter.
- Insert the watch into its charging base and make sure to align the two charging pins on the backside of the watch with the ones on the charging base.
- Once clipped in, the watch face will light up and show that the watch as “charging”.
Note: The charger adapter output values are DC 5.0V/500mA. We suggest you use brand phone power adapters or charge the watch by connecting to a computer.
Watch Functions
Watch Display Settings
- You can choose items like “Status”, “Activities”, “Weather”, “Alarm”, “Timer”, and “Compass” to be displayed on the watch or not.(Open App➡Profile➡My devices Amazfit Bip➡Watch display settings➡Hold the Sort button to rearrange the items)
- Note: “Watch face” and “Settings” are defaulted to be displayed on the watch.
Watch Dial
1. Change the dial on the watch:
- From the home screen of the watch, swipe left you can access Set the watch face.
- Tap and swipe up, you can access watch faces.
- Tap on your selection and confirm by tapping OK, the watch face will update.
2. Change the dial on the Mi Fit App:
Open App➡Profile➡My devices Amazfit Bip➡Watch face settings➡Tap on your selection and sync it to your watch
3. DND (Do Not Disturb) Mode
Swipe down from the home screen of the watch; Tap on DND, you will have two options: “Now” and “Auto”.
- When you choose “Now”, your watch will immediately stop alerting for phone call, SMS/APP/Email and other push notifications from apps you set.
- However, if you choose “Auto”, Bip will stop alerting only in the night when it detects you are sleeping with wearing the watch.
Notifications
1. Setting up notifications
Please enable “App alerts” in the Mi Fit App and make sure Bluetooth is turned on in your mobile device.
- For iOS phones, please connect your watch with your phone in Bluetooth settings
- For Android phones, please enable auto-start and lock Mi Fit App in the “Recent apps”/ “App overview” page.
2. Viewing notifications
When the watch receives a notification reminder, it will vibrate and automatically display the content of the notification. If you do not view the notification immediately, you can find it later by swiping up from the watch face.
3. Delete or clear notifications
The watch can save up to 10 recent notifications. After this limit is exceeded, the oldest notification will be automatically deleted every time a new one is received. When the content of the notification exceeds one screen and cannot be displayed, it will display on the second screen, and the portion beyond the second screen will not be displayed.
- You can delete the notification by swiping left on the content page.
- Swipe up to the bottom of the notification list and tap “Clear” to delete all notifications.
4. Status
- We can see Steps, last-minute heart rate, mileage, calories burned, and sedentary times from “Status” widget.
- Heart rate will be measured automatically when you tap “Status”.
5. Activity
From home screen of the watch, swipe left till you find Activity. For more details, please refer to Activity Tracking.
6. Weather
From the home screen of the watch, swipe left till you find “Weather”. Tap “Weather” and view the weather for the current day and the next several days.
- The weather comes from the server. Therefore, in order to obtain the latest weather information, please keep your watch connected with your phone.
- In addition, the watch can receive the weather warning notification when “Weather alert push” is turned on. (Mi Fit App➡Profile➡My Devices Amazfit Bip➡Weather settings➡Weather alert push )
7. Alarm
You can turn off/on the alarm directly from the watch and add another alarm from Mi Fit App. You can store up to 10 alarms on the watch.

- When an alarm vibrates, you have two options “Snooze” and “Stop”. If you tap “Snooze”, it will vibrate later. And you can tap “Snooze” to delay reminder by 10 minutes; If you tap “Stop”, it will stop vibrating.
- If the alarm continuously vibrates 6 times, the alarm will be turned off after the sixth vibration is over.
8. Timer
The timer has a stopwatch and a countdown timer.
- The stopwatch can be used to record multiple time periods.
- For countdown timer, you can set a time. And when the time is up, it will vibrate to remind you.
9. Compass
From the home screen of the watch, swipe left till you find “Compass”.
- Tap “Compass”, it will show you a figure 8 pattern. Move your watch around in a figure 8 pattern to calibrate. After calibration successfully, you can see your orientation on the watch screen. “N” will always point North, and the arrow is the direction you are facing.
- Swipe Left and you can see the altitude and pressure data, which can only be obtained when in an open space outside with GPS signal. It takes some time to enable GPS, please wait patiently.
- In order to avoid signal interference, please stay away from magnetic interference.
10. Settings
From the home screen of the watch, swipe left you can access “Watch face”, “Long press the button”, “Adjust brightness”, “Find device”, “About”, “Factory reset”, and “Turn off” in watch “Settings”.
- Watch face: There are 10 watch faces, which can be applied according to your preferences
- Long press the button: Tap the check mark next to the activity to make it quick start by long press. You can set to quick start outdoor running, treadmill, cycling and walking. And you can tap the check mark next to “Turn off” to disable this function.
- Adjust brightness: You can adjust the brightness by tapping the add or subtract buttons on the brightness scale.
- Find device: Your phone will ring when the watch is connected to your phone by Bluetooth.
- About: You can check firmware version and Bluetooth address.
- Turn off: You can turn off your watch.
- Factory reset: All the data in the watch will be removed after factory reset. And in this case, you need to re-pair the watch with phone.
Watch Alerts
1. Incoming call notification:
When the watch receives an incoming call, it will vibrate. If you want to hang up the phone, click “Hang up” on the reminder page; If you want to ignore the reminder, click “Silent” or press the key to stop the vibration. Before using this function, please go to the app and turn on the alert. (Mi Fit App➡Profile➡My Devices Amazfit Bip➡Incoming call)
2. Idle alert:
The watch will vibrate to remind you to get up and move for a while if inactivity lasts for one hour. Before using this function, please go to the app and turn on the alert. (Mi Fit APP➡Profile➡My Devices Amazfit Bip➡More➡Idle alert)
3. Liked by your friend notification:
The watch will vibrate to remind you when someone liked you.
4. Goals notification:
The watch will vibrate when you reach a goal. Before using this function, please go to the app and turn on the alert. (Mi Fit App➡Profile➡My Devices Amazfit Bip➡More➡Goals notifications)
5. Alarms alert:
When the alarm on your mobile phone rings, the watch will vibrate to remind you. Before using this function, please go to the app and turn on the alert. (Mi Fit App➡Profile➡My Devices Amazfit Bip➡More➡Watch alarm )
6. Disconnection reminder:
When your watch is disconnected with your phone the watch will vibrates to remind you. Before using this function, please go to the app and turn on the alert. (Mi Fit App➡Profile➡My Devices Amazfit Bip➡More➡Disconnection reminder )
7. Event reminder:
The watch will vibrate on time if you have added an event reminder. Before using this function, please go to the app and turn on the alert. (Mi Fit App➡Profile➡My Devices Amazfit Bip➡More➡Event reminder )
8. Quick Entry Settings
Swiping the dial to the right gives you a quick view of the weather information.
Activity Tracking
1. Starting Activity
There are two ways to start an Activity:
- From the home screen of the watch, swipe left till you find Activity.
- Long press the physical button to quick start an Activity set up already in watch Settings.
Amazfit Bip supports outdoor running, treadmill, cycling and walking. Before you start an activity, please check if the storage space on the watch is enough. If it is not enough, the previously unsynchronized activity data may be covered during the activity. To ensure that the data will not be covered, it is recommended to connect and sync the data as soon as you finish the activity.
For these sports modes like outdoor running, cycling and walking, which need to enable GPS positioning, you can start the activity after the GPS getting location successfully.
2. Activity Initiated
If the GPS option is initiated and started, the watch will offer a three-second countdown before tracking begins.
3. Alerts during Activity
From the home screen of the watch, swipe left to access “Activity”➡ “Activity settings”. Tap “Activity settings” to set “Auto pause”, “Heart rate alert”, “Pace alert”, and “Distance alert”.
- Heart rate alert: You can set a value to make the watch alert you when your heart rate jumps above the value you set.
- Pace alert: You can set a target pace to make the watch alert you when your pace is below the target pace.
- Distance alert: You can set the desired distance to alert you. (eg: The watch will vibrate when you reach every 2 mile/km)
- Insufficient space alert: The watch will vibrate to remind you whether to continue the activity when there is insufficient space. If you click “Continue”, the unsynchronized data will be covered. If you click “End”, you will end this activity.
- Space exhaust alert: If you run out of space during the activity, you will be also alerted by vibration. And the watch will automatically save this activity record for you.
- GPS status change alert: When you choose an outdoor activity, it will vibrate to alert you after GPS is successful positioned.
4. Basic approach during Activity
On activity interface, long press the key to pause the activity; short press the key to switch the screen. You can also switch the screen by swiping up or down manually.

5. Suspending/Continuing/Ending Activity
Press and hold the physical button to pause the activity. The paused interface is displayed. And you can tap “Continue” to resume or tap “End” to stop.Note: If you ran less than 50 meters, watch will prompt you that “distance is too short to save”.
6. Viewing Activity History
You can view the activity history from both your watch and app.
- Watch From the home screen of the watch, swipe left to access “Activity”➡ “Activity history”. If there is an unsynchronized activity record, you can see an unsynchronized icon on the right side of the list column. After the data is synchronized successfully in the app, that icon will no longer be displayed. Click on an activity record to see the detailed data.
- Mi Fit AppPlease open App➡ Click “Activity” right below the app home page to view all activity records that are synchronized from the watch.
7. Deleting Activity History
From the home screen of the watch, swipe left to access “Activity”➡ “Activity history”➡ Swipe up till you see “Delete”.Note: Please make sure this activity is synchronized with app before you delete it. And if you also want to delete this activity record from app, you need to delete it manually on the app.
8. Activity Settings
From the home screen of the watch, swipe left to access “Activity”➡ “Activity settings”. Tap “Activity settings” to set “Auto pause”, “Heart rate alert”, “Pace alert”, and “Distance alert”. And after the alert is activated, the corresponding reminder will be performed during the activity.
9. GPS and A-GPS
Tap outdoor running, watch will automatically initiate the search for a GPS signal but you can skip this step at that moment by clicking on the “Skip” button, however it will still search GPS during your activity.
- If the GPS option is initiated and started, the watch will offer a three-second countdown before tracking begins. You can long press the physical button to “pause” and tap “continue” to continue or tap “end” to stop.
- After you finish and sync, you can view the GPS route and details in the watch and Mi Fit App.
- 3) GPS signal is better in an open space. After getting location successfully, you can start the activity. If you are in a crowd, please raise your arm to your chest, which can speed up the GPS positioning.
Assisted GPS (A-GPS) is a system allowing global positioning system (GPS) receivers to obtain information from network resources to assist in satellite location. An A-GPS system is especially useful when the receiver is in a location where it is difficult for the satellite signals to penetrate.
AGPS will help your watch find your precise position quickly and improve accuracy. The A-GPS data updates once a day. The latest A-GPS data is automatically updated each time you sync it with Mi Fit App.
Note: If watch hasn’t sync with your Mi Fit App for 7 days, A-GPS data will expire. The positioning speed may be affected when AGPS expires and watch will remind you to update when you start an activity.
10. Heart Rate Zone
During activity, the watch calculates your heart rate zone based on your personal information. The heart rate zone will help you determine the effect and intensity of the activity. The current heart rate zone will be displayed next to the heart rate on the watch. After the activity is finished, you can view the duration in each heart rate zone from “Details” page of Activity history on the app.
There are six zones (Relaxed, Light, Weight, Aerobic, Anaerobic, and VO2 max) by default, which are calculated based on the estimated maximum heart rate. And the watch calculates the maximum heart rate using the commonly used “220 minus age” formula.
Maintenance
Amazfit Bip is water-resistant, but NOT waterproof.
- Please clean the watch and strap periodically with clean water and then use a dry soft cloth to dry up the watch.
- Please DO NOT use shampoo, soaps and other chemicals to wipe the dirt in avoidance of irritating skin or corrosion of the watch.
- Please wipe your wrist and watch with a dry cloth or tissue after workout. Sweat may interfere and cause inaccuracy.
Warning:
- Amazfit Bip is IP 68 certified which means resistant to dust, rain, splashing, and accidental submersion. It can withstand a maximum depth of 1.5 meter water for up to 30 minutes. The resistance testing is performed in fresh water, normal temperature and under static condition. It shouldn’t be used when you are taking a shower/bath, having a spa, swimming or in the sauna or steam room.
- DO NOT operate the watch underwater. Please wipe the watch with a dry cloth before operating the touch screen or charging it.
- Amazfit Bip is NOT waterproof. Our warranty does NOT cover damages or defects caused by misuse or abuse, including but not limited to damage caused by corrosive liquids such as sea water, acid and alkaline solution, and chemical reagents.
Read More About This User Manuals…
report this adQuestions about your Manual? Post in the comments!
[xyz-ips snippet=”download-snippet”]