amazon Full HD Mini Dash Camera D330GD User Manual
D330GD
[Warning] In order to avoid product loss caused by improper operation, please read all safety information of operation instructions in this manual first. And then use this product. For more technical support, please refer to the “exception handling” section of this manual.
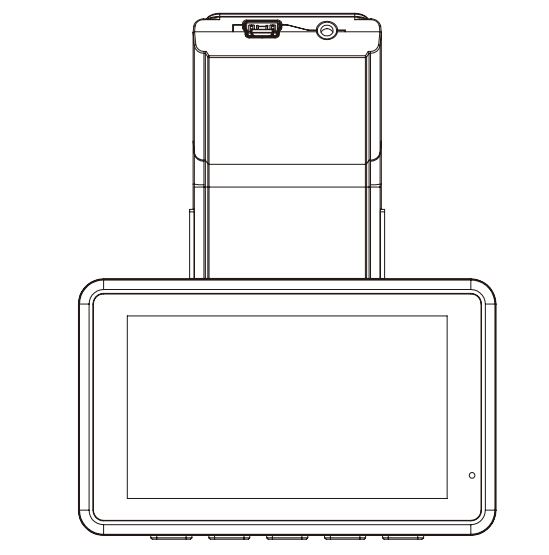
Appearance
Product Instruction
- File playbackPress “menu” to enter system menu, select the “File playback”, press “ok” to enter the playback interface.File Playback Instruction1) Select the video file to play back and press “ok” to play it.2) Press Menu button to exit play.
- WIFI: open / close
- Satellite Status: Received the GPS signal status
- GPS on/ off: open / close
- Speed Unit: km/h / mph
- Speed remind:OFF/30mph/35mph/40mph/50mph/55mph/60mph/65mph
- Time Zone Select: Please select your local time zone
- Clock Setting: Up and Down button change the number, the Ok button to confirm.
- Language: English, Deutsche, Rançais, Español, Italiano, Nederlands
- Stamp: Date / Off .Note: the stamp display on the video.
- Movie Mode: FHD30 / HD30
- Exposure: -2 ~ +2
- LCD Power Save: OFF / 1min / 3min
- Sound Record: open / close
- Beep: open / close
- Volume: 0~10
- Loop recording: 1min/ 2mins /3mins
- Time lapes: open / close
- Protect Level: Off / High/ Middle / Low
- Parking Monitoring: Off / High/ Middle / Low
- Delete Files: Delete Normal folder or Event folder
- Flicker: 50Hz / 60Hz
- Reset Setup: YES / NONote: restore all the setting to factory default value
- Format sd cardPress “menu button” to enter system menu, select the “format SD-card”Note: Format sd card will clear all the micro card data, and it’s unrecoverable.
- FW Version: AVT004
- APP Download: Please scan the QR code to download the APP
- Loop Recording: Off, 1minute, 2minutes, 3minutes
- Resolution: FHD, HD
- Sound Record: On, Off
- G-sensor: Off, High, Middle, Low
- Language: English, Deutsche, français,Español,italiano,Nederlands
- LCD Save: Off, 1minute, 3minutes
- Date and Time: Press up/down to adjust date and time, and press ok to confirm
- Volume: press up to increase volume, down to decrease volume, andpress ok to confirm
- Sound: Off, On
- Watermark format: date, close
- Time zone: press up/down to adjust the time zone
- Frequency: 50Hz, 60Hz
- System Reset: Confirm, Cancel
- GPS positioning information: Check current GPS location information
- GPS time setting: Confirm or Cancel
- Speed: km/h / mph
- Speed reminder: optional speed, machine will alarm when driving speed over the set value
- Delete document: press the ok key to enter to delete the corresponding file
- APP download: Enter by confirm key , and use mobile phone to scan QR code to download(If the product relevant functions do not conform to the specification, it is the upgrade reason.The actual version shall prevail)
Exception handling
If some functions do not work properly, or you have changed the relevant Settings, try to restart the machine or restore factory Settings.
● Low battery/Not to save settings/automatic shutdown when car start?
- Remove the memory card
● Memory card is full?
- Format memory card.
- Adjust the “G-sensor” in the machine to a low level and format the memory card regularly for about a month.
- Replace the memory card.
● Memory card is wrong?
- Format memory card.
- Replace to use new card.
● Please insert SD card/ SD card can not be recognized?The memory card is damaged/slow/incompatible/no card/please replace the genuine high speed TF card.● Black screen/flower screen/flash screen?
- Restart and test to see if it can be restored.
- Reset the system.
- Contact the merchant for repair.
● Breakdown?
- Restart and test to see if it can be restored.
- Remove the memory card to test whether the memory card caused the crash.
- Reset the system and test.
- Contact the merchant for repair.
● Don’t start up?
- Check if the power cable is connected properly.
- Unplugged memory card to boot and test.
- Connect the machine to the computer to start the test.
- Reset the system and test.
Installation instruction
Attentions:
- Power on before installation to check whether all functions of the machine are normal. Wiring cannot be pulled vigorously. Do not connect wrong or insert wrong or even reverse connection when connecting the cable head.
- If the function and display are normal before installation, but abnormal after installation, it is likely to cause problems during installation. Please check whether there is a short circuit in the link line, or whether the pin inserted in the link head is crooked and causes short circuit.
It is strictly forbidden to destroy or privately modify the original line in the process of loading .If wire is damaged, you must replace a whole set of new wire to install before power on.
◆ Rear camera installation
Step 1: Fix camera with 3M adhesive
Find a best location, tear off the 3M adhesive on the rear camera, fix the rear camera near by the car license plate lamp. (if you need to adjust the angle, please attach the rear camera bracket to the rear camera and tighten it with screws first).

Step 2: Remove the PanelRemove your trunk’s interior panel to expose the cars rear wiring chambers. Pop open your trunk and look for a solid interior panel covering the opposite side of your license plate mounting area. Then,insert a trim removal tool or other thin devic behind the panel and pry it off.

Step 3: Snake the cableUse a trim removal tool to pop out tailgate trim, then run the cable from outside of the car into the trunk of your car.

Step 4: Connect the rear cameras power cable to the extension cable. After snaking your rear camera’s extension cable, connect the power cable to your rear camera’s extension cord.
For safety, make sure you do this while the car is turned off. Lastly, please poke the red positive bare wire through the positive reverse light wire and then wrap with an electrical tape. After connecting the red lead, it will have the reverse assist function.

Step 5: Connecting the red wire with the reverse light wires.Reverse light wires are normally located on the rear side of your car although their placement may vary so be sure to refer to your car’s manual. Once spotted, Use a pair of pliers or wire stripper to peel the rubber to expose the live wire.

Step 6: Route your rear camera’s power cable to the front of the car. If you’d like, use a trim removal tool to pop out the headlining panel directly above your windshield. Then, run your cable through the exposed chamber.

Step 7: Power on the dash cam with box included car charger, don’t charge it with your own chargers.

Step 8: Test the camera to make sure everything works.
Cable arrangement
Please arrange the cable as below

Hardwired kit installation
Note: This cable low voltage protection 11.8V


- You can use the car charger in the package directly.
- If you want the time lapse function, you need to use a hardwired kit,Please buy our hardwired kit on Amazon, or contact us to get it.
- For hardwired kit installation, please follow the instructions or consult a professional installer.
How to use APP
- Please scan the QR code to download APP

2. Connect APP

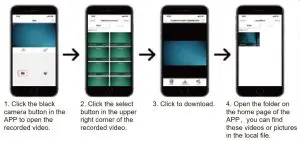
3. Download local files

4. WIFI Information

The WIFI signal of each dash cam is inconsistent, the corresponding WIFI information and password will be displayed on the screen after the WIFI function is turned on on the dash cam.
5. APP Operation

Note:
- Note that the rear camera will automatically record after being inserted into the host, without manual adjustment. If the screen is not displayed, please switch the screen display mode
- After WIFI connection and APP operation setting, the screen of the recorder will display network operation.
- After connected to the APP, the APP video cannot be displayed on separate screens, but the recorder screen can.
6. Playback Video

- On the playback video page, you can see the normal recorded front and rear camera videos and emergency locked videos.
- Click the button in the upper right corner, you can choose to switch the front and rear camera screen, download, share and delete the video.
Installation and usage video

Installation of hardwired kit

Contact us:If you have any questions about the functions or installations please feel free to contact us.


LINE
E-mail: [email protected]
[xyz-ips snippet=”download-snippet”]

