USER MANUAL
 VEHICLE MEDIA& NAVIGATION SYSTEM DEVICE
User instructions
We are very glad that you ‘you’d choose the vehicle ratio navigation system device. The deuce .5 is based On the And/od platform with WIFI. It enables you to have a fast and convenient Internet experience. kinds of multimedia entertainment function.This booklet will introduce the various features of the device, please read it carefully before the installation of the device.
Features and Functions
- Smartphone connection, Mirror Unk with dual COnbOl
- Fully capacitive touch screen control
- Build-In BanetcOth 4.0, hands-free, phone book, A2DP to steaming the phone music to the radio.
- 1024’600 super high definition digital screen
- Android System
- Quad-Core 1.3GtIt
- Built-in 1G DDR3/16G flash memory’ “2G 00R3, I6G flash memory”. 2G DDR3/32G flash memory (optional)
- Built-in WIFI.
- Rear Hew camera input
- Built-in/FM, 18 preset stations/bulletin AM 12 reset stations (Optional)
- Two VS9 inpUt
- Steering Mite! control
- 201 rear video Input
- 201 rear RCA input
- 2CH rear audio output
- 101 rear video output
- ICII Reversing video input
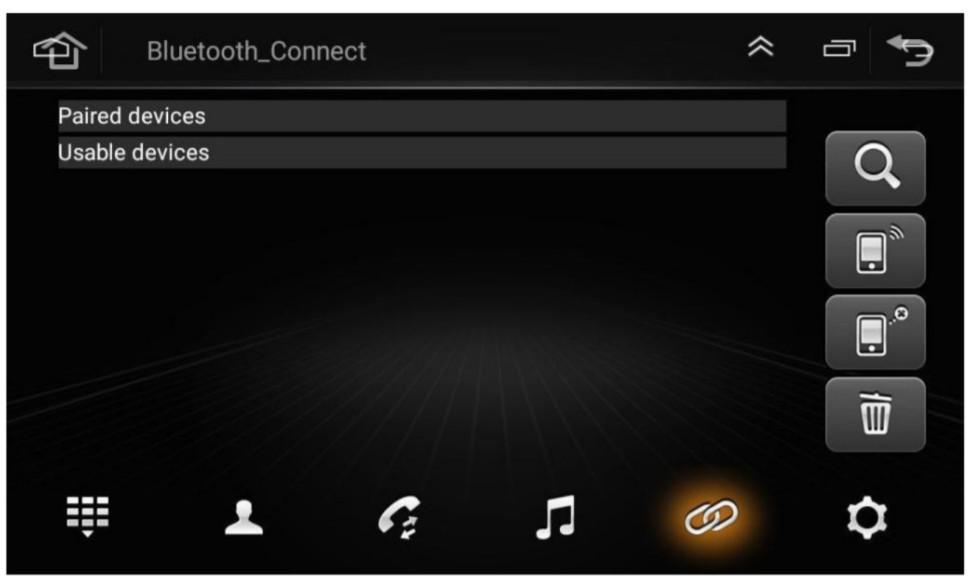
Bluetooth Connection
Press the Bluetooth icon on this page. Open the Bluetooth option on the mobile phone and search the device named “Car BT”, The PIN is “0000”. Users can also go to the setting to change the Bluetooth device tag and PIN.
 |
 |
If you want to play the music on your mobile phone, please click the music icon
Radio

FM: Switch the Radio band from FNI 1/FM2/FM3AM: Switch the Radio band from ANI 1/AM2![]() Short press for manual frequency search backward, long press for auto frequency search
Short press for manual frequency search backward, long press for auto frequency searchSearch: Long press this icon for auto search and memory of the stations.![]() Short press for manual frequency search forward, long press for auto frequency search.
Short press for manual frequency search forward, long press for auto frequency search.![]() Press this icon to select ST/LOC options.
Press this icon to select ST/LOC options.![]() Users can save their favorite radio frequency here. Press the relative column for 3 seconds, the current radio frequency is saved in this place.
Users can save their favorite radio frequency here. Press the relative column for 3 seconds, the current radio frequency is saved in this place.
Mirror Link Feature for
Use the APP named “TIMA” for the smartphone mirror link features.After you open the APP, your wilt goes to the Selection page according to your smartphone types
 |
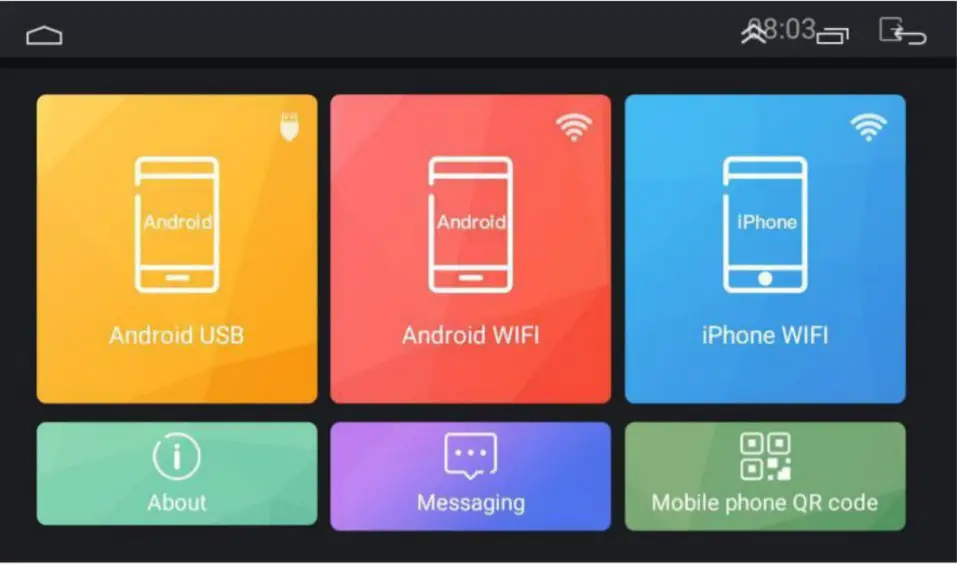 |
Please follow the steps in the APP according to the instruction displayed.
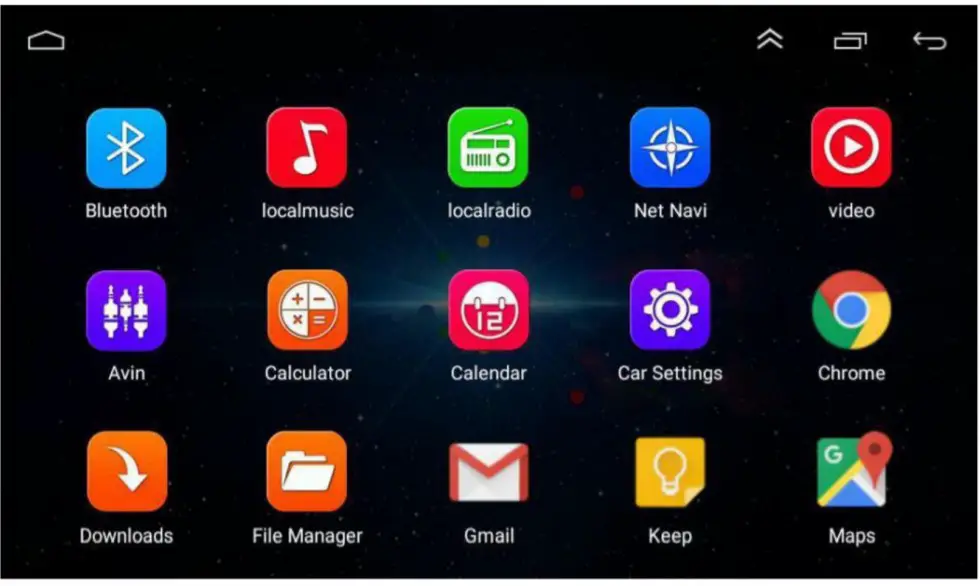
Car Setting:
This APP is specially designed for Car Android Device
6.1 Sound setting
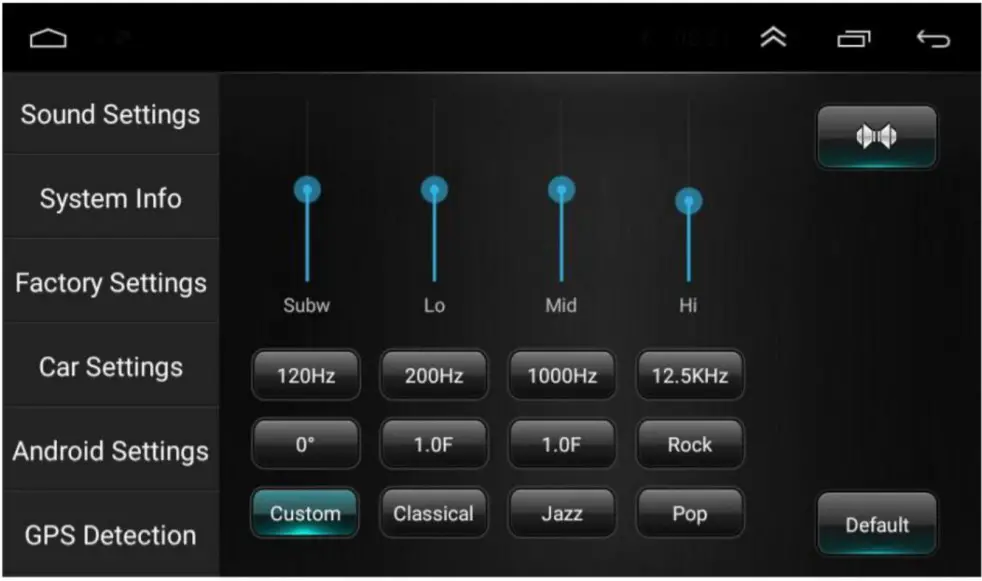 Users can adjust sound performance in this setting6.2 System Info
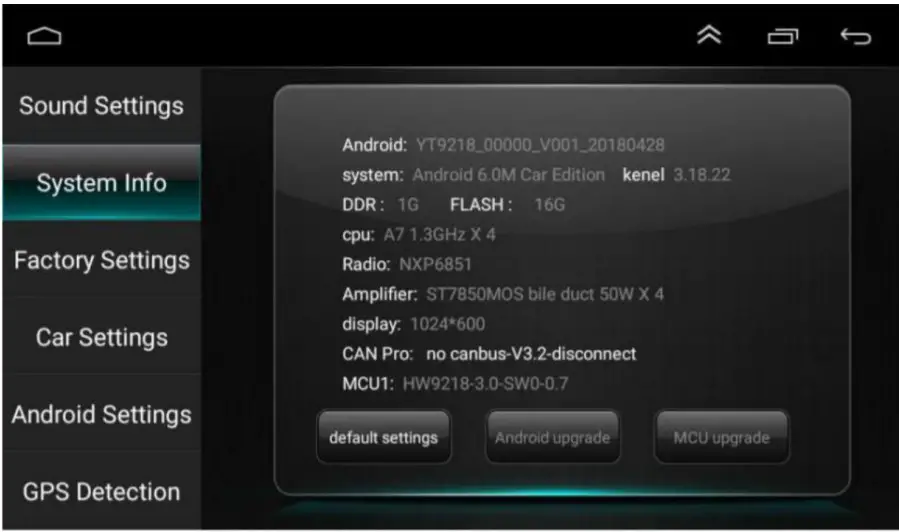
use’s can check the unit system information here(The atom information a for reference only end rs based en actual configuration).6.3 Factory Settings
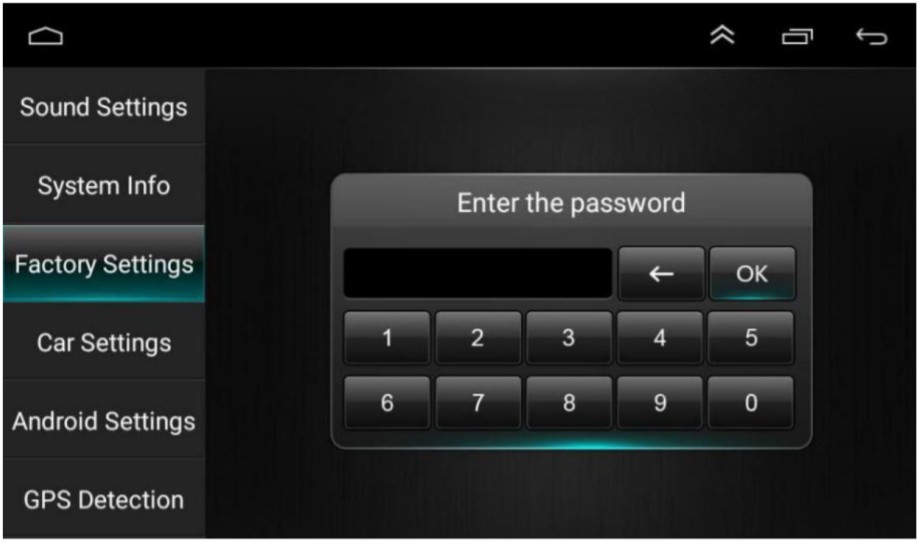
USN’S Carl change the (Mt resetting! haft vie do not recommend uses to Cferh;e any settings ho as it may recut unrocoyarabla damages to the unit (Password: 8e84)4.2 Car Settings:
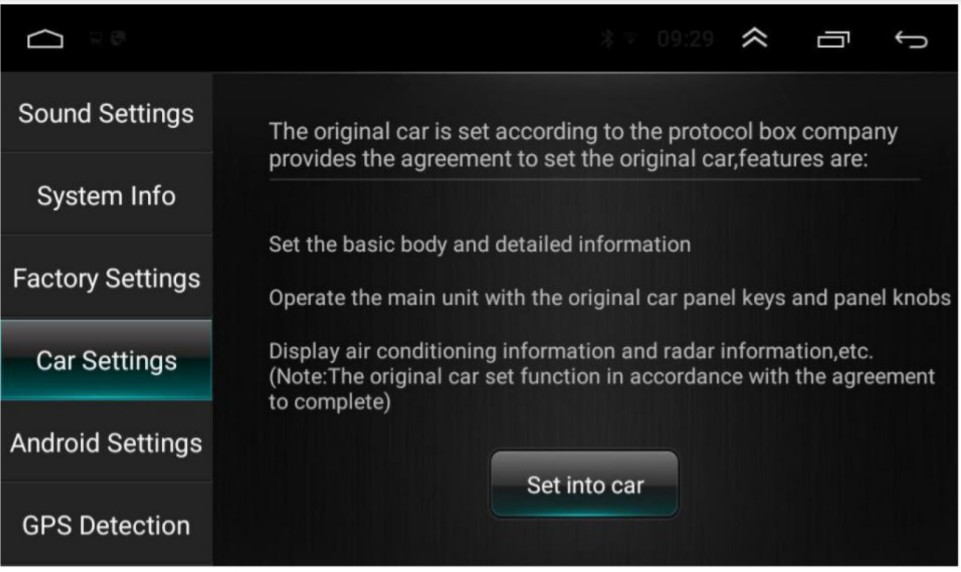
If users want to use the CANBUS to decode the car system do have the original steering wheel control, air conditioner, etc, please contact the sellers to buy the suitable CANBUS Decoding Box and make relative changes.6.5Android Settings
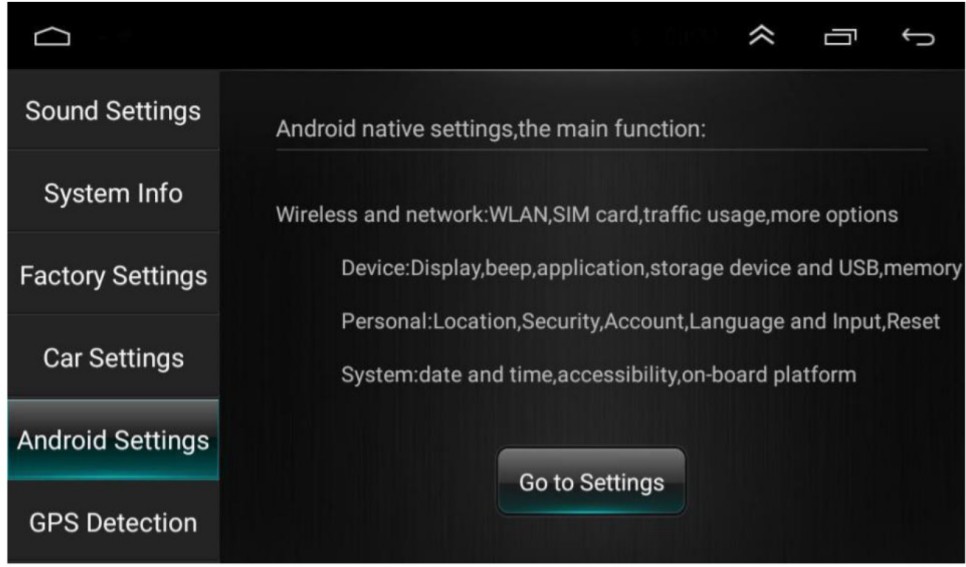
Users Press the “Go to settings” here to go to the android setting mode.6.6 GPS Detection
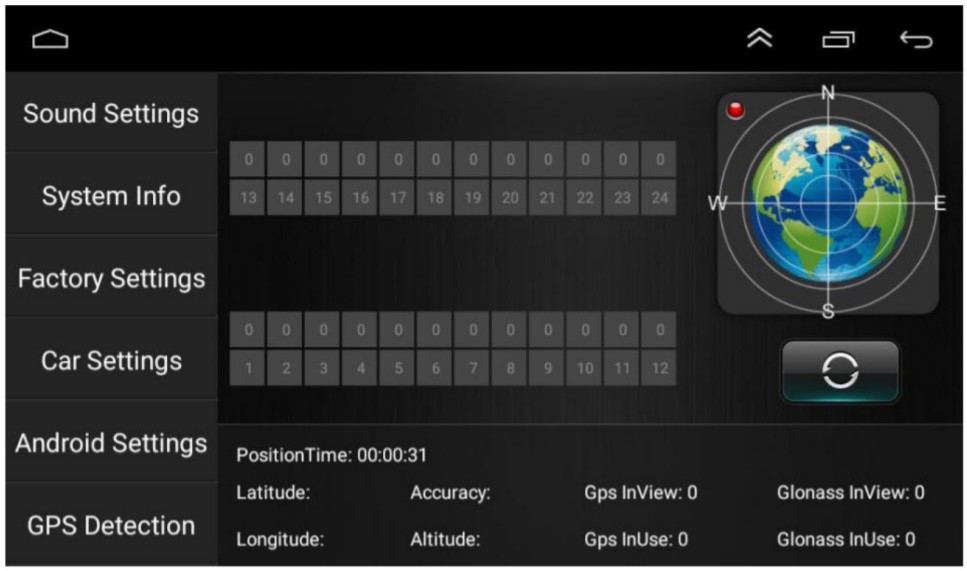
If users can not get the position in the navigation software, users can go here to check the hardware performance. If users can not find the GPS signal, please check if the GPS antenna is placed in the right way, make sure the receiver side is up, the side with stickers is down.6.7 Volume Settings
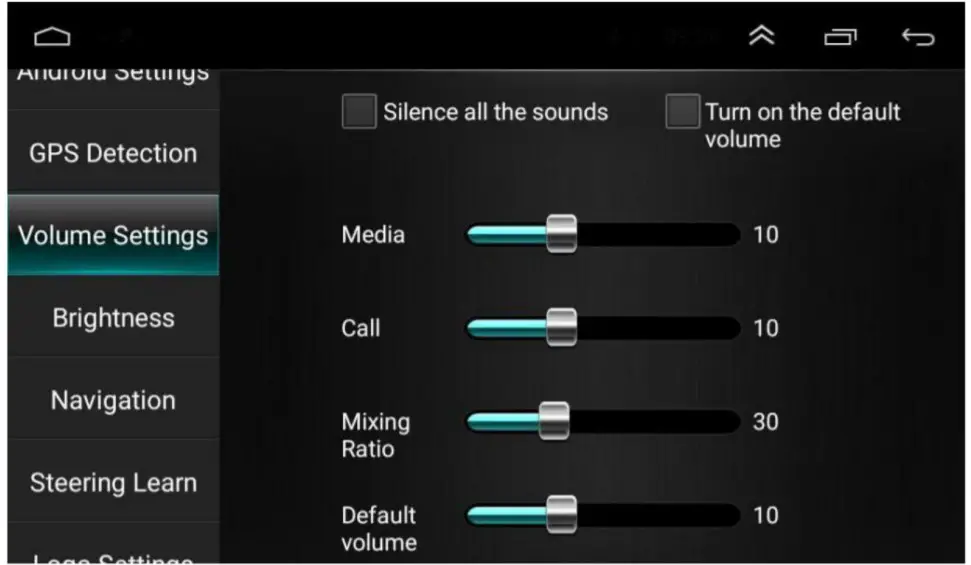
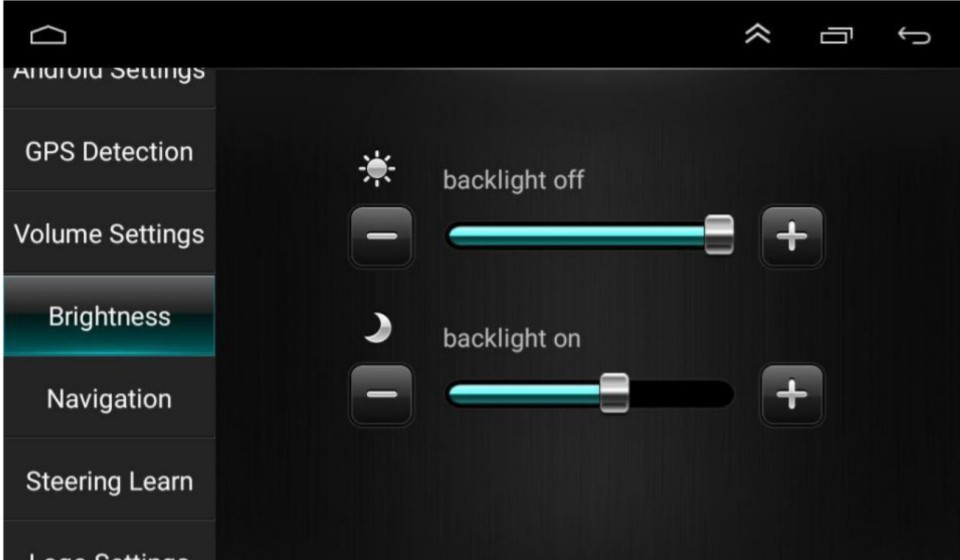
Users can adjust the volume ratio in different modes here.6.8 Brightness
Users can change the brightness of the screen here.6.9 Navigation

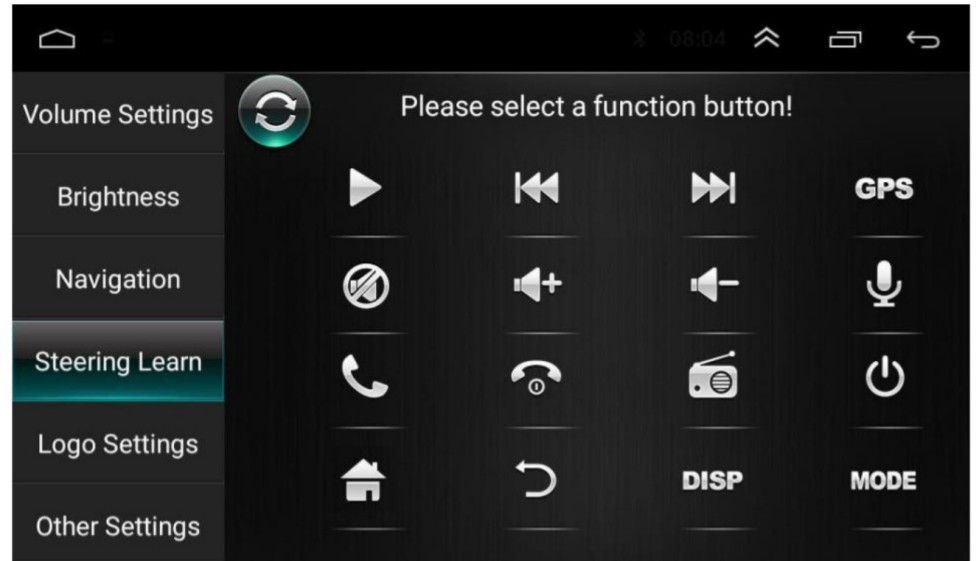
Users can select the relative navigation software as his preset one6.10 Steering Learn
Please follow the below steps to connect the wires:
- Find your car steering wheel control button signal wires, it is normally located under your driving wheel.
- The signals have two, one gives “+” voltage and another gives GND voltage.
- Check our unit power cable, there is a wire labeled “key1″ or ” key1″
- Connect the “+” Voltage wires to the “key1” or “key” wires.
- Connect the GND wire to the GND wires of our unit.
- Go to this option to learn the steering wheel control function.
- Press the relative function icon on the unit.
- Press your steering wheel control button and there will be a voltage on our unit to memory.
- Step by step to finalize all the buttons.
6.11 Logo Set ling

Users can change the startup logo here with their favorite.6.12 Other Settings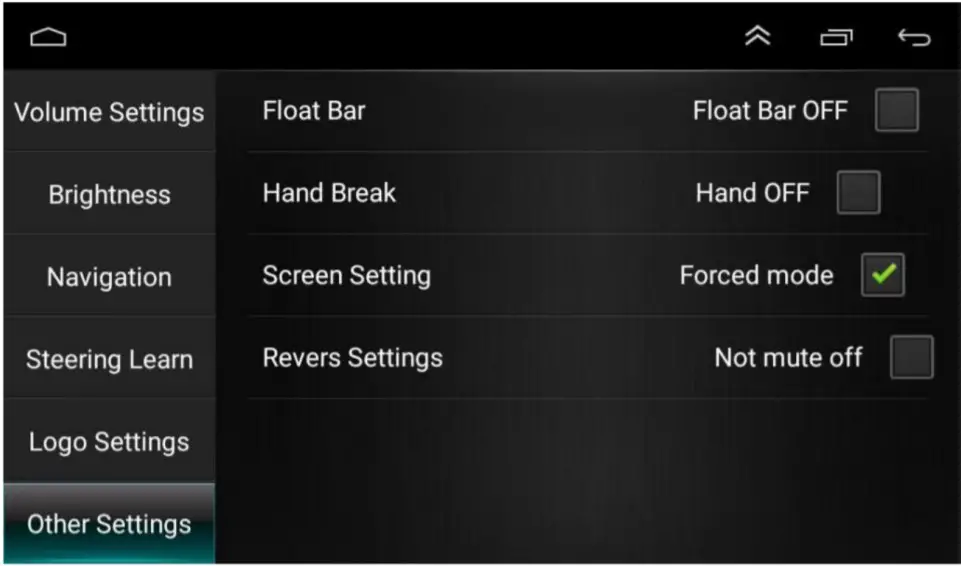 Float Bar: press this feature on to have the assistive touchpoint display on the screen all the timeHandbrake: press this on, then the device will not allow watching a video during driving due to safety reasonScreen Setting: This setting will force the screen in the Horizontal screen modeRevers Settings: if you need to have the sound of the unit when you are reversing the car and enter into reverse camera mode, please click it on
Common troubleshooting wizard
If you encounter the following problems in use, troubleshooting will help you quickly solve the problem, if the problem is still not resolved, it is recommended to contact our service department to help. solve.
| Phenomenon | Reason | Handle |
| Can not boot | The car key is not inserted into the switch and then switch is not open | Insert the vehicle key and open the door |
| Power line insertion host | Insert power cord | |
| Maybe the fuse of this machine is burned | Replace fuses with the same rated current | |
| The touch screen is not allowed | Please press 5 fingers on the main page of the unit for 20seconds. Users will go to the screen/touch button calibrate page automatically | |
| The touch screen does not respond | The system is dealing with transactions (road search, etc.), a moment, if the system is not working, you can try to reset it, if still can not be resolved, it is recommended to contact our service department to help solve | |
| The backlight of the button is not working | Please check if the wire labeled ILL” is connected to the front lamp wire. When the front lamp is on, the unit backlight will be on automatically. Users can also connect this ILL wire to continuous +12V to keep the button light on always. | |
| Without reversing the visual image | No camera installed | Install the camera, insert the CCD plug of the host |
| The camera standard is wrong | Replace camera with matching system | |
| The system is not started, rearview image reversing the process, the key is invalid | The driving safety of the emphasis on the principle of product design, the car after the preset priority | Must terminate the reverse action, in order to press the original car power button to start the system boot |
| GPS cannot locate | GPS antenna not inserted | Insert GPS antenna |
| Maybe in a number of GPS signal shielding area | Test the car out of a distance, to observe whether the recovery of GPS signal, if not restored, please contact the service department | |
| The boot can not locate and navigate | Navigation map blind, some remote mountain or the road has not been established in the local area | Please contact the after-sales service department to confirm the updated map |
| Fuzzy search can not find the place to go | First, confirm whether the input is correct, and then try to enter the location of another name, if you can not find it, it may not be in our database, It is recommended to connect WiFi to use on-line maps. | |
| The navigation system to the selected road detour | The navigation system in the road search will consider various factors, in addition to the distance will consider the level of the road, traffic rules, viaduct, trunk, etc., in short, to facilitate the drivers in the shortest possibletime to reach the destination. | |
| A blank on the map | It may be too large or too small for navigation scale. Try to change scale size to see if you can restore the map display. If it is not resolved, Maybe map data is lost, It is recommended to connect WiFi to use the online map. |
Back-up camera connection schematic
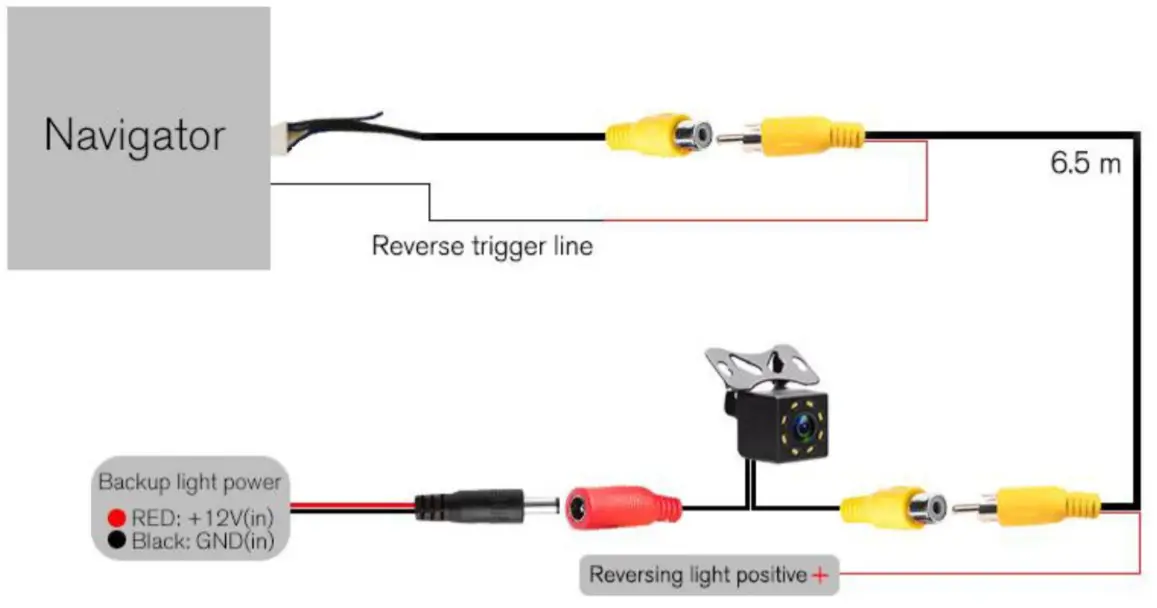
RCA Input/Output
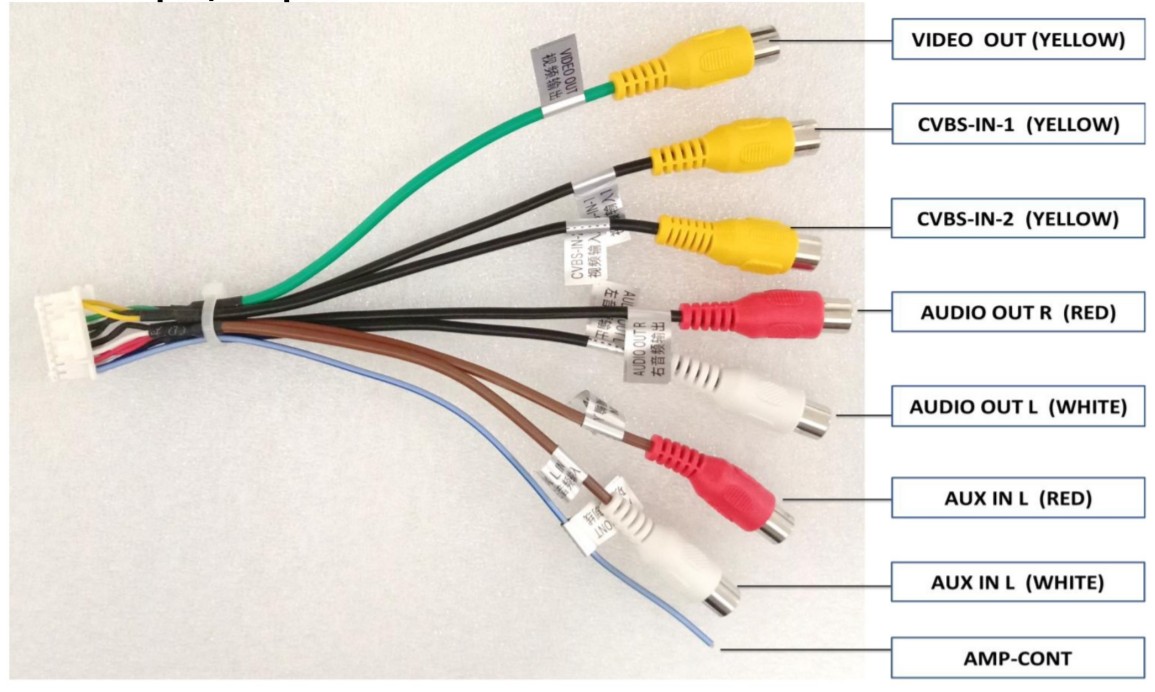
Installation Diagram
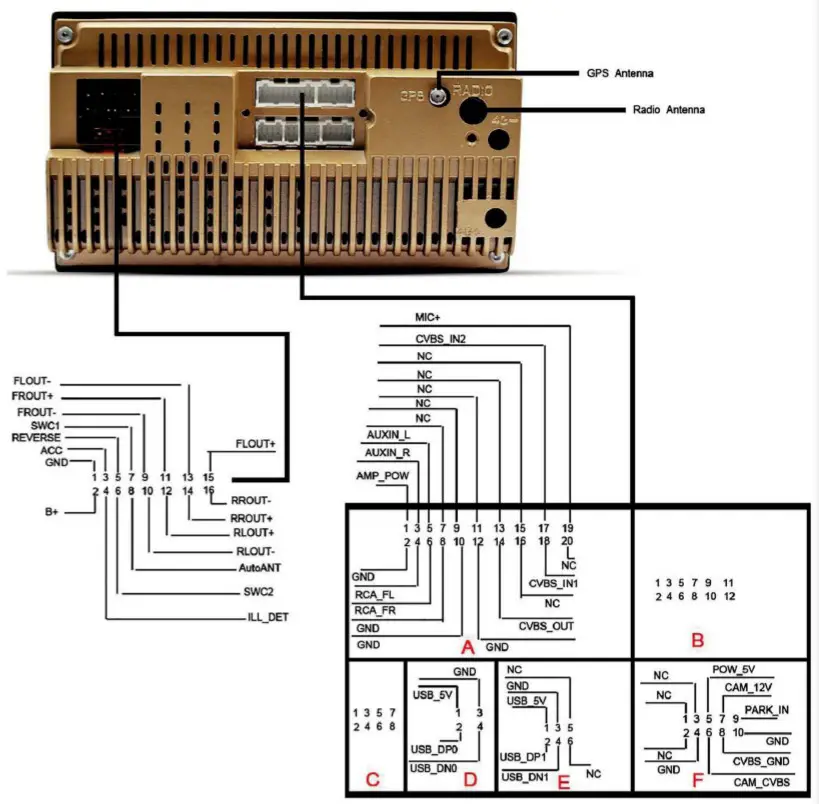
| 1 | GND | 9 | Front Right Speaker- |
| 2 | Battery 12V | 10 | Rear Left Speaker – |
| 3 | ACC | 11 | Frong Right Speaker + |
| 4 | Front Light Signal Wire | 12 | Rear Left Speaker + |
| 5 | REVERSE | 13 | Front Left Speaker – |
| 6 | SW2+ | 14 | Rear Right Speaker + |
| 7 | SW1+ | 15 | Front Left Speaker + |
| 8 | Auto ANT Power | 16 | Rear Right Speaker – |
Thank you for your time.
[xyz-ips snippet=”download-snippet”]