
Login with Amazon Getting Started Guide for Android

Login with Amazon: Getting Started Guide for AndroidCopyright © 2016 Amazon.com, Inc., or its affiliates. All rights reserved. Amazon and the Amazon logo are trademarks of Amazon.com, Inc. or its affiliates. All other trademarks not owned by Amazon are the property of their respective owners.
Getting Started for Android
In this guide we will show you how to add Login with Amazon to your Android app. After completing this guide you should have a working Login with Amazon button in your app to allow users to log in with their Amazon credentials.
Installing the Android Developer Tools
The Login with Amazon SDK for Android will help you add Login with Amazon to your Android application. We recommend you use the Login with Amazon SDK for Android from developer.amazon.com with Android Studio. You can however also use the Eclipse with ADT plugin. For steps on how to install Android Studio and on getting the Android SDK set up, see Get the Android SDK on developer.android.com.
When the Android SDK is installed, find the SDK Manager application in your Android installation. To develop for Login with Amazon, you must use the SDK Manager to install the SDK Platform for Android 2.2 or higher (API version 8). See Adding SDK Packages on developer.android.com for more information on using SDK
After installing the SDK, set up an Android Virtual Device (AVD) for running your apps. See Managing Virtual Devices on developer.android.com for instructions on setting up a virtual device.
When your development environment is set up, you can Install the Login with Amazon SDK for Android or Run the Sample App, as described below.
Install the Login with Amazon SDK for Android
The Login with Amazon SDK for Android comes in two packages. The first contains the Android library and supporting documentation. The second contains a sample application that allows a user to log in and displays their profile data.
If you have not already installed the Android SDK or the Android Development Tools, see the Installing the Android Developer Tools section above.
- Download zip and extract the files to a directory on your hard drive.You should see a doc and a lib subdirectory.
- Open doc/index.html to view the Login with Amazon Android API
- See Install the Login with Amazon Library , for instructions on how to add the library and documentation to an Android
When the Login with Amazon SDK for Android is installed, you can Create a New Login with Amazon Project, after Registering with Login with Amazon .
Run the Sample App
To run the sample application, import the sample into an AndroidStudio workspace (if you are using Eclipse, you must also add a custom debug keystore to the workspace. See the Add the Custom Debug Keystore in Eclipse section below). The API Key that the sample application uses requires the workspace to use the keystore that ships with the sample. If the custom keystore is not installed, users will not be able to log in using the sample. The keystore will be picked up automatically if you are using AndroidStudio.
- Download SampleLoginWithAmazonAppForAndroid-src.zip and extract the files to a directory on your hard
- Start Android Studio and select Open an existing Android Studio project
- Browse to the SampleLoginWithAmazonApp directory obtained after extracting the downloaded zip file in Step
- From the Build menu, click Make Project, and wait for the project to
- From the Run menu, click Run and then click the SampleLoginWithAmazonApp.
- Select the emulator or connected Android device and click Run.
Add the Custom Debug Key store in Eclipse
If you are using Eclipse, follow the instructions below to add the custom debug keystore:
- In the Preferences dialog, select Android and Build.
- Next to Custom Debug Keystore, click Browse.
- Navigate to the sample app directory and select 3p.keystore, and then click OK.
Registering with Login with Amazon
Before you can use Login with Amazon on a website or in a mobile app, you must register an application with Login with Amazon. Your Login with Amazon application is the registration that contains basic information about your business, and information about each website or mobile app you create that supports Login with Amazon. This business information is displayed to users each time they use Login with Amazon on your website or mobile app. Users will see the name of your application, your logo, and a link to your privacy policy. These steps demonstrate how to register a Login with Amazon application and add an Android app to that account.
See the following topics:
- Register Your Login with Amazon Application
- Register Your Android App
- Add an Android App for Amazon Appstore
- Add an Android App Without Appstore
- Android App Signatures and API Keys
- Determining an Android App Signature
- Retrieving an Android API Key
Register Your Login with Amazon Application
- Go to https://login.amazon.com.
- If you have signed up for Login with Amazon before, click App Console. Otherwise, click Sign Up. You will be redirected to Seller Central, which handles application registration for Login with If this is your first time using Seller Central, you will be asked to set up a Seller Central account.
- Click Register New Application. The Register Your Application form will appear:
 a. In the Register Your Application form, enter a Name and a Description for your application.The Name is the name displayed on the consent screen when users agree to share information with your application. This name applies to Android, iOS, and website versions of your application.b. Enter a Privacy Notice URL for your applicationThe Privacy Notice URL is the location of your company’s or application’s privacy policy (for example, http://www.example.com/privacy.html). This link is displayed to users on the consent screen.c. If you want to add a Logo Image for your application, click Browse and locate the applicable image.This logo is displayed on the sign-in and consent screen to represent your business or website. The logo will be shrunk to 50 pixels in height if it is taller than 50 pixels; there is no limitation on the width of the logo
 - Click Save. Your sample registration should look similar to this:After your basic application settings are saved, you can add settings for specific websites and mobile apps that will use this Login with Amazon account.
 a. In the Register Your Application form, enter a Name and a Description for your application.The Name is the name displayed on the consent screen when users agree to share information with your application. This name applies to Android, iOS, and website versions of your application.b. Enter a Privacy Notice URL for your applicationThe Privacy Notice URL is the location of your company’s or application’s privacy policy (for example,
 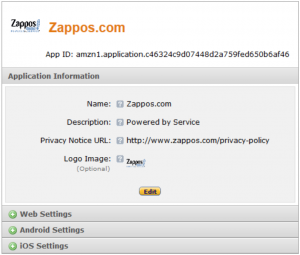 After your basic application settings are saved, you can add settings for specific websites and mobile apps that will use this Login with Amazon account.
Register Your Android App
To register an Android App, you have the choice of registering an app through the Amazon Appstore (Add an Android App for Amazon Appstore, p. 8) or directly with Login with Amazon (Add an Android App Without Appstore, p. 9). When your app is registered, you will have access to an API key that will grant your app access to the Login with Amazon authorization service.
Note: If you plan to use Amazon Device Messaging within your Android app, please contact lwa- [email protected] with:
- The email address of the Amazon account you used to sign up for Login with Amazon.
- The email address of the Amazon account you used to sign up for the Amazon Appstore (if different).
- The name on your Seller Central account. (On Seller Central, click Settings > Account Info > Seller Information, and use the Display Name).
- The name on your Amazon Appstore developer account. (On the Mobile App Distribution site, click Settings > Company Profile and use the Developer Name or Company Name).
Add an Android App for Amazon Appstore
The following steps will add an Amazon Appstore app to your Login with Amazon account:
- From the Application screen, click Android Settings. If you already have an Android app registered, look for the Add API Key button in the Android SettingsThe Android Application Details form will appear:
- Select Yes in answer to the question “Is this application distributed through the Amazon Appstore?”
- Enter the Label of your Android App. This does not have to be the official name of your app. It simply identifies this particular Android app among the apps and websites registered to your Login with Amazon application.
- Add your Amazon Appstore ID.
- If you self-signed your app, add self-signing information. This will allow you to obtain an API key during development without using the Appstore directly:a. If your app is not being signed through the Amazon Appstore, select Yes in answer to the question “Is this application self-signed?”The Android Application Details form will expand:b. Enter your Package Name.This must match the package name of your Android project. To determine the package name of your Android Project, open the project in your choice of Android developer tool.Open AndroidManifest.XML in Package Explorer and select the Manifest tab. The first entry is the Package name.c. Enter the app Signature.This is a SHA-256 hash value used to verify your application. The signature must be in the form of 32 hexadecimal pairs separated by colons (for example: 01:23:45:67:89:ab:cd:ef:01:23:45:67:89:ab:cd:ef:01:23:45:67:89:ab:cd:ef:01: 3:45:67:89:a b:cd:ef). See Android App Signatures and API Keys for steps you can use to extract the signature from your project.
- Click Save.
 b. Enter your Package Name.This must match the package name of your Android project. To determine the package name of your Android Project, open the project in your choice of Android developer tool.Open AndroidManifest.XML in Package Explorer and select the Manifest tab. The first entry is the Package name.c. Enter the app Signature.This is a SHA-256 hash value used to verify your application. The signature must be in the form of 32 hexadecimal pairs separated by colons (for example: 01:23:45:67:89:ab:cd:ef:01:23:45:67:89:ab:cd:ef:01:23:45:67:89:ab:cd:ef:01: 3:45:67:89:a b:cd:ef). See
 If different versions of your app have different signatures or package names, such as for one or more testing versions and a production version, each version requires its own API Key. From the Android Settings of your app, click the Add API Key button to create additional keys for your app (one per version).
Android App Signatures and API Keys
The app signature is a SHA-256 hash value that is applied to every Android app when it is built. Amazon uses the app signature to construct your API Key. The API Key enables Amazon services to recognize your app. If you use the Amazon Appstore to sign your app, the API key is provided automatically. If you are not using the Amazon Appstore, you will need to manage your API key manually.
App signatures are stored in a keystore. Generally, for Android apps there is a debug keystore and a release keystore. The debug keystore is created by the Android Development Tools plugin for Eclipse and is used by default. You can find the location of the debug keystore in Eclipse by clicking Window, and then selecting Preferences > Android > Build. From that screen you can also add your own debug keystore. For Android Studio, from the Build menu, select Edit Build Types, then go to the Signing tab, and locate the debug keystore in the Store File field.
A release keystore is normally created when you export your Android app to create a signed APK file.
Through the export process, if you are creating a new release keystore you will select its location. By
default it will be placed in the same location as your default debug KeyStore.
If you have registered your app using the debug signature during development, you will have to add a new Android setting to your application when you are ready to release the app. The new app setting must use the signature from the release keystore.
See Signing Your Applications on developer.android.com for more information.
Determine the Android App Signature
- If you have a signed APK file:a. Unzip the APK file and extract CERT.RSA. (You can rename the APK extension to ZIP if necessary).b. From the command line, run:
keytool -printcert -file CERT.RSA Keytoolis located in the bin directory of your Java installation.
- If you have a keystore file:a. From the command line, run:
keytool -list -v -alias <alias> -keystore <keystore.filename> Keytool is located in the bin directory of your Java installation. The alias is the name of the key used to sign the app.b. Enter the password for the key and press Enter.
- Under Certificate Fingerprints, copy the SHA256 value.
Retrieve the Android API Key
When you have registered an Android setting and provided an app signature, you can retrieve the API key from the registration page for your Login with Amazon application. You will need to place that API key into a file in your Android project. Until you do, the app will not be authorized to communicate with the Login with Amazon authorization service.
- Go to https://login.amazon.com.
- Click App Console.
- In the Applications box at left, select your
- Find your Android app under the Android Settings (If you have not yet registered an Android app, see Add an Android App for Amazon Appstore).
- Click Generate API Key Value. A popup window will display your API key. To copy the key, click Select All to select the entireNote: The API Key Value is based, in part, on the time it is generated. Thus, subsequent API Key Value(s) you generate may differ from the original. You can use any of these API Key Values in your app as they are all valid.
- See Add Your API Key to Your Project for instructions on adding the API key to your Android
Creating a Login with Amazon Project
In this section, you will learn how to create a new Android project for Login with Amazon, configure the project, and add code to the project to sign in a user with Login with Amazon. We will be describing the steps for Android Studio, but you can apply analogous steps to any IDE or Android development tool of your choice.
See the following topics:
- Create a New Login with Amazon Project
- Install the Login with Amazon Library
- Enable Content Assist for the Login with Amazon Library
- Set Network Permissions for Your App
- Add Your API Key to Your Project
- Remove the Sample App Custom Debug Keystore
- Handle Configuration Changes for Your Activity
- Add an Authorization Activity to Your Project
- Add a Login with Amazon Button to Your App
- Handle the Login Button and Get Profile Data
- Check for User Login at Startup
- Clear Authorization State and Log Out a User
- Call Amazon Authorization Manager Methods Synchronously
Create a New Login with Amazon Project
If you do not yet have an app project for using Login with Amazon, follow the instructions below to create one. If you have an existing app, skip to Install the Login with Amazon Library .
- Launch Android Development Tool.
- From the File menu, select New and Project.
- Enter an Application Name and Company Name for your
- Enter the Application and Company Name corresponding to the package name that you chose when you registered your app with Login with Amazon.If you haven’t registered your app yet, choose a Package Name and then follow the instructions in the Registering with Login with Amazon section after you create your project. If the package name of your app does not match the registered package name, your Login with Amazon calls will not succeed.
- Select a Minimum Required SDK of API 8: Android 2 (Froyo) or higher, and click Next.
- Select the type of activity you want to create and click Next.
- Fill in the relevant details and click Finish.
You will now have a new project in your workspace that you can use to call Login with Amazon.
Install the Login with Amazon Library
If you have not yet downloaded the Login with Amazon SDK for Android, see Install the Login with Amazon SDK for Android (p. 4).
- With your project open in Android Developer Tools, in Project Explorer, right-click your Project.
- If a folder called libs is not already present, create
- Copy the login-with-amazon-sdk.jar file from the File System, and then paste it in the libs directory under your project/app.
- Right-click login-with-amazon-sdk.jar, and check the Add As Library
Enable Content Assist for the Login with Amazon Library in Eclipse
To enable the Eclipse content assist support in an Android project requires using a .properties file. For more information on content assist, see Content/Code Assist onhelp.eclipse.org.
To enable the Eclipse content assist support in an Android project requires using a .properties file. For more information on content assist, see Content/Code Assist onhelp.eclipse.org.
- In Windows Explorer, navigate to the docs folder for the Login with Amazon SDK for Android and copy the folder to the
- With your project open, go to Package Explorer and select the libs Click Edit from the main menu and select Paste. You should now have a libs\docs directory.
- Select the libs Click File from the main menu and select New andFile.
- In the New File dialog, enter login-with-amazon-sdk.jar.properties and click Finish.
- Eclipse should open login-with-amazon-sdk.jar.properties in the text editor. In the text editor, add the following line to the file:
doc=docs - From the File menu, click Save.
- You may need to restart Eclipse for the changes to take effect
Set Network Permissions for Your App
In order for your app to use Login with Amazon, it must access the Internet and access network state information. Your app must assert these permissions in your Android manifest, if it doesn’t already.
NOTE: The procedure steps below are specific to adding the permissions in Eclipse. If you are using Android Studio or a different IDE, you can skip all of the numbered steps below. Instead, copy the lines of code displayed below the screenshot, and paste them into the AndroidManifest.xml file, outside of the application block.
- In Package Explorer, double-click xml.
- On the Permissions tab, click Add.
- Select Uses Permission and click OK.
- To the right of Permissions, find the Attributes for Uses Permission
- In the Name box, enter permission. INTERNET or select it from the drop-down.
- On the Permissions tab, click Add
- Select Uses Permission and click OK.
- In the Name box, enter permission.ACCESS_NETWORK_STATE or select it from the drop-down
- From the File menu, click Save.Your manifest permissions should now have the following values:In the AndroidManifest.xml tab, you should now see these entries under the manifest element:
<uses-permission android:name=”android.permission.INTERNET”/> <uses-permission android:name=”android.permission.ACCESS_NETWORK_STATE”/>
 In the AndroidManifest.xml tab, you should now see these entries under the manifest element:
Add Your API Key to Your Project
When you register your Android application with Login with Amazon, you are assigned an API key. This is an identifier that the Amazon Authorization Manager will use to identify your application to the Login with Amazon authorization service. If you are using the Amazon Appstore to sign your app, the Appstore will provide the API key automatically. If you are not using the Amazon Appstore, the Amazon Authorization Manager loads this value at runtime from the api_key.txt file in the assets directory.
- If you do not have your API Key yet, follow the instructions in Retrieve the Android API Key (p. 11).
- With your ADT project open, from the File menu, click New and select Untitled Text File. You should now have an editor window for a text file named Untitled 1. Add your API key to the text
- From the File menu, click Save As.
- In the Save As dialog, select the assets directory of your project as the parent folder. For File name, enter txt.
Remove the Sample App Custom Debug Keystore
NOTE: This step is required only if you are using Eclipse; if you are using Android Studio, skip this section.
If you installed the Login with Amazon for Android sample application into the same workspace you are using for your Android app, you may have a custom debug keystore set for the workspace. You need to clear the custom debug keystore in order to use your own API key.
- From the main menu, click Window and select Preferences.
- In the Preferences dialog, select Android and Build.
- Clear the Custom debug keystore
- Click OK.
Handle Configuration Changes for Your Activity
If a user changes the screen orientation or changes the keyboard state of the device while they are logging in, it will prompt a restart of the current activity. This restart will dismiss the login screen unexpectedly. To prevent this, you should set the activity that uses the authorize method to handle those configuration changes manually. This will prevent a restart of the activity.
- In Package Explorer, double-click xml.
- In the Application section, locate the activity that will handle Login with Amazon (for example, MainActivity).
- Add the following attribute to the activity you located in Step 2:
android:configChanges=”keyboard|keyboardHidden|orientation” Or for API 13 or greater:
android:configChanges=”keyboard|keyboardHidden|orientation|screenSize” - From the File menu, click SaveNow, when a keyboard or device orientation change happens, Android will call the onConfigurationChanged method for your activity. You do not need to implement this function unless there is an aspect of these configuration changes that you want to handle for your app
When the user clicks the Login with Amazon button, the API will launch a web browser to present a login and consent page to the user. In order for this browser activity to work, you must add the AuthorizationActivity to your manifest.
- In Package Explorer, double-click xml.
- In the Application section, add the following code, replacing “com.example.app” with your package name for this app:
<activity android:name=“com.amazon.identity.auth.device.authorization.AuthorizationActivity” android:theme=”@android:style/Theme.NoDisplay” android:allowTaskReparenting=”true” android:launchMode=”singleTask”><intent-filter><action android:name=”android.intent.action.VIEW” /><category android:name=”android.intent.category.DEFAULT” /><category android:name=”android.intent.category.BROWSABLE” /><!– android:host must use the full package name found in Manifest General Attributes –><dataandroid:host=”com.example.app” android:scheme=”amzn” /></intent-filter></activity>
your app. This section gives steps for downloading an official Login with Amazon image and pairing it with an Android ImageButton.
- Add a standard ImageButton to your app.For more information on Android buttons and the ImageButton class, see Buttons on developer.android.com.
- Give your button an id.In the button XML declaration, set the android:id attribute to @+id/login_with_amazon. For example:
android:id=”@+id/login_with_amazon” - Choose a button image.Consult our Login with Amazon Style Guidelines for a list of buttons that you can use in your app. Download a copy of the LWA_Android.zip file. Extract a copy of your preferred button for each screen density your app supports (xxhdpi, xhdpi, hdpi, mdpi, or tvdpi). For more information on supporting multiple screen densities in Android, see Alternative Layouts in the “Supporting Multiple Screens” topic ondeveloper.android.com.
- Copy the appropriate button image files to your project.For each screen density that you support (xhdpi, hdpi, mdpi, or ldpi), copy the downloaded button to the res/drawable directory for that screen density.
- Declare the button image.In the button XML declaration, set the android:src attribute to the name of the button you have chosen. For example:
android:src=”@drawable/btnlwa_gold_loginwithamazon.png” 6. Load your app, and verify that the button now has a Login with Amazon image. You should verify that the button displays properly for each screen density you support.
This section explains how to call the authorize and getProfile APIs to log in a user and retrieve their profile data. This includes creating an onClick listener for your Login with Amazon button in the onCreate method of your app.
- Add Login with Amazon to your Android project. See Install the Login with Amazon Library .
- Import the Login with Amazon API to your sourceTo import the Login with Amazon API, add the following import statements to your source file:
import com.amazon.identity.auth.device.AuthError; importcom.amazon.identity.auth.device.authorization.api.AmazonAuthorizationManager; importcom.amazon.identity.auth.device.authorization.api. AuthorizationListener; import com.amazon.identity.auth.device.authorization.api.AuthzConstants; - Initialize AmazonAuthorizationManager.You will need to declare an AmazonAuthorizationManager variable and create a new instance of the class. Creating a new instance only requires your current application context and an empty bundle. The best place to initialize AmazonAuthorizationManager is in the onCreate method of your Activity. For example:
- Create an AuthorizeLiistener.AuthorizeListener implements the AuthorizatioinListener interface, and will process the result of the authorizecall. It contains three methods: oinSuccess, onError, and onCanceil. Each method receives either a Bundle or an AuthError object.
private class AuthorizeListener implements AuthorizationListener{/* Authorization was completed successfully. */@Overridepublic void onSuccess(Bundle response) {}/* There was an error during the attempt to authorize the application.*/@Overridepublic void onError(AuthError ae) {}/* Authorization was cancelled before it could be completed. */@Overridepublic void onCancel(Bundle cause) {}} - Call AmazonAuthorizationManager.authorize.In the onClick handler for your Login with Amazon button, call authorize to prompt the user to log in and authorize your application.This method is responsible for authorizing the customer in one of the following ways:
- Switches to the system browser and lets the customer sign in and consent to the requested
- Switches to web view in a secure context, to let the customer sign in and consent to the requested
This secure context for #2 is currently made available as the Amazon Shopping app on Android devices. Amazon-created devices running Fire OS (for example Kindle Fire, Fire Phone, and Fire TV) always use this option even if there is no Amazon Shopping app on the device. Because of this, if the customer is already signed in to the Amazon Shopping app, this API will skip the sign- in page, leading to a Single Sign On experience for the customer.When your application is authorized, it is authorized for one or more data sets known as scopes. The first parameter is an array of scopes that encompass the user data that you are requesting from Login with Amazon. The first time a user logs in to your app, they will be presented with a list of the data you are requesting and asked for approval. Login with Amazon currently supports three scopes: profile, which contains the user’s name, email address, and Amazon account id; profile:user_id, which contains only the Amazon account id; and postal_code, which contains the user’s zip/postal code.The best way to call authorize is asynchronously, so you do not have to block the UI thread or create a worker thread of your own. To call authorizeasynchronously, pass an object that supports the AuthorizationListenerinterface as the last parameter:
private AmazonAuthorizationManager mAuthManager; @Overrideprotected void onCreate(Bundle savedInstanceState) {super.onCreate(savedInstanceState);mAuthManager = new AmazonAuthorizationManager(this, Bundle.EMPTY);
// Find the button with the login_with_amazon ID// and set up a click handlermLoginButton = (Button) findViewById(R.id.login_with_amazon);mLoginButton.setOnClickListener(new OnClickListener() {@Overridepublic void onClick(View v) {mAuthManager.authorize(new String []{“profile”,”postal_code”},Bundle.EMPTY, new AuthorizeListener());}});}
- Create a ProfileListener.ProfileListener is our name for a class that implements the APIListener interface, and will process the result of the getProfile call. APIListener contains two methods: onSuccess and onError (it does not support onCancel because there is no way to cancel a getProfile call). onSuccess receives a Bundle object with profile data, while onEriror receives an AuthError object with information on the error.
private class ProfileListener implements APIListener{ /* getProfile completed successfully. */ @Overridepublic void onSuccess(Bundle response) {
}/* There was an error during the attempt to get the profile. */ @Overridepublic void onError(AuthError ae) {}}
- Implement onSuccess for your AuthorizeListener.In onSuccess, call AmazonAuthorizationManager.getProfile to retrieve the customer profile. getProfile, like authorize, uses an asynchronous listener interface. For getProfile, that interface is APIListener, notAuthorizationListener.
/* Authorization was completed successfully. */ @Overridepublic void onSuccess(Bundle response) {mAuthManager.getProfile(new ProfileListener());} - Implement onSuccessfor your ProfileListener.onSuccesshas two main tasks: to retrieve the profile data from the response Bundle, and to pass the data to the UI. updateProfileDatais a hypothetical function your app could implement to display profile details. setLoggedInState, another hypothetical function, would indicate that a user is logged in and give them a means of loggingout.To retrieve the profile data from the Bundle, we use names stored by the AuthzConstants class. The onSuccess bundle contains the profile data in a BUNDLE_KEY.PROFILE bundle.Within the profile bundle, the scope data is indexed under PROFILE_KEY.NAME, PROFILE_KEY.EMAIL, PROFILE_KEY.USER_ID, and PROFILE_KEY.POSTAL_CODE. PROFILE_KEY.POSTAL_CODE is only included if you request the postal_code scope.
@Overridepublic void onSuccess(Bundle response) {// Retrieve the data we need from the Bundle Bundle profileBundle = response.getBundle(AuthzConstants.BUNDLE_KEY.PROFILE.val);String name = profileBundle.getString(AuthzConstants.PROFILE_KEY.NAME.val);String email = profileBundle.getString(AuthzConstants.PROFILE_KEY.EMAIL.val);String account = profileBundle.getString(AuthzConstants.PROFILE_KEY.USER_ID.val);String zipcode = profileBundle.getString(AuthzConstants.PROFILE_KEY.POSTAL_CODE.val);runOnUiThread(new Runnable() { @Overridepublic void run() {updateProfileData(name, email, account, zipcode);}});} - Implement onError for your ProfileListener.onError includes an AuthError object containing details about the error.
/* There was an error during the attempt to get the profile. */ @Overridepublic void onError(AuthError ae) {/* Retry or inform the user of the error */} - Implement onErrorfor your AuthorizeListener.
/* There was an error during the attempt to authorize the application.*/@Overridepublic void onError(AuthError ae) {/* Inform the user of the error */} - Implement onCancelfor your AuthorizeListener.Because the authorization process presents a login screen (and possibly a consent screen) to the user in a web browser (or a webview), the user will have an opportunity to cancel the login or navigate away from the web page. If they explicitly cancel the login process, onCancel is called. If onCancelis called, you will want to reset your UI.
/* Authorization was cancelled before it could be completed. */@Overridepublic void onCancel(Bundle cause) {/* reset the UI to a ready-to-login state */} Note: If the user navigates away from the login screen in the browser or web view and switches back to your app, the SDK will not detect that the login was not completed. If you detect user activity in your app before login is completed, you can assume they have navigated away from the browser and react accordingly.
Check for User Login at Startup
If a user logs into your app, closes the app, and restarts the app later, the app is still authorized to retrieve data. The user is not logged out automatically. At startup, you can show the user as logged in if your app is still authorized. This section explains how to use getToken to see if the app is still authorized.
- Create a TokenListener.TokenListener implements the APIListener interface, and will process the result of the getToken call. APIListener contains two methods: onSuccess and onError (it does not support onCancel because there is no way to cancel a getToken call). onSuccess receives a Bundle object with token data, while onError receives an AuthError object with information on the error.
private class TokenListener implements APIListener{ /* getToken completed successfully. */ @Overridepublic void onSuccess(Bundle response) {}/* There was an error during the attempt to get the token. */ @Overridepublic void onError(AuthError ae) {}}
- In the onStart method of your Activity, call getToken to see if the application is still authorized.getToken retrieves the raw access token that the AmazonAuthorizationManager uses to access a customer profile. If the token value is not null, then the app is still authorized and a call to getProfile should succeed. getTokenrequires the same scopes you requested in your call to authorize.getTokensupports asynchronous calls in the same manner as getProfile, so you do not have to block the UI thread or create a worker thread of your own. To call getToken asynchronously, pass an object that supports the APIListener interface as the final parameter.
@Overrideprotected void onStart(){super.onStart();mAuthManager.getToken(new String []{“profile”,”postal_code”},newTokenListener());} - Implement onSuccess for your TokenListener.onSuccesshas two tasks: to retrieve the token from the Bundle, and if the token is valid, to call getProfile.To retrieve the token data from the Bundle, we use names stored by the AuthzConstants class. The onSuccess bundle contains the token data in a BUNDLE_KEY.TOKEN value. If that value is not null, this example calls getProfile using the same listener you declared in the previous section (see steps 7 and 8).
/* getToken completed successfully. */@Overridepublic void onSuccess(Bundle response) {final String authzToken =response.getString(AuthzConstants.BUNDLE_KEY.TOKEN.val);if (!TextUtils.isEmpty(authzToken)){// Retrieve the profile datamAuthManager.getProfile(new ProfileListener());}}
The clearAuthorizationState method will clear the user’s authorization data from the AmazonAuthorizationManager local data store. A user will have to log in again in order for the app to retrieve profile data. Use this method to log out a user, or to troubleshoot login problems in the app.
- Implement a logoutWhen a user has successfully logged in, you should provide a logout mechanism so they can clear their profile data and previously authorized scopes. Your mechanism might be a hyperlink, or a menu item. For this example we will create an onClick method for a button.
- In your logout handler, call clearAuthorizationState. clearAuthorizationState will remove a user’s authorization data (access tokens, profile) from the local store. clearAuthorizationStatetakes no parameters except for an APIListener to return success or
- Declare an anonymous APIListener.Anonymous classes are a useful alternative to declaring a new class to implement APIListener. See Handle the Login Button and Get Profile Data (p. 17) for an examplethat declares listener classes.
- Implement onSuccess inside the APIListenerWhen clearAuthorizationState succeeds you should update your UI to remove references to the user, and provide a login mechanism users can use to log in again.
- Implement onError inside the APIListener.If clearAuthorizationStatereturns an error, you can let the user try to log out again.
@Overrideprotected void onCreate(Bundle savedInstanceState) {super.onCreate(savedInstanceState);/* Previous onCreate declarations omitted */// Find the button with the logout ID and set up a click handlermLogoutButton = (Button) findViewById(R.id.logout);mLogoutButton.setOnClickListener(new OnClickListener() {@Overridepublic void onClick(View v) {mAuthManager.clearAuthorizationState(newAPIListener() {@Overridepublic void onSuccess(Bundle results) {// Set logged out state in UI}@Overridepublic void onError(AuthError authError) {// Log the error}});}});}
Some AmazonAuthorizationManager methods return a Future object. This allows you to call the method synchronously instead of passing a listener as a parameter. If you do use a Future object, you should not use it on a UI thread. If you block a UI thread for more than five seconds you will get an ANR (Application Not Responding) prompt. In the Handle the Login Button and Get Profile Data example , the onSuccess method for AuthorizeListener is called with a worker thread created by AmazonAuthorizationManager. This means it is safe to use that thread to call getPirofile synchronously. To make a synchronous call, assign the return value from getPirofile to a Future object, and call the gietmethod on that object to wait until the method completes.
Fuiture.get returns a Bundle object that contains a FUTURE_TYPE value of SUCCESS, ERROR, or CANCEL. If the method was a success, the same bundle will contain PROFILE_KEY values for the profile data. For example:
| /* Authorization was completed successfully. */@Overridepublic void onSuccess(Bundle response) {Future<Bundle> future = mAuthManager.getProfile(null); Bundle result = future.get();// Find out if the call succeeded, and retrieve the profile Object future_type =result.get(AuthzConstants.BUNDLE_KEY.FUTURE.val);if (future_type == AuthzConstants.FUTURE_TYPE.SUCCESS){String name = result.getString( AuthzConstants.PROFILE_KEY.NAME.val);String email = result.getString( AuthzConstants.PROFILE_KEY.EMAIL.val);String account = result.getString( AuthzConstants.PROFILE_KEY.USER_ID.val);String zipcode = result.getString( AuthzConstants.PROFILE_KEY.POSTAL_CODE.val);runOnUiThread(new Runnable() { @Overridepublic void run() { updateProfileData(name, email, account,zipcode);}});}else if (future_type == AuthzConstants.FUTURE_TYPE.ERROR){// Get error objectAuthError authError = AuthError.extractError(result);/* Use authError to diagnose error */
}else if (future_type == AuthzConstants.FUTURE_TYPE.CANCEL){/* User cancelled during authorization */}} |
Login with Amazon Getting Started Guide for Android – Login with Amazon Getting Started Guide for Android –
[xyz-ips snippet=”download-snippet”]