![]()
10 Cup Rice cookerInstruction Manual

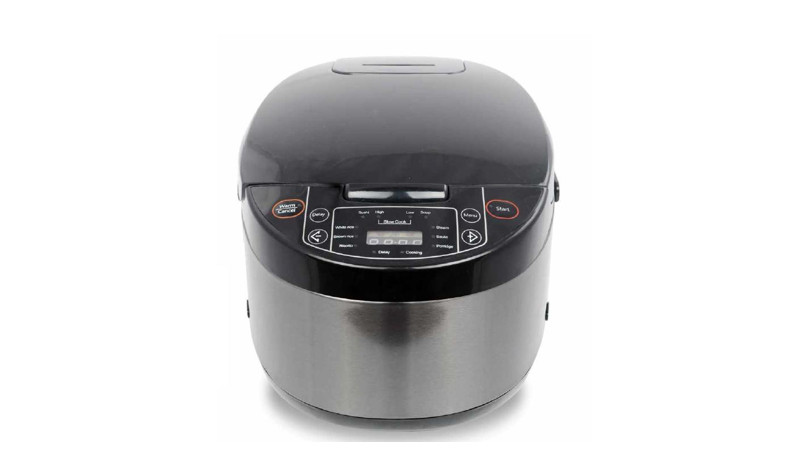
Model: CFXB50-B
PLEASE READ AND SAVE THESE INSTRUCTIONS FOR FUTURE REFERENCE
IMPORTANT SAFEGUARDS
READ ALL INSTRUCTIONS CAREFULLY BEFORE FIRST USE.
- To reduce electric shock, risk of fire or injury, please read the operating instructions carefully before using the appliance for the first time and keep them for future reference.
- Never immerse the appliance in water or other liquids.
- Never operate the appliance if any cable or part has been damaged or malfunctioned.
- For electrical safety, appliance should only to be repaired by a qualified electrical person.IMPORTANT! Children and infirm person are not aware of the hazards of an electric appliance. Therefore, never allow them to operate the appliance unless they are properly supervised.
- Please turn OFF and unplug the appliance before cleaning, maintenance or relocation, and whenever it is not in use.
- This appliance is for household use only.
- Do not place any objects on the appliance.
- Please place the power cord in the right place in order to avoid tripping the unit over.
- This appliance is not intended for use by persons (including children) with reduced physical, sensory or mental capabilities, or lack of experience and knowledge unless they have been given supervision or instructions concerning use of the appliance by a person responsible for their safety.
- Children should be supervised to ensure that they do not play with the appliance.
- When the supply cord is damaged, it must be replaced by manufacturer, its service agent or similarly qualified persons in order to avoid a hazard.
- The appliance should be installed at minimum distance of 10cm from the wall or other obstacles.
- Do not use bug sprays or other flammable cleaners on the unit and keep away from any fire and heat sources.
- This appliance is for household use only. Do not use outdoors.
- The power cord must be plugged into the wall outlet with earthing.
- Always keep the rice cooker disconnected from mains power when not in use.
- Do not put the cooker on a wet or unstable place, or near a heating range to avoid deformity.
- To prevent damage to the inner cooking pot, do not heat the pot on a stove. Never use other containers in the cooker.
- Do not cover the cooker with a cloth, as this may warp or discolor the outer lid.
- The steam vent is very hot during cooking. Keep face and hands away from outer lid and steam vent.
- To protect against electric shock, do not immerse the appliance and electric cord in water or any liquid. Do not allow any liquid to fall on the electric parts.
- If the power cord and damaged, DO NOT USE. The supply cord must be replaced with the same type and size only. If unsure, consult a qualified electrical person for advice.
- This appliance is intended to be used in household and similar applications such as: – Staff kitchen areas in shops, offices and other working environments; – Farm houses; – By clients in hotels, motels and other residential type environments; – Bed and breakfast type environments
- Do not use this appliance for any other purpose but its intended use. Do not use in a moving vehicle or boats. Do not use outdoor. Misuse may cause injury.
- Do not operate the appliance without water, as it may damage the heating element.WARNING: The heating element surface is subjected to residual heat after use.
- Do not use attachments or accessories which are not recommended by the manufacturer. They may cause malfunction or injury.
- The rice cooker should be operated in a separate electrical circuit from other operating appliances. If the electrical circuit is overloaded with other appliances, the appliance may not operate properly or activate the household circuit breaker/fuse.
- Always make sure the outside of the inner cooking pot is dry prior to use. If the inner pot is place in the cooker when wet, it may damage or cause the product to malfunction.IMPORTANT! Rice should not be left in the inner pot with the Keep-Warm function for more than 12hrs.
- This appliance is not intended to be operated by means of an external timer or a separate remote-control system.WARNING: Electric Shock Hazard. Avoid spillage on the power connector.NOTE: To avoid injury, malfunction or damage, do not tilt or move the unit during operation.
FOR HOUSEHOLD USE ONLY SAVE THESE INSTRUCTIONS FOR FUTURE REFERENCE.
PARTS

BEFORE FIRST USE
- Remove all packaging from the rice cooker.
- Wash the inner pot, spatula, measuring cup, steam tray in hot soapy water. Rinse well in clear water and dry carefully.
- Wipe the cooker body with a damp cloth. Dry thoroughly.
- Check that the voltage of your electricity supply is the same as that indicated on the rating plate of the appliance.
- Ensure the appliance is stable and well-supported.
- Check that the multi-cooker has no cracks or other visible signs of damage.
- Ensure there are no objects in the cooker.

- Do not use abrasive cleaners or scouring pads
- Do not immerse the cooker body, cord or plug in water at any time.
FUNCTIONS

- Keep Warm/Cancel button
- Cooking time/Delay time button
- Cooking mode indicators
- Menu selection button
- Start button
- Time – / Menu selection button
- LED Display
- Time +/ Menu selection button
CONTROL PANELThe control panel consists of an LED display and function keys. Use “Menu” to select function mode. Each mode has an indicator light. Once the function is selected, its indicator light will illuminate (RED).
KEYSStart Use this button to initiate rice cooking and other desired cooking function.
Warm/CancelAfter cooking is done, the rice cooker will automatically activate the keep warm function. To stop the keep warm function, press the “Warm/Cancel” button to cancel the program and the cooker will switch to standby mode. If you want to activate the keep warm function again, press “Warm/Cancel” button. The cooker can keep the cooked food warm up to 24 hours. However, for the best flavors, the recommendedmaximum keep warm time should not be longer than 6 hours.
DelayPressing this key once will allow the user to adjust the cooking time. The “Cooking” indicator will turn on and the user may adjust the cooking time by using ![]() buttons. The time setting range varies for different modes. Please refer to COOKING MODE in Table 1.
buttons. The time setting range varies for different modes. Please refer to COOKING MODE in Table 1.
This key is also used for preset cooking. Press the key twice, and the “Delay” indicator will turn on and the user may adjust delay time by using ![]() button. To program delayed cooking, first the desired cooking mode, then select set the timer. The corresponding indicator light will be turned on and the program will start. (see paragraph “COOKING FUNCTIONS”)
button. To program delayed cooking, first the desired cooking mode, then select set the timer. The corresponding indicator light will be turned on and the program will start. (see paragraph “COOKING FUNCTIONS”)
To cancel a “Delay” function, press the “Warm/Cancel” key
MenuPress “Menu” button to select a desired cooking function. When the desired cooking mode is selected, the corresponding indicator light will be turned ON. You will see a number flashing on the display which stands for the default cooking time.
Refer to the table below for the default cooking time in each cooking mode:
|
Cooking mode |
Cooking time | Keep warm | Delay | ||
| Default time |
Time setting |
||||
| Rice cooker | Sushi |
Auto |
● |
● |
|
| Brown rice |
Auto |
● |
● |
||
| White rice |
Auto |
● |
● |
||
| Risotto | 40min | 10min – 2hr |
● |
● |
|
| Slow cooking | High | 4hr | 2-12hr |
● |
● |
| Low | 8hr | 2-12hr |
● |
● |
|
| Soup | 30min | 10min – 2hr |
● |
● |
|
| Steam | 10min | 10min – 1.5hr |
● |
● |
|
| Sauté | 50min | 5min – 1hr |
● |
● |
|
| Porridge | 15min | 5min – 2hr |
● |
● |
|
| Keep warm |
Auto |
x |
x |
Table.1
If a different cooking time is desired, press the button ![]() to adjust the cooking time, refer to the adjustable range above.
to adjust the cooking time, refer to the adjustable range above.
Note: you can only adjust the cooking time within the adjustable range for each cooking mode.
Press the “Start” button and the unit will start cooking. When the cooker is being programmed or any program is in effect, press “Warm/Cancel” to cancel the program and the cooker will return to standby mode.
GETTING STARTED
- Carefully wipe the outside of the inner pot, make sure that are no foreign residues or liquid underneath the pot and heating element.
- Place the inner pot into the appliance, check that it is correctly positioned.
- Close the lid, a “click” sound will indicate it is properly closed.
- Connect the power cord into the cord connector and then plug into a mains power outlet. The appliance will ring a long “beep” sound, and all the indicators on the control panel will light up for an instant.
- “Beep” sound will continue if the rice cooker is idle in standby mode for 10s.
- The rice cooker is defaulted to the “white rice” cooking function. Press “Start” button to start “white rice” cooking.
- To use other cooking functions, press “Menu” key. The rice cooker select function in the sequence “white rice” “Sushi” “Slow cook (High)” “Slow cook (Low)” “Soup” “Steam” “Sauté” “Porridge” “Risotto” “Brown rice”.
- The screen will display the default cooking time of each function. For “Rice cooking”, it will display “- – – -” initially and the countdown timer will change to 10min before the program ends.
CAUTION: RISK OF SCALDING!
![]() Never place your hand on the steam vent during cooking
Never place your hand on the steam vent during cooking![]() • Do not touch the heating element when the product is plugged or after cooking.• Do not carry the cooker during use or immediately after cooking.
• Do not touch the heating element when the product is plugged or after cooking.• Do not carry the cooker during use or immediately after cooking.
COOKING FUNCTIONS
Rice Cooking (Brown rice/ White rice/ Sushi) Before cooking, measure the rice with the measuring cup and rinse it, except for risotto rice.
- Put the rinsed rice well distributed around the inner pot. Fill it with water to the corresponding water level.
- When the rice is ready, the “Warm/Cancel” indicator light will turn ON. Stir the rice and then leave it in the rice cooker for a few minutes longer in order to get perfect rice with separated grains.
- When cooking white rice, use the measuring cup provided. The optimum proportion is 1 cup of rice to 1 cup of water. After cooking is done, allow it to rest for 10 minutes before opening the lid.
| COOKING GUIDE FOR WHITE RICE | |||
|
UNCOOKED RICE |
RICE WATER LINE
INSIDE POT |
APPROX. COOKED
RICE YIELD |
Serves |
| 2 Rice Cooker Cups | Line 2 | 4 Rice Cooker Cups | 3-4 persons |
| 4 Rice Cooker Cups | Line 4 | 8 Rice Cooker Cups | 5-6 persons |
| 6 Rice Cooker Cups | Line 6 | 12 Rice Cooker Cups | 8-10 persons |
| 8 Rice Cooker Cups | Line 8 | 16 Rice Cooker Cups | 13-14 persons |
| 10 Rice Cooker Cups | Line 10 | 20 Rice Cooker Cups | 16-18 persons |
Risotto
- Press “Menu” button in standby mode until the “Risotto” indicator light turns ON.
- Display shows default cooking time “00:40”.
- Adjust the cooking time if necessary by pressing button. Cooking time can be adjusted from 10min to 2hr in 5min intervals.
- Press the “Start” button. The rice cooker enters into “Risotto” cooking mode.
- When temperature of the inner pot reaches the pre-set value, 3 beep sounds will be heard. User can open the lid and add ingredients at this time.
- Close the lid, and the rice cooker continues counting down and the display will show the remaining cooking time.
- When the program ends, the “Warm/Cancel” indicator light will turn ON, and the cooker enters into “Keep warm” mode automatically.
Slow cook
- Press “Menu” button while in standby mode until the “Slow Cook” indicator light turns ON.
- Display shows default cooking time “04:00” if High is selected or “08:00” if Low is selected.
- Adjust the cooking time if necessary by pressing button. Cooking time can be adjusted from 2hr to 12hr in 30min intervals.
- Press the “Start” button. The “Start” indicator light will turn ON and the display will show the countdown time.
- When the program ends, the “Warm/Cancel” indicator light will turn ON, the cooker enters “Keep warm” mode automatically.
Soup
- Press “Menu” button in standby mode until the “Soup” indicator light turns ON.
- Display shows default cooking time “00:30”.
- Adjust the cooking time if necessary by pressing button. Cooking time can be adjusted from 10min to 2hr in 5min intervals.
- Press “Start” button. The rice cooker enters into “Soup” cooking mode.
- When temperature of the inner pot reaches the pre-set value, the rice cooker will start counting down and the display will show the remaining cooking time.
- When the program ends, the “Warm/Cancel” indicator light will turn ON, and the cooker enters “Keep warm” mode automatically.
Steam
- Use a steam basket for steaming. Add water to the cooking pot, ensuring it is above the minimum water fill level, but not above the steam basket.
- Press “Menu” button in standby mode until the “Steam” indicator light turns ON.
- Display shows default cooking time “00:10”.
- Adjust the cooking time is necessary by pressing button. Cooking time can be adjusted from 10min to 2hr in 5min intervals.
- Press “Start” button. The rice cooker enters into “Steam” cooking mode.
- After the water has boiled, the timer will start counting down and the display will show the remaining cooking time.
- When the program ends, the “Warm/Cancel” indicator light will turn ON, and the cooker enters “Keep warm” mode automatically.
Saute
- Use the Saute function with the lid opened.
- Press “Menu” button in standby mode until the “Saute” indicator light turns ON.
- Display shows default cooking time “00:50”.
- Adjust the cooking time is necessary by pressing button. Cooking time can be adjusted from 5min to 1hr in 5min intervals.
- Press “Start” button. The rice cooker enters into “Saute” cooking mode
- All oil or butter to the cooking pot and allow the cooker to preheat for approximate 3-6 minutes.
- Add ingredients to be sautéed/ browned to the inner cooking pot. Using a long-handled wooden or heat-safe spoon, stir ingredients until sautéed/ browned to desired level.
- The Saute program will turn OFF automatically after the preset cook time had finished.
- Press the “Warm/Cancel” button before time is up, to manually turn the appliance OFF.
- If adding white rice or brown rice, follow instruction of “RICE COOKING” on page 7.
- Disconnect the appliance from mains power outlet before serving.
![]() Do not use the provided serving spatula to sauté. It is not intended to be used in contact with high temperatures. Use a long-handled wooden or heat-safe CAUTION! spoon to stir food while sautéing.
Do not use the provided serving spatula to sauté. It is not intended to be used in contact with high temperatures. Use a long-handled wooden or heat-safe CAUTION! spoon to stir food while sautéing.
Porridge
- Press “Menu” button in standby mode until the “Porridge” indicator light turns ON.
- Display shows default cooking time “00:15”.
- Adjust the cooking time if necessary by pressing button. Cooking time can be adjusted from 5min to 2hr in 5min intervals.
- Press “Start” button. The rice cooker enters into “Soup” cooking mode.
- When temperature of the inner pot reaches the pre-set value, the cooker will start counting down and the display will show the remaining cooking time.
- When the program ends, the “Warm/Cancel” indicator light will turn ON, and the cooker enters “Keep warm” mode automatically.
CARE AND MAINTENANCE
- Unplug the appliance from mains power socket.
- Allow the appliance and inner pot to cool before cleaning.
- Wash the inner pot, lid, steam tray in warm and soapy water using a sponge or cloth and rinse with water properly, then wipe dry with cloth. Do not clean with abrasive brushes to avoid damaging the non-stick coating.
- Residual food can be removed with a rubber spatula, a cleaning sponge or a cloth. Soak stubborn food deposits in warm soapy water before cleaning.
- Wipe the body of the rice cooker with a damp cloth. Dry thoroughly.
- Store the assembled cooker away from sources of heat and moisture and out of the reach of children and pets.IMPORTANT! Parts are not dishwasher safe.
TECHNICAL INFORMATION
Rated voltage: 220-240V ~ 50-60HzRated power: 700W
TROUBLESHOOTING
Some problems may be caused by minor faults that you can correct yourself. To do so, follow the instructions in the following table. If it is still not possible to resolve the problem, contact Kmart customer service for advice. Do not attempt to repair the rice cooker yourself.
|
Problem |
Possible cause |
Solution |
| “E1” is shown on the display. | Bottom sensor error | Unplug the pressure cooker and allow it to rest for 20 minutes before using it again. |
| “E2” is shown on the display. | Overeat or Short circuit of bottom sensor | Ensure there is enough food and liquid inside the pot. Ensure the pot is properly placed inside the base unit. Unplug the rice cooker and allow it to rest for 20 minutes before using it again. |
| “E3” is shown on the display. | Top Sensor error | Unplug the pressure cooker and allow it to rest for 20 minutes before using it again. |
| “E4” is shown on the display. | Over-heat or Short circuit of bottom sensor | Have it checked by qualified electrical appliance repair person. |
12 Month Warranty
Thank you for your purchase from Kmart. Kmart Australia Ltd warrants your new product to be free from defects in materials and workmanship for the period stated above, from the date of purchase, provided that the product is used in accordance with accompanying recommendations or instructions where provided. This warranty is in addition to your rights under the Australian Consumer Law.Kmart will provide you with your choice of a refund, repair or exchange (where possible) for this product if it becomes defective within the warranty period. Kmart will bear the reasonable expense of claiming the warranty. This warranty will no longer apply where the defect is a result of alteration, accident, misuse, abuse or neglect.Please retain your receipt as proof of purchase and contact our Customer Service Centre on 1800 124 125 (Australia) or 0800 945 995 (New Zealand) or alternatively, via Customer Help at Kmart.com.au for any difficulties with your product. Warranty claims and claims for expense incurred in returning this product can be addressed to our Customer Service Centre at 690 Springvale Rd, Mulgrave Vic 3170.Our goods come with guarantees that cannot be excluded under the Australian Consumer Law. You are entitled to a replacement or refund for a major failure and compensation for any other reasonably foreseeable loss or damage. You are also entitled to have the goods repaired or replaced if the goods fail to be of acceptable quality and the failure does not amount to a major failure. For New Zealand customers, this warranty is in addition to statutory rights observed under New Zealand legislation.
[xyz-ips snippet=”download-snippet”]