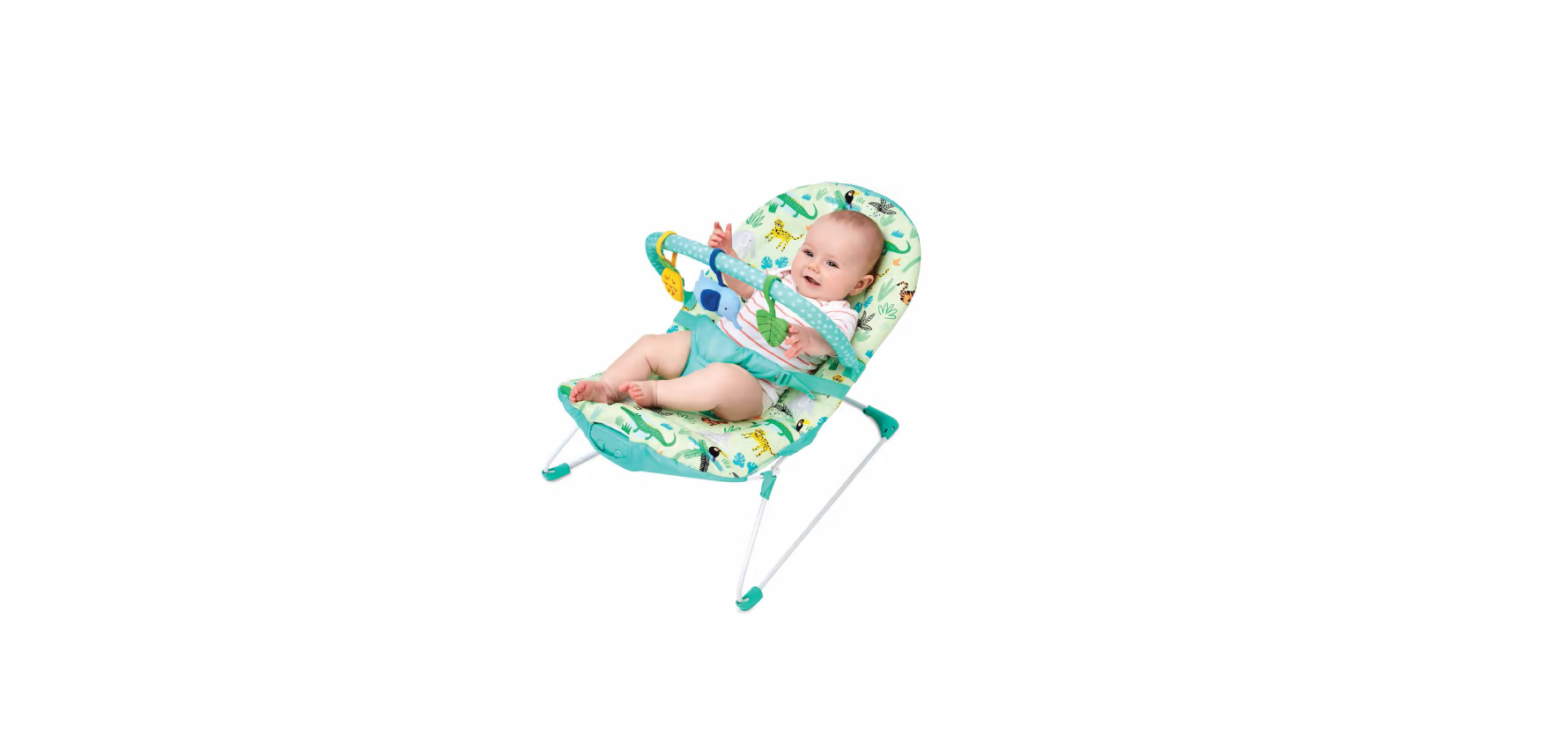
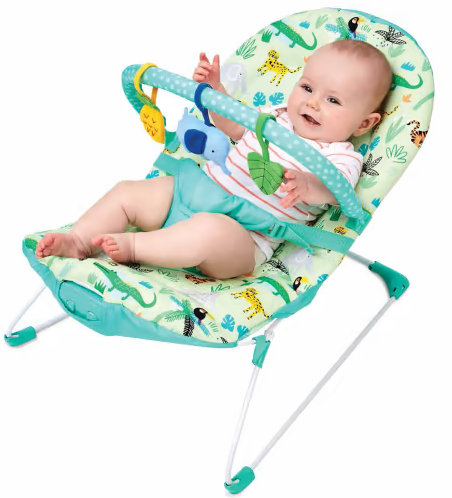
anko 42-824-557 Jungle Baby Bouncer
IMPORTANT!KEEP FOR FUTURE REFERENCE
WARNING
- PLEASE READ THESE INSTRUCTIONS CAREFULLY BEFORE USE AND RETAIN THEM IN A SAFE PLACE FOR FUTURE REFERENCE.
- FAILURE TO FOLLOW THESE INSTRUCTIONS COULD RESULT IN SERIOUS INJURY OR DEATH.
- Adult assembly required.
- Complies with: BS EN 12790-2009
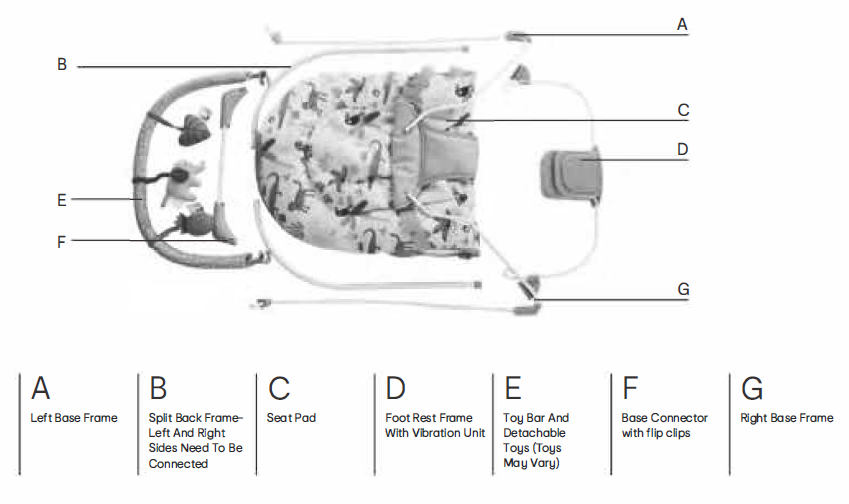
PARTS
ASSEMBLY
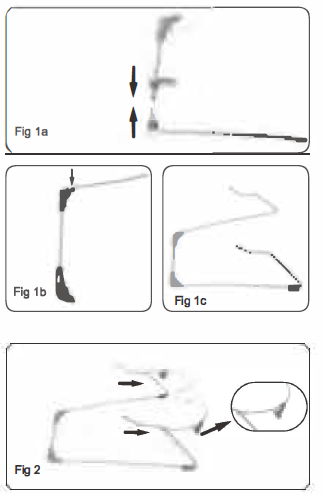
- Base AssemblyPlace the left and right base frames and base connector on a flat surface . Ensure the edge of the rubber grip is touching the ends of the base connector. Slide the base connector into the left base frame. Push gently on the flip clip until you hear a ‘click’. Repeat step 1 with the right base frame. (Fig 1 a , b+c)
- Foot rest frameSlide the looped ends of the foot rest over the left and right base frames. Please follow the direction of the ‘wings’. (Fig 2)
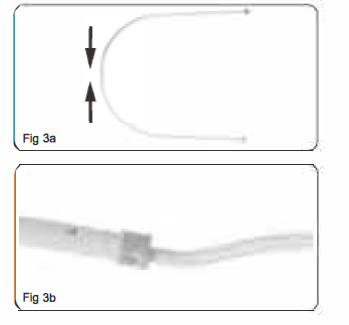
- Split back frameSlide the left and right sides into each other, ensuring that the silver locking button is securely locked into place. (Fig 3a)Slide the connected back frame onto the left and right base frame and press securely into place. Ensure the silver buttons are locked into place. (Fig 3b+c)
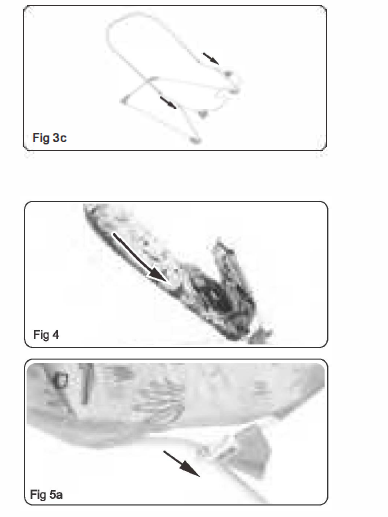
- Seat padSlide the seat pad over the back frame. Raise the foot rest frame and slide the seat pad over it. The front of the vibration unit should be visible through the seat pad opening. (Fig 4)
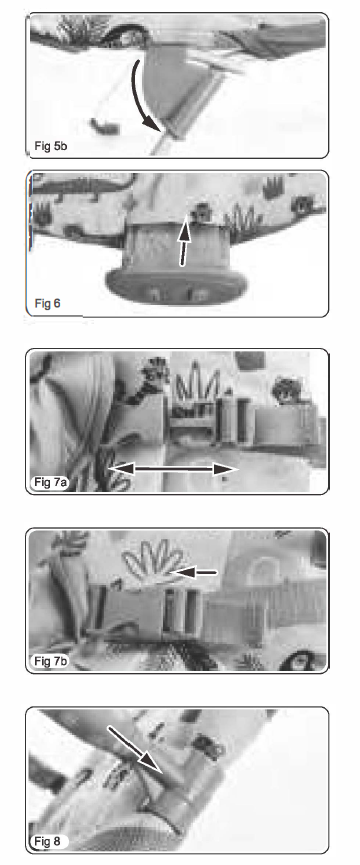
- Foot rest clipsSlide the looped ends of foot rest over the curved part of the frame until it rests securely on the ‘wings’. (Fig 5a)Once the seat pad has been positioned into place, push gently on the foot rest clip until you hear a ‘click’. (Fig 5b)Repeat on the other side. (Fig 5a +b)IMPORTANTEnsure the foot rest clips are snapped securely into place prior to use.
- Battery InstallationUsing a small Phillips head screwdriver, open the battery compartment cover on the vibration unit. Insert the number of alkaline batteries as indicated inside the battery compartment. Close the compartment door.Replace and tighten the screw. The vibration unit can then be slotted into the foot rest frame. (Fig 6)
- Adjustable seat restraintPlace baby in the bouncer with the seat restraint positioned between its legs. Fasten the buckles on both sides of the restraint, pressing until you hear a ‘click ‘. Ensure the restraint is secured correctly by pulling it away from baby’s body. It should remain fastened. (Fig 7a +b)
- Toy barClip the toy bar to the seat frame just above the seat restraint. (Fig 8)
- vibration unitTo activate the vibration and musical feature, press the button on the front of the unit. (Fig 9)
CAUTION
- This product requires 2×1 .SV C batteries. (Not Included).
- To insert /replace the batteries:
- Loosen the screw on the battery compartment cover of the vibration unit and open the compartment. Insert batteries into space provided with the correct polarity(as shown on the product). Close the compartment, and screw shut securely.
- CAUTION : Battery Safety
- Always keep batteries and tools out of reach of babies and children.
- Always remove exhausted batteries from the toy to avoid leakage from the batteries which can be dangerous and damage the product.
- Remove the batteries if the toy will not be used for a long period of time.
- Only use alkaline batteries of the same type or equivalent to the type recommended for the correct function of this product.
- Never mix new and old or different types of batteries.
- When fitting new batteries, always ensure that they have been fitted in the correct polarity(+ AND-) as shown on the product.
- Do not burn or dispose of exhausted batteries into the environment.
- Dispose of batteries at an appropriate differentiated collection point.
- Do not short circuit the battery terminals.
- Never attempt to recharge non-rechargeable batteries, they may explode.
GENERAL CARE & CLEANING
SEAT PAD:
- WIPE CLEAN WITH DAMP CLOTH
- DO NOT BLEACH
- DO NOT TUMBLE DRY
- DO NOT IRON
- DO NOT DRY CLEAN !8!
BOUNCER:
- WIPE WITH A DAMP CLOTH AND DRY IMMEDIATELY WITH A SOFT CLEAN CLOTH.
- DO NOT USE ABRASIVE PADS, BLEACH OR STRONG HOUSEHOLD CLEANERS AS DAMAGE MAY RESULT.
TOY /TOY BAR:
- WIPE CLEAN WITH DAMP CLOTH
- DO NOT BLEACH
- DO NOT IRON
- DO NOT DRY CLEAN !8!
MAINTENANCE
General Care
- Regularly inspect all tubes and fixings. Ensure that all are secure before each use of the product.
- Do not use if any parts are broken/ missing.
- Regularly inspect fabric and stitching to ensure that it is undamaged.
- Only use replacement parts and accessories that have been approved by the manufacturer. Failure to do this may invalidate your warranty.
SAFETY WARNINGS
- WARNING: Never leave the child unattended in the reclined cradle.
- WARNING: It is dangerous to put this cradle on an elevated surface.
- Always use this bouncer on a level floor.
- Always ensure that the harness is fastened and adjusted at all times.
- Do not use near stairs/ steps.
- Do not position the bouncer close to a source of heat e.g. household electric fires etc.
- Do not position close to items such as curtains and electrical cables as they could pose a danger of suffocation or strangulation.
- Never use in a vehicle as a child restraint.
- Never pick the bouncer up when the child is in it.
- Store the bouncer out of the reach of children when not in use.
- WARNING: Do not use the reclined cradle once your child can sit unaided. (approximately 6 months or 9kg ).
- WARNING: This reclined cradle is not intended for prolonged periods of sleeping. WARNING: Never use the toy bar to carry the reclined cradle.
- This reclined cradle does not replace a cot or a bed. Should your child need to sleep, then it should be placed in a suitable cot or bed.
- The product complies with
BS EN 12790: 2009.
[xyz-ips snippet=”download-snippet”]