anko 42963080 3-In-1 UV Steriliser User Manual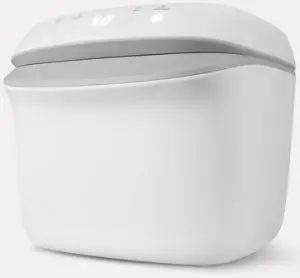
The illustrations/drawings shown in this manual are for reference only. The manufacturer reserves the right to change any specification or feature without further notice
Warning
- Unpack and remove the product and check the accessories list. (user manual x1, UV Steriliser, accessories basket x1, spare filter x1)
- Place the accessories basket as needed.
- Wipe the cabinet with a clean, damp cloth.
- Put a few slices of lemon or ginger in the empty steriliser and choose automatic mode to run 5 cycles. Open the cabinet lid for 12 hours so that it can disperse the smell of the new machine, which can dispel the smell of the materials involved in the production, packaging, storage and transportation.
- Before use, wash and dry the items to be sterilised and sterilise on auto mode.
Caution
- Do not use accessories or parts produced by other manufacturers.
- Keep the product out of reach of children.
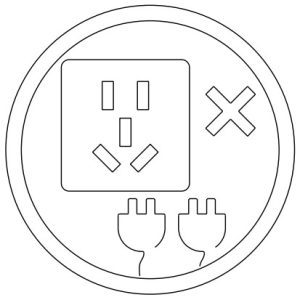
- Check if the voltage indicated on the bottom of the appliance corresponds to local mains voltage 0 before you connect the appliance.
- Dispose of all packaging materials to avoid suffocation risks.
- The appliance is designed for indoor use only.
- If there is any breakage or damage to the appliance, please do not use it again.
- Do not lift or move the appliance during use.
- The appliance is not to be used by persons with reduced physical, sensory or mental capabilities, or 00lack of experience and knowledge, unless supervised.
- This item is not a toy. Do not allow children to use or play with it.
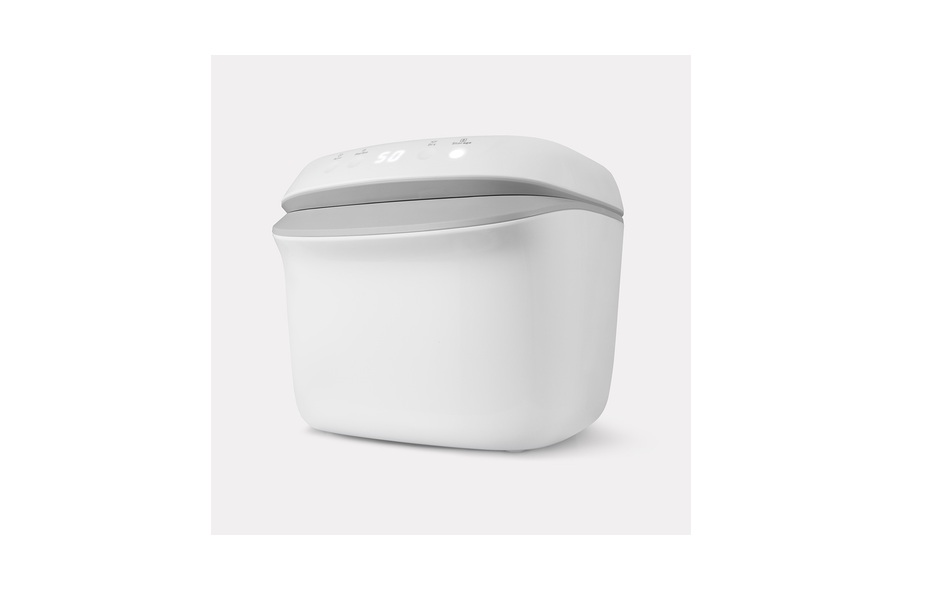
Product Introduction
Specification
- Product Name: UV Steriliser
- Model: 42963080
- Rated Power: 84W
- Voltage: 220V-240V, 50/60Hz
- Inner Capacity: 7L
- Product Size: 280*280*247mm
- Using Condition: Indoor use only
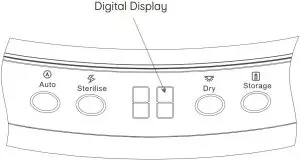
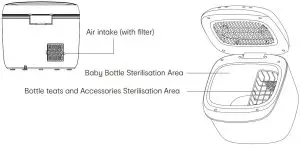
Panel Features
Parts of Product
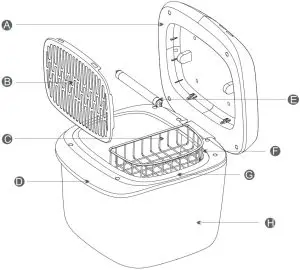
- A Display Cover
- B Reflex housing
- C Accessories basket
- D Base cover
- E UV lamp
- F Sealing ring
- G Inner Tank
- H Base
Introduction of UV Steriliser
Tips for Use :
- Before placing each bottle, try to dry the water inside the bottles

- Place the bottle mouth opening up vertically into the sterilisation cabinet.
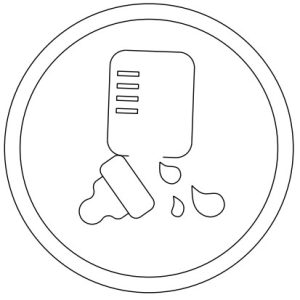
- This unit may be used to sterilise accessories including soothers and utensils.
- Press the desired function button to start and stop the program.
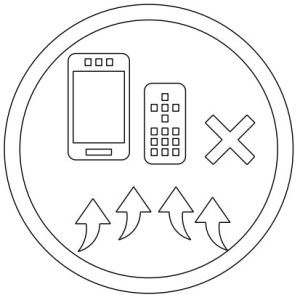
- Do not dry electronic products.
- Ensure that there is ample space between items during sterilisation.
- The time remaining is displayed on the unit.
- Do not use the same socket with other high power appliances.Caution: The height of the baby bottles should not exceed 16cm


 Caution: The height of the baby bottles should not exceed 16cm
Usage Method
Preparation for Operation
- Wash and dry the bottles you wish to sterilise before placing into the UV steriliser.
- Hang the accessories basket on the liner hook, then put the teats that needs to be dried and sterilised into the accessories basket.
- Close the display cover.
Functions & Operation
DRY” function :This function is used only when drying items, no sterilise function will be performed.
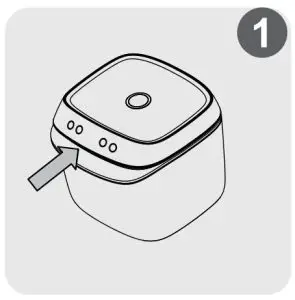
- Before using the DRY function, open the display cover as shown in Figures 1 and 2.
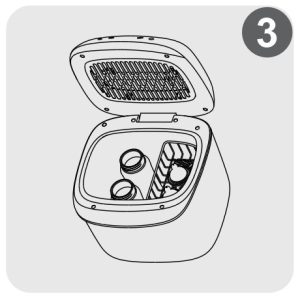
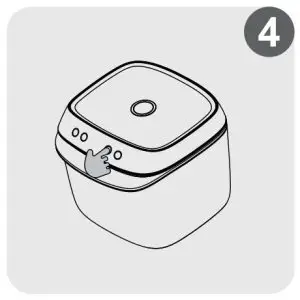
- Place the bottles/teats to be dried into the inner tank/accessories basket and close the display cover as shown in Figures 3 and 4.
- Plug the steriliser into the mains socket.
- Press the “Dry” button. The time display light will flash for 3 seconds. TheLED light will be on. The remaining time will be displayed. The air exchange will take place in the last 60 seconds of the cycle. There are 2 drying options : 41/51 minutes. Press the “Dry” function button again to cancel if required.

Note: When the “DRY” function is completed, the buzzer sounds 6 times. It enters the standby mode.
Sterilise Function:
This function is used to sterilise items only, no drying function will be performed.
- Before using the “Sterilise” function, open the display cover as shown in Figures 1 and 2.
- Place the bottles/teats to be sterilised into the inner tank/accessories basket and close the display cover as shown in Figures 3 and 4.
- Plug the steriliser into the mains socket.
- Press the “Sterilise” button. The time display will flash 3 times, then the program will start. Digital display shows remaining operation time.There are 3 operation times for selection. The default time is 11 minutes. Press again for 16 minutes and press twice for 21 minutes. Press one more time to turn off the appliance.
Note: When the “Sterilise” function is completed, the buzzer sounds 6 times. It enters the standby mode.
“Auto” Function:
This function is used to both sterilise and dry.
- Before using the “Auto” function, open the display cover as shown in the Figures 1 and 2.
- Place the bottles/teats to be dried and sterilised into the inner tank/accessories basket and close the display cover as shown in Figures 3 and 4.
- Plug the steriliser into the mains socket.
- Press the “Auto” button. The time display will flash 3 times, then the program will start.Drying function will be carried out first, followed by the sterilisation. The air exchange will take place in the last 60 seconds of the operation cycle. There are 2 operation durations for selection. The default time is 51 minutes. Press again for 61 minutes. Press one more time to turn off the appliance.
Note: When the “Auto” function is completed, the buzzer sounds 6 times. It enters the standby mode.
Storage” Function:
This function is to be used to store the clean items.
- Before using the “Storage” function, open the display cover as shown in Figures 1 and 2. (2) Put the bottles/teats to be dried and sterilised into the inner tank/accessories basket and close the display cover as shown in Figures 3 and 4.
- Plug the steriliser into the mains socket.
- Press the “Storage” button. The time display will flash 3 times, then the program will start.
- This is a 2 stage program. It begins with 51 minutes “Auto” function, then followed by 72 hours “Storage” function.
- During “Storage” period, the unit will perform the sterilisation process every 2 hours.
- Press “Storage” button again to turn off the appliance.
Note: When the “Storage” function is completed, the buzzer sounds 6 times. It enters the standby mode.
Remove plug from socket when not in use.
Note:
During sterilising, if the lid is opened, the program will end automatically to protect human body from direct radiation.Closing the lid will not restart the program. User shall follow operation procedures on pages 5 and 6 to restart the program.
Cleaning & Maintenance
Caution:
- Clean the appliance immediately after every use.
- Do not immerse the product into water or pour water directly into the product.
- Do not use bleaching or chemical solution tablets in the appliance.
- Do not use steel wool, abrasive cleaners or corrosive liquids (such as petrol, acetone or alcohol) to clean the appliance.
Cleaning Method:
- Turn off the appliance and unplug from the power socket.
- Open the display cover.
- Remove the accessories basket.
- Wipe the product with a dry towel or a dry cotton cloth.
Note:
There will be residual heat after use. Allow the appliance and inner tank to cool down completely before cleaning.
12 Month Warranty
Thank you for your purchase from Kmart.
Kmart Australia Ltd warrants your new product to be free from defects in materials and workmanshipfor the period stated above, from the date of purchase, provided that the product is used inaccordance with accompanying recommendations or instructions where provided. This warranty is in addition to your rights under the Australian Consumer Law.Kmart will provide you with your choice of a refund, repair or exchange (where possible) for this product if it becomes defective within the warranty period. Kmart will bear the reasonable expense of claiming the warranty. This warranty will no longer apply where the defect is a result of alteration, accident, misuse, abuse or neglect.
Please retain your receipt as proof of purchase and contact our Customer Service Centre on 1800 124 125 (Australia) or 0800 945 995 (New Zealand) or alternatively, via Customer Help at Kmart.com.au for any difficulties with your product. Warranty claims and claims for expense incurred in returning this product can be addressed to our Customer Service Centre at 690 Springvale Rd, Mulgrave Vic 3170.
Our goods come with guarantees that cannot be excluded under the Australian Consumer Law. You are entitled to a replacement or refund for a major failure and compensation for any other reasonably foreseeable loss or damage. You are also entitled to have the goods repaired or replaced if the goods fail to be of acceptable quality and the failure does not amount to a major failure.
 report this ad
For New Zealand customers, this warranty is in addition to statutory rights observed under New Zealand legislation.
References
[xyz-ips snippet=”download-snippet”]