
Anko 94800 Clock Radio with Wireless Charging Operating Instructions
Includes:
- clock radio with wireless charging
- charging AC adaptor
- user manual
42-963-530
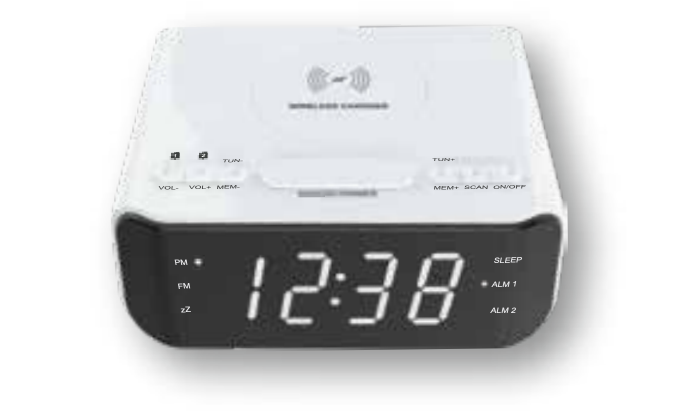
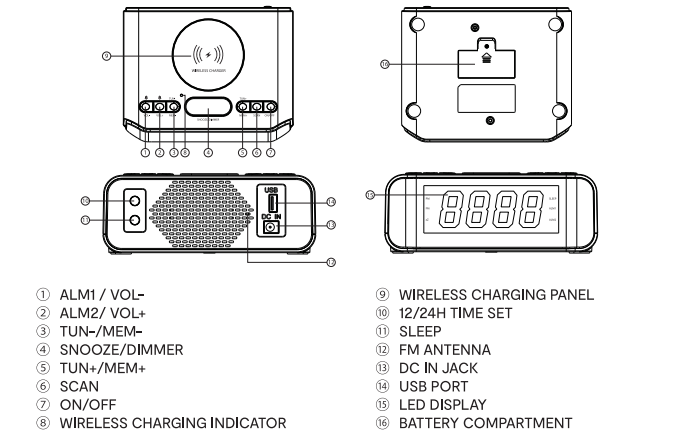
Function overview
Clock operation
TIME SETTING
- Press button (10) to set the time. Press and hold button (10), the hour number flashes, press button (3) or (5) to set the hour.
- Press button (10) again, the minutes number flashes, press button (3) or (5) to set the minutes. Then press button (10) to confirm the setting.
- Press button (10) again to select from 12H or 24H clock display, If you choose the 12H mode, the PM Icon will light up In the afternoon.
ALARM 1 SETTING
- In standby mode press button (1) to show the first alarm time (default set to 6:00); press button (1) again to turn it ON, the ALM1 Indicator will be on; press button (1) again to turn it OFF. The Screen returns to the time setting.
- Press and hold button (1), the hours number flashes, press button (3) or (5) to select the hour. Press button (1) again to confirm the hour setting, the minutes number flashes, press button (3) or (5) to adjust and set the minutes.
- Press button (1) again, select alarm mode, default ring is BUZZ. The BUZZ flashes on display, the device will beep when alarm active, press button (3) or (5) to change alarm sound to Radio.
- Press button (1) again when the volume indicator flashes on display, press button (3) or (5) to adjust volume to your ideal level. Press button (1) to confirm and exit setting.
- When theAlarm rings, if the alarm sound is BUZZ, press any button to stop or press button (4) to enter snooze mode.
- If Alarm sound is Radio, the radio will keep playing If there Is no operation. Press button (1) or (7) to stop.
- Press button (4) to enter Snooze.
- Under FM mode, press button (1) to decrease volume step by step, press and hold this button to decrease volume continuously.
ALARM 2 SETTING
- In standby mode press button (2) to show the second alarm time (default set to 7:00); press button (2) again to turn it ON. the ALM1 indicator will be an; press button (2) again to turn it OFF. The Screen returns to the time setting.
- Press and hold button (2), number of hours flashes. Press button (3) or (5) to adjust hour number, and press button (2) again the number of minutes flashes, press button (3) or (5) to adjust minutes.
- Press button (2) again select alarm mode, default ring is BUZZ. The BUZZ flashes on display, the device will beep for alarm active, press button (3) or (5) to change alarm to radio.
- Press button (2) again, alarm volume flashes on display, press button (3) or (5) to adjust volume to desired level. Press button (2) to confirm and exit setting.
- When theAlarm rings, if the alarm sound is BUZZ, press any button to stop or press button (4) to enter snooze mode.
- If Alarm sound is Radio, the radio will keep playing If there no operation. Press button (2) or (7) to stop. Press button (4) to enter snooze.
- Under FM mode, press button (2) to increase volume step by step, press and hold this button to increase volume continuously.
SNOOZE/DIMMER SETTING
- When the Alarm goes off, press button (4) to snooze the alarm. Snooze Icon zZ appears and flashes on LED display. Alarm goes off again after 9 minutes. The zZ icon turns OFF on the LED Screen.
- For Dimmer, LED display light has four brightness levels, the default setting is on the brightest level.
Radio operation
FM RADIO OPERATION
- Press and hold button (7) to turn on FM mode; and FM Indicator lights up on LED display, LED shows current frequency.
- Press and hold button (7) again to turn off FM mode.
AUTOMATIC CHANNEL SEARCH
- To search for stations automatically, press and hold button (6), this unit will start to search for channels automatically and keep selected channels from P1 to P40. The final saved amount of channels after automatically search might be less than 40 channels if current signal status is not good enough, or there are less than 40 channels from local broadcasting.
- There are up to 40 channels that will be set after automatically scanning, press button (3) or (5) to choose from the 40 channels and start playing the selected channel.
MANUAL CHANNEL SEARCH
- If you don’t find the preferred channel after automatic channel search, you can try to search channels manually to add new channels. To search for stations manually, press and hold button (3) or (5) to decrease or increase frequency search for channels.
- When the unit finds a suitable channel, it stops searching and starts to play. If it is not the preferred channel, press and hold button (3) or (5) again to search for other suitable channels.
SAVING CHANNELS
- When the channel has been selected, press and hold button (3) to save manually, “P##” flashes on the LCD display and then changes to channel and returns to clock mode. So after you save the manually searched channel (for example, 107.5 MHz) as P01, It will replace the original automatically searched and saved channel P01 (for example. 89.0 MHz). Next time when you play P01, it will play 107.5 MHz instead of 89.0 MHz. You can repeat this operation to keep your preferred channels In your preferred channel name P##.
- To play preset channels, press button (3) or (5) to skip to previous or next channel.
SLEEP MODE
- Under FM mode, press button (11) to select 120-90-60-45-30-15-OFF for sleep time setting, when it is Off, FM turns off and return to stand by (clack) mode.
USB OPERATION
- Insert USB charging cable (not included) to USB part at back to charge your cell phone or Smartphone. The output Is d.c. 5V/1A.
WIRELESS CHARGING
- Support 10 Watts wireless charging. Place your cell phone or smartphone with wireless charging function on top of the unit The wireless charging indicator on the unit will light up blue. The Indicator turns off when your device is fully charged.Warning: Do not place any metal object on the wireless charging panel.
BATTERY COMPARTMENTS
- Insert 2 x AAA batteries (not included) for clock memory when power is off.
Specifications
Model No:42963530
Wireless Charger:10W
USB Charging Output:d.c. 5V/1A
LED Display:WHITE 5.1 INCHES LED
Backup Battery:2 x AAA (Not Included)
Frequency Response:100Hz-16KHz
FM Frequency:87.5MHz-108.0MHz
External AC Adaptor:Input AC 100-240V 50/60Hz,Output 12V d.c. 1.5A
WARNING Do not dispose of unit in fire or water. > Never attempt to disassemble and reassemble. >Waste electrical products should not to disposed of with household waste, please recycle where facilities east. > Check with your local authority for recycle advice. > Keep your device and all accessories out of the reach of children and animals. > Small parts may cause choking or serious injury If swallowed. > Avoid exposing your device to very cold or very hot temperatures (below 0°C or above 45°C). > Extreme temperatures can cause deforming of the device and reduce the charging capacity and life of your device. > Do not allow your device to get wet-liquids can cause serious damage. > Do not handle your device with wet hands.
[xyz-ips snippet=”download-snippet”]