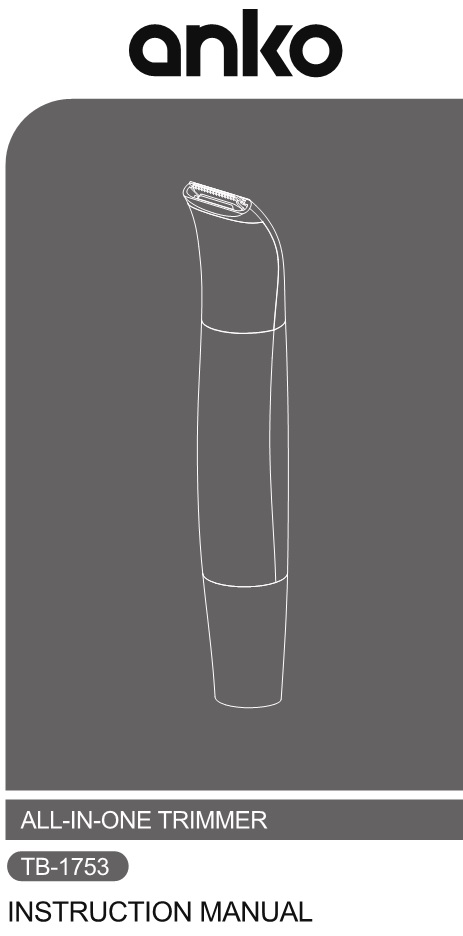
anko All In One Trimmer
Instruction Manual
Safety Instructions
To ensure proper operation of this appliance, please read this instruction manual completely and carefully before using the appliance and keep it for future reference.
![]()
WARNING
- Do not use this appliance under the following conditions: children; persons with skin inflammation or skin diseases; persons with allergies; do not use the appliance on the eyelids or throat; on areas where epilation or where any surgery has been performed.
- Do not press the trimming head with excessive force and do not use it repeatedly in the same area. Do not insert the Nose & Ears Trimmer Head too deep into the nose and ears.
- If you feel any discomfort on your skin during or after using the appliance, stop using it and seek medical assistance ifnecessary.
- Do not place the appliance in a hot or humid environment.
- Do not attempt lo modify, disassemble (except the removable parts), or repair the appliance by yourself for safely.
NOTE: After using the appliance, you may notice a slight redness on the skin. Although this is normal, you can avoid skin irritation by moving the trimmer head gently against the direction of hair growth. Do not trim with excessive force. If after three days skin is still irritated, it is recommended to consult a doctor.
Product Specification
- Name: All-in-One Trimmer
- Model No.: TB-1753
- Type of Battery:1xAA battery required (Not Included)
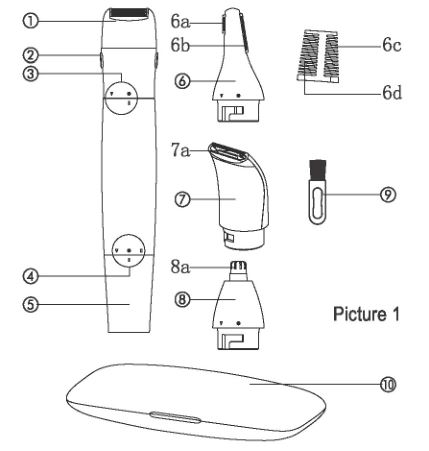
Product Description
- Short Hair Trimmer
- Blade Head Removal Buttons
- Head Removal Indicators“‘v” Disassembly Indicator” 0 ” Install Indicator” I ” Alignment Indicator
- Battery Removal Indicators“‘v ” Disassembly Indicator“0” Turnoff Indicator“I” Tum on Indicator
- Rotary Switch/Battery Cover
- Facial Trimmer Head6a) Short Blade6b) Long Blade6c) 3mm Eyebrow Comb6d) 5mm Eyebrow Comb
- Long Hair Trimmer7a) Trimmer Blade
- Nose & Ears Trimmer8a) Stainless Steel Blade
- Cleaning Brush
- Storage Case
Preparation Instructions
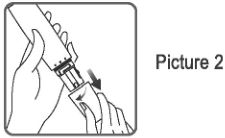
*Rotate the Battery Cover to the left to ·v·. Remove the Battery Cover and insert one AA battery (battery is not included) according to the battery compartment instructions and put the Battery Cover back on. Rotate the Battery Cover to “o” to lock into position and turn off the appliance (picture 2).
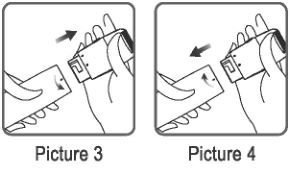
Head ReplacementRemoving the Head: Hold the appliance body with one hand, with the other hand grab the trimmer head (be careful with the trimmer blade). Rotate the trimmer head counterclockwise until the disassembly signs align, pull the head to remove it (picture 3).
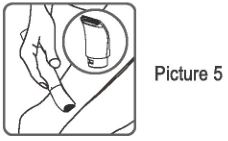
Install the Head: Hold the appliance with one hand and with the other hand grab the trimmer head (be careful with the trimmer blade). Align the Alignment Indicator on the appliance body with the Disassembly Indicator on the trimmer head and rotate it clockwise until the Alignment Indicator is aligned with the Install Indicator (picture 4).
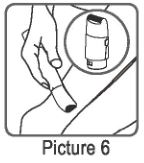
*Long Hair Trimmer: This head is suitable to trim long and thick hair, such as armpits, bikini line, sideburns, etc. Adjust the Long Hair Trimmer to a suitable angle, place the trimmer blade against the hair you want to trim. Slide the trimmer blade gently and slowly against the direction of hair growth (picture 5).
*Short Hair Trimmer: This head is suitable to trim shorter hair, such as trim hairs after using the Long Trimmer Head, orsecondary hair growth, etc. (picture 6) First, trim long hair with the Long Hair Trimmer and then use the Short Hair Trimmer to remove short hair. Trim against hair growth.
NOTE: If you use the appliance on skin-fold areas, use your hand to stretch it. If you use the appliance on the armpits, liftthe arm and put it behind your head until the area is stretched (picture 7).

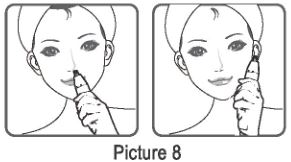
* Nose & Ears Trimmer: This Head is suitable to trim nose and ears hair.Install the Nose & Ears Trimmer head. Gently and slowly insert the tip of the trimmer Head in the entrance of the nose and ears (do not insert it too deep to avoid injuries). Clean the nostril and ear canal after trimming (picture 8).
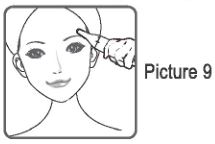
* Facial Trimmer Head: This trimmer head is suitable to trim facial hair and shape eyebrows. Install the Facial Trimmer Head and select the appropriate length of the double-side comb. Trim against the direction of eyebrows growth (picture 9).
How to Use :
Choose and install the trimmer head you want to use. Lightly place the blade on the area you want to trim and move it against the direction of hair growth. Trim as recommended:
- Above the Eyebrows: Move the trimmer from the hairline to the center of the forehead and back to the hairline.
- Cheeks: Move the Blade from the center of the face to the ear.
- Upper Lip: Stretch your upper lip to trim.
- Sideburns: Decide on the length of the sideburns and trim downwards.
- Sides of the Nose: Slightly stretch the skin with your fingers and move the trimmer blade from the center outwards.
- Back of the Neck: Move the trimmer blade upwards to trim.
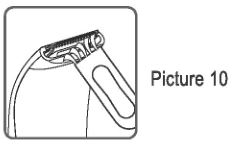
After use, turn off the appliance and use the Cleaning Brush to remove hair residue from the trimmer head (picture 10).
Cleaning & Maintenance
- Make sure the appliance is turned off before you start cleaning it. After each use, clean the trimmer head with the Cleaning Brush provided or remove the trimmer head and rinse it with water to remove hair residues.
- Do not use alcohol steel wool, abrasive cleansers, chemicals or corrosive liquids to clean the appliance to prevent damages.
Recycling
Batteries contain substances harmful to our environment. Do not dispose of the appliance with the battery inside, remove the battery and hand it over to your local council recycling point for environmental protection.
Warranty & Support
Troubleshooting

12 Month WarrantyThank you for your purchase from Kmart.
Kmart Australia Ltd warrants your new product to be free from defects in materials and workmanship for the period stated above, from the date of purchase, provided that the product is used in accordance with accompanying recommendations or instructions where provided. This warranty is in addition to your rights under the Australian Consumer Law.
Kmart will provide you with your choice of a refund, repair or exchange (where possible} for this product if it becomes defective within the warranty period. Kmart will bear the reasonable expense of claiming the warranty. This warranty will no longer apply where the defect is a result of alteration, accident, misuse, abuse or neglect.
Please retain your receipt as proof of purchase and contact our Customer Service Centre on 1800 124 125 (Australia) or 0800 945 995 (New Zealand) or alternatively, via Customer Help at Kmart.com.au for any difficulties with your product. Warranty claims and claims for expense incurred in returning this product can be addressed to our Customer Service Centre at 690 Springvale Rd, Mulgrave Vic 3170.
Our goods come with guarantees that cannot be excluded under the Australian Consumer Law. You are entitled to a replacement or refund for a major failure and compensation for any other reasonably foreseeable loss or damage. You are also entitled lo have the goods repaired or replaced if the goods fail to be of acceptable quality and the failure does not amount to a major failure.
For New Zealand customers, this warranty is in addition to statutory rights observed under New Zealand legislation.
[xyz-ips snippet=”download-snippet”]