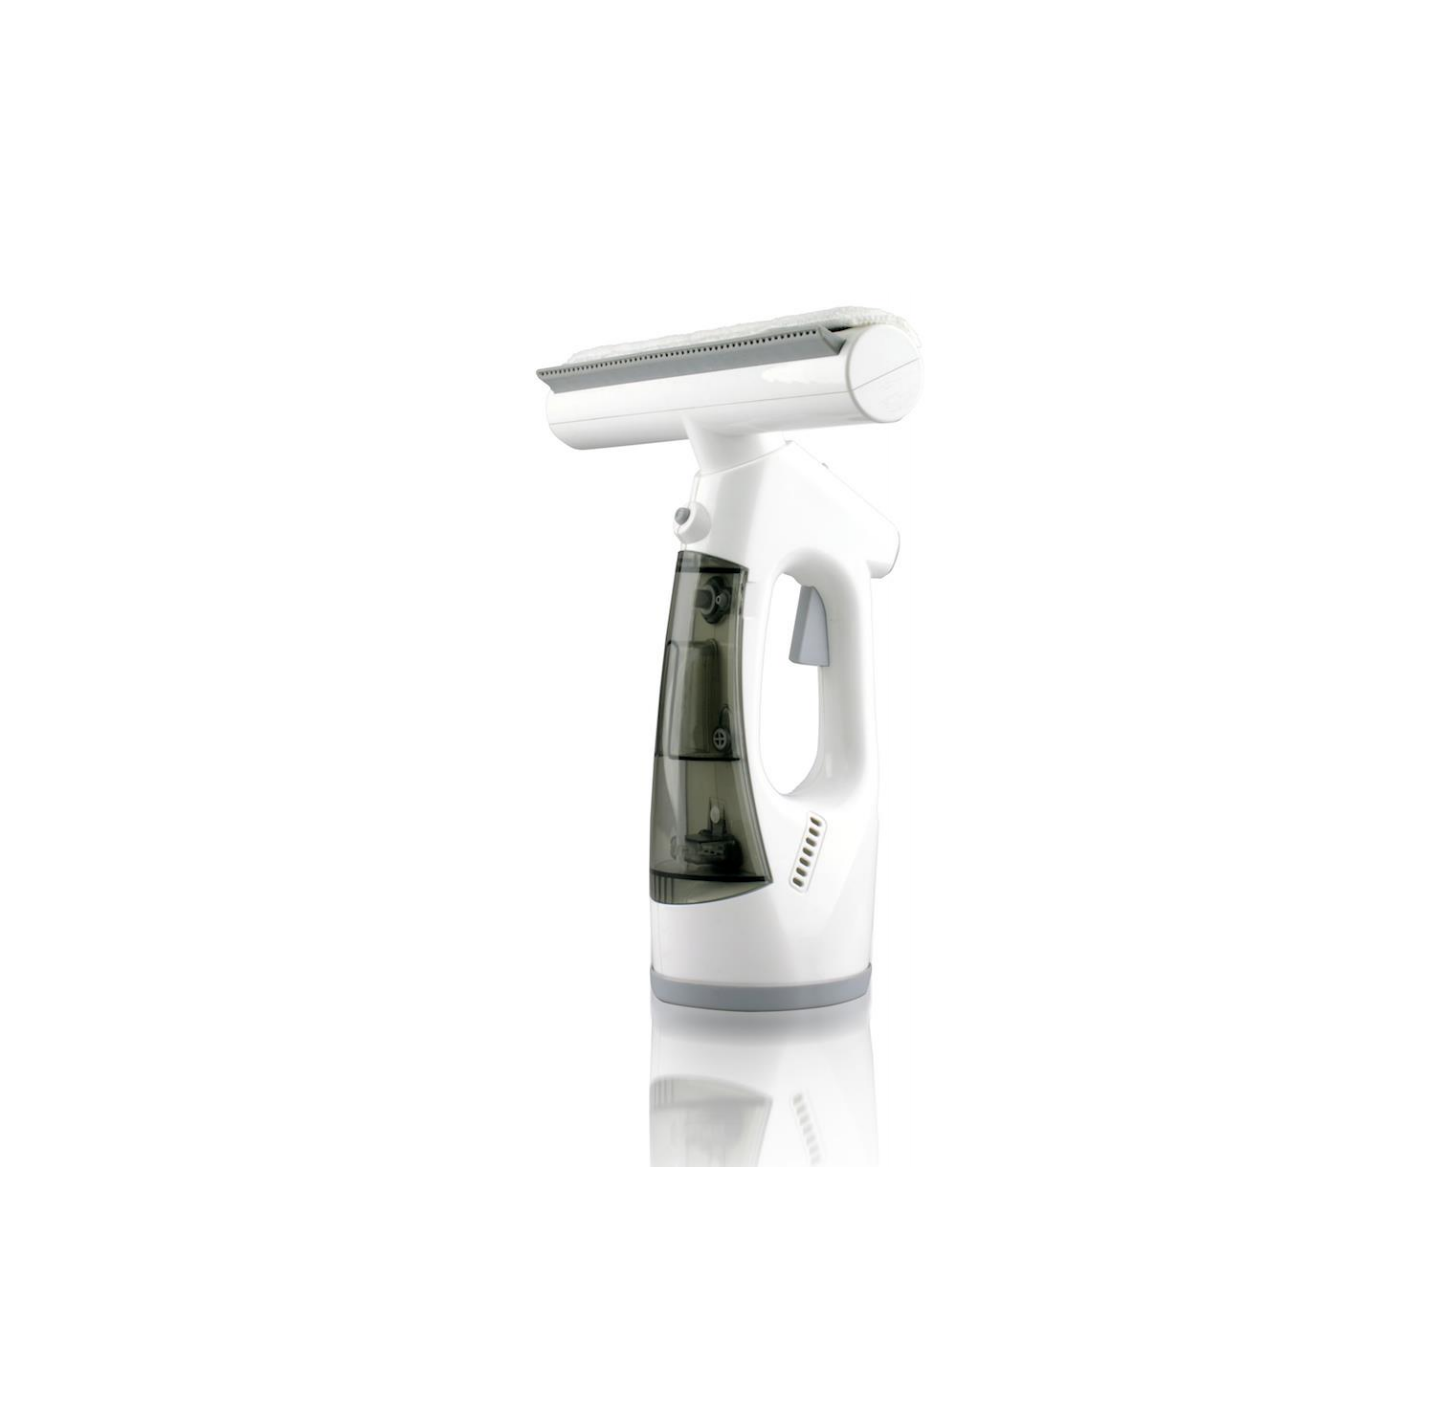
anko Window Vacuum Cleaner
PLEASE READ AND SAVE THESE INSTRUCTIONS FOR FUTURE REFERENCE
IMPORTANT SAFEGUARDS
When using any electrical product, always follow these basic safety precautions:
 READ ALL INSTRUCTIONS BEFORE USE.
Warning: When using any electrical appliance, always observe basic safety precautions. The following instructions should be followed to reduce the risk of fire, electric shock or injury.
General:
- Read this manual carefully before using the appliance. Keep this manual in a safe place for future reference.
- Use the appliance only as described in this manual.
- Check if the voltage indicated on the charger corresponds to the local voltage before you connect the device to mains power.
- Always use an earthed power outlet socket.
- Check the device regularly for damage. Do not use the device in case the power cord, plug or charger is damaged, or if the device has been dropped or damaged. If the power cord is damaged, it must be replaced by a qualified electrician in order to avoid a hazard or the product must be disposed.
- Do not attempt to repair the device yourself.
- This appliance is not suitable for use by children or persons with reduced physical, sensory or mental capabilities, or lack of experience and knowledge, unless someone responsible for their safety is supervising them or explains how the appliance must be used. Children should be supervised to ensure that they do not play with the appliance.
- Never allow children to play with packaging as there is risk of suffocation.
- Always disconnect the device from the adaptor when you fill, empty or clean the device.
- Never pull the power cord to disconnect the charger from the socket; instead, hold the adaptor and gently pull to disconnect.
- Do not close the door on the power cord or pull it around sharp edges or corners. Do not allow the power cord to be compressed or curled.
- Keep the device, charger and the power cord away from flames and hot surfaces.
- Do not use attachments which are not supplied with the product.
- Never use the device in areas where certain vapours may be present (paint thinner, flammable material, oil-based paint and varnish, flammable liquids and gases) for risk of an explosion.
- Never immerse the device and/or the charger in water or other liquids.
- Do not touch the charger with wet hands.
- Never attempt to grasp an electric device if it has fallen in water or other liquids.
- Do not add harsh cleaning materials such as caustics, acids, scented perfumes, oils or cleaning products not intended for this type of cleaning to the water or the water tank as this may damage the device or make it unsafe to use. Only use clear and pure water. The use of distilled water is recommended in areas with hard water to avoid lime scale deposits inside the product.
- Use the vacuum function only to vacuum/suck liquids used during the cleaning process.
- Only use the device on smooth, solid, flat surfaces that is suitable to withstand moisture.
- Make sure the air exhaust is not blocked.
- Only use the original charger supplied with the product.
- Be extra careful when cleaning windows.
- Always store the appliance indoors.
- The appliance contains batteries that should only be replaced by a skilled technical person.
This appliance is only intended for domestic use; do NOT use for commercial purposes.
![]() Warning: Do not add harsh cleaning materials, caustics, acids, scented perfumes, oils or cleaning products not intended for this type of cleaning to the water or the water tank as this can damage the item or make it unsafe to use. Only use clear and pure water. The use of distilled water is recommended in areas with hard water to avoid lime scale deposits inside the product.
Warning: Do not add harsh cleaning materials, caustics, acids, scented perfumes, oils or cleaning products not intended for this type of cleaning to the water or the water tank as this can damage the item or make it unsafe to use. Only use clear and pure water. The use of distilled water is recommended in areas with hard water to avoid lime scale deposits inside the product.
![]() Warning: Use the vacuum function only to vacuum liquids used during the cleaning process.
Warning: Use the vacuum function only to vacuum liquids used during the cleaning process.
SAVE THESE INSTRUCTIONS FOR FUTURE REFERENCE
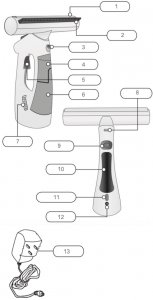
KNOW YOUR WINDOW CLEANER
- Wipe attachment Area
- Squeegee
- Spray
- Water collection tank
- Trigger
- Clean water tank
- Air outlet
- Squeegee press-button
- Vacuum switch
- Handle
- Battery level LED lights
- Charger socket
- Battery charger KH6-050100AU

BEFORE FIRST USE
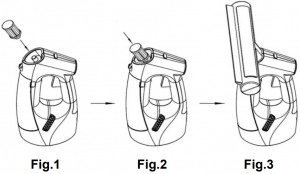
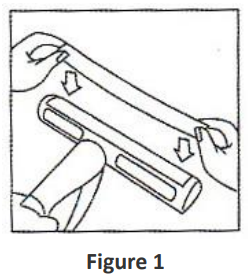
PLEASE INSERT SUCTION STRAINER BEFORE USING (Fig.1)
Before use
Remove all packaging materials.Clean the device, if necessary, with a wet cloth and some mild detergent (also refer to “CLEANING AND STORAGE”).Check the device for any damage before each use. Do not use the device if the power cord or battery charger is damaged or when not functioning properly.
Charging the battery
Attach the battery charger (13) to the device through the charger socket (12) before connecting the battery charger to the power supply. Make sure the power supply indicated on the battery charger corresponds with the local voltage. A blue light at the charger indication light (11) will turn on and flash to indicate the device is charging and all four LED lights will turn ON when the battery is fully charged. It takes approximately 2 hours to fully charge the battery.
Note: We recommend that you unplug your charger when charging is completed.
Note: Always make sure the device is fully charged before using it.
Filling the water tank
Switch the device OFF and disconnect it from the charger. Pull out the water tank and remove the cap. Fill the water tank (6) with clean water (or distilled water) by slightly tilting the device forward. Once the water tank is nearly full, replace the water tank cap.
Note: The appliance must be disconnected from the charger when filling the water tank.
Note: Do not add harsh cleaning materials, caustics, acids, scented perfumes, oils or cleaning products not intended for this type of cleaning to the water or the water tank as this may damage the unit or make it unsafe to use. Only use clear and purified water. The use of distilled water is recommended in areas with hard water to avoid lime scale deposits inside the product.
Attaching the cleaning wipes
The cleaning wipes stick to wipe attachment area (1) with Velcro. Position the selected wipe in front of the attachment area evenly at the entire length, then press the surface to secure wipe it, as shown in Figure 1
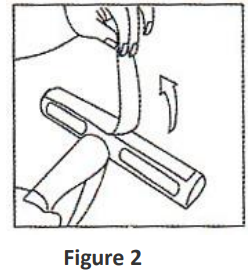
Remove the wipe by simply tearing it off Figure 2
Emery wipes can be used to remove tough stains and grease from surfaces while the microfiber wipes give a shiny and streak-less finishing for cleaned or less dirty-surfaces.
For maximum results, wipes should be replaced regularly according to their cleanliness. Wipes can be machine washed at 40. Do not put in dryer.
USING YOUR WINDOW CLEANER
Spray
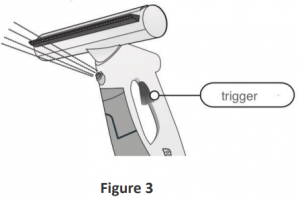
Hold the unit by the handle and press the water spray trigger (5) as show in Figure 3. Ensure the spray (3) is directed towards the area to be cleaned and cover the surface in water.
Clean
Then turn the device and wash the surface with either one of the wipes attached to the unit. If necessary, a mild glass cleaner can be sprayed on the window or a few drops of vinegar added to the water in the water tank.
Vacuum
Once completed turn the unit again and switch on the vacuum function with the vacuum switch (9) by pressing it once as shown in Figure 4. Keep the device in horizontal position and move the squeegee (2) over the surface in a gentle, top-to-bottom movement to vacuum and remove and remove the excess water and dirt.

![]() Warning: Do not spray on eyes or on electrical/electronic components, such as a plug, switch, cable, stereo, equipment, computer screens, household appliances etc.
Warning: Do not spray on eyes or on electrical/electronic components, such as a plug, switch, cable, stereo, equipment, computer screens, household appliances etc.
![]() Warning: Use the vacuum function only to vacuum liquids used during the cleaning process
Warning: Use the vacuum function only to vacuum liquids used during the cleaning process
Tip: With the use of the emery wipe the device does not need detergent, but in case of heavy dirt and grease a few drops vinegar can be added to the water to help degreasing and unclog your windows. This is an environment friendly and economic solution.
After use
- Turn off the vacuum function by pressing the Vacuum switch (9)
- Wait half a minute and lift the water tank cap. Remove the filter and empty the water tank (4) by turning the device upside down above the sink.
- Wash the filter carefully before placing it back in the unit. The collected water from the vacuum cleaner is recycled through this filter and it is therefore important that the filter is cleaned after each use. Note: Always switch off the device and unplug from the charger before cleaning. Never immerse the device and/or the power cord in water or other liquids.
CLEANING AND STORAGE
Cleaning the device
- Turn the device off.
- Lift the water tank cap, remove the filter and empty the water tank by turning the device upside down above the sink.
- Clean the device and accessories with a damp cloth and a mild detergent and allow to dry completely.
- Wash the filter carefully before placing it back in the unit. The collected water from the vacuum cleaner is recycled though this filter and it is therefore important that the filter is cleaned after each use.
Note: Never use abrasives, bleaching agents or steel wool to clean the device. This could cause damage to the product.
Rinsing the water tankTo clean the water tank, we recommend that you fill it with water, close the lid and shake the unit vigorously. This will release any lime-scale deposits that have collected on the bottom of the tank. Pour the water out by holding the cleaner upside down.
Lime-scale removalTo extend the life of your device, it is recommended to descale the appliance every six months. Switch the device off and remove the charger from the socket. Fill the tank with 130ml of 50 hot water and add one or two descaling tablets or solution (commercially available kettle cleaning solution can be used for this purpose). Pour the water out as described above after 30 minutes.
StorageMake sure that the device and the attachments are completely clean and dry before you store the device.
TECHNICAL SPECIFICATION
Window Cleaner Input: 5Vd.c. 1000mABattery Charger Input: 100-240V~ 50/60Hz 0.2ABattery Charger Output: 5Vd.c. 1000mALi-ion Battery Pack: ICR18650P-1500mAh, 3.7Vd.c. 1500mAh
12 Month Warranty
Thank you for your purchase from Kmart.
Kmart Australia Ltd warrants your new product to be free from defects in materials and workmanship for the period stated above, from the date of purchase, provided that the product is used in accordance with accompanying recommendations or instructions where provided. This warranty is in addition to your rights under the Australian Consumer Law.
Kmart will provide you with your choice of a refund, repair or exchange (where possible) for this product if it becomes defective within the warranty period. Kmart will bear the reasonable expense of claiming the warranty. This warranty will no longer apply where the defect is a result of alteration, accident, misuse, abuse or neglect.
Please retain your receipt as proof of purchase and contact our Customer Service Centre on 1800 124 125 (Australia) or 0800 945 995 (New Zealand) or alternatively, via Customer Help at Kmart.com.au for any difficulties with your product. Warranty claims and claims for expense incurred in returning this product can be addressed to our Customer Service Centre at 690 Springvale Rd, Mulgrave Vic 3170.
Our goods come with guarantees that cannot be excluded under the Australian Consumer Law. You are entitled to a replacement or refund for a major failure and compensation for any other reasonably foreseeable loss or damage. You are also entitled to have the goods repaired or replaced if the goods fail to be of acceptable quality and the failure does not amount to a major failure.
For New Zealand customers, this warranty is in addition to statutory rights observed under New Zealand legislation.
[xyz-ips snippet=”download-snippet”]