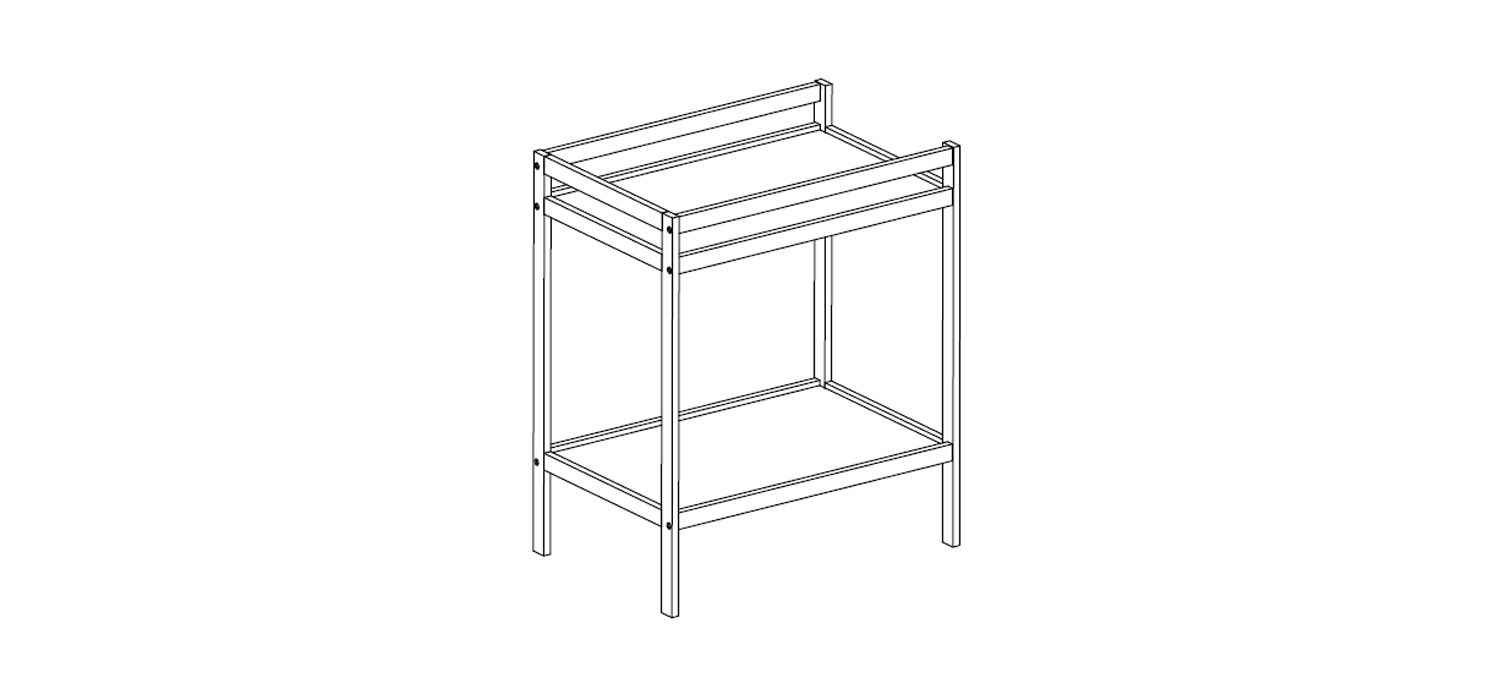

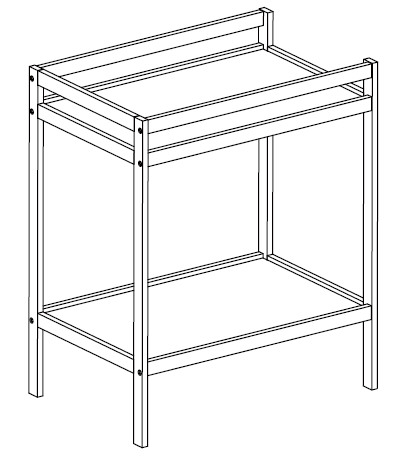
Wooden Change TableInstruction Manual
Drawings in the manual are for visual purposes only. Actual product may vary slightly.The manufacturer reserves the right to change any specification or feature without prior notice.
Important: Keep for future Reference. Read Carefully.
Read these instructions carefully before use and keep for future reference. The child may be hurt if you do not follow these instructions.
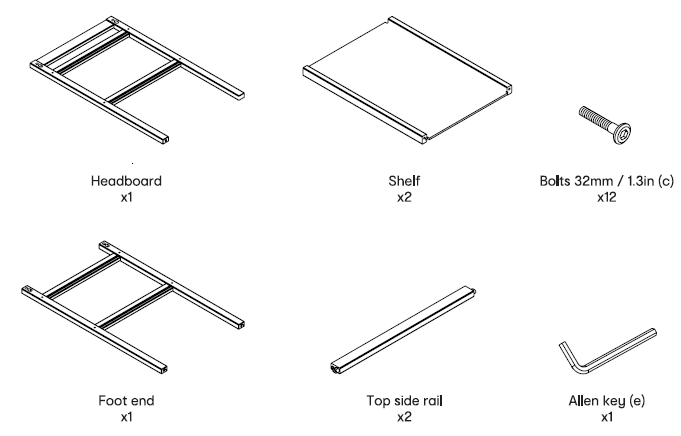
Supplied loose in box
Assembling Shelves

Attach both shelves into the headboard as per the diagram by aligning the shelf grooves with the headboard slots.
Insert a bolt (c) in each end of the headboard for each shelf. Ensure they are secure by the alien key (e), but not tight.
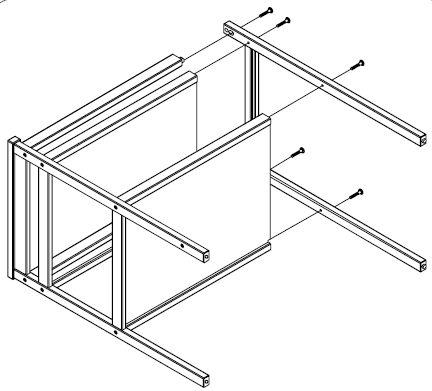
Assembling Top Side Rails

Attach both top side rails into the headboard as per the diagram by aligning the top side rail grooves of both the shelves and side rails.
Insert a bolt (c) in each end of the headboard for each top side rail. Ensure they are secure, but not tight.
Warning: Do not over tighten bolts.
Assembling Foot End
Attach the foot end to the shelves and the top side of the rails by aligning the foot end to the grooves of both the shelves and top side rails.
Insert the remaining 6 bolts (c) in foot end and ensure they are secure with the alien key (e).
Stand change table upright tighten all 12 bolts.
Keycode: 42861140Made in chinaFor AU / NZ: imported for Kmartstores in Australia and Newzealand.For USA: imported by ANKO retail Inc.19500 Alderwood mall parkway Lynnwood wa 98036 USA.
WARNING:
DO NOT LEAVE THE CHILD UNATTENDED. TO PREVENT FALLS, DO NOT USE CHANGE MAT WITH A THICKNESS OF MORE THAN 30mm /1.2in. All assembly fittings should always be tightened properly and checked regularly. To prevent falls, do not leave your baby unattended on the change table.
- Discontinue use once child reaches 12months or 11kg / 24.31b. Do not allow older children to climb or play on the change table.
- Do not use accessories other than those supplied and approved by the manufacturer. Promptly replace worn out or broken parts.
- Do not overtighten the bolts. Ensure the change table is placed at a reasonable distance away from open fires and other sources of strong heat, such as electric bar heater, gas fire, etc.
- Do not use this change table if any part is broken, torn or missing. Ensure children are clear of any moving parts when adjusting the change table.
- For warranty purposes, keep your sales receipt to provide proof of purchase.
RECOMMENDED CHANGE MAT SIZE (NOT SUPPLIED),
This change table has been manufactured for use with a change mat which measures 9.5cm(H) x 48cm(W) x 73.5orn(L) / I7in(-1) x1.6ft(W) 2.4ft(L). Place change mat directly onto Change Table top shelf.
Care and Maintenance
- To ensure the long-lasting use of your change table, wipe down with a damp cloth and use a mild soap solution if necessary.
- Do not use abrasive cleaners.
- Always store product in a clean dry place.
- Always check parts regularly for tightness of screws, nuts and other fasteners – tighten or replace if required.
- To maintain the safety of your change table, seek prompt repairs for bent, torn, worn or broken parts.
- Use only those parts and accessories approved and supplied by the manufacturer.
[xyz-ips snippet=”download-snippet”]