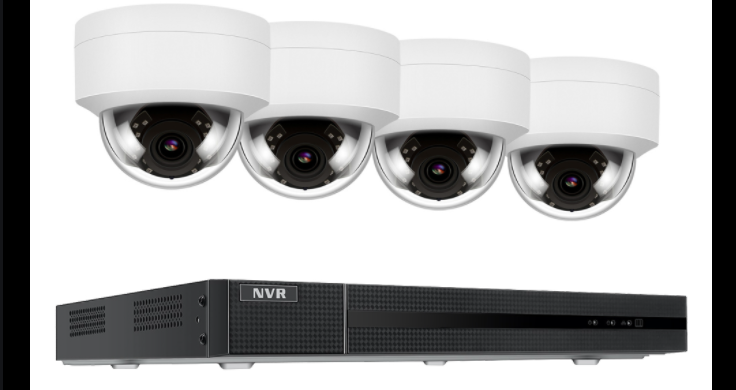
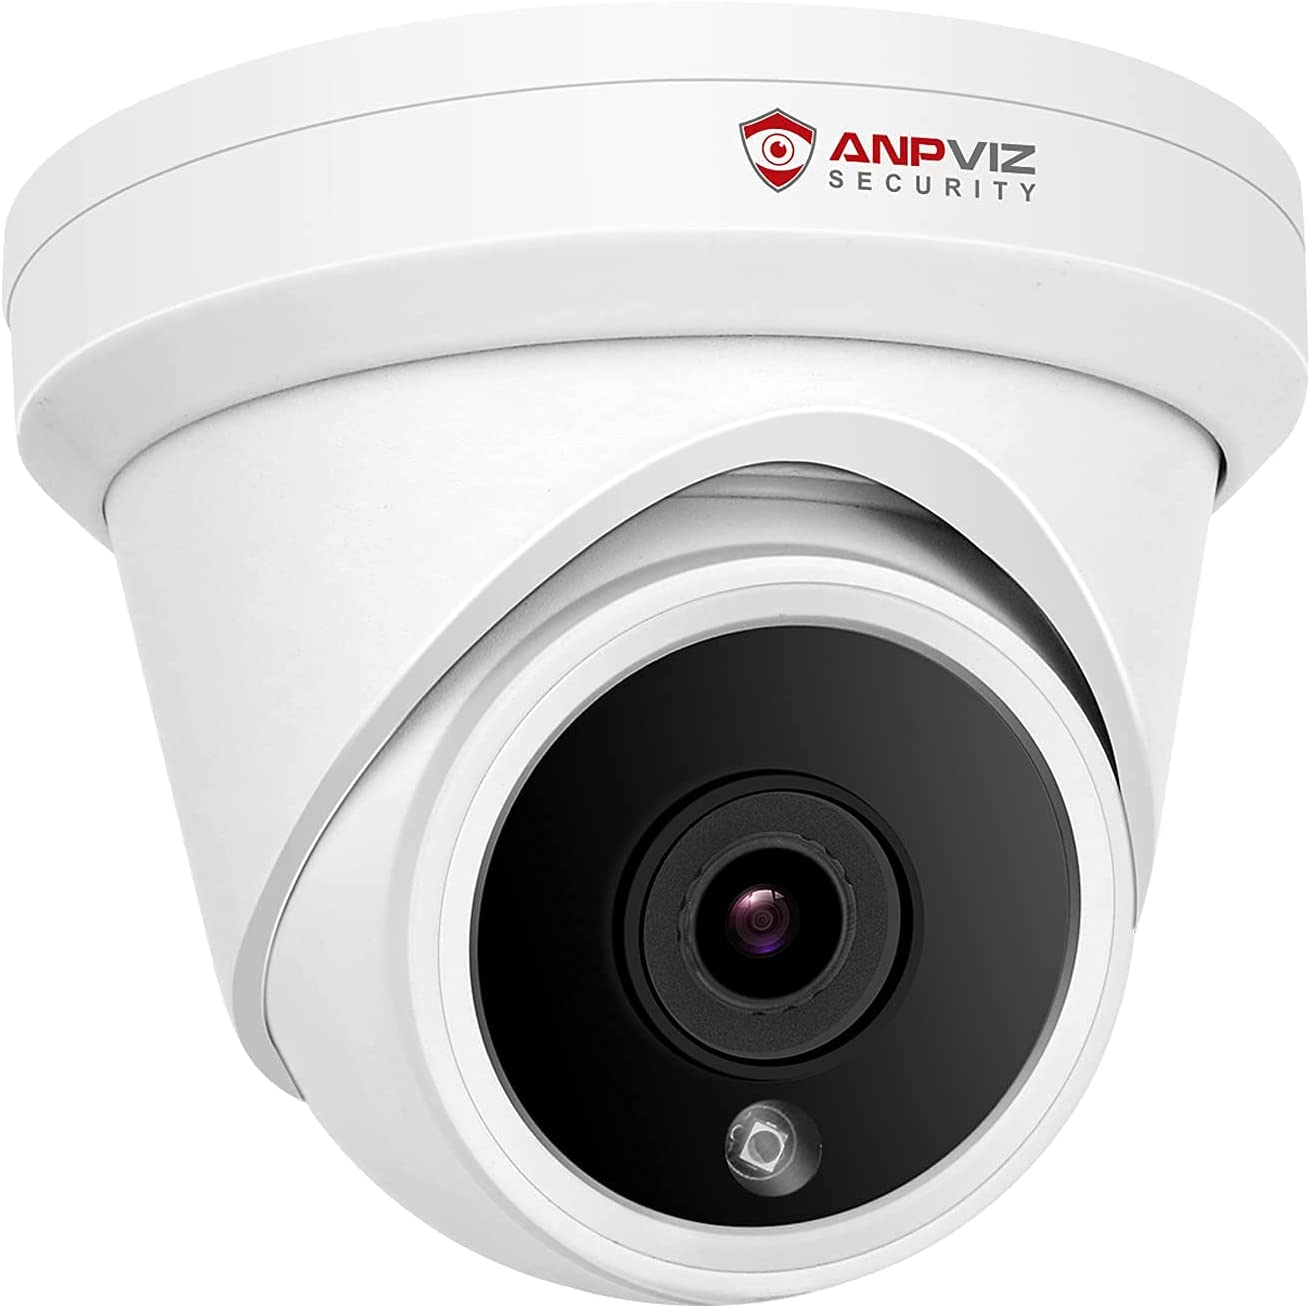
ANPVIZ HD IP POE Dome Camera
Package contents
- IP Dome Camera.
- Mounting Kit*
- Mounting Template*
- Warranty Card
- Per camera in multi-camera packs.
ATTENTION
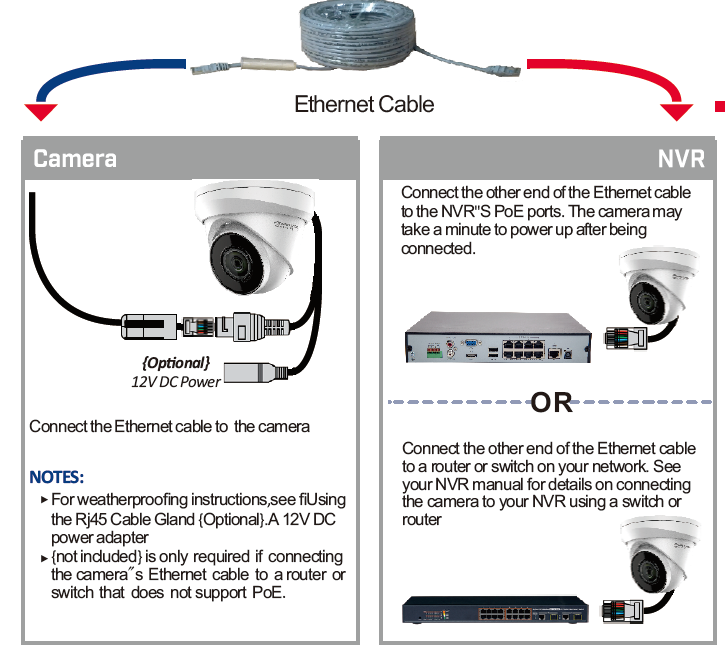
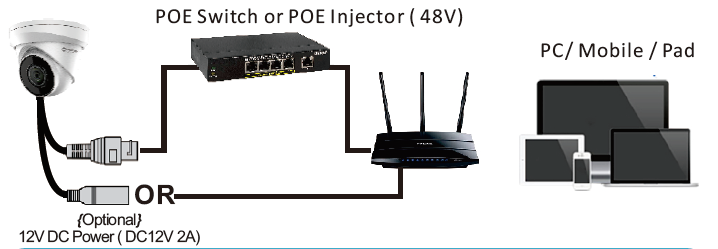
It is recommended to connect the camera to the NVR or an external PoE switch. If using a DC power adapter (not included) with the camera, a REGULATED power supply is REQUIRED for use with this camera. Use of a non-regulated, non-conforming power supply can damage this product and voids the warranty. If you need a free power adapter, please send mail to: [email protected]
Appearance Description
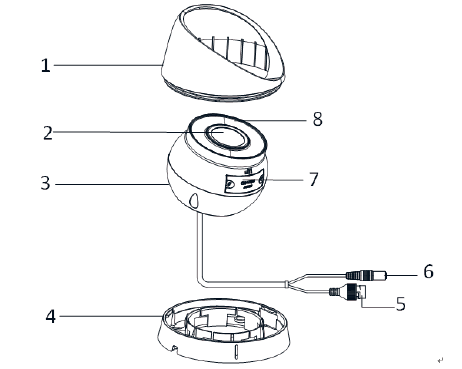
Camera Overview
|
NO |
Description |
NO |
Description |
| 1 | Mounting Base | 5 | IR LED |
|
2 |
Panning Adjusting Bracket |
6 |
Lens |
| 3 | Front Cover | 7 | Black Liner |
| 4 | Power Cord | 8 | Safety Rope |
Drill the cable hole, if adopting ceiling outlet to route the cable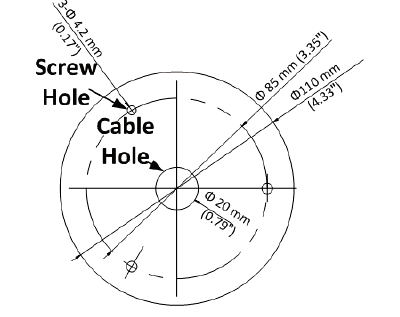
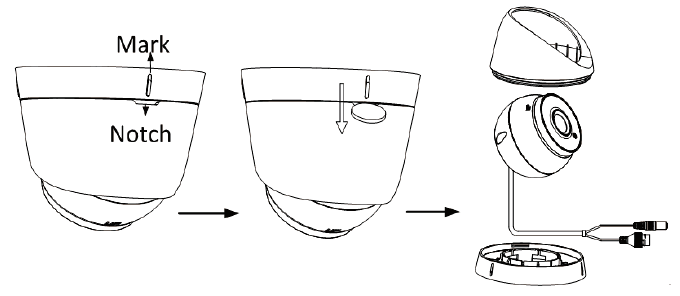
Disassemble the camera.
- Rotate the camera to align the notch to one of the marks.
- Insert a coin or another similar tool to the notch.
- Press down the coin or another similar tool to pry the mounting base so as to separate the mounting base from the camera.

Fix the mounting base to the ceiling with supplied screws. Note
Note
- In the supplied screw package, both self-tapping screws, and expansion bolts are contained.
- If the ceiling is cement, expansion bolts are required to fix the camera. If the ceiling is wooden, self-tapping screws are required.
Route the cables through the cable hole or the side opening.Install the camera body back to the mounting base.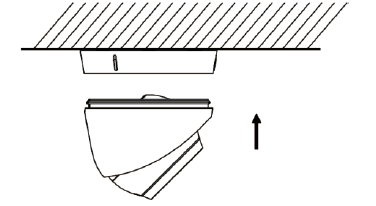 Connect the power cord and network cable.Power on the camera, and set the network configuration (for details, refer to ) to check whether the image is gotten from the optimum angle. If not, adjust the surveillance angle.
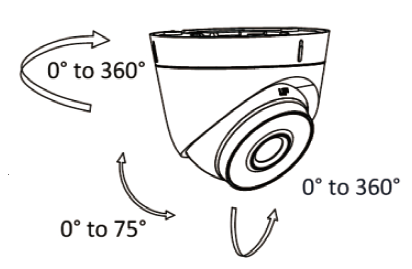
Connecting The Camera
Accessing via Web Browser or Mobile
Tips
- Modify the ip address of camera by SADP in the same subnet of your computer firstly.
- Make sure the camera is powered on.
Tips on using this Dome Camera
We strongly recommend you to read carefully the User manual together with this quick user instruction. It will tell you more details on how to use it correctly. You also could contact us any time: [email protected]
Before You Start
Get SADP/CMS software from the Anpivz official website (https://www.anpvizsecurity.com/software-tools-appa00062a1.html) to install.
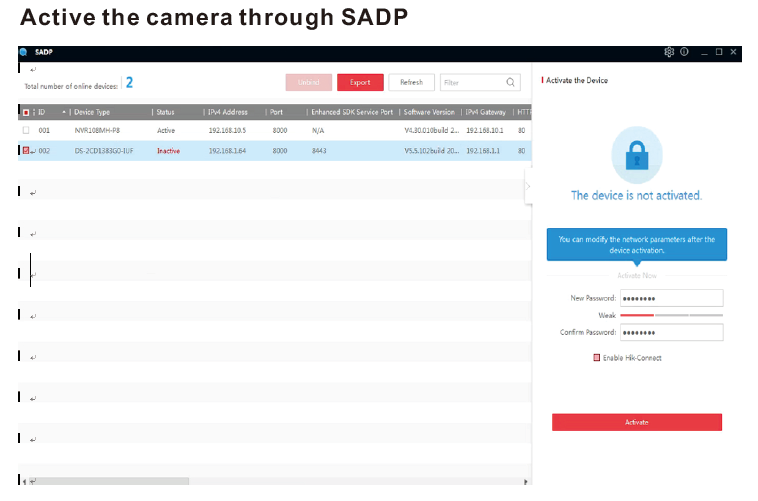
Modify IP Address
Steps:
- Run the SADP software.
- Select an active device.
- Change the device IP address to the same subnet with your computer by either modifying the IP address manually or checking the Enable DHCP checkbox.
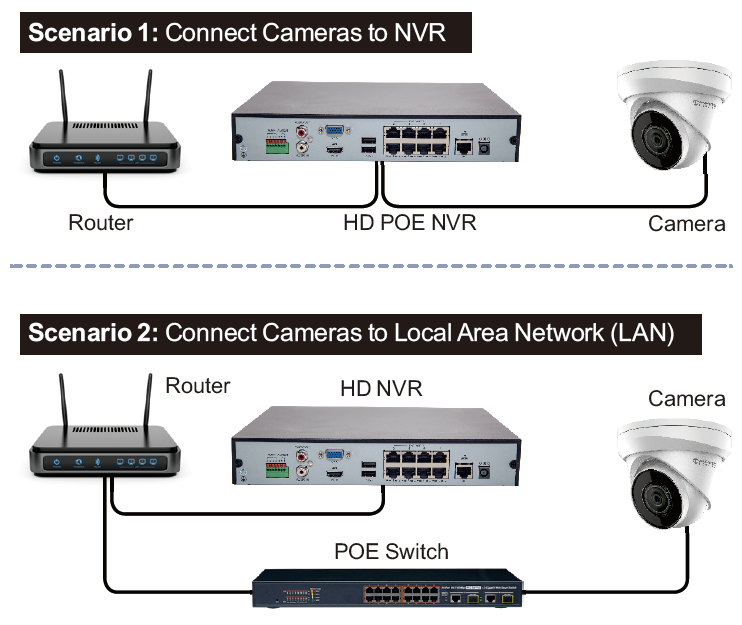
Tip on Accessing via NVR
- Stream Video Compression default to H.265+. If you are using H.264 NVR. Please modify the IP stream to H.264 by accessing the web browser firstly. Otherwise, there will be no image.
- If your NVR only support 1920X1080, please modify the resolution of camera by accessing the web browser.
- Ensure the IP Address of the camera is in the same subnet of your NVR. Modify the IP Address of the camera before connecting to NVR firstly.
Accessing by Client Software IVMS4200
Download the iVMS-4200 client software from official Website . You can view the live video and manage the camera with the software.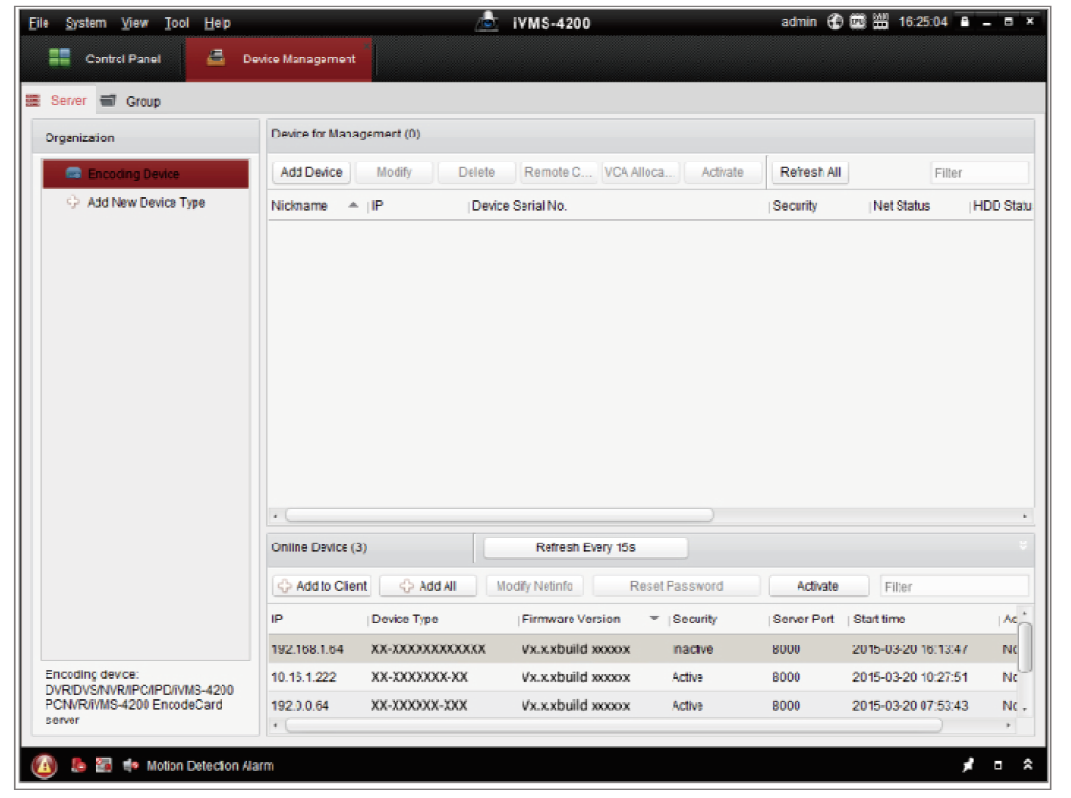
Login
- Login to the device via Web browser.
- Double click the camera’s address or you can input IP address on the browser to enter the logo page. The default account name is admin and the password is the one you just set up.
Plug-in Installation
Certain operation systems and web browser may restrict the display and operation of the camera function. You should install plug-in or complete certain settings to ensure normal display and operation. For detailed restricted function, refer to the actual device.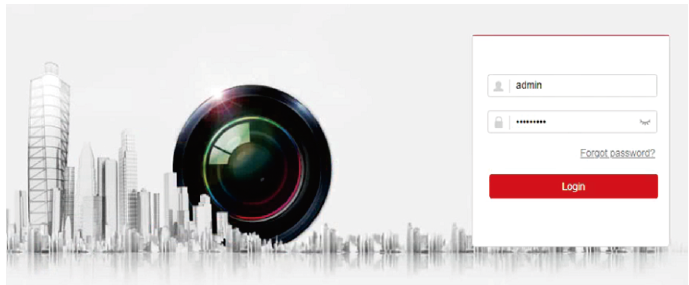
Live View
Open the browser and login the camera.Choose the channel you want to access and set up the camera by clicking Configuration.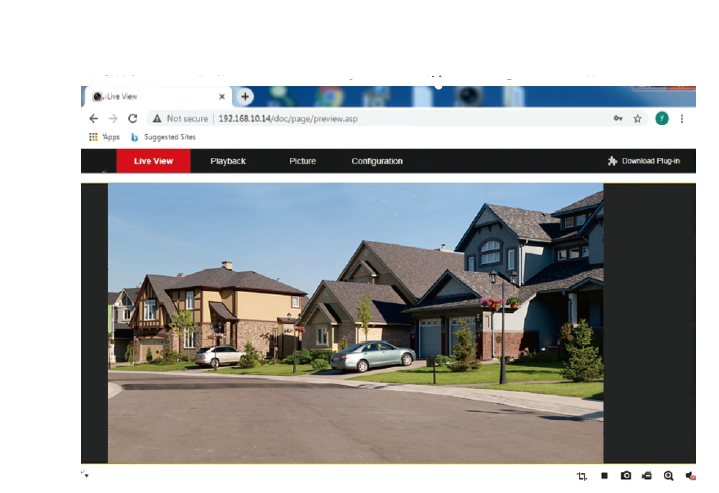 REMOTE VIEWING
View footage on your mobile devices with our app. You can either scan the provided QR Code below Or search Guarding Vision in the app Store.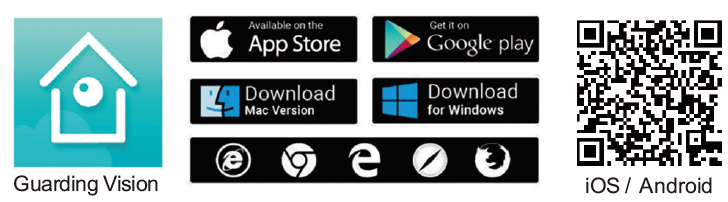 It is all on the Web : Software and complete instruction manualavailable on http://www.anpvizsecurity.com/download/ Choose: HK Series
Smartphone Remote View
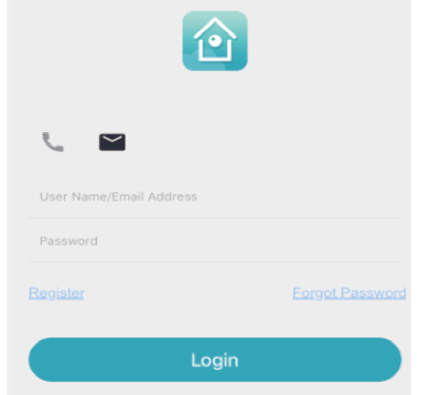
- Download and install Guarding Vision or hik-connect app from Google Play or Apple Store.
- Click Register and follow the prompt steps to create your account.
- You Can using phone number or E-mail to quick sign up, Select the corresponding area.
Connect to the Camera
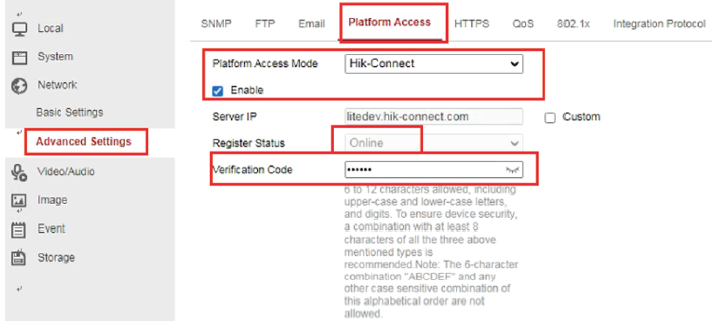
- You need to turn on the P2P function of the camera (guardingvision or hik-connect platform) and set the verification code yourself, which can be enabled by entering the camera through the SADP tool or through a browser. As shown in the figure, browser enables the camera P2P platform.
- Open Guarding Vision or hik-connect app, Click the icon “+” to add device. scan the QR code on the camera bo om, input the verification code of your camera, after adding, click the device to preview.
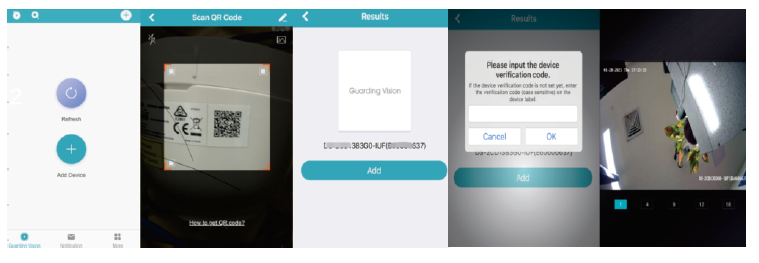
Note: About the introduction of APP function icons, you can find the function introduction in the more-help of APP.
FOR SUPPORT AND INFORMATION,VISIT www.anpvizsecurity.com
- Product Information
- User Manuals
- Quick Start Guides
- Specifications
- Software
- Firmware
Also available on below links
Software Download:https://www.anpvizsecurity.com/download/hk-series_c0037![]()
References
[xyz-ips snippet=”download-snippet”]