ANTOP AT-500SBS HDTV and FM Amplified Antenna Installation Guide
Installation Instruction Manual
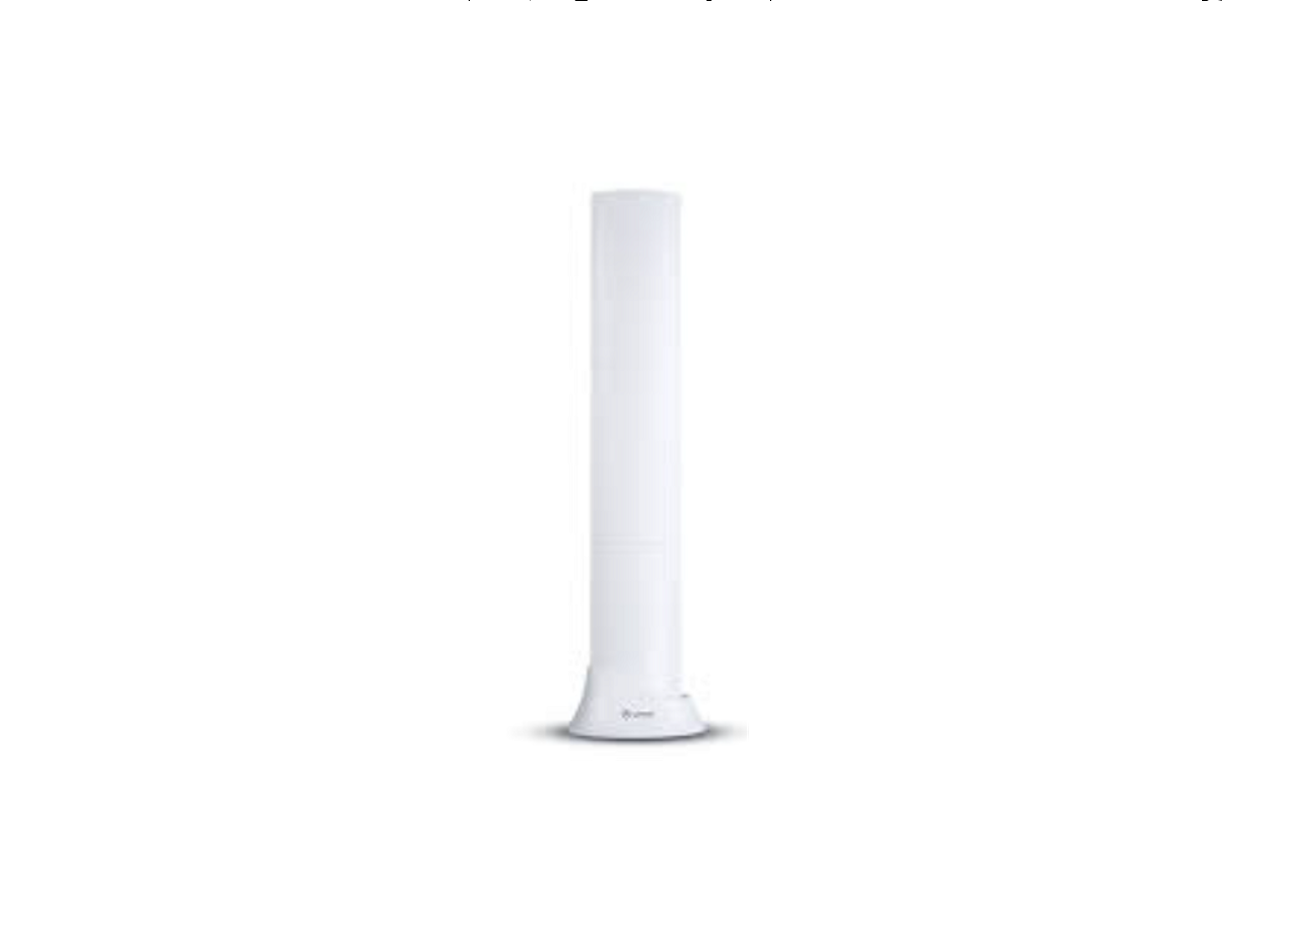
Your HD Smart Bar HDTV & FM Amplified Antenna/ AT-S00SBS is perfect for indoor use nd features ANTOP’s exclusive Smart Boost System (SBS) that allows you to adjust theantenna’s reception power with a simple turn of a dial! The Smart Bar is part of ANTOP’sNew Generation Digital Technology that allows you the flexibility to set up your antenna in various locations and still receive a great digital reception.
ANTOP’s New Generation Digital Technology
- Smart Boost System: Activate the SBS and you can connect a second device simultaneously to the AT-S00SBS: FM stereo, a second TV, or any OTA-Ready streaming device or projector!
- The SBS design allows easier connection, and dials-in the correct balance between shortand long-range reception.
- 4G LTE filter: blocks 3G and 4G wireless signals to ensure noise-free digital TV reception. Following are instructions for installation options for indoor table top use, wall mounted orplaced in an attic. Read through all instructions prior to beginning installation procedure.
Note: Although this antenna is great for indoor use, a higher mounting location or placement positioned towards the broadcast tower may result in better reception. Install the antenna as high as possible, and preferably with a clear path between the antenna and the TV station transmitters. Trees, buildings, mountains, etc., can all impact the performance of any antenna.
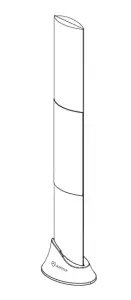
1.1 For Table Top Mounting with Stand
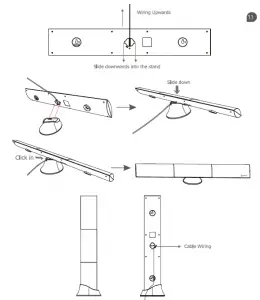
For horizontal positioning: Hold the antenna in a horizontal position then slide the antenna downwards into the stand. Slide down until slots on back side of antenna go into the stand andyou hear a “click” sound. For vertical positioning: From rear view of antenna, hold the antenna right side down. Slide the antenna downward into the stand. Slide down until tab on right side of antenna go into the stand.
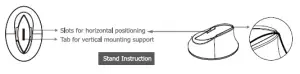
Figure 1.1
1.2 Wall Mounting
Measure the distance between two hanging holes and draw position symbols on the wall. Attach two screws (not provided) into the wall according to the symbols. Match screws to hangingholes and place screws into hanging holes to hang the antenna. Antenna can be positioned horizontally or vertically (horizontal mounting illustrated below).
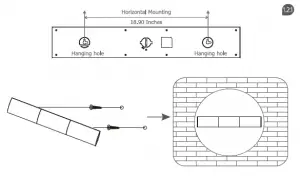
Figure 1.2
1.3 Attic Placement
Antenna can be placed in an attic, either in horizontal or vertical position. Local a suitable area in your attic and follow the table top mounting with stand installation instructions from above.
2 / Connecting
Connect the coaxial cable of antenna to the ANTENNA IN of power booster. Connect TV and other devices to the power booster via TV and TV/FM outputs. Connect the power adapter to the DC socket.
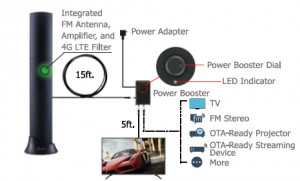
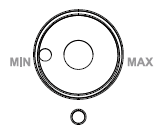
In order to adjust the amplifier gain, use the power booster dial:
- To increase gain, turn the dial clockwise.
- To reduce gain, turn the dial counter clockwise.
3 / Setting and Scanning
In the lV’s setup menu, set the mode to “Antenna” or “Air’: then, set lV to “Scan” for channels. Consult the lV manual for detailed instructions.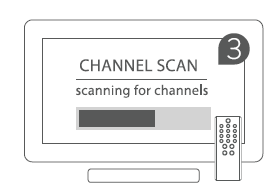
4/ Placing and Adjusting Instruction
Test the antenna in multiple locations and adjust it horizontally or vertically to find the best one for reception before fixing it. A high location or positioning the antenna toward the broadcasttower may result in better reception.
WARRANTY POLICY
Customers should first contact their place of purchase to determine the reseller’s warranty policy. Antop Antenna’s warranty will take effect after the expiration of reseller’s policy.Antop Antenna, warrants its products for a period of one (1) year from the original date of purchase. Warranty is valid only with proof of purchase. Warranty does not apply todefects or failures of the product caused by; neglect, misuse, negligence, accident, abuse, mishandling, misapplication, alteration, modification, power outage, unauthorized/ unreasonable use, or any uncontrollable environmental damage.
RETURNS & REFUNDS
For any return, customers should first contact their place of purchase to determine the reseller’s return policy. A Return Material Authorization (RMA) number must be obtained in advance by contacting Antop Antenna customer service via e-mail or telephone. Merchandise returned to Antop Antenna must have a RMA number displayed on the box and a copy of your proof of purchase inside the package. Absolutely no refund after 30 days of purchase from Antop Antenna. A restocking fee of 15% will be deducted from any refund, ask representative for further details. Refund policy for US & Canada customers only.
EXCHANGE & REPLACEMENT
For any exchange or replacement, customers should first contact their place of purchase to determine the reseller’s policies. No upgrades or exchanges for different models or SKU’s.One (1) Year limited manufacturer’s warranty for exchange of product due to malfunction, failure or defect, missing parts or components. Exchanges will be for the same item, modeland/or SKU, within one (1) year of original purchase date. A Return Material Authorization (RMA) number must be issued by Antop Antenna prior to returning any product or part. Toobtain an RMA, contact Antop Antenna via email or telephone.
SHIPPING & COSTS
Customer will be responsible for shipping costs of merchandise sent to Antop Antenna. Please consult a customer service representative for details. When shipping any item to Antop Antenna, please consider using a trackable shipping method. Antop Antenna cannot be held responsible for lost or misdirected shipments. Exchanged and returned products must be sent to: Antop Antenna, RMA Department, 1650 S. Balboa Ave, Ontario, California 91761. To receive a Return Material Authorization from Antop Antenna please send your request to RMA Dept: or to speak to Customer Service: Via telephone, M-F, 9am to 5pm (PST) 909-947-8883.
https://antopusa.comANTOP ANTENNA INC I Tel. 909.947.8883 I Email:
Read More About This Manual & Download PDF:
[xyz-ips snippet=”download-snippet”]