Anycubic Wash and Cure User Manual
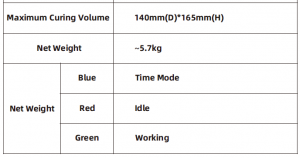
Technical Specification
| Model | Wash and Cure |
| Control Mode | Touch button, LED Light |
| Rated Power | 40W |
| Input Voltage | AC110/220V 50/60Hz |
| UV LED | 405nm(8)+365nm(8) |
| Time Mode | 2min 4min 6min |
| Machine Size | 220mm(L)*230mm(W)*370mm(H) |
| Maximum Wash Volume | 115mm(L)*65mm(W)*165mm(H) |
| Maximum Curing Volume | 140mm(D)*165mm(H) |
Thank you for choosing ANYCUBIC products.
Please read this manual carefully. The installation techniques and precautions in this manual can help you avoid any unnecessary damage or frustration.More information please refer to :
- http://www.anycubic.com/ ANYCUBIC website provides software, videos, models, after-sale service, etc. Please visit our website for technical support and we are likely to answer or solve all the questions for you!
- Facebook page and Youtube channel as shown below.

Copyrighted by “Shenzhen Anycubic Technology Co., Ltd”, all rights reserved.
Safety instruction
Always follow the safety instructions during assembly and usage, to avoid any unnecessary damage to the machine or individual injury.
 Please contact our customer service first if you have any issue after receiving the products.
 The washing liquid should be sealed and stored in a cool and dry place after use. If the liquid is alcohol, please strictly follow the instructions of alcohol.
 In the curing mode, do not take off the cover of the machine to prevent potential hazard of UV light.
 Do not clean the models directly without putting them in cleaning basket or suspending them on the platform. After cleaning, the models need air-dried before putting in the curing chamber.
 Be cautious when using the scraper. Never direct the scraper towards your hands.
 In case of emergency, please immediately cut off the power of ANYCUBIC machine and contact thetechnical support.
 ANYCUBIC machine includes moving parts that can cause injury.
 Keep the ANYCUBIC machine and its accessories out of reach from children at all times.
 ANYCUBIC machine must not be exposed to water or rain.
 ANYCUBIC machine is designed to be used within ambient temperature ranging 0ºC-40ºC, andhumidity ranging 20%-50%. Working outside those limits may result in low quality performance.
 Do not disassemble ANYCUBIC machine, please contact technical support if you have any question.
Packing list

Product Overview
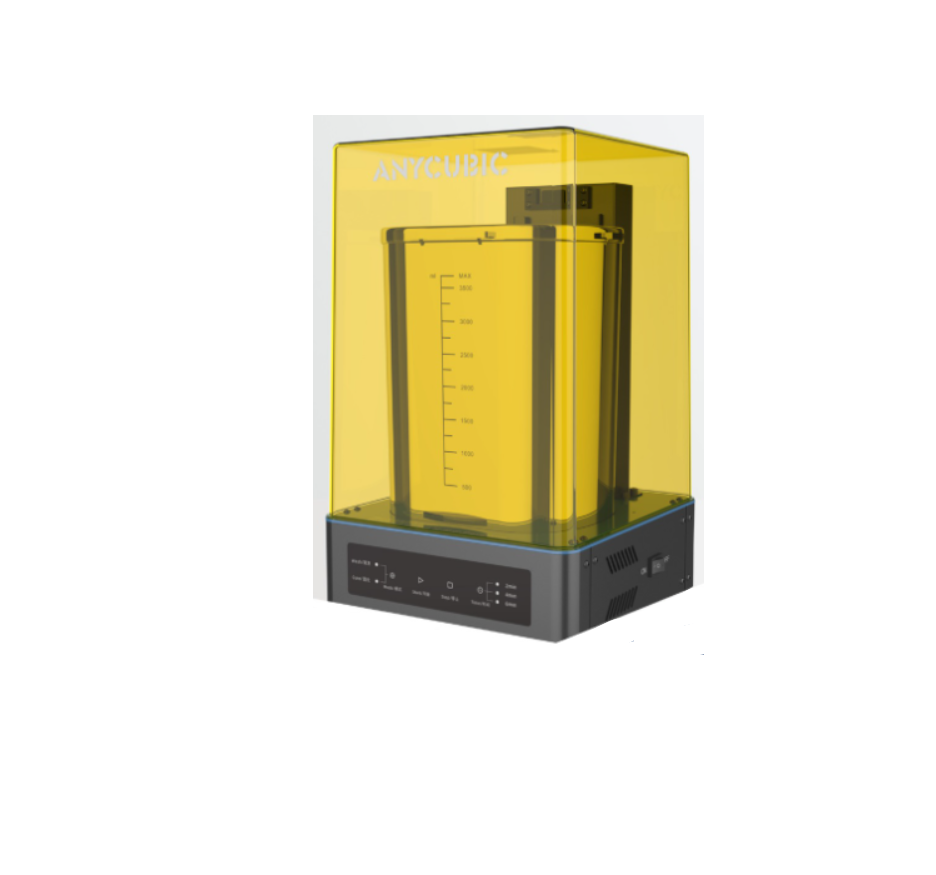
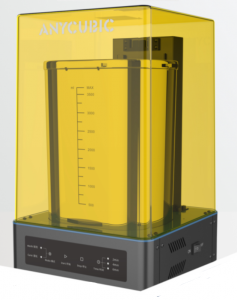
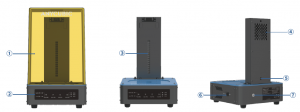 ①Anti-UV lid – blocks 99.995% of UV light and plays a protective role.②Control panel – touch it to control the machine.③UV LED panel – for model curing.④Air vent – there is a fan inside to dissipate heat.⑤Anti-UV lid sensor – to detect whether the anti- UV lid is covered or not.⑥Power switch – turn on/off the machine.⑦Power socket – to connect the external adapter.
Instructions
This machine (Wash & Cure) is suitable for washing and post-curing of printed objects of M-SLA 3D printers (such as the Anycubic Photon Series 3D printers). This machine has two working modes, wash and cure. The following describes the basic functions and operation precautions in different working modes. Please read the manual carefully before get started.


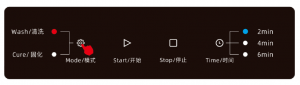
①Plug in the power ②Turn on the machine ③The default mode is curing
1Wash mode
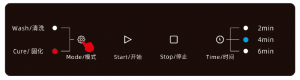
- Switch the machine to wash mode by touching the Mode on the front panel.
- Place the washing bucket firmly on the platform by the indentation.(Note: The curing table must be took off if it is on the platform.)
- There are two cases for washing:Case 1: The printed objects are on the platform. Then please use the platform holder to secure the platform as shown below.Choose the suitable platform holder:① Adjustable platform holder – Suitable for model with height less than 115mm.② Platform holder – Suitable for models with height greater than 115mm and less than 165mm.Case 2: The printed objects has been removed from the platform (suitable for small models). Then please usethe washing basket to hold the printed objects.Note: The holes on the washing basket is 18mm. If the objects are less than 18mm, please do not remove them from the platform, and refer to the instructions on the leftto clean them with the platform.If you use another platform holder, you just need to fix it directly to the machine.Tip: the washing liquid can be alcohol, detergent solution, etc.
- Touch the time icon to select the washing time, and then touch the start icon to start washing. (If the lid has been removed during the operation, the program will be paused. And the program will resume after cover back the lid.)
- After the washing is completed, a beeping sound will indicate it’s finished. After the model is washed, it issuggested to air dry the model before proceeding to the next post-cure process.

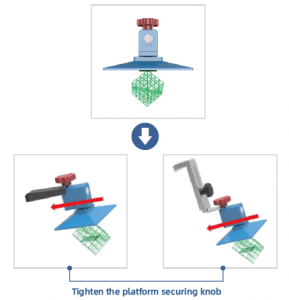 Choose the suitable platform holder:① Adjustable platform holder – Suitable for model with height less than 115mm.② Platform holder – Suitable for models with height greater than 115mm and less than 165mm.
 Case 2: The printed objects has been removed from the platform (suitable for small models). Then please usethe washing basket to hold the printed objects.
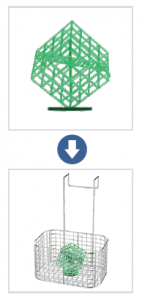 Note: The holes on the washing basket is 18mm. If the objects are less than 18mm, please do not remove them from the platform, and refer to the instructions on the leftto clean them with the platform.
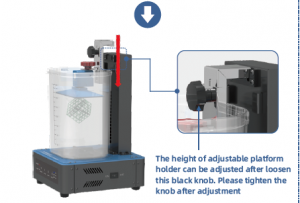 If you use another platform holder, you just need to fix it directly to the machine.
 Tip: the washing liquid can be alcohol, detergent solution, etc.

Tips: After washing, please remove and and seal the washing bucket to avoid spilling the washing liquid.
2.Cure mode (After washing, post curing can increase the strength of the printed objects.)
It is suggested to air dry the model before proceeding to the post-cure process.
- Switch the machine to cure mode by touching the Mode on the front panel.
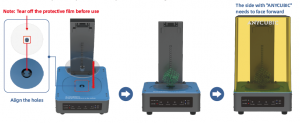
- Align the curing table with the hole of the platform and install (The washing bucket needs to be removed first if it is on the platform). Place the objects on the curing tableand cover the lid.
- Select the curing time. (Generally, if a model has a diameter of less than 30mm, it is recommended to have a curing time of 2 minutes. If the model has a very complicated surface structure, it is recommended to increase the curing time.) Then touch the start icon to start curing the model.Attention:①If the lid has been removed during the operation, the program will be paused. And the program will resume after cover back the lid. In order not to affect the curing effect, please do not remove the lid during the curing process.②The temperature of the front side of the lid will be slightly higher than room temperature because of the direct UV light.③Do not look directly at the UV light during the curing process, although the lid has blocked 99.995% of the UV light.
- After the curing is completed, a beeping sound will indicate it completed.Tips: If the machine is not used for a long time, please cut off the power.
 Attention:①If the lid has been removed during the operation, the program will be paused. And the program will resume after cover back the lid. In order not to affect the curing effect, please do not remove the lid during the curing process.②The temperature of the front side of the lid will be slightly higher than room temperature because of the direct UV light.③Do not look directly at the UV light during the curing process, although the lid has blocked 99.995% of the UV light.
Maintenance1.Recycling of washing liquid
Here we take “alcohol“ as the washing liquid for example.
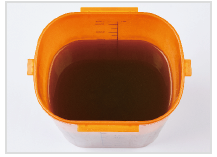 ① After used for cleaning about 30 models, the alcohol might become muddy, as shown above.
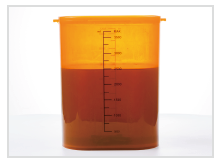 ② Allow the liquid stays still for over 10 hours so the residue could be precipitated and settled.
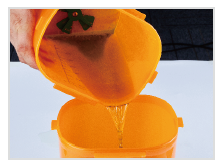 ③ Pour the top layer of alcohol into another container and then dispose the residue, e.g. expose the residue in the sunlight until the alcohol iscompletely evaporated and the resin is cured, then the cured resin can be treated as general solid waste.
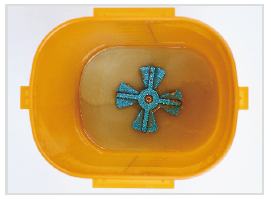 ④ After disposing the waste, rinse the washing bucket several times with water; if the sediment at the bottom of the bucket is too viscous, remove the bucket rotor and brush themseparately. (The method of removing the bucket rotor is shown in the first step of the “Cleaning rotor of the washing bucket” on the next page.)
 ⑤ After cleaning the bucket, pour the filtered alcohol into the washing bucket and covered with lid for future use.The filtered alcohol may still contain dissolved resin, but it can be used to wash the printed.
2. Cleaning rotor of the washing bucket
At washing mode, the rotor at the bottom of the washing bucket will rotate at high speed. If the rotor rotates abnormally after long-term use, you can replace the stainless steel bearing in the rotor (there is 1pcs spare bearing in the package). The process is shown below.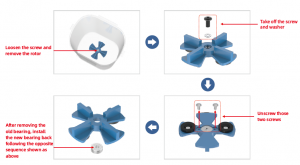
Troubleshooting
- The machine does not work.① Poor power contact. Pull out the power cord and plug it in again.② The lid is not covered. Try again after cover the lid.
- The rotor inside the washing bucket does not rotate during the washing process.① The rotor inside the washing bucket does not move because it is caught by foreign matter. After the power is turned off, pour out the alcohol and remove the foreign matter. Then turn on the power to wash the model again.② There are too much precipitation in the washing liquid, please change the washing liquid and clean the bucket and rotor.
- The machine has abnormal sound during operation.① The floor on which the machine is placed is not flat enough.② Z-axis motor bearings need oil. Inject normal grease into the oil hole of the motor.③ The screw on the rotor is loose during the washing process. Fix the screw to the rotor.
- The model turn white after washing and curing.① The concentration of alcohol used for washing is not high enough. Wash with more than 95% alcohol.② Curing is performed immediately after the model is washed. It needs to wait for the model to air dry before putting it into the machine for curing.
- Touch to switch the mode button of the machine, the two mode lights are not bright.① Try again or reboot the machine.
Thank you for purchasing ANYCUBIC products! Under normal usage and service, the products and its parts have a warranty period up to one year. Please visit ANYCUBIC official website (www.anycubic.com) for more details and report any issues with ANYCUBIC products. Our professional after-sale service team would response within 24 hours and help you to solve the issue.
Read More About This Manual & Download PDF:
Anycubic Wash and Cure User Manual – Anycubic Wash and Cure User Manual –
[xyz-ips snippet=”download-snippet”]