
anywAiR Setting Up Scenes

Setting Up Scenes
The anywAiR® technology Wi-Fi adaptor allows you to set up Scenes within the myanywAiR app. A Scene allows you to set up different scenarios that can activate all at once either at the touch of a button, or voice command (if smart devices are connected). For example, you can set up a Scene called ‘Living Room On’ that will turn your living room air conditioner on at 5pm every day when arriving home, setting it to 22 degrees, cooling mode, with auto fan speed and swinging vanes. In this guide we will show you how to set up Scenes on your myanywAiR app.
|
IMPORTANTIf you wish to control a scene using voice commands, you must first have your desired scenes already setup through the myanywAiR app prior to linking your account with other smart devices. |
How To Set Up Scenes
To begin, open up the myanywAiR app on your smartphone.
STEP 1From the main screen select ‘Scenes’.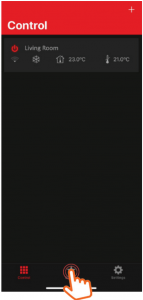
STEP 2On the Scenes page select the ‘+’ in the top right hand corner.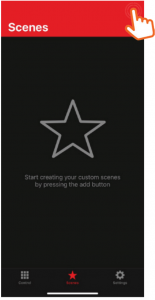
STEP 3This will open up the New Scene page. Enter the name for the scene you want to set up.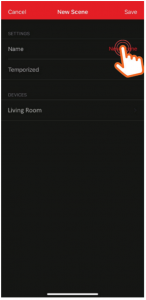
STEP 4For example ‘Living Room On’. Then select the device name you want to set this scene for.
STEP 5All the available settings will appear grayed out. You must select which ones you want to run for each scene.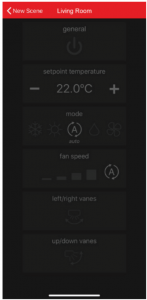
STEP 6For this example we want the ‘Living Room On’ scene to turn the unit on, set it to 24 degrees, cooling mode, fan speed high, left/right and up/down vanes on swing.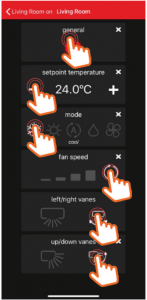
STEP 7Once all your options are set you can exit back to the previous screen by selecting the scene name in the top left hand corner.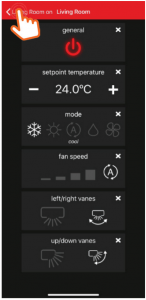
STEP 8You can either save it as is without a timer or set a timer from this screen. To finish here select ‘Save’ in the top right hand corner.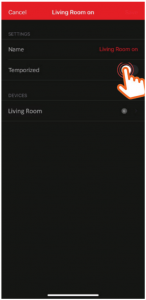
STEP 9Select Temporized on to enable the timer function. Select your preferred time and whether you want it to repeat every day.
STEP 9Once done you can select ‘Save’ in the top right hand corner to finish.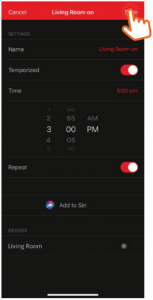
STEP 10Your preconfigured scene will now appear in your Scenes page where you are able to switch it on or off by selecting it.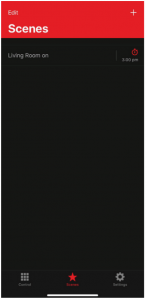
STEP 11To run your preconfigured scene, simply select it and you will be notified of it running in the top bar.
To edit a Scene simply follow the steps below.
STEP 1From the Scenes screen, select ‘Edit’ in the top left hand corner.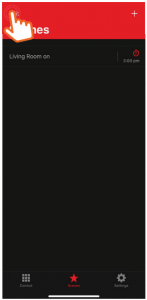
STEP 2In the Edit screen select the scene which you want to edit or remove the scene by selecting the red dash next to the scene name.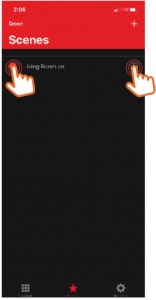
STEP 3Here you can edit the name of the scene, the temporized/timer, repeat function, or the device it’s operating on.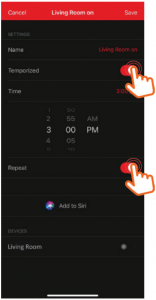
STEP 4By selecting the device again you’re able to edit the set functions within that screen. Repeat previous Steps 7 to 10 to finish editing.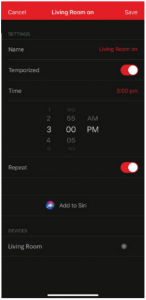
STEP 5If you have more than one device you are able to use the configured scene on each device by selecting each device name and adjusting the settings as required.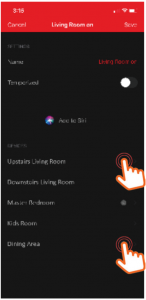

[xyz-ips snippet=”download-snippet”]