
 Quick Setup Guide
Thank you for purchasing MiniPoint Ethernet zero client. This unit is suitable to work with the following systems: Windows 7, Windows8/8.1, Windows10, Server 2008, Server 2012/R2, MultiPoint Server, Userful, and Monitors AnyWhere.
This Quick Setup Guide provides a brief instructions on how to set up your system for Monitors AnyWhere digital signage solution.
Getting Connected

- It’s recommended to use a gigabit switch to connect your host PC and zero clients.
- Host PC and zero clients must be located on the same Subnet\VLAN.
- To connect the zero clients over WIFI you’ll need an additional mini Access Point. Read more on our Online Knowledge Base at: www.monitorsanywhere.com
Installing Drivers and Utilities
To install the display drivers, Network USB Utility and Monitors AnyWhere, please follow the steps below:
- Download the drivers and applications from our website at: www.monitorsanywhere.com, under Support > Quick Installation Guide.
- Install the drivers and applications and reboot your system.
Initial Setup for MiniPoint Ethernet zero clients
First you’ll need to assign the zero client to the host PC. Once the assignment is established, your zero client is ready for use. Follow the steps below to complete the initial setup:
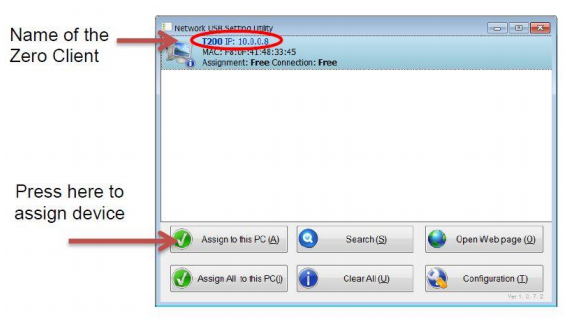
- Open the Network USB Utility and select the zero client from the list.
- Press on the “Assign to this PC” button.
For more information or technical support:
Monitors AnyWhere Quick Setup Guide – Monitors AnyWhere Quick Setup Guide –
[xyz-ips snippet=”download-snippet”]