Aputure MC RGBWW LED Light User Manual
Foreword
Thank You for purchasing the Aputure MC.
Instructions
Intended Use
Intended use of the Aputure MC includes:
- The user has read the instructions of this manual.
- The user is using the products within the operating conditions and
- limitations described in this product manual.“Improper use” means using the products other than as described in these instructions or under operating conditions which differ from those described herein.
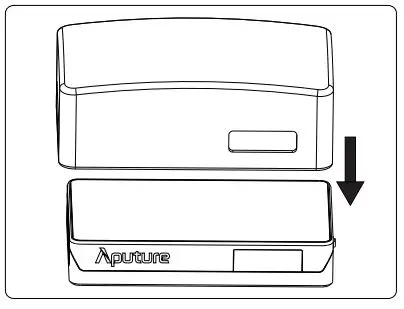
Item Check List
Package includes the following items:
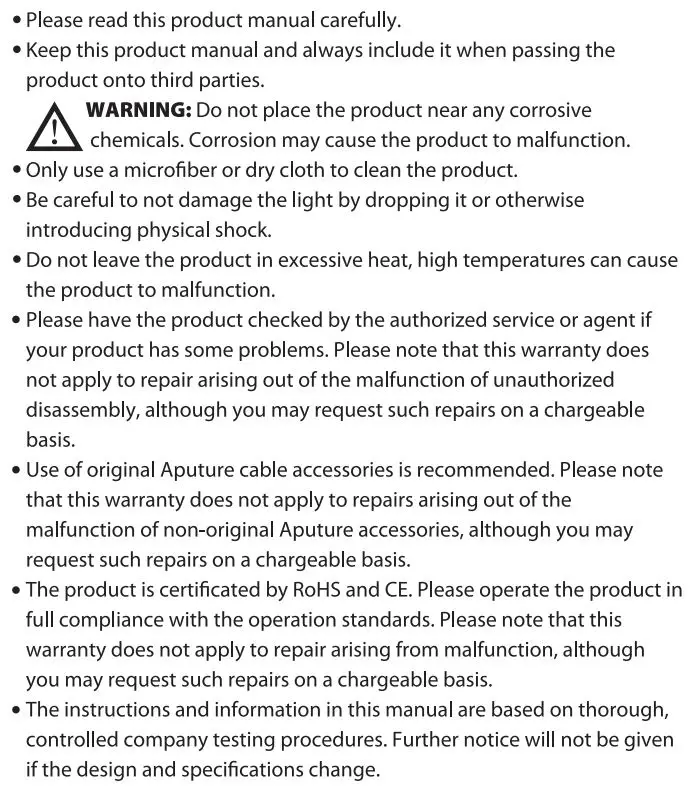
Product Details
- OLED Screen
- Function Control Wheel
- Power Switch
- USB Type-C Charging Port
- Magnets
- 1/4″-20 Screw Mount
Operation Instructions
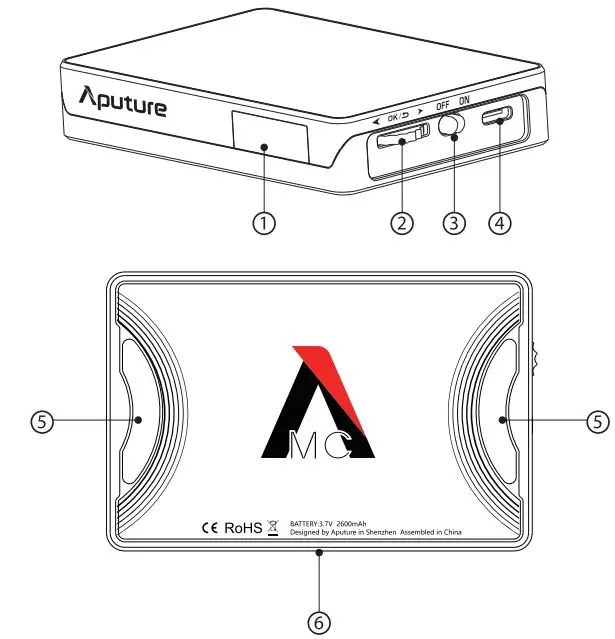
1.Charging
1). Type C chargingAs the light is charging, the on-screen battery level indicator will animate to show the battery’s status. After the battery is fully charged, the battery level indicator will be displayed as full.
* Supports 5V/2A charging via power brick or power bank.* Supports quick charging via USB-C PD protocol.* Charging is slow when the light is powered on. Turn the light off for optimal charging.* The on-screen battery indicator will flash when the battery level is too low.
2). Wireless chargingThe MC is compatible with the Qi wireless charging protocol. The MC can be charged via a SW Qi-certified wireless charger.
• Charge the light after powering the device off for optimal charging. Charging the device while the light is powered on will decrease its charging speed.
2. Power ON/OFF
Adjust the position of the power switch to turn the light on or off.
3.CCT Mode
Press and hold the control wheel for 2 seconds to access the system menu. Rotate the control wheel to select CCT and press the wheel to enter CCT mode. In CCT Mode, rotate the control wheel to adjust the color temperature between 3200-6500K. “Short press” the wheel to select intensity (IND control, and turn the wheel to adjust the brightness level from 0-100%.

* Access more fine control via the Sides link mobile application.
4.HSI Mode
Press and hold the control wheel for 2 seconds to access the system menu. Rotate the control wheel to select HSI and press the wheel to enter HSI mode. In HSI Mode, “short press” the control wheel to toggle between HUE/SAT (saturation)/INT (intensity) controls. When controlling HUE, rotate the control wheel to adjust the hue color from 0-360°. When controlling saturation (SAD, turn the control wheel to adjust the color saturation between 0-100%. When controlling intensity (IND, turn the wheel to adjust the brightness level between 0-100%.
5. FX Mode
6. Bluetooth Mode
Press and hold the control wheel for 2 seconds to access the system menu. Rotate the control wheel to select BT and press the wheel to the Bluetooth Reset menu. Rotate the control wheel to select “YES” and short press the wheel to reset the device’s Bluetooth pairing, (the pop-up window displays the current reset progress. The reset process completes within 5 seconds.) or select “NO” to return to the system menu.
7. Attaching the Silicone Diffuser
8. Using the Mounting Tape
9. Using the Magnets
* Do no attach this device or the magnets to any surface with a temperature above 80°. Doing otherwise can damage the magnets.
10. Using the Sidus Link APP
You can download the Sidus Link app from the App store or google play for more Aputure light capabilities. Please visit sidus.link/app/help for more details regarding how to use the app to control your Aputure lights.
Specifications
* These are average results, the specific tux values may vary slightly between each lighting fixture.
Detailed product manual for Aputuer MC can be found on www.aputure.com
Service Warranty
Aputure Imaging Industries Co., Ltd. warrants the original consumer purchaser from defects in material and workmanship for a period of one (1) year after the date of purchase. For more details of warranty visit www.aputure.com
Important:Keep your original sales receipt. Be sure the dealer has written on it the date, serial No. of the product. This information is required for warranty service.
This warranty does not cover:
- Damage that is the result of misuse, abuse, accident (including but not limited to damage by water), faulty connection, defective or maladjusted associated equipment, or the use of the product with equipment for which ii was not intended.
- Cosmetic defects that appear more than thirty {30) days after the date of purchase. Cosmetic damage caused by improper handling is also excluded.
- Damage that occurs while the product is being shipped to whoever will service it.
This warranty Is void If:
- The product identification or serial No. label is removed or defaced in anyway.
- The product is serviced or repaired by any one other than Aputure or an authorized Aputure dealer or service agency.
 report this ad
Aputure Imaging Industries Co., Ltd.Add: F/3, Building 21, Logjam industrial estate,He Ping West Road, Shenzhen, GuangdongE-MAIL: [email protected]Sales Contact: (86)0755-83285569-613
[xyz-ips snippet=”download-snippet”]