
INSTRUCTIONS & MAINTENANCE
![]()
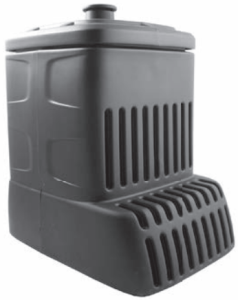
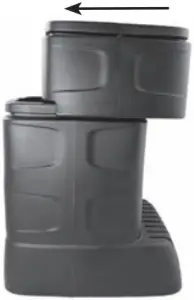
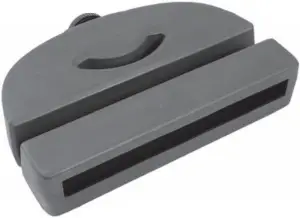
Pondless®Waterfall Vault
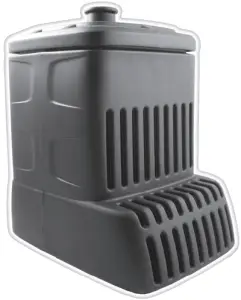 Item #49000 Pondless® Waterfall Vault
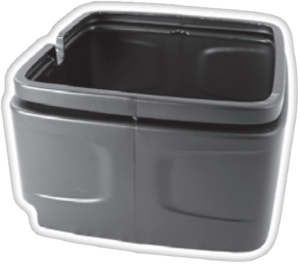 Item #49001 Optional Pondless® Waterfall Vault Extension
Handles Pumps up to 10,000 Gallons
For Models:
- Item #49000 Pondless® Waterfall Vault
- Item #49001 Pondless® Waterfall Vault Extension
Engineered for Continuous Use
![]()
Thank you for choosing the Pondless® Waterfall Vault. At Aquascape our goal is to provide our customers with the best valued products in water gardening. We hope you enjoy your purchase and thank you for choosing Aquascape. Your Paradise. Our Passion.®
Pondless® Waterfall Vault
LIFETIME WARRANTY
Aquascape warrants that the Pondless® Waterfall Vault will be free of manufacturing defect for the lifetime of the product if properly installed and maintained. If upon Aquascape’s inspection, the Pondless® Waterfall Vault shows evidence of a manufacturing defect, Aquascape’s liability is limited, at Aquascape’s option, to the repair of the defect, or the replacement of the defective product. There are no warranties either expressed or implied, including the implied warranties of merchantability and fitness for a particular purpose, which extend beyond the warranties contained in this document. Aquascape shall not be liable for any incidental, consequential or other damages arising under any theory of law whatsoever.
 Contact Us
For more information about our company or products please visit our website at www.aquascapeinc.com or call (US) 1-866-877-6637 (CAN) 1-866-766-3426.
Find us on:


www.facebook.com/AquascapeIncwww.youtube.com/aquascape4www.twitter.com/AquascapeIncwww.flipboard.com/profile/AquascapeInc
VISIT OUR WEBSITE
 DOWNLOAD A FREE COPY OF OUR CATALOG
INTRODUCTION
Aquascape’s Pondless® Waterfall Vault is packed with features that a professional installer will truly appreciate. The Pondless® Waterfall Vault is sized for small to mid-sized projects.
- An extra wide opening provides easy access and large interior fi ts a wide range of pump sizes. The Pondless® Waterfall Vault is capable of handling pumping fl ow rates up to 12,500 gallons per hour.
- The Pondless® Waterfall Vault is designed to integrate with the AquaBlox® modular water storage tanks. The vault comes standard for use with the Small AquaBlox®. An optional Pondless® Waterfall Vault Extension (Item #49001) can be used when creating deeper basins using the Large AquaBlox®.
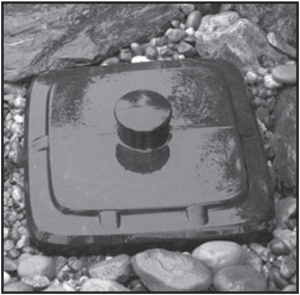
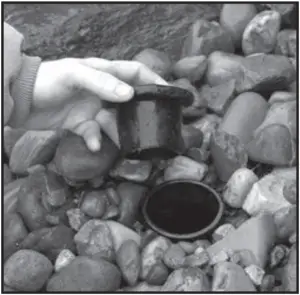
- Easy to camouflage! Built-in water level inspection port allows the lid to be buried out of sight.
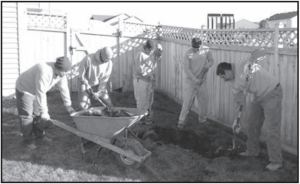
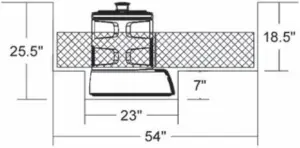
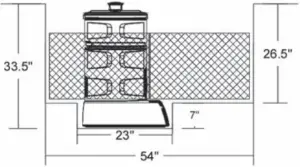
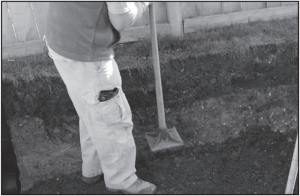
1 EXCAVATE PONDLESS® WATERFALL STORAGE BASIN
It is recommended to lay out the position of the Pondless® Waterfall Vault and AquaBlox® prior to excavation in order to determine actual excavation dimensions. Please note an additional 6” of excavation is recommended per side of the basin to allow for: AquaBlox® dimensions, sufficient backfill material and compaction required during backfilling. See the diagrams below for examples of Pondless® Waterfall storage basin configurations. Larger storage basins can be constructed by increasing the quantity of Small AquaBlox® and/or using the optional Pondless® Waterfall Vault Extension in combination with the Large AquaBlox®. Liner and geotextile dimensions will vary according to the quantity and size of AquaBlox® used.
The optional Pondless® Waterfall Vault Extension (Item #49001) slides onto the top of the Pondless® Waterfall Vault increasing the height for deeper basins using the Large AquaBlox®. The Extension slides on from the front of the unit towards the back.
 NOTE: Check for presence of high water table in the excavation, which must be kept at levels a minimum of 3 feet below the bottom of the AquaBlox® structure at all times.
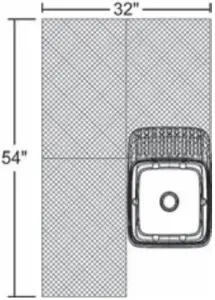
Pondless® Waterfall Vault location when using 3 AquaBlox®.NOTE: An additional 6” of excavation is recommended per side.
For maximum structural strength on larger storage basins, locate Pondless® Waterfall Vault between AquaBlox®.
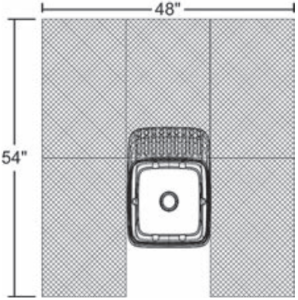
Pondless® Waterfall Vault with Extension.
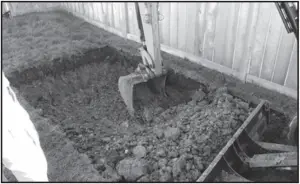
2 EXCAVATE LOCATION OF PONDLESS® WATERFALL VAULT
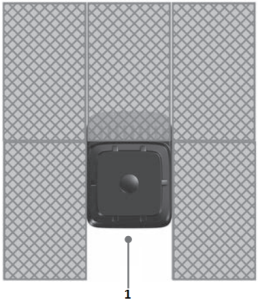
Excavate a recessed area for the Pondless® Waterfall Vault. This positions the vault at the lowest point in the storage basin allowing maximum water availability for the pump system.
Pondless® Waterfall Vault Pondless® Waterfall Vault with Extension
AQUABLOX® COMPONENTS
Panel C
Panel A
Panel D
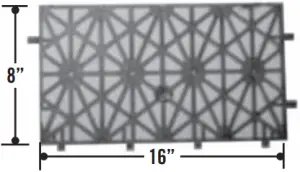
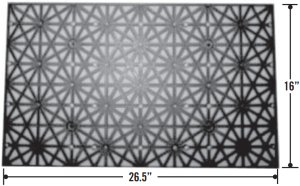
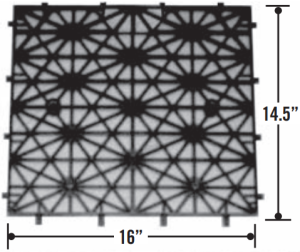
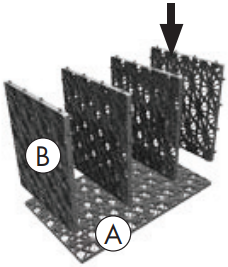
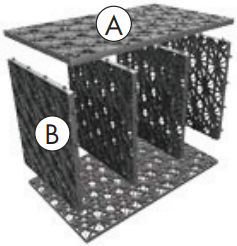
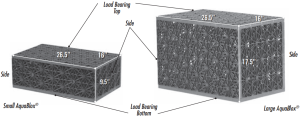
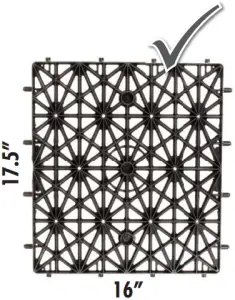
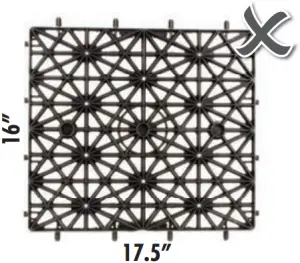
Small AquaBlox® consists of 8 panels: 2 “A”, 2 “C”and 4 “D”(see chart below for dimensions)
Panel B
Panel A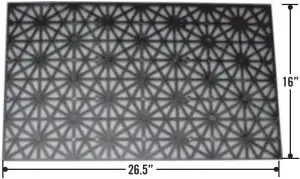
Large AquaBlox® consists of 8 panels: 4 “A” and 4 “B” (see chart below for dimensions)
3 ASSEMBLE AQUABLOX® D-RAINTANKS®*
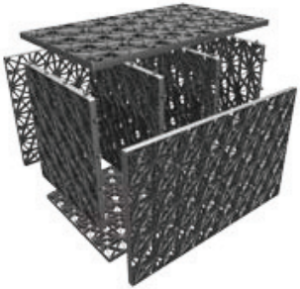
Step 1: Evenly distribute and connect the small panels to one large panel.Step 2: Next, working from one end to the other, attach a second large panel on the opposite side of the first.Step 3: Once the top and bottom large panels are attached, complete the sides of the tank module. This is a “single” AquaBlox®.
SINGLE MODULE ASSEMBLY
Step 1 Step 2
Step 3
*D-Raintank® is a register trademark of Atlantis® Water Management Systems
Be sure to check all pieces upon arrival for any damages that may have occurred during shipping
4 PREPARE BASE
The base of the excavation should be smooth soil, flat and free of lumps and debris. Check the size and depth of the excavation by placing the Pondless® Waterfall Vault and AquaBlox® into the excavated area. The AquaBlox® should sit level on the front ledge of the Pondless® Waterfall Vault, as well as line up level to the side of the vault. See diagram below for example. There should be approximately 6” between the AquaBlox® and the soil. Add compactible material such as sand, if existing soil conditions do not meet requirements listed above. The compactible material should be spread to a 4” minimum depth and compacted.
AquaBlox® should sit level on front ledge as well as line up level to side of the vault.
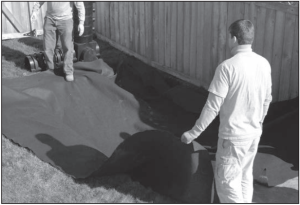
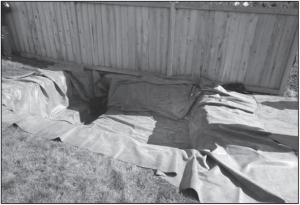
5 INSTALL GEOTEXTILE AND LINER
- Install Outer Geotextile – Lay the geotextile into the excavation covering the bottom and sides. Multiple sections of geotextile can be overlapped to accomplish complete coverage.
- Install Liner – Lay the liner into the excavation and position to cover entire storage basin. Do not trim the excess liner material until later in the project.
- Optional Inner Geotextile – An optional second layer of geotextile may be used within the lined storage basin. The second layer is wrapped around the bottom and sides of the AquaBlox® helping further protect the liner from the edges of the AquaBlox®. The secondary inner layer of geotextile is especially useful protection on bigger storage basins that contain a larger quantity of AquaBlox®.
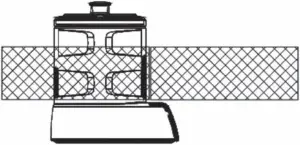
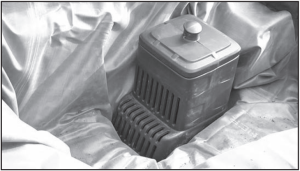
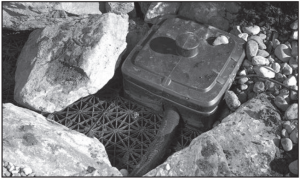
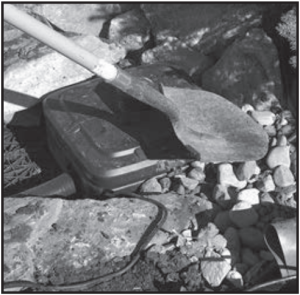
6 INSTALL PONDLESS® WATERFALL VAULT
Place Pondless® Waterfall Vault into its proper location.
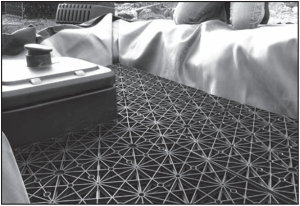
7 INSTALL AQUABLOX®
Install AquaBlox® in the storage basin, butting them tightly against each other.After placement of the tanks, bring the inner geotextile (if using) up the sides of the tanks.
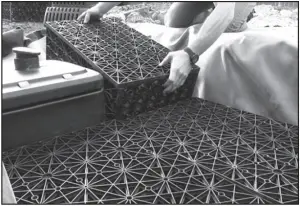
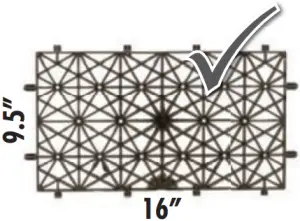
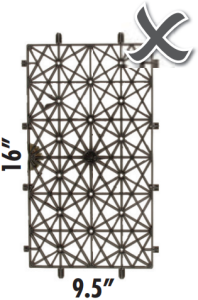
Tank Module Orientation: The AquaBlox® must be installed with the correct orientation to ensure maximum load bearing capacity. See images below.
Proper Orientation
UP
![]()
8 BACKFILL SIDES
- Backfill Sides – The excess excavation along the outside perimeter of the storage basin can be backfilled once all of the AquaBlox® are installed. Use sand or compactible free draining material to back fill evenly on all sides to secure the AquaBlox® into position.
Outer Basin Wall 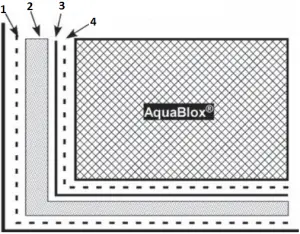
- Outer Geotextile
- Sand or compactible free draining material
- Liner
- Optional Inner Geotextile
- Backfill Pondless® Waterfall Vault – When the Pondless® Waterfall Vault is located between two AquaBlox® there will be a void space behind the vault that will require backfilling. Use 1 1/2” or larger gravel inside the liner, behind the Pondless® Waterfall Vault to fill the void space.
- Backfill gravel here
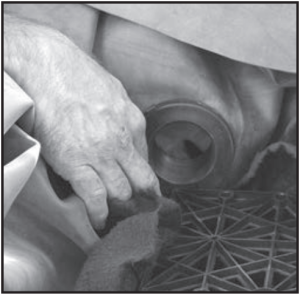
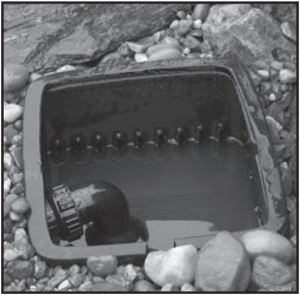
9 INSTALL PUMP AND PLUMBING
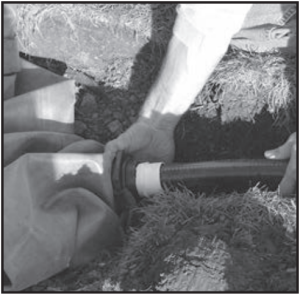
- The Pondless® Waterfall Vault and extension includes one 3-inch hole to run the plumbing from the pump to the start of the waterfall. The PVC flex pipe can be trimmed to the proper length and inserted through the hole in the side of the Pondless® Waterfall Vault. Additional plumbing holes can be drilled through the Pondless® Waterfall Vault if needed. A second drill point is located on the opposite side of the the Pondless® Waterfall Vault as well as the extension for accuracy when drilling an additional plumbing hole. Larger pumps using 3-inch plumbing will require the use of the Pondless® Waterfall Vault extension and Large AquaBlox®. Consult your AquascapePRO® Product Catalog for pump selection and the proper Check Valve Assembly required to complete the pump’s plumbing.

- PVC flex pipe plumbing can withstand extreme weather conditions so it is unnecessary to dig a deep trench. The pipe can transition over the edge of the basin and be covered with boulders and backfilled with soil. To eliminate a frozen and potentially broken PVC flex pipe, the pipe should be sloping down from the top of the waterfall to the Pondless® Waterfall storage basin to help drain as much water from the line as possible when the pump is removed for winter storage.
10 INSTALL OPTIONAL OVERFLOW
An optional overflow can be installed using the Overflow Kit (Item #30209) to manage any excess water entering the basin. Installing an overflow system is recommended on Pondless® Waterfalls that will be receiving captured rainwater (RainXchange® Systems) as a means of replenishing water in the storage basin. Please contact your local Authorized AquascapePRO® Distributor or Aquascape’s Customer Care Department for more information.
11 BACKFILL TOP AND FINISH EDGES
The AquaBlox® can be covered with a layer of 1 1/2” or larger decorative gravel. Boulders can be placed around the perimeter of the water storage basin to complete the edges of the basin. The liner edges can be trimmed to at least 3” above the maximum water level in the basin and backfilled behind the boulders. The built-in water level inspection port allows the lid of the Pondless® Waterfall Vault to be buried. Permeable paver applications installed on top of the water storage basin require a woven geotextile (Item #30219). The geotextile is laid directly on top of the exposed AquaBlox®. This will provide a base for the paver screening to be spread.
NOTE: Do not use the inner and outer non-woven geotextile (underlayment) on top of the AquaBlox® as it will potentially clog.
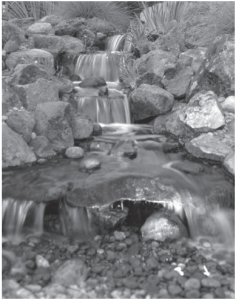
12 BUILD WATERFALL AND STREAM
The Waterfall Spillway (Item#77000) is an excellent product to help you create beautiful waterfalls and streams. For more information on installing the Waterfall Spillway please consult the Waterfall Spillway Installation Instructions. For information on waterfall and stream design and installation please visit our online gallery at www.aquascapeinc.com.
For more information about our company or products, please visit our website at www.aquascapeinc.com or call us at (US) 1-866-877-6637 (CAN) 1-866-766-3426
49010.112013 ©2013 Aquascape, Inc. • All Worldwide Rights Reserved
US 1-866-877-6637 | CAN 1-866-766-3426 | www.aquascapeinc.com
References
[xyz-ips snippet=”download-snippet”]