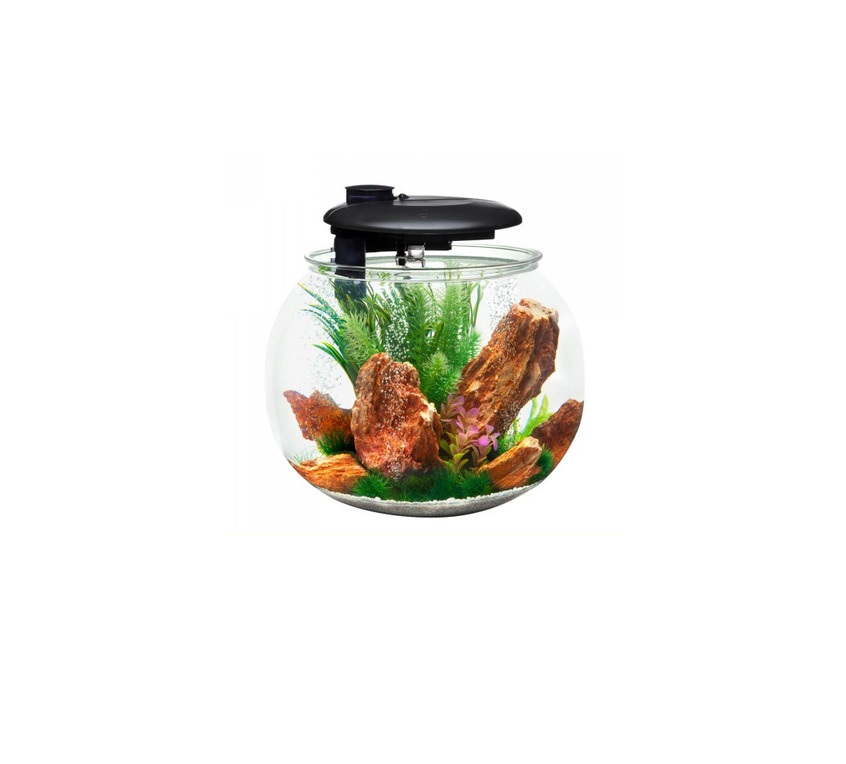
AQUASPHERE AS360 AS361 AS362 Bowl User Guide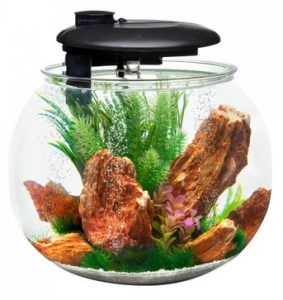
PART LIST
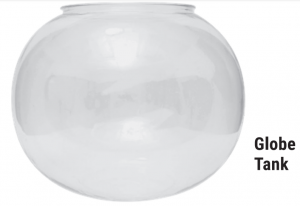
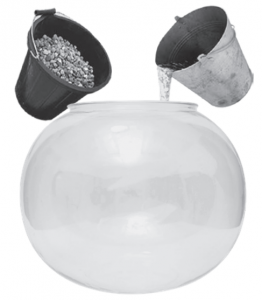
- Rinse and place all gravel and deco-rations into your Aquarium prior to assemblying the Top Filtration Cover.

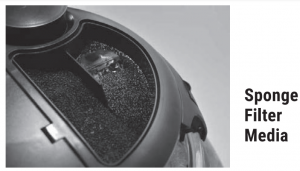
- Remove, rinse and replace the Sponge Filter Media prior to starting the setup process. Pour water into tank up to fill line pi 3 inches from the top and let sit for 24 hours.
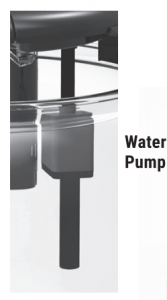
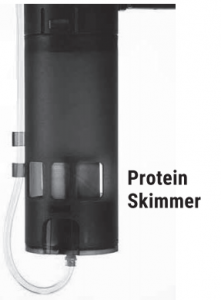
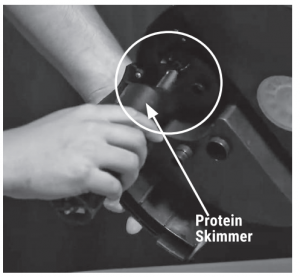
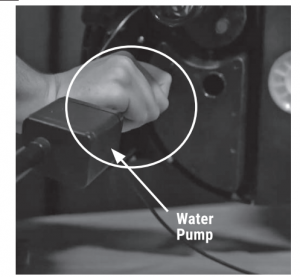
- Attach Protein Skimmer to bottom Attach Water Pump to bottom of of the Filtration Cover. The Protein the Filtration Cover. Skimmer should securely snap into place. Optional for fresh water aquariums.
- Attach water pump to bottom of the Filtration Cover.
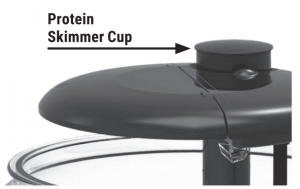
- Place Protein Skimmer Cup on the fit-ted area adjacent to the filter media section. Place the Filtration cover on top of the Filter Media section.
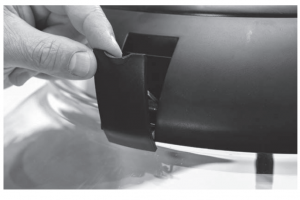
- Attach Water Pump Plug to trans-former located underneath the Fil-tration Cover. This plug is located next to where the Protein Skimmer is secured.
- Fit the rim of the Top Filtration Cov-er securely on the rim of the Globe Aquarium. Make sure the rim of the Filtration Cover is flush to the rim of the Aquarium. Snap both clips to securely attach the filtration unit to the Aquarium.
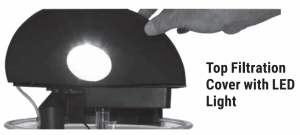
- Plug in Transformer to start both your filtration unit as well as power your touch control LED Light.
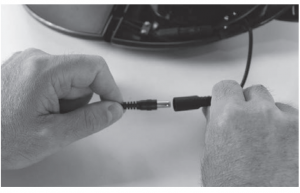
- INCLUDE DRIP LOOP:Plug filter pump and water pump into power. Be sure to create a drip loop, as shown above, to prevent water from running down the cord and coming into contact with a power outlet. Should water ever travel into a power out-let, DO NOT unplug your Aquasphere 360 Fish Tank. Always turn off power to the outlet before unplugging your Aquasphere 360 Fish Tank and examining the outlet for damage. Let your new Aquasphere 360 Fish Tank cycle for at least 24 hours prior to adding fish and wildlife. Be sure to add new fish or wildlife slowly (1 or 2 at a time) to allow them to acclimate to their new conditions. For more information on care of aquatic life, please visit our website at www.penn-plax.com


 Plug filter pump and water pump into power. Be sure to create a drip loop, as shown above, to prevent water from running down the cord and coming into contact with a power outlet. Should water ever travel into a power out-let, DO NOT unplug your Aquasphere 360 Fish Tank. Always turn off power to the outlet before unplugging your Aquasphere 360 Fish Tank and examining the outlet for damage. Let your new Aquasphere 360 Fish Tank cycle for at least 24 hours prior to adding fish and wildlife. Be sure to add new fish or wildlife slowly (1 or 2 at a time) to allow them to acclimate to their new conditions. For more information on care of aquatic life, please visit our website at
 SIX MONTH WARRANTY:The contents of this package have been quality control inspected and found free of any defects in material and works man ship. Additionally, Penn-Plax Inc. offers the original customer replacement or repair of any product found to be defective, providing it is returned prepaid to Penn-Plax Inc. in it’s original packaging including a dated purchase receipt plus a note explaining the problem. Defects resulting from misuse, abuse or accident are expressly excluded from coverage under this warranty. This warranty is in lieu of all warranties, expressed or implied including the implied warranty of merchantability. Neither the seller nor the manufacturer shall be liable for loss or damage consequential or direct arising from the use or inability to use this product.
Watch our Instructional Set Up Video at www.youtube.com/pennplaxpetproducts PROBLEMS OR QUESTIONS? Visit our website at www.penn-plax.com or contact us directly via email at cs®pennplax.com, by phone at 866-625-2385 ext. 333 or by mail. Penn-Plax Pet Products 35 Marcus Blvd. Hauppauge, NY 11788. ci 2021 Penn-Plax. Inc. Printed in China.
WARNING/NOTICE DO NOT PLACE IN DIRECT SUNLIGHT CONCENTRATED LIGHT RAYS CAN CAUSE A FIRE Regularly wash out the filter media sponge and clean filtration drainage hole to ensure it is not clogged. A clogged drainage hole can cause water to overflow from the aquarium.

[xyz-ips snippet=”download-snippet”]