![]() OBISP 13MP Low DistortionCamera Module
OBISP 13MP Low DistortionCamera Module
 13MP AR1335(SKU: B0277)QUICK START GUIDE
INTRODUCTION
- About ArducamArducam has been a professional designer and manufacturer of SPI, MIPI, DVP, and USB cameras since 2012. We also offer customized turnkey design and manufacturing solution services for customers who want their products to be unique.
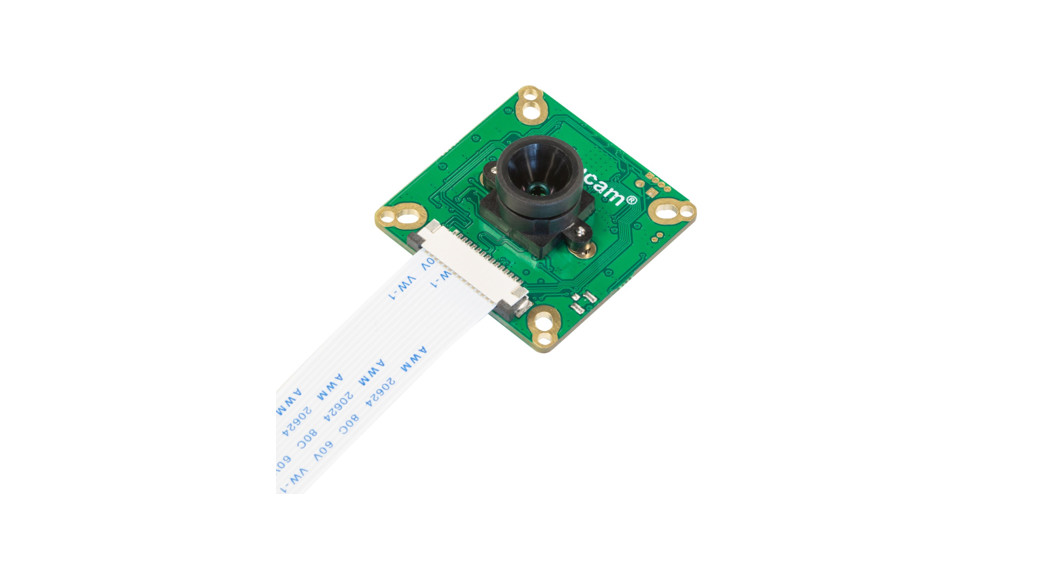
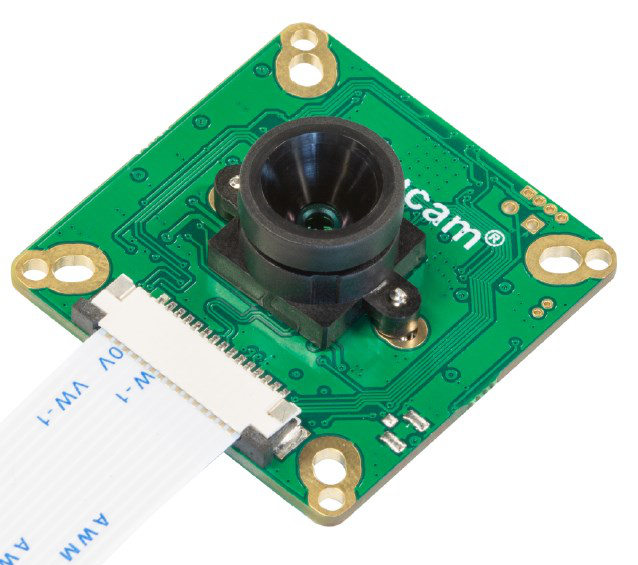
- About This OBISP CameraArducam 13MP OBISP MIPI camera features onboard ISP (Image Signal Processor), it uses standard Raspberry pi 15pin MIPI CSI-2 interface, and works seamlessly on Raspberry pi, Jetson Nano, and can also be ported to other platforms which compliant to MIPI CSI-2 interface protocol.
- About Customer ServiceIf you need our help or want to customize other models of USB cameras, feel free to contact us at [email protected].Website: https://www.arducam.com/docs/arducam-obisp-mipi-camera-module/
SPECS
| Image Sensor | 13MP AR1335 |
| Max. Resolution | 4160×3120 |
| Optical Format | 1/3″ |
| Lens Mount | M12 default, optional CS mount |
| Stock Lens FOV | horizontal 50 degrees |
| Output Format | YUV422, RGB888 |
| Output Interface | 2-Lane MIPI CSI-2 |
| Max data rate | 1.2Gbps/lane |
| UYUV: | |
| Supported Resolution&Frame rate | 4160×,1920×,1600×,1280×,640× |
| RGB3: | |
| 2560×,1920×+C156:D159s,1600×1200/1280×720/640× | |
| Support ISP Functions | AWB, AE, Flip, Mirror, Denoise, Gamma, Sharpness, Saturation,Contrast Digital Zoom, Digital Pan/ Tilt, Special Effects, etc. |
| Responsivity | 4.7k e/lux-sec |
| IR Sensitivity | 650nm IR filter, visible light only |
| SNRmax | 37dB |
| Dynamic Range | 69dB |
| Power Consumption | 270mW |
| Temperature Range | -10 ~ 70 degrees Celcius |
| Camera Driver | V4L2 Compliant driver for Raspberry pi and Jetson Nano |
| Board Size | 38x38mm |
Used on Raspberry Pi
- Driver Installation•Download the driver for the OBISP MIPI camerawget https://github.com/ArduCAM/Arducam_OBISP_MIPI_Camera_Module/archive/v1.0.tar.gz•Extract the archive filestar -zxvf v1.0.tar.gz•Enter the extracted foldercd Arducam_OBISP_MIPI_Camera_Module-1.0/Release/•Install the driver./install_driver.sh•Reboot the devicePress y, and then hit Enter to reboot.
- Check and Test the CameraAfter you’ve finished the hardware assembly and driver installation, you can test whether the camera is detected and working.• List the Video DeviceThe OBISP MIPI camera modules are emulated as the standard video device under /dev/video* node, so you can use the ls command for listing the contents in the /dev folder.ls/dev/video0 • List the available video modesSince the camera module is V4L2 compliant, you can use the V4l2 controls to list the supported color space, resolutions, and frame rates.v4l2-ctl –list-formats-extIf you run the commands without results, you might have to check the ribbon connection or install the drivers correctly, then reboot the Raspberry Pi.
- Use the Camera with Supplied Command-Line Applications (arducamstill)arducamstill -t 0arducamstill -o test.jpg -w 4160 -h 3120arducamstill -t 0 -e h264
- Control Image Settings with Linux Webcam Software QtCam• Download the Arducam -QtCamwget https://github.com/ArduCAM/Arducam_OBISP_MIPI_Camera_Module/releases/download/Arducam_QtCam/Arducam_QtCam.zip• Unzip the downloaded filesudo unzip Arducam_QtCam.zip• Enter the foldercd Arducam_QtCam/• Alter the permissionssudo chmod +x Arducam_QtCam• Run the program./Arducam_QtCam
- Play the Video Feed with VLC Media Player• Open VLC with command line vlc, or click the icon to launch.• Hit the ▶ (Play) button to call the open media window.• In Capture Device >> Device Selection >> Video device name, select the camera video node.• Hit Advanced Options… Button• In Advanced Options window >> Video input chroma format, type UYUV.• Type in the width and height, for example, 1920 and 1080.• Hit OK to save the settings and see the video feed.
Notice: VLC might not be able to support very high resolution.
Used on Jetson Nano
- Driver Installation• Check the Kernel VersionThe driver package should match with your current kernel version, then you have to check your kernel version before downloading the corresponding driver package. Using cat /etc/nv_tegra_release command to determine the L4T releasenumber. Using name -a command to determine the kernel number.• Download the Driver PackageDownload the Arducam camera driver package for JetsonNano from https://github.com/ArduCAM/MIPI_Camera/tree/master/Jetson/Jetvariety/driver. Please download the corresponding package mentioned above.• InstallationUsing the command below to install the Arducam driver package, a reboot is required after installation.sudo dpkg -i arducam-nvidia-l4t-kernel_4.9.140-32.3.1 -20200314151719_arm64.deb• UninstallationIf you want to roll back to the original Jetson Nano camera driver, just run the following command to uninstall the Arducam driver, a reboot is also required.sudo dpkg -r arducam-nvidia-l4t-kernel
-
Check and Test the CameraAfter you’ve finished the hardware assembly and driver installation, the following steps can help you diagnose to make sure the camera is detected and supported.• List the video deviceThe OBISP MIPI camera modules are emulated as the standard video device under /dev/video* node, so you can use the lscommand for listing the contents in the /dev folder.ls /dev/video0• List the available video modesSince the camera module is a V4L2 complaint, you can use the V4l2 controls to list the supported color space, resolutions,and frame rates. The results might vary from camera to camera (The screenshot is only applied for a 13MP OBISP camera).v4l2-ctl –list-formats-extIf you run the commands without results, you might have to check the ribbon connection or install the drivers correctly,then reboot the Jetson Nano or Xavier NX board.
- Play the Video Feed with VLC Media Player• Open VLC with command line vlc, or click the icon to launch.• Hit the ▶ (Play) button to call the open media window.• In Capture Device >> Device Selection >> Video device name, select the camera video node.• Hit Advanced Options… Button• In Advanced Options window >> Video input chroma format, type UYUV.• Type in the width and height, for example, 1920 and 1080.Notice: VLC might not be able to support video width or height larger than 4000.• Hit OK to save the settings and see the video feed.• Open Adjustments and Effects >> v4l2 controls property page, you can adjust the camera control parameters manually.
- Live View the Video usingOpenCV with Python• Download the demo codegit clone https://github.com/ArduCAM/MIPI_Camera.gitcd MIPI_Camera/Jetson/Jetvariety/example• Check the help message of the parameterspython arducam_displayer.py -d 0• Run the Demo,python arducam_displayer.py
- GStreamer Example• GStreamer Server on Jetsongst-launch-1.0 v4l2src device=”/dev/video0″ ! “video/xraw,width=1920, height=1080, format=(string)UYVY” ! nvvidconv ! ‘video/x-raw(memory:NVMM), format= (string)I420’ ! omxh264enc profile=high cabac-entropycoding=true insert-sps-pps=true iframeinterval=30 ! ‘video/x-h264, level=(string)4.2, stream-format=(string) byte-stream’ ! tcpserversink host=localhost port=5001• GStreamer Clinet on Jetsongst-launch-1.0 -v tcpclientsrc port=5001 ! decodebin ! nvoverlaysink• GStreamer Clinet on PCgst-launch-1.0 -v tcpclientsrc host=192.168.1.105port=5001 ! decodebin ! autovideosink
References
[xyz-ips snippet=”download-snippet”]